Publicidad
Enlaces rápidos
Fitting instructions
Make:
A3+ A3 sportback; 2008-2013
Type:
Audi
5098
Montagehandleiding
Fitting instructions
Montageanleitung
Instructions de montage
Monteringsanvisningar
Montagevejledning
Instrucciones de montaje
Istruzioni per il montaggio
Instrukcja montażu
Asennusohjeet
Pokyny k montáži
Szerelési útmutató
Руководство для монтажа
Your perfect fit
brink.eu
Publicidad

Resumen de contenidos para Brink 5098
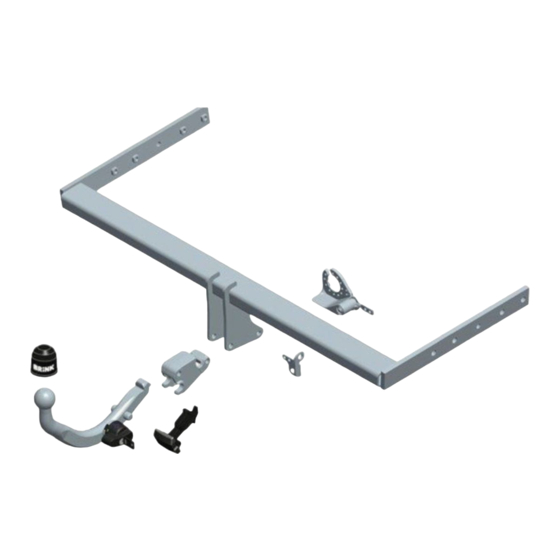
- Página 1 Fitting instructions Make: Audi A3+ A3 sportback; 2008-2013 Type: 5098 Montagehandleiding Fitting instructions Montageanleitung Instructions de montage Monteringsanvisningar Montagevejledning Instrucciones de montaje Istruzioni per il montaggio Instrukcja montażu Asennusohjeet Pokyny k montáži Szerelési útmutató Руководство для монтажа Your perfect fit...
- Página 2 Couplingsclass: A50-X 1000km euro Approved tested 94/20/EC e11 00-7107 Max. mass trailer : 1800 Max. vertical load : RAYMOND D-Value: 9,7 kN 10.9 © 509870/14-03-2013/1...
- Página 3 M10x35 (10.9) 45Nm 509880 5 doors 3 doors 5098/4 3 doors 5 doors M10x35 (10.9) 45Nm M6x20 (10.9) 15Nm © 509870/14-03-2013/2...
- Página 4 M10x35 (10.9) 45Nm 509780 5 doors 3 doors 5098/4 3 doors 5 doors M10x35 (10.9) 45Nm M6x20 (10.9) 15Nm © 509870/14-03-2013/3...
-
Página 5: Fitting Instructions
MUST be obtained by the installation engineer of the custo- zig is, dient deze verwijderd te worden. mer’s acceptance prior to completion. Brink Towing Systems do not * Voor de max. toegestane massa, welke uw auto mag trekken, dient u uw accept responsibility for any matters arising as a result of this miscom- dealer te raadplegen. - Página 6 Für die Montage und die Befestigungsmittel die skizze zu Rate zie- "of the vehicle". hen. * Remove the insulating material from the contact area of the fitting Für die Montage und Demontage des abnehmbaren Kugelsystems points. die beiliegende Montageanleitung zu Rate ziehen. * Consult your dealer for the maximum tolerated pull weight and ball hitch pressure of your vehicle.
- Página 7 7. Serrer tous les boulons et écrous conformément au schéma. 3. Demontera tvärbalken från fordonet (sätt tillbaka skruvar). 8. Placer les deux blocs de mousse en polyester en guise de colmatage 4. Såga ut den angivna delen ur stötfångaren med hjälp av schablonen. dans les longerons de châssis.
- Página 8 te en la reseña de montaje. 1. Demonter baglysenhederne. Se fig. 1. 2. Demonter kofangeren. Se fig. 1. 3. Demonter køretøjets tværvange (Sæt bolte på plads igen). 1. Desmontar las unidades de las luces traseras. Véase la figura 1. 4. Sav den angivne del ud af kofangeren ved hjælp af skabelonen (ska- 2.
- Página 9 * Guarde estas instucciones junto a la documentación del veículo des- cavi del freno e i condotti del carburante. pués del montaje del enganche. * Rimuovere, se presenti, i coperchietti in plastica dai dadi di saldatura per punto. IstRuzIoNI PER IL MoNtAGGIo.: * Questa istruzione di montaggio deve essere allegata ai documenti del veicolo dopo l'installazione del gancio.
- Página 10 Ajoneuvon osien purkamis- ja asennusohjeet, ks. työpaikalla käytet- Wskazówki: ty käsikirja. - Po przejechaniu 1000 km dokręcić wszystkie elementy skręcane. Asennus- ja kiinnityohjeet, ks. piirros. - Podczas ewentualnych odwiertów upewnić się czy w pobliżu nie znaj- Irrotettavan kuulajärjestelmän asennus- ja purkamisohjeet, ks. ohei- dują...
- Página 11 10. Utáhněte všechny matice a šrouby kroutivou silou uvedenou ve výkre- 7. Szorítsa be az összes anyát és csavart a rajzon feltüntetett csavaró- nyomatékig. 11. Připevněte nárazník. 8. Helyezze a két PE habtömböt távolságtartóként az alváz elemeiben. 12. Připevněte jednotky zadních světel. 9.
- Página 12 2. Снять бампер. См. рисунок 1. 3. Снять стальным буферным брусом автомобиля. Поставить болты на место. 4. Выпилить указанную часть из бампера при помощи шаблона. (Нанести шаблон на наружную сторону бампера.) 5. По мере необходимости, удалить наклейки на местах крепления. 6.
- Página 13 Disconnect Disconnect Disconnect Fig. 1 © 509870/14-03-2013/12...
- Página 14 © 509870/14-03-2013/13...
- Página 15 © 509870/14-03-2013/14...
- Página 16 Template 5098 (3-Doors) Place on outside bumper Cut out Underside bumper...
- Página 17 Template 5098 (5-Doors) Place on outside bumper Cut out Underside bumper...


