
Manuales relacionados para Honda EG4000CX


Resumen de contenidos para Honda EG4000CX
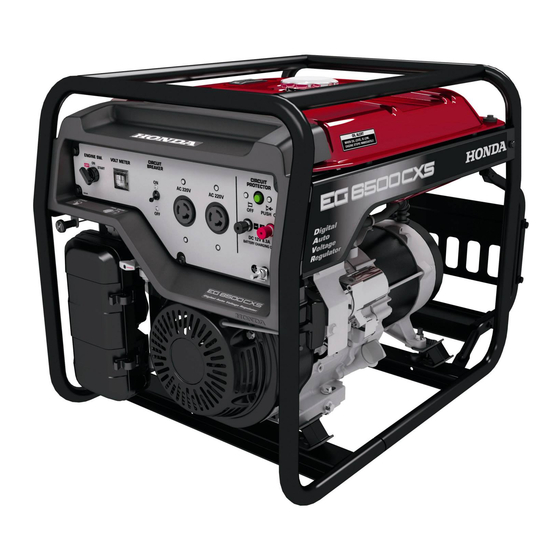
- Página 1 GENERATOR EG4000CX EG5000CX • EG6500CX EG6500CXS • OWNER'S MANUAL MANUAL DE EXPLICACIONES...
-
Página 2: Manuel De Explicaciones
Honda EG4000CX∙EG5000CX EG6500CX∙EG6500CXS OWNER’S MANUAL MANUEL DE EXPLICACIONES... - Página 3 The information and specifications included in this publication were in effect at the time of approval for printing. Honda Motor Co., Ltd. reserves the right, however, to discontinue or change specifications or design at any time without notice and without incurring any obligation whatsoever.
- Página 4 All information in this publication is based on the latest product information available at the time of approval for printing. Honda Motor Co., Ltd. reserves the right to make changes at any time without notice and without incurring any obligation.
-
Página 5: Tabla De Contenido
CONTENTS GENERATOR SAFETY ..............3 IMPORTANT SAFETY INFORMATION ......... 3 Operator Responsibility ............3 Carbon Monoxide Hazards ............3 Electric Shock Hazards............4 Fire and Burn Hazards ............4 Refuel With Care ..............4 SAFETY LABEL LOCATIONS ............5 COMPONENT IDENTIFICATION ............. 9 PRE-OPERATION CHECK ............ -
Página 6: Generator Safety
GENERATOR SAFETY IMPORTANT SAFETY INFORMATION Honda generators are designed for use with electrical equipment that has suitable power requirements. Other uses can result in injury to the operator or damage to the generator and other property. Most injuries or property damage can be prevented if you follow all instructions in this manual and on the generator. -
Página 7: Electric Shock Hazards
GENERATOR SAFETY Electric Shock Hazards • The generator produces enough electric power to cause a serious shock or electrocution if misused. • Do not use in wet conditions. Keep the generator dry. – Do not use in the rain or snow. –... -
Página 8: Safety Label Locations
These labels warn you of potential hazards that can cause serious injury. Read the labels and safety notes and precautions described in this manual carefully. If a label comes off or becomes hard to read, contact your Honda servicing dealer for a replacement. S1H, MH, RH, REH, KH, LD1H types... - Página 9 SAFETY LABEL LOCATIONS RAH type...
- Página 10 SAFETY LABEL LOCATIONS • Honda generator is designed to give safe and dependable service if operated according to instructions. Read and understand the Owner's Manual before operating the generator. Failure to do so could result in personal injury or equipment damage.
- Página 11 SAFETY LABEL LOCATIONS • A hot exhaust system can cause serious burns. Avoid contact if the engine has been running.
-
Página 12: Component Identification
COMPONENT IDENTIFICATION MH type S1H, RH, REH, KH types RECEPTACLE No.1 RECEPTACLE No.1 ENGINE SWITCH RECEPTACLE No.2 RECEPTACLE No.2 DC CIRCUIT PROTECTOR VOLT METER AC CIRCUIT BREAKER GROUND TERMINAL DC TERMINALS LD1H type RAH type VOLT METER RECEPTACLE No.1 ENGINE SWITCH RECEPTACLE No.1 RECEPTACLE No.2 RECEPTACLE No.2... - Página 13 COMPONENT IDENTIFICATION FUEL GAUGE CHOKE KNOB OIL FILLER CAP FUEL VALVE LEVER SEDIMENT CUP AIR CLEANER OIL DRAIN PLUG FUEL TANK CAP SPARK PLUG CAP FRAME SERIAL NUMBER MUFFLER Record the frame serial number in the space below. You will need this serial number when ordering parts.
-
Página 14: Pre-Operation Check
PRE-OPERATION CHECK Before each use, look around and underneath the engine for signs of oil or gasoline leaks. 1.ENGINE OIL LEVEL Check the engine oil level with the generator on a level surface and the engine stopped. Recommended oil: 4-STROKE MOTOR OIL SAE 10W-30 API Service category SE or later Check the engine oil level with the engine stopped and in a level position. -
Página 15: Fuel Level
PRE-OPERATION CHECK 2.FUEL LEVEL Never use gasoline that is stale, contaminated, or mixed with oil. Fuel tank capacity: 24.0 L 1.Check the fuel level. 2.If the fuel level is low, fill the fuel to the upper level. UPPER LEVEL MARK (RED) FUEL GAUGE FUEL TANK CAP UPPER LEVEL... -
Página 16: Air Cleaner
PRE-OPERATION CHECK 3.AIR CLEANER 1.Remove the air cleaner cover taking care not to damage it. (1)Unsnap the air cleaner cover clips and pull the air cleaner cover. (2)Free the hooks from the setting pins. (3)Remove to the right side of the frame pipe. HOOK SETTING PIN CLIP... - Página 17 PRE-OPERATION CHECK 3.Reinstall the air cleaner cover. (1)Place the air cleaner cover over the air cleaner case. (2)Set the hooks to the setting pins securely. (3)Push the air cleaner cover to lock the clips. HOOK AIR CLEANER CASE SETTING PIN CLIP AIR CLEANER COVER Be sure that the air cleaner cover is set securely.
-
Página 18: Battery Service (Electric Starter Type Only)
PRE-OPERATION CHECK BATTERY SERVICE (electric starter type only) Your generator’s engine charging system charges the battery while the engine is running. However, if the generator is only used periodically, the battery must be charged monthly to maintain the battery service life. - Página 19 PRE-OPERATION CHECK The battery fluid level must be kept between the UPPER and LOWER level marks. If the battery fluid level is below the LOWER level, sulfation and battery plate damage will occur. If rapid loss of battery fluid is experienced, or if your battery seems to be weak causing slow operation of the starter motor, see your servicing dealer.
-
Página 20: Starting The Engine
STARTING THE ENGINE 1.Make sure that all appliances are disconnected from the AC receptacle. 2.Make sure that the AC circuit breaker is in the OFF position. S1H, MH, RH, REH, KH, RAH types LD1H type AC CIRCUIT BREAKER 3.Turn the fuel valve lever to the FUEL VALVE LEVER ON position. - Página 21 STARTING THE ENGINE 5.Start the engine. • Using the electric starter: (electric starter type only) START Turn the engine switch to the START position, and hold it there until the engine starts. When the engine starts, release the key, allowing the switch to return to the ON position.
-
Página 22: Oil Alert System
STARTING THE ENGINE 6.If the choke knob was moved to the CLOSED position, move to the OPEN position as the engine warms up. OPEN CHOKE KNOB Oil Alert System The Oil Alert system is designed to prevent engine damage caused by an insufficient amount of oil in the crankcase. -
Página 23: Generator Use
• Combined load of the connected apparatus must not exceed the rated capacity of the generator. Rated capacity: EG4000CX : 3.2 kVA (MH, RH, REH, KH types) : 3.6 kVA (LD1H type) EG5000CX : 4.0 kVA (MH, RH, REH, KH, RAH types) : 4.5 kVA (S1H, LD1H types) - Página 24 GENERATOR USE 3.Turn the AC circuit breaker to the ON position. Confirm that the appliance to be used is switched off, and plug in the appliance. S1H, RH, REH, KH types MH type AC CIRCUIT BREAKER AC CIRCUIT BREAKER PLUG PLUG LD1H type RAH type...
- Página 25 GENERATOR USE 4.Turn on the equipment to be used. An overloaded AC circuit will switch off the AC circuit breaker. If this happens, reduce the load on the circuit, and wait a few minutes before switching on. S1H, MH, RH, REH, KH, RAH types LD1H type AC CIRCUIT BREAKER AC CIRCUIT BREAKER...
-
Página 26: Ac Receptacle Selection
Total Current Available: S1H type: 20.5 A (EG5000CX) 25.0 A (EG6500CX∙EG6500CXS) RH, REH, KH types: 14.5 A (EG4000CX) 18.2 A (EG5000CX) 22.7 A (EG6500CX∙EG6500CXS) Receptacles Available power 20 A 20 A... - Página 27 Make sure the load on any receptacle does not exceed its available power shown below and the total load does not exceed the total current available. Total Current Available: 30.0 A (EG4000CX) 37.5 A (EG5000CX) 45.8 A (EG6500CX∙EG6500CXS) Available power Receptacles EG4000CX EG5000CX EG6500CX∙EG6500CXS...
- Página 28 GENERATOR USE RAH type RECEPTACLE No.1 Make sure the load on any receptacle RECEPTACLE No.2 does not exceed its available power shown below and the total load does not exceed the total current available. Total Current Available: 18.2 A (EG5000CX) 22.7 A (EG6500CXS) Receptacles Available power...
-
Página 29: Dc Application
GENERATOR USE DC Application The DC terminals may be used for charging 12 volt automotive-type batteries only. 1.Connect the charging cable to the DC terminals and battery terminals in numerical order as shown. (1)to positive (+) battery terminal (2)to positive (+) DC terminal (3)to negative (–) battery terminal (4)to negative (–) DC terminal DC TERMINALS... -
Página 30: Stopping The Engine
STOPPING THE ENGINE In emergency, turn the engine switch to the OFF position. In normal use: 1.Switch off the connected appliance and pull off the plug. 2.Turn the AC circuit breaker to the OFF position. S1H, MH, RH, REH, KH, RAH types LD1H type AC CIRCUIT BREAKER AC CIRCUIT BREAKER... -
Página 31: Maintenance
(2)These items should be serviced by your servicing dealer, unless you have the proper tools and are mechanically proficient. Refer to the Honda shop manual for service procedures. (3)For commercial use, log hours of operation to determine proper maintenance intervals. -
Página 32: Engine Oil Change
MAINTENANCE ENGINE OIL CHANGE 1.Remove the oil filler cap and oil drain plug to drain the oil. SEALING WASHER (Replace) OIL DRAIN PLUG OIL FILLER CAP 2.Install the oil drain plug, and tighten it securely. TORQUE: 22.5 N∙m (2.25 kgf∙m) 3.Fill to the upper level with the recommended oil (see page 11). -
Página 33: Air Cleaner Service
MAINTENANCE AIR CLEANER SERVICE 1.Remove the air cleaner cover taking care not to damage it. (1)Unsnap the air cleaner cover clips and pull the air cleaner cover. (2)Free the hooks from the setting pins. (3)Remove to the right side of the frame pipe. (4)Remove the air cleaner element from the air cleaner case and clean it. - Página 34 MAINTENANCE 2.Install the air cleaner element to the air cleaner case. 3.Reinstall the air cleaner cover. (1)Place the air cleaner cover over the air cleaner case. (2)Set the hooks to the setting pins securely. (3)Push the air cleaner cover to lock the clips. HOOK AIR CLEANER CASE SETTING PIN...
-
Página 35: Spark Plug Service
MAINTENANCE SPARK PLUG SERVICE Recommended spark plug: BPR5ES (NGK) Never use a spark plug with an improper heat range. 1.Remove the spark plug cap and SPARK PLUG WRENCH then remove the spark plug using a spark plug wrench. 2.Clean the spark plug with a wire brush. -
Página 36: Sediment Cup Cleaning
MAINTENANCE SEDIMENT CUP CLEANING Gasoline is extremely flammable and is explosive under certain conditions. Do not smoke or allow flames or sparks in the area. 1.Type with electric starter: Turn the engine switch to the OFF position and remove the key. Type without electric starter: Turn the engine switch to the OFF position. -
Página 37: Fuse (Electric Starter Type Only)
MAINTENANCE FUSE (electric starter type only) If the fuse is blown, the starter motor will not operate. In the event of fuse failure, locate the cause of failure and repair it before you continue operation. If the fuse continues to fail, discontinue generator use and consult your servicing dealer. -
Página 38: Storage
STORAGE Gasoline is extremely flammable and is explosive under certain conditions. Do not smoke or allow flames or sparks in the area. 1.Drain the fuel from the fuel tank. DRAIN SCREW 2.Loosen the drain screw, and drain the fuel from the carburetor. 3.After all the fuel has drained, tighten the drain screw. -
Página 39: Troubleshooting
TROUBLESHOOTING When the engine will not start: Is there fuel in Refill the fuel the tank? tank. Is the fuel valve Turn the fuel lever ON? valve lever ON. Is the engine Turn the engine switch ON? switch ON. Is there enough Add the oil in the engine? recommended... - Página 40 TROUBLESHOOTING Starter motor does not turn round (electric starter type only): Is the fuse blown? Replace the fuse (see page 34). Charge the battery. Is the battery discharged? If the starter motor still does not turn round, take the generator to your servicing dealer.
- Página 41 TROUBLESHOOTING No electricity at the DC terminals: Is the DC circuit Push the DC circuit protector ON? protector ON. Take the generator to your servicing dealer. When the engine is stopped: Is there fuel in Refill the fuel the tank? tank.
-
Página 42: Specifications
SPECIFICATIONS Dimensions Model EG4000CX EG5000CX EG6500CX EG6500CXS Description code EBHC EBFC EBCC EBDC Length 681 mm 844 mm Width 530 mm Height 571 mm Dry mass (weight) 71.0 kg 82.5 kg 84.0 kg 87.0 kg Engine Model GX270H GX340H1 GX390H1... - Página 43 SPECIFICATIONS Generator Model EG4000CX Type LD1H Rated voltage 120 V/240 V 220 V Rated frequency 60 Hz 50 Hz Rated current 30.0 A/15.0 A 14.5 A output Rated output 3.6 kVA 3.2 kVA Maximum output 4.0 kVA 3.6 kVA Rated voltage...
-
Página 44: Installation Of Kit Parts
INSTALLATION OF KIT PARTS STANDARD KIT PARTS EG6500CXS Electric starter type: Battery Tray Kit 1.Install the battery guard pipe on the frame. Set the battery tray on the battery guard pipe and tighten the bolts. 2.Route the starter cable under the tank and connect it to the starter solenoid. -
Página 45: Spring Washer
INSTALLATION OF KIT PARTS STARTER CABLE (Positive) BATTERY GROUND CABLE CABLE TIE STARTER SOLENOID (16) (17) (14) (13) (11) (12) (15) (10) (1) BATTERY SET BOLT (9) BATTERY TRAY (2) BATTERY SET PLATE (10) BATTERY GUARD PLATE (3) 6 mm FLANGE NUT (11) BATTERY BOX (4) BATTERY GROUND CABLE (12) 6×30 mm FLANGE BOLT... -
Página 46: Optional Kit Parts
INSTALLATION OF KIT PARTS OPTIONAL KIT PARTS Four Wheel Kit Installation 1.Install the lock plate and four wheels on the wheel shaft using the plain washers and split pins. Install the front wheel shaft on the front side nearest the engine. 2.Install the wheel shaft assembly to the generator using eight 8×16 mm hex bolts. - Página 47 MEMO...
- Página 48 Honda EG4000CX∙EG5000CX EG6500CX∙EG6500CXS MANUEL DE EXPLICACIONES...
- Página 49 La información y las especificaciones incluidas en esta publicación estaban vigentes en el momento de su aprobación para impresión. Sin embargo, Honda Motor Co., Ltd. se reserva el derecho a suspender o modificar las especificaciones o diseños en cualquier momento sin...
- Página 50 última información del producto, disponible en el momento de la impresión. Honda Motor Co., Ltd. se reserva el derecho a realizar cambios en cualquier momento sin previo aviso y sin incurrir en ninguna obligación. Ninguna parte de esta publicación puede reproducirse sin permiso por escrito.
- Página 51 ÍNDICE SEGURIDAD DEL GENERADOR ............. 3 INFORMACIÓN IMPORTANTE SOBRE SEGURIDAD....... 3 Responsabilidades del operador ..........3 Peligros del monóxido de carbono ........... 3 Peligros de descargas eléctricas ..........4 Peligros de incendios y quemaduras......... 4 Reposte con cuidado ............. 4 SITUACIÓN DE LAS ETIQUETAS DE SEGURIDAD......
-
Página 52: Seguridad Del Generador
SEGURIDAD DEL GENERADOR INFORMACIÓN IMPORTANTE SOBRE SEGURIDAD Los generadores Honda están diseñados para su empleo con equipos eléctricos que cumplan los requisitos adecuados de alimentación eléctrica. Otras aplicaciones pueden ocasionar lesiones al operador o daños en el generador y en otros sitios. -
Página 53: Peligros De Descargas Eléctricas
SEGURIDAD DEL GENERADOR Peligros de descargas eléctricas • El generador produce suficiente energía eléctrica como para causar descargas eléctricas graves o electrocución si se utiliza indebidamente. • No lo emplee en condiciones de humedad. Mantenga seco el generador. – No lo emplee bajo la lluvia ni la nieve. –... -
Página 54: Situación De Las Etiquetas De Seguridad
Lea con atención las etiquetas y notas de seguridad así como las precauciones descritas en este manual. Si una de estas etiquetas se despega o si resulta difícil de leer, solicite su reemplazo a su concesionario de servicio Honda. Tipos S1H, MH, RH, REH, KH y LD1H... - Página 55 SITUACIÓN DE LAS ETIQUETAS DE SEGURIDAD Tipo RAH...
- Página 56 SITUACIÓN DE LAS ETIQUETAS DE SEGURIDAD • El generador Honda está diseñado para proporcionar un servicio seguro y fiable si se opera de acuerdo con las instrucciones. Lea y entienda el Manual del propietario antes de operar el generador. Si no lo hace así, podrían ocasionarse lesiones corporales o desperfectos en el equipo.
- Página 57 SITUACIÓN DE LAS ETIQUETAS DE SEGURIDAD • El sistema de escape puede causar quemaduras graves cuando esté caliente. No lo toque si el motor ha estado en marcha.
-
Página 58: Identificación De Componentes
IDENTIFICACIÓN DE COMPONENTES Tipos S1H, RH, REH y KH Tipo MH RECEPTÁCULO Nº 1 RECEPTÁCULO Nº 1 INTERRUPTOR DEL MOTOR RECEPTÁCULO Nº 2 RECEPTÁCULO Nº 2 PROTECTOR DE CIRCUITO CC VOLTÍMETRO DISYUNTOR DEL TERMINAL DE TIERRA CIRCUITO DE CA TERMINALES CC Tipo LD1H Tipo RAH VOLTÍMETRO... - Página 59 IDENTIFICACIÓN DE COMPONENTES MEDIDOR DE COMBUSTIBLE PERILLA DEL ESTRANGULADOR TAPA DE PALANCA DE LLENADO DE VÁLVULA DE ACEITE COMBUSTIBLE COPA DE SEDIMENTOS FILTRO DE AIRE TAPÓN DE DRENAJE DEL ACEITE TAPA DEL DEPÓSITO DE COMBUSTIBLE CAPUCHÓN DE LA BUJÍA NÚMERO DE SERIE DEL BASTIDOR SILENCIADOR Anote el número de serie del bastidor en el espacio de abajo.
-
Página 60: Comprobaciones Previas Antes Del Uso
COMPROBACIONES PREVIAS ANTES DEL USO Antes de cada utilización, mire en torno al motor y debajo del mismo para ver si hay indicios de fugas de aceite o de gasolina. 1.NIVEL DE ACEITE DEL MOTOR Compruebe el nivel de aceite del motor con el generador sobre una superficie nivelada y el motor parado. -
Página 61: Nivel Del Combustible
COMPROBACIONES PREVIAS ANTES DEL USO 2.NIVEL DEL COMBUSTIBLE No emplee nunca gasolina pasada, sucia ni mezclada con aceite. Capacidad del depósito de combustible: 24,0 L 1.Compruebe el nivel de combustible. 2.Si el nivel de combustible es bajo, añada combustible hasta el nivel superior. -
Página 62: Filtro De Aire
COMPROBACIONES PREVIAS ANTES DEL USO 3.FILTRO DE AIRE 1.Extraiga la cubierta del filtro de aire teniendo cuidado para no dañarla. (1)Desenganche los retenedores de la cubierta del filtro de aire y tire de ella. (2)Libere los ganchos de los pasadores de posicionamiento. (3)Extraiga hacia el lado derecho del tubo del bastidor. - Página 63 COMPROBACIONES PREVIAS ANTES DEL USO 3.Vuelva a instalar la tapa del filtro de aire. (1)Ponga la cubierta del filtro de aire encima de la caja del filtro de aire. (2)Coloque con seguridad los ganchos en los pasadores de posicionamiento. (3)Presione la cubierta del filtro de aire para bloquear los retenedores. GANCHO CAJA DEL FILTRO DE AIRE PASADOR DE...
-
Página 64: Servicio De La Batería
COMPROBACIONES PREVIAS ANTES DEL USO SERVICIO DE LA BATERÍA (sólo el tipo con motor de arranque eléctrico) El sistema de carga del motor del generador carga la batería mientras el motor está en funcionamiento. Sin embargo, si el generador solo se emplea de vez en cuando, deberá... - Página 65 COMPROBACIONES PREVIAS ANTES DEL USO El nivel del líquido de la batería debe mantenerse entre las marcas de nivel superior UPPER e inferior LOWER. Si el nivel del líquido de la batería está por debajo de la marca de nivel inferior LOWER, se producirán sulfatación y daños en las placas de la batería.
-
Página 66: Arranque Del Motor
ARRANQUE DEL MOTOR 1.Asegúrese de que todos los aparatos estén desconectados del receptáculo de CA. 2.Asegúrese de que el disyuntor del circuito de CA esté en la posición OFF. Tipos S1H, MH, RH, REH, KH y RAH Tipo LD1H DISYUNTOR DEL CIRCUITO DE CA 3.Gire la palanca de la válvula de PALANCA DE VÁLVULA DE COMBUSTIBLE combustible a la posición ON. - Página 67 ARRANQUE DEL MOTOR 5.Arranque el motor. • Empleo del motor de arranque eléctrico: (solamente con motor de START arranque eléctrico) Gire el interruptor del motor a la posición START, y reténgalo ahí hasta que se ponga en marcha el motor. Cuando el motor se ponga en INTERRUPTOR DEL MOTOR marcha, suelte la llave,...
-
Página 68: Sistema De Aviso Del Aceite
ARRANQUE DEL MOTOR 6.Si se ha movido la perilla del estrangulador a la posición CLOSED, muévala a la posición OPEN a medida que se vaya OPEN calentando el motor. PERILLA DEL ESTRANGULADOR Sistema de aviso del aceite El sistema de alerta de aceite está diseñado para evitar daños en el motor causados por una cantidad insuficiente de aceite en el cárter. -
Página 69: Uso Del Generador
• La carga combinada del aparato conectado no debe exceder la capacidad nominal del generador. Capacidad nominal: EG4000CX : 3,2 kVA (tipos MH, RH, REH y KH) : 3,6 kVA (tipo LD1H) EG5000CX : 4,0 kVA (tipos MH, RH, REH, KH y RAH) : 4,5 kVA (tipos S1H y LD1H) EG6500CX∙EG6500CXS : 5,0 kVA (tipos MH, RH, REH, KH y RAH) - Página 70 USO DEL GENERADOR 3.Ponga el disyuntor del circuito de CA en la posición ON. Compruebe que el aparato que va a utilizar está desactivado, y enchúfelo. Tipos S1H, RH, REH y KH Tipo MH DISYUNTOR DEL CIRCUITO DE CA DISYUNTOR DEL CIRCUITO DE CA ENCHUFE ENCHUFE Tipo LD1H...
- Página 71 USO DEL GENERADOR 4.Conecte la alimentación del equipo que se proponga utilizar. Un circuito de CA sobrecargado desconectará el disyuntor del circuito de CA. En este caso, reduzca la carga en el circuito y espere unos minutos antes de volver a conectarlo. Tipos S1H, MH, RH, REH, KH y RAH Tipo LD1H DISYUNTOR DEL...
-
Página 72: Selección Del Receptáculo De Ca
Corriente total disponible: Tipo S1H: 20,5 A (EG5000CX) 25,0 A (EG6500CX∙EG6500CXS) Tipos RH, REH y KH: 14,5 A (EG4000CX) 18,2 A (EG5000CX) 22,7 A (EG6500CX∙EG6500CXS) Receptáculos Potencia disponible 20 A 20 A Tipo MH Compruebe que la carga de los receptáculos no... - Página 73 Corriente total disponible: 30,0 A (EG4000CX) 37,5 A (EG5000CX) 45,8 A (EG6500CX∙EG6500CXS) Potencia disponible Receptáculos...
- Página 74 USO DEL GENERADOR Tipo RAH RECEPTÁCULO Nº 1 Asegúrese de que la carga en cualquier RECEPTÁCULO Nº 2 receptáculo no exceda la energía a su disposición, indicada más abajo, y de que la carga total no exceda la corriente total disponible. Corriente total disponible: 18,2 A (EG5000CX) 22,7 A (EG6500CXS)
-
Página 75: Aplicación De Cc
USO DEL GENERADOR Aplicación de CC Los terminales de CC pueden utilizase para cargar baterías, de 12 voltios solamente, de las que utilizan los automóviles. 1.Conecte el cable de carga a los terminales de CC y a los terminales de la batería en el orden numérico que se indica. (1) al terminal positivo (+) de la batería (2) al terminal positivo (+) de CC (3) al terminal negativo (–) de la batería... -
Página 76: Parada Del Motor
PARADA DEL MOTOR En caso de emergencia, gire el interruptor del motor a la posición OFF. En uso normal: 1.Desconecte la alimentación del aparato conectado y desenchufe la clavija. 2.Ponga el disyuntor del circuito de CA en la posición OFF. Tipos S1H, MH, RH, REH, KH y RAH Tipo LD1H DISYUNTOR DEL... -
Página 77: Mantenimiento
(2)El servicio de estas partes deberá realizarlo su concesionario de servicio, a menos que usted disponga de las herramientas adecuadas y posea suficientes conocimientos mecánicos. Para ver los procedimientos de servicio, consulte el manual de taller Honda. (3)Para aplicaciones comerciales, registre las horas de operación para poder determinar los intervalos adecuados de mantenimiento. -
Página 78: Cambio Del Aceite Del Motor
MANTENIMIENTO CAMBIO DEL ACEITE DEL MOTOR 1.Extraiga la tapa de relleno de aceite y el tapón de drenaje de aceite y drene el aceite. ARANDELA DE SELLADO (sustituir) TAPÓN DE DRENAJE DEL ACEITE TAPA DE LLENADO DE ACEITE 2.Instale el tapón de drenaje de aceite y apriételo con seguridad. PAR: 22,5 N∙m (2,25 kgf∙m) 3.Llene hasta el nivel superior con el aceite recomendado (consulte la página 11). -
Página 79: Mantenimiento Del Filtro De Aire
MANTENIMIENTO MANTENIMIENTO DEL FILTRO DE AIRE 1.Extraiga la cubierta del filtro de aire teniendo cuidado para no dañarla. (1)Desenganche los retenedores de la cubierta del filtro de aire y tire de ella. (2)Libere los ganchos de los pasadores de posicionamiento. (3)Extraiga hacia el lado derecho del tubo del bastidor. - Página 80 MANTENIMIENTO 2.Instale el elemento del filtro de aire en la caja del filtro de aire. 3.Vuelva a instalar la tapa del filtro de aire. (1)Ponga la cubierta del filtro de aire encima de la caja del filtro de aire. (2)Coloque con seguridad los ganchos en los pasadores de posicionamiento. (3)Presione la cubierta del filtro de aire para bloquear los retenedores.
-
Página 81: Mantenimiento De La Bujía De Encendido
MANTENIMIENTO MANTENIMIENTO DE LA BUJÍA DE ENCENDIDO Bujía recomendada: BPR5ES (NGK) PRECAUCIÓN No utilizar jamás bujías de un valor térmico inadecuado. 1.Extraiga la tapa de la bujía y a LLAVE PARA BUJÍAS continuación extraiga la bujía empleando una llave para bujías. 2.Limpie la bujía empleando un cepillo de alambre. -
Página 82: Limpieza De La Taza De Sedimentos
MANTENIMIENTO LIMPIEZA DE LA TAZA DE SEDIMENTOS ADVERTENCIA La gasolina es muy inflamable y explosiva bajo ciertas condiciones. No fume ni permita que haya fuego ni chispas en el lugar. 1.Tipo con motor de arranque eléctrico: Gire el interruptor del motor a la posición OFF y extraiga la llave. Tipo sin motor de arranque eléctrico: Desconecte el interruptor del motor OFF. -
Página 83: Fusible (Sólo El Tipo Con Motor De Arranque Eléctrico)
MANTENIMIENTO FUSIBLE (sólo el tipo con motor de arranque eléctrico) Si se quema el fusible, el motor de arranque no funcionará. En caso de que falle el fusible, busque la causa del fallo y repárela antes de proseguir la operación. Si el fusible sigue fallando, deje de utilizar el generador y consulte con su concesionario de servicio. -
Página 84: Almacenaje
ALMACENAJE ADVERTENCIA La gasolina es muy inflamable y explosiva bajo ciertas condiciones. No fume ni permita que haya fuego ni chispas en el lugar. 1.Drene el combustible del depósito TORNILLO DE DRENAJE de combustible. 2.Afloje el tornillo de drenaje y drene el combustible del carburador. -
Página 85: Resolución De Problemas
RESOLUCIÓN DE PROBLEMAS Cuando el motor no arranque: ¿Hay suficiente Vuelva a llenar el combustible en el depósito de depósito? combustible. SÍ ¿Está la palanca de la Gire la palanca de la válvula del combustible válvula de combustible en la posición ON? a la posición ON. - Página 86 RESOLUCIÓN DE PROBLEMAS El motor de arranque no gira (sólo el tipo con motor de arranque eléctrico): SÍ ¿Está quemado el fusible? Reemplace el fusible (vea la página 34). SÍ Cargue la batería. ¿Está descargada la batería? Si el motor de arranque sigue sin girar, lleve el generador a su concesionario de...
- Página 87 RESOLUCIÓN DE PROBLEMAS No hay electricidad en los terminales de CC: ¿Está el protector Ponga el protector del circuito de CC del circuito de CC en la posición ON? en la posición ON. SÍ Lleve el generador a su concesionario de servicio.
-
Página 88: Especificaciones
ESPECIFICACIONES Dimensiones Modelo EG4000CX EG5000CX EG6500CX EG6500CXS Código de EBHC EBFC EBCC EBDC descripción Longitud 681 mm 844 mm Ancho 530 mm Alto 571 mm Masa en seco 71,0 kg 82,5 kg 84,0 kg 87,0 kg [peso] Motor Modelo GX270H... - Página 89 ESPECIFICACIONES Generador Modelo EG4000CX Tipo LD1H Tensión nominal 120 V/240 V 220 V Frecuencia 60 Hz 50 Hz nominal Salida Corriente de CA 30,0 A/15,0 A 14,5 A nominal Potencia nominal 3,6 kVA 3,2 kVA Potencia máxima 4,0 kVA 3,6 kVA Tensión nominal...
-
Página 90: Instalación De Las Partes Del Juego
INSTALACIÓN DE LAS PARTES DEL JUEGO PARTES DEL JUEGO ESTÁNDAR EG6500CXS Tipo con motor de arranque eléctrico: Juego de la bandeja de la batería 1.Instale el tubo de protección de la batería en el bastidor. Monte la bandeja de la batería en el tubo de protección de la batería y apriete los pernos. -
Página 91: Solenoide Del Motor De Arranque
INSTALACIÓN DE LAS PARTES DEL JUEGO CABLE DEL MOTOR DE CABLE DE PUESTA A TIERRA ARRANQUE (Positivo) DE LA BATERÍA ABRAZADERA PARA CABLES SOLENOIDE DEL MOTOR DE ARRANQUE (16) (17) (14) (13) (11) (12) (15) (10) (1) PERNO DE AJUSTE DE LA BATERÍA 2 (9) BANDEJA DE LA BATERÍA (2) PLACA DE AJUSTE DE LA BATERÍA 1 (10) PLACA DE PROTECCIÓN DE LA BATERÍA 1... -
Página 92: Partes Del Juego Opcional
INSTALACIÓN DE LAS PARTES DEL JUEGO PARTES DEL JUEGO OPCIONAL Instalación del juego de cuatro ruedas 1.Instale la placa de bloqueo y las cuatro ruedas en el eje de las ruedas empleando las arandelas lisas y los pasadores hendidos. Instale el eje de la ruedas delanteras en el lado delantero que está más cerca del motor. - Página 93 NOTA...
- Página 94 EG5000CX·EG4000CX Honda EG6500CXS·EG6500CX...
- Página 95 ﻛﺎﻧﺕ ﺍﻟﻣﻌﻠﻭﻣﺎﺕ ﻭﺍﻟﻣﻭﺍﺻﻔﺎﺕ ﺍﻟﻭﺍﺭﺩﺓ ﻓﻲ ﻫﺫﻩ ﺍﻟﻧﺷﺭﺓ ﺳﺎﺭﻳﺔ ﺍﻟﻣﻔﻌﻭﻝ ﻓﻲ ﻭﻗﺕ ﺍﻟﻣﻭﺍﻓﻘﺔ ﻋﻠﻰ ﺍﻟﻁﺑﺎﻋﺔ. ﻭﻣﻊ ﻟﻧﻔﺳﻬﺎ ﺑﺣﻕ ﻭﻗﻑ ﺃﻭ ﺗﻐﻳﻳﺭHonda Motor Co., Ltd . ﺫﻟﻙ، ﺗﺣﺗﻔﻅ ﺷﺭﻛﺔ ﻫﻭﻧﺩﺍ ﻣﻭﺗﻭﺭ ﺍﻟﻣﺣﺩﻭﺩﺓ .ﺍﻟﻣﻭﺍﺻﻔﺎﺕ ﺃﻭ ﺍﻟﺗﺻﻣﻳﻡ ﻓﻲ ﺃﻱ ﻭﻗﺕ ﺩﻭﻥ ﺳﺎﺑﻕ ﺇﻧﺫﺍﺭ ﻭﺩﻭﻥ ﺗﺣﻣﻝ ﺃﻱ ﺍﻟﺗﺯﺍﻡ ﻣﻥ ﺃﻱ ﻧﻭﻉ...
- Página 96 ﺗﺳﺗﻧﺩ ﻛﺎﻓﺔ ﺍﻟﻣﻌﻠﻭﻣﺎﺕ ﺍﻟﻣﻭﺟﻭﺩﺓ ﻓﻲ ﻫﺫﻩ ﺍﻟﻧﺷﺭﺓ ﻋﻠﻰ ﺃﺣﺩﺙ ﺍﻟﻣﻌﻠﻭﻣﺎﺕ ﺍﻟﺧﺎﺻﺔ ﻓﻲ ﺍﻟﻣﻧﺗﺞ ﻭﺍﻟﻣﺗﺎﺣﺔ ﻭﻗﺕ .ﺍﻟﻣﻭﺍﻓﻘﺔ ﻋﻠﻰ ﺍﻟﻁﺑﺎﻋﺔ ﺑﺣﻕ ﺍﻟﺗﻐﻳﻳﺭﻓﻲ ﺃﻱ ﻭﻗﺕ ﺩﻭﻥ ﺳﺎﺑﻕHonda Motor Co., Ltd . ﺗﺣﺗﻔﻅ ﺷﺭﻛﺔ ﻫﻭﻧﺩﺍ ﻣﻭﺗﻭﺭ ﺍﻟﻣﺣﺩﻭﺩﺓ .ﺇﻧﺫﺍﺭ ﻭﺩﻭﻥ ﺗﺣﻣﻝ ﺃﻱ ﺍﻟﺗﺯﺍﻡ ﻣﻥ ﺃﻱ ﻧﻭﻉ...
- Página 97 ﺍﻟﻣﺣﺗﻭﻳﺎﺕ ۳ ......................ﺃﻣﺎﻥ ﺍﻟﻣﻭﻟﺩ ۳ ..................ﻣﻌﻠﻭﻣﺎﺕ ﺍﻷﻣﺎﻥ ﺍﻟﻬﺎﻣﺔ ۳ ................ﻣﺳﺅﻭﻟﻳﺎﺕ ﻣﻥ ﻳﻘﻭﻡ ﺑﺎﻟﺗﺷﻐﻳﻝ ۳ ................ﺃﺧﻁﺎﺭ ﻏﺎﺯ ﺃﻭﻝ ﺃﻛﺳﻳﺩ ﺍﻟﻛﺭﺑﻭﻥ ٤ ................ﺃﺧﻁﺎﺭ ﺍﻟﺻﺩﻣﺔ ﺍﻟﻛﻬﺭﺑﺎﺋﻳﺔ ٤ ................ ﺃﺧﻁﺎﺭ ﺍﻟﺣﺭﻳﻕ ﻭﺍﻟﺣﺭﻭﻕ ﺍﻟﺟﻠﺩﻳﺔ ٤ ................... ﺍﻟﺗﺯﻭﺩ ﺑﺎﻟﻭﻗﻭﺩ ﺑﺣﺭﺹ ٥ ..................ﻣﻭﺍﺿﻊ ﻣﻠﺻﻘﺎﺕ ﺍﻷﻣﺎﻥ ۱۰...
- Página 98 ﺃﻣﺎﻥ ﺍﻟﻣﻭﻟﺩ ﻣﻌﻠﻭﻣﺎﺕ ﺍﻷﻣﺎﻥ ﺍﻟﻬﺎﻣﺔ ﺇﻥ ﻣﻭﻟﺩﺍﺕ ﻫﻭﻧﺩﺍ ﻣﺻﻣﻣﺔ ﻟﻛﻲ ﺗﺳﺗﺧﺩﻡ ﻣﻊ ﺍﻷﺟﻬﺯﺓ ﺍﻟﻛﻬﺭﺑﺎﺋﻳﺔ ﺫﺍﺕ ﻣﺗﻁﻠﺑﺎﺕ ﻁﺎﻗﺔ ﻣﻼﺋﻣﺔ. ﻭﻗﺩ ﻳﻧﺗﺞ ﻋﻥ .ﺍﺳﺗﺧﺩﺍﻡ ﺃﺟﻬﺯﺓ ﺃﺧﺭﻯ ﻏﻳﺭ ﻣﻧﺎﺳﺑﺔ ﺣﺩﻭﺙ ﺇﺻﺎﺑﺔ ﻟﻣﻥ ﻳﻘﻭﻡ ﺑﺎﻟﺗﺷﻐﻳﻝ ﺃﻭ ﺗﻠﻑ ﻟﻠﻣﻭﻟﺩ ﻭﺍﻟﻣﻣﺗﻠﻛﺎﺕ ﺍﻷﺧﺭﻯ ﻳﻣﻛﻥ ﻣﻧﻊ ﺣﺩﻭﺙ ﻣﻌﻅﻡ ﺍﻹﺻﺎﺑﺎﺕ ﺃﻭ ﺗﻠﻑ ﺍﻟﻣﻣﺗﻠﻛﺎﺕ ﻓﻲ ﺣﺎﻟﺔ ﺍﺗﺑﺎﻉ ﺟﻣﻳﻊ ﺍﻹﺭﺷﺎﺩﺍﺕ ﺍﻟﻭﺍﺭﺩﺓ ﻓﻲ ﻫﺫﺍ ﺍﻟﺩﻟﻳﻝ .ﻭﻋﻠﻰ...
- Página 99 ﺃﻣﺎﻥ ﺍﻟﻣﻭﻟﺩ ﺃﺧﻁﺎﺭ ﺍﻟﺻﺩﻣﺔ ﺍﻟﻛﻬﺭﺑﺎﺋﻳﺔ ﻳﻧﺗﺞ ﺍﻟﻣﻭﻟﺩ ﻁﺎﻗﺔ ﻛﻬﺭﺑﺎﺋﻳﺔ ﻛﺎﻓﻳﺔ ﻳﻣﻛﻥ ﺃﻥ ﺗﺗﺳﺑﺏ ﻓﻲ ﺣﺩﻭﺙ ﺻﺩﻣﺔ ﻛﻬﺭﺑﺎﺋﻳﺔ ﺷﺩﻳﺩﺓ ﺃﻭ ﺍﻟﻣﻭﺕ ﺑﺎﻟﺻﺩﻣﺔ • .ﺍﻟﻛﻬﺭﺑﺎﺋﻳﺔ ﺇﺫﺍ ﻣﺎ ﺗﻡ ﺍﺳﺗﺧﺩﺍﻣﻬﺎ ﺑﺷﻛﻝ ﺧﺎﻁﺊ .ﺗﺟﻧﺏ ﺍﻻﺳﺗﺧﺩﺍﻡ ﻓﻲ ﺍﻟﺣﺎﻻﺕ ﺍﻟﺭﻁﺑﺔ. ﻭﺍﺣﺗﻔﻅ ﺑﺎﻟﻣﻭﻟﺩ ﺟﺎ ﻓ ً ﺎ •...
- Página 100 ﻣﻭﺍﺿﻊ ﻣﻠﺻﻘﺎﺕ ﺍﻷﻣﺎﻥ ﺗﻧﺑﻬﻙ ﻫﺫﻩ ﺍﻟﻣﻠﺻﻘﺎﺕ ﺇﻟﻰ ﻷﺧﻁﺎﺭ ﺍﻟﻣﺣﺗﻣﻠﺔ ﺍﻟﺗﻲ ﻗﺩ ﺗﺗﺳﺑﺏ ﻓﻲ ﺇﺻﺎﺑﺎﺕ ﺧﻁﻳﺭﺓ. ﻗﻡ ﺑﻘﺭﺍءﺓ ﺍﻟﻣﻠﺻﻘﺎﺕ .ﻭﻣﻼﺣﻅﺎﺕ ﺍﻷﻣﺎﻥ ﻭﺍﻻﺣﺗﻳﺎﻁﺎﺕ ﺍﻟﻣﺫﻛﻭﺭﺓ ﻓﻲ ﻫﺫﺍ ﺍﻟﺩﻟﻳﻝ ﺑﻌﻧﺎﻳﺔ ﺇﺫﺍ ﺗﻡ ﻧﺯﻉ ﺃﻱ ﻣﻥ ﻫﺫﻩ ﺍﻟﻣﻠﺻﻘﺎﺕ ﺃﻭ ﺃﺻﺑﺢ ﻣﻥ ﺍﻟﺻﻌﺏ ﻗﺭﺍءﺗﻪ، ﻓﺎﺗﺻﻝ ﺑﻭﻛﻳﻝ ﻫﻭﻧﺩﺍ ﻟﻠﺻﻳﺎﻧﺔ ﺍﻟﺧﺎﺹ ﺑﻙ .ﻻﺳﺗﺑﺩﺍﻟﻪ...
- Página 101 ﻣﻭﺍﺿﻊ ﻣﻠﺻﻘﺎﺕ ﺍﻷﻣﺎﻥ RAH ﺍﻟﻧﻭﻉ ٦...
- Página 102 ﻣﻭﺍﺿﻊ ﻣﻠﺻﻘﺎﺕ ﺍﻷﻣﺎﻥ ﺗﻡ ﺗﺻﻣﻳﻡ ﻣﻭﻟﺩ ﻫﻭﻧﺩﺍ ﻟﺗﻭﻓﻳﺭ ﺧﺩﻣﺎﺕ ﺁﻣﻧﺔ ﻭﻣﻭﺛﻭﻗﺔ، ﻭﺫﻟﻙ ﺇﺫﺍ ﺗﻡ ﺗﺷﻐﻳﻠﻪ • .ﻭﻓ ﻘ ً ﺎ ﻟﻺﺭﺷﺎﺩﺍﺕ ﺍﻗﺭﺃ ﺩﻟﻳﻝ ﺍﻟﻣﺎﻟﻙ ﻭﺍﻓﻬﻣﻪ ﻗﺑﻝ ﺗﺷﻐﻳﻝ ﺍﻟﻣﻭﻟﺩ. ﻗﺩ ﻳﻧﺗﺞ ﻋﻥ ﻋﺩﻡ ﺍﻟﻘﻳﺎﻡ ﺑﺫﻟﻙ .ﺣﺩﻭﺙ ﺇﺻﺎﺑﺔ ﺷﺧﺻﻳﺔ ﺃﻭ ﺗﻠﻑ ﺍﻟﺟﻬﺎﺯ ﻳﺣﺗﻭﻱ...
- Página 103 ﻣﻭﺍﺿﻊ ﻣﻠﺻﻘﺎﺕ ﺍﻷﻣﺎﻥ ﻗﺩ ﻳﺗﺳﺑﺏ ﻧﻅﺎﻡ ﺍﻟﻌﺎﺩﻡ ﺍﻟﺳﺎﺧﻥ ﻓﻲ ﺣﺩﻭﺙ ﺣﺭﻭﻕ ﺧﻁﻳﺭﺓ. ﺗﺟﻧﺏ ﻣﻼﻣﺳﺗﻪ • .ﺇﺫﺍ ﻛﺎﻥ ﺍﻟﻣﺣﺭﻙ ﻳﻌﻣﻝ ﻗﺑﻝ ﺫﻟﻙ ۸...
- Página 104 ﺗﻌﺭﻳﻑ ﺍﻟﻣﻛﻭﻧﺎﺕ MH ﺍﻟﻧﻭﻉ KH ﻭREH ﻭRH ﻭS1H ﺍﻷﻧﻭﺍﻉ ۱ ﺍﻟﻣﻘﺑﺱ ﺭﻗﻡ ۱ ﺍﻟﻣﻘﺑﺱ ﺭﻗﻡ ﻣﻔﺗﺎﺡ ﺍﻟﻣﺣﺭﻙ ۲ ﺍﻟﻣﻘﺑﺱ ﺭﻗﻡ ۲ ﺍﻟﻣﻘﺑﺱ ﺭﻗﻡ ﻭﺍﻗﻲ ﺩﺍﺋﺭﺓ ﺍﻟﺗﻳﺎﺭ ﺍﻟﻣﺑﺎﺷﺭ ﻋﺩﺍﺩ ﺍﻟﻔﻭﻟﺗﻳﺔ ﻗﺎﻁﻊ ﺩﺍﺋﺭﺓ ﺍﻟﺗﻳﺎﺭ ﺍﻟﻣﺗﺭﺩﺩ ﻁﺭﻑ ﺗﺄﺭﻳﺽ ﺃﻁﺭﺍﻑ ﺗﻭﺻﻳﻝ ﺍﻟﺗﻳﺎﺭ ﺍﻟﻣﺑﺎﺷﺭ LD1H ﺍﻟﻧﻭﻉ...
- Página 105 ﺗﻌﺭﻳﻑ ﺍﻟﻣﻛﻭﻧﺎﺕ ﻣﻘﻳﺎﺱ ﺍﻟﻭﻗﻭﺩ ﻣﻘﺑﺽ ﺍﻟﺧﺎﻧﻕ ﻏﻁﺎء ﻓﺗﺣﺔ ﻣﻝء ﺍﻟﺯﻳﺕ ﺫﺭﺍﻉ ﺻﻣﺎﻡ ﺍﻟﻭﻗﻭﺩ ﻁﺎﺳﺔ ﺍﻟﺗﺭﺳﻳﺑﺎﺕ ﻣﻧﻅﻑ ﺍﻟﻬﻭﺍء ﺳﺩﺍﺩﺓ ﺗﺻﺭﻳﻑ ﺍﻟﺯﻳﺕ ﻏﻁﺎء ﺧﺯﺍﻥ ﺍﻟﻭﻗﻭﺩ ﻏﻁﺎء ﺷﻣﻌﺔ ﺍﻹﺷﻌﺎﻝ ﺍﻟﺭﻗﻡ ﺍﻟﺗﺳﻠﺳﻠﻲ ﻟﻠﻬﻳﻛﻝ ﻛﺎﺗﻡ ﺍﻟﺻﻭﺕ ﺳﺟﻝ ﺍﻟﺭﻗﻡ ﺍﻟﺗﺳﻠﺳﻠﻲ ﻟﻠﻬﻳﻛﻝ ﻓﻲ ﺍﻟﻣﺳﺎﺣﺔ ﺍﻟﻣﺧﺻﺻﺔ ﺃﺩﻧﺎﻩ. ﺳﻭﻑ ﺗﺣﺗﺎﺝ ﺇﻟﻰ ﻫﺫﺍ ﺍﻟﺭﻗﻡ ﺍﻟﺗﺳﻠﺳﻠﻲ ﻋﻧﺩ ﻁﻠﺏ .ﺷﺭﺍء...
- Página 106 ﺇﺟﺭﺍء ﺍﻟﻔﺣﺹ ﺍﻟﺳﺎﺑﻕ ﻟﻌﻣﻠﻳﺔ ﺍﻟﺗﺷﻐﻳﻝ .ﻗﺑﻝ ﻛﻝ ﺍﺳﺗﺧﺩﺍﻡ، ﺍﻧﻅﺭ ﺣﻭﻝ ﺍﻟﻣﺣﺭﻙ ﻭﺃﺳﻔﻝ ﻣﻧﻪ ﻟﻠﺗﺄﻛﺩ ﻣﻥ ﻋﺩﻡ ﻭﺟﻭﺩ ﺃﻱ ﻋﻼﻣﺎﺕ ﻟﺗﺳﺭﺏ ﺍﻟﺯﻳﺕ ﺃﻭ ﺍﻟﺑﻧﺯﻳﻥ ﻣﺳﺗﻭﻯ ﺯﻳﺕ ﺍﻟﻣﺣﺭﻙ ۱ . .ﺍﻓﺣﺹ ﻣﺳﺗﻭﻯ ﺯﻳﺕ ﺍﻟﻣﺣﺭﻙ ﻣﻊ ﻭﺟﻭﺩ ﺍﻟﻣﻭﻟﺩ ﻋﻠﻰ ﺳﻁﺢ ﻣﺳﺗﻭ ٍ ﻭﺍﻟﻣﺣﺭﻙ ﻣﺗﻭﻗﻑ :ﺍﻟﺯﻳﺕ...
- Página 107 ﺇﺟﺭﺍء ﺍﻟﻔﺣﺹ ﺍﻟﺳﺎﺑﻕ ﻟﻌﻣﻠﻳﺔ ﺍﻟﺗﺷﻐﻳﻝ ﻣﺳﺗﻭﻯ ﺍﻟﻭﻗﻭﺩ ۲ . .ﻻ ﺗﻌﻣﺩ ﺃﺑ ﺩ ً ﺍ ﺇﻟﻰ ﺍﺳﺗﺧﺩﺍﻡ ﺑﻧﺯﻳﻥ ﻓﺎﺳﺩ ﺃﻭ ﻣﻠﻭﺙ ﺃﻭ ﺍﻟﻣﻣﺯﻭﺝ ﻣﻊ ﺍﻟﺯﻳﺕ ﺳﻌﺔ ﺧﺯﺍﻥ ﺍﻟﻭﻗﻭﺩ: ۰٫٤۲ ﻟﺗﺭ .ﺍﻓﺣﺹ ﻣﺳﺗﻭﻯ ﺍﻟﻭﻗﻭﺩ ۱ . .ﺇﺫﺍ ﻛﺎﻥ ﻣﺳﺗﻭﻯ ﺍﻟﻭﻗﻭﺩ ﻣﻧﺧﻔ ﺿ ًﺎ، ﻗﻡ ﺑﺗﻌﺑﺋﺔ ﺍﻟﻭﻗﻭﺩ ﺇﻟﻰ ﺍﻟﻣﺳﺗﻭﻯ ﺍﻟﻌﻠﻭﻱ ۲...
- Página 108 ﺇﺟﺭﺍء ﺍﻟﻔﺣﺹ ﺍﻟﺳﺎﺑﻕ ﻟﻌﻣﻠﻳﺔ ﺍﻟﺗﺷﻐﻳﻝ ﻣﻧﻅﻑ ﺍﻟﻬﻭﺍء ۳ . .ﺃﺯﻝ ﻏﻁﺎء ﻣﻧﻅﻑ ﺍﻟﻬﻭﺍء ﻣﻊ ﻣﺭﺍﻋﺎﺓ ﻋﺩﻡ ﺇﻟﺣﺎﻕ ﺍﻟﺿﺭﺭ ﺑﻪ ۱ . .)۱( ﻗﻡ ﺑﺈﺭﺧﺎء ﻣﺷﺎﺑﻙ ﻏﻁﺎء ﻣﻧﻅﻑ ﺍﻟﻬﻭﺍء ﻭﺳﺣﺏ ﻏﻁﺎء ﻣﻧﻅﻑ ﺍﻟﻬﻭﺍء .)۲( ﻗﻡ ﺑﺗﺣﺭﻳﺭ ﺍﻟﺧﻁﺎﻓﺎﺕ ﻣﻥ ﻣﺳﺎﻣﻳﺭ ﺍﻟﺗﺛﺑﻳﺕ .)۳( ﻗﻡ ﺑﺈﺯﺍﻟﺗﻬﺎ ﺇﻟﻰ ﺍﻟﺟﺎﻧﺏ ﺍﻷﻳﻣﻥ ﻣﻥ ﺃﻧﺑﻭﺏ ﺍﻹﻁﺎﺭ ﺍﻟﺧﻁﺎﻑ...
- Página 109 ﺇﺟﺭﺍء ﺍﻟﻔﺣﺹ ﺍﻟﺳﺎﺑﻕ ﻟﻌﻣﻠﻳﺔ ﺍﻟﺗﺷﻐﻳﻝ .ﺇﻋﺎﺩﺓ ﺗﺭﻛﻳﺏ ﻏﻁﺎء ﻣﻧﻅﻑ ﺍﻟﻬﻭﺍء ۳ . .)۱( ﻗﻡ ﺑﻭﺿﻊ ﻏﻁﺎء ﻣﻧﻅﻑ ﺍﻟﻬﻭﺍء ﻓﻭﻕ ﻋﻠﺑﺔ ﻣﻧﻅﻑ ﺍﻟﻬﻭﺍء .)۲( ﻗﻡ ﺑﺗﺛﺑﻳﺕ ﺍﻟﺧﻁﺎﻓﺎﺕ ﻋﻠﻰ ﻣﺳﺎﻣﻳﺭ ﺍﻟﺗﺛﺑﻳﺕ ﺑﺈﺣﻛﺎﻡ .)۳( ﺍﺩﻓﻊ ﻏﻁﺎء ﻣﻧﻅﻑ ﺍﻟﻬﻭﺍء ﻟﻘﻔﻝ ﺍﻟﻣﺷﺎﺑﻙ ﺍﻟﺧﻁﺎﻑ ﻋﻠﺑﺔ ﻣﻧﻅﻑ ﺍﻟﻬﻭﺍء ٢...
- Página 110 ﺇﺟﺭﺍء ﺍﻟﻔﺣﺹ ﺍﻟﺳﺎﺑﻕ ﻟﻌﻣﻠﻳﺔ ﺍﻟﺗﺷﻐﻳﻝ (ﺻﻳﺎﻧﺔ ﺍﻟﺑﻁﺎﺭﻳﺔ )ﻧﻭﻉ ﻣﺣﺭﻙ ﺍﻟﺗﺷﻐﻳﻝ ﺍﻟﻛﻬﺭﺑﺎﺋﻲ ﻓﻘﻁ ﻳﻘﻭﻡ ﻧﻅﺎﻡ ﺷﺣﻥ ﺍﻟﻣﺣﺭﻙ ﺍﻟﺧﺎﺹ ﺑﺎﻟﻣﻭﻟﺩ ﻟﺩﻳﻙ ﺑﺷﺣﻥ ﺍﻟﺑﻁﺎﺭﻳﺔ ﺃﺛﻧﺎء ﻋﻣﻝ ﺍﻟﻣﺣﺭﻙ. ﻣﻊ ﺫﻟﻙ، ﺇﺫﺍ ﺗﻡ ﺍﺳﺗﺧﺩﺍﻡ .ﺍﻟﻣﻭﻟﺩ ﺑﺷﻛﻝ ٍ ﺩﻭﺭﻱ ﻓﻘﻁ، ﻳﺟﺏ ﺷﺣﻥ ﺍﻟﺑﻁﺎﺭﻳﺔ ﺷﻬﺭ ﻳ ًﺎ ﻟﻠﺣﻔﺎﻅ ﻋﻠﻰ ﺍﻟﻌﻣﺭ ﺍﻟﺗﺷﻐﻳﻠﻲ ﻟﻠﺑﻁﺎﺭﻳﺔ ﺗﺣﺗﻭﻱ...
- Página 111 ﺇﺟﺭﺍء ﺍﻟﻔﺣﺹ ﺍﻟﺳﺎﺑﻕ ﻟﻌﻣﻠﻳﺔ ﺍﻟﺗﺷﻐﻳﻝ ﻭﺍﻟﻣﺳﺗﻭﻯ ﺍﻟﺳﻔﻠﻲUPPER ﻳﺟﺏ ﺃﻥ ﻳﺑﻘﻰ ﻣﺳﺗﻭﻯ ﺳﺎﺋﻝ ﺍﻟﺑﻁﺎﺭﻳﺔ ﺑﻳﻥ ﻋﻼﻣﺗﻲ ﺍﻟﻣﺳﺗﻭﻯ ﺍﻟﻌﻠﻭﻱ ، ﻓﺳﻳﺅﺩﻱ ﺫﻟﻙ ﺇﻟﻰ ﺣﺩﻭﺙLOWER . ﺇﺫﺍ ﻛﺎﻥ ﻣﺳﺗﻭﻯ ﺳﺎﺋﻝ ﺍﻟﺑﻁﺎﺭﻳﺔ ﺃﺩﻧﻰ ﻣﻥ ﺍﻟﻣﺳﺗﻭﻯ ﺍﻟﺳﻔﻠﻲLOWER .ﺍﻟﻛﺑﺭﺗﺔ ﻭﺗﺗﻌﺭﺽ ﻟﻭﺣﺔ ﺍﻟﺑﻁﺎﺭﻳﺔ ﻟﻠﺗﻠﻑ ﺇﺫﺍ ﻭﺍﺟﻬﺗﻙ ﻣﺷﻛﻠﺔ ﺍﻟﻔﻘﺩﺍﻥ ﺍﻟﺳﺭﻳﻊ ﻟﺳﺎﺋﻝ ﺍﻟﺑﻁﺎﺭﻳﺔ، ﺃﻭ ﺃﻥ ﺍﻟﺑﻁﺎﺭﻳﺔ ﺃﺻﺑﺣﺕ ﺿﻌﻳﻔﺔ ﻭﺗﺗﺳﺑﺏ ﻓﻲ ﺍﻟﺗﺷﻐﻳﻝ .ﺍﻟﺑﻁﻲء...
- Página 112 ﺑﺩء ﺗﺷﻐﻳﻝ ﺍﻟﻣﺣﺭﻙ .AC ﺗﺄﻛﺩ ﻣﻥ ﺃﻥ ﺟﻣﻳﻊ ﺍﻷﺟﻬﺯﺓ ﻣﻔﺻﻭﻟﺔ ﻋﻥ ﻣﻘﺑﺱ ﺍﻟﺗﻳﺎﺭ ﺍﻟﻣﺗﺭﺩﺩ ۱ . .OFF ﻋﻠﻰ ﺍﻟﻭﺿﻊ ﺇﻳﻘﺎﻑAC ﺗﺄﻛﺩ ﻣﻥ ﺃﻥ ﻗﺎﻁﻊ ﺩﺍﺋﺭﺓ ﺍﻟﺗﻳﺎﺭ ﺍﻟﻣﺗﺭﺩﺩ ۲ . RAH ﻭKH ﻭREH ﻭRH ﻭMH ﻭS1H ﺍﻷﻧﻭﺍﻉ LD1H ﺍﻟﻧﻭﻉ...
- Página 113 ﺑﺩء ﺗﺷﻐﻳﻝ ﺍﻟﻣﺣﺭﻙ .ﺍﺑﺩﺃ ﺗﺷﻐﻳﻝ ﺍﻟﻣﺣﺭﻙ ٥ . :ﺑﺎﺳﺗﺧﺩﺍﻡ ﻣﺣﺭﻙ ﺍﻟﺗﺷﻐﻳﻝ ﺍﻟﻛﻬﺭﺑﺎﺋﻲ • ON ﺗﺷﻐﻳﻝ ()ﻧﻭﻉ ﻣﺣﺭﻙ ﺍﻟﺗﺷﻐﻳﻝ ﺍﻟﻛﻬﺭﺑﺎﺋﻲ ﻓﻘﻁ START ﺑﺩء ،START ﺃﺩﺭ ﻣﻔﺗﺎﺡ ﺍﻟﻣﺣﺭﻙ ﺇﻟﻰ ﺍﻟﻭﺿﻊ ﺑﺩء .ﻭﺍﻣﺳﻛﻪ ﻫﻧﺎﻟﻙ ﺣﺗﻰ ﻳﺑﺩﺃ ﺗﺷﻐﻳﻝ ﺍﻟﻣﺣﺭﻙ ،ﻋﻧﺩﻣﺎ ﻳﺑﺩﺃ ﺗﺷﻐﻳﻝ ﺍﻟﻣﺣﺭﻙ، ﻗﻡ ﺑﺗﺣﺭﻳﺭ ﺍﻟﻣﻔﺗﺎﺡ ﻣﻣﺎ...
- Página 114 ﺑﺩء ﺗﺷﻐﻳﻝ ﺍﻟﻣﺣﺭﻙ ﺇﺫﺍ ﻗﻣﺕ ﺑﺗﺣﺭﻳﻙ ﻣﻘﺑﺽ ﺍﻟﺧﺎﻧﻕ ﺇﻟﻰ ﺍﻟﻭﺿﻊ ﻣﻐﻠﻕ ٦ . ، ﻓﻘﻡ ﺑﺎﻟﺗﺣﺭﻳﻙ ﺇﻟﻰ ﺍﻟﻭﺿﻊ ﻣﻔﺗﻭﺡCLOSED . ﺑﻳﻧﻣﺎ ﻳﺳﺧﻥ ﺍﻟﻣﺣﺭﻙOPEN ﻣﻔﺗﻭﺡ OPEN ﻣﻘﺑﺽ ﺍﻟﺧﺎﻧﻕ ﻧﻅﺎﻡ ﺍﻹﻧﺫﺍﺭ ﺑﺎﻧﺧﻔﺎﺽ ﺍﻟﺯﻳﺕ ﺗﻡ ﺗﺻﻣﻳﻡ ﻧﻅﺎﻡ ﺍﻹﻧﺫﺍﺭ ﺑﺎﻧﺧﻔﺎﺽ ﺍﻟﺯﻳﺕ ﻛﻲ ﻳﻣﻧﻊ ﺗﻠﻑ ﺍﻟﻣﺣﺭﻙ ﺑﺳﺑﺏ ﻭﺟﻭﺩ ﻛﻣﻳﺔ ﻏﻳﺭ ﻛﺎﻓﻳﺔ ﻣﻥ ﺍﻟﺯﻳﺕ ﻓﻲ ﻋﻠﺑﺔ...
- Página 115 • :ﺍﻟﺳﻌﺔ ﺍﻟﻣﻌﺎﻳﺭﺓ (KH ﻭREH ﻭRH ﻭMH : ۲٫۳ ﻛﻳﻠﻭ ﻓﻭﻟﺕ ﺃﻣﺑﻳﺭ )ﺍﻷﻧﻭﺍﻉ EG4000CX (LD1H : ٦٫۳ ﻛﻳﻠﻭ ﻓﻭﻟﺕ ﺃﻣﺑﻳﺭ )ﺍﻟﻧﻭﻉ (RAH ﻭKH ﻭREH ﻭRH ﻭMH : ۰٫٤ ﻛﻳﻠﻭ ﻓﻭﻟﺕ ﺃﻣﺑﻳﺭ )ﺍﻷﻧﻭﺍﻉ EG5000CX (LD1H ...
- Página 116 ﺍﺳﺗﺧﺩﺍﻡ ﺍﻟﻣﻭﻟﺩ .ON ﺃﺩﺭ ﻗﺎﻁﻊ ﺩﺍﺋﺭﺓ ﺍﻟﺗﻳﺎﺭ ﺍﻟﻣﺗﺭﺩﺩ ﺇﻟﻰ ﺍﻟﻭﺿﻊ ﺗﺷﻐﻳﻝ ۳ . .ﺗﺄﻛﺩ ﻣﻥ ﺇﻳﻘﺎﻑ ﺗﺷﻐﻳﻝ ﺍﻟﺟﻬﺎﺯ ﺍﻟﻣﺭﺍﺩ ﺍﺳﺗﺧﺩﺍﻣﻪ، ﻭﻗﻡ ﺑﺗﻭﺻﻳﻝ ﺍﻟﺟﻬﺎﺯ MH ﺍﻟﻧﻭﻉ KH ﻭREH ﻭRH ﻭS1H ﺍﻷﻧﻭﺍﻉ ﻗﺎﻁﻊ ﺩﺍﺋﺭﺓ ﺍﻟﺗﻳﺎﺭ ﺍﻟﻣﺗﺭﺩﺩ ﻗﺎﻁﻊ ﺩﺍﺋﺭﺓ ﺍﻟﺗﻳﺎﺭ ﺍﻟﻣﺗﺭﺩﺩ ON ﺗﺷﻐﻳﻝ...
- Página 117 ﺍﺳﺗﺧﺩﺍﻡ ﺍﻟﻣﻭﻟﺩ .ﻗﻡ ﺑﺗﺷﻐﻳﻝ ﺍﻟﺟﻬﺎﺯ ﺍﻟﻣﺭﺍﺩ ﺍﺳﺗﺧﺩﺍﻣﻪ ٤ . .ﺳﻳﻌﻣﻝ ﺍﻟﺣﻣﻝ ﺍﻟﺯﺍﺋﺩ ﻟﺩﺍﺋﺭﺓ ﺍﻟﺗﻳﺎﺭ ﺍﻟﻣﺗﺭﺩﺩ ﻋﻠﻰ ﺇﻳﻘﺎﻑ ﺗﺷﻐﻳﻝ ﻗﺎﻁﻊ ﺩﺍﺋﺭﺓ ﺍﻟﺗﻳﺎﺭ ﺍﻟﻣﺗﺭﺩﺩ .ﺇﺫﺍ ﺣﺩﺙ ﻫﺫﺍ، ﻗﻠﻝ ﺍﻟﺣﻣﻝ ﺍﻟﻣﻭﺟﻭﺩ ﻋﻠﻰ ﺍﻟﺩﺍﺋﺭﺓ ﻭﺍﻧﺗﻅﺭ ﺑﺿﻊ ﺩﻗﺎﺋﻕ ﻗﺑﻝ ﺍﻟﺗﺷﻐﻳﻝ LD1H ﺍﻟﻧﻭﻉ RAH ﻭKH ﻭREH ﻭRH ﻭMH ﻭS1H ﺍﻷﻧﻭﺍﻉ OFF ﺇﻳﻘﺎﻑ...
- Página 118 ﺍﻟﺧﺎﺻﺔ ﺑﻪ ﻭﺍﻟﻣﺑﻳﻧﺔ ﺃﺩﻧﺎﻩ ﻭﻣﻥ ﺃﻥ ﺍﻟﺣﻣﻝ ﺍﻟﻛﻠﻲ ﻻ ﻳﺗﺟﺎﻭﺯ ﺍﻟﺗﻳﺎﺭ ﺍﻟﻛﻠﻲ .ﺍﻟﻣﺗﺎﺡ :ﺍﻟﺗﻳﺎﺭ ﺍﻟﻛﻠﻲ ﺍﻟﻣﺗﺎﺡ (EG5000CX) ٥٫۰۲ ﺃﻣﺑﻳﺭ :S1H ﺍﻟﻧﻭﻉ (EG6500CXS·EG6500CX) ۰٫٥۲ ﺃﻣﺑﻳﺭ :KH ﻭREH ﻭRH ﺍﻷﻧﻭﺍﻉ (EG4000CX) ٥٫٤۱ ﺃﻣﺑﻳﺭ (EG5000CX) ۲٫۸۱ ﺃﻣﺑﻳﺭ (EG6500CXS·EG6500CX) ۷٫۲۲ ﺃﻣﺑﻳﺭ ﺍﻟﻣﻘﺎﺑﺱ ﺍﻟﻁﺎﻗﺔ ﺍﻟﻣﺗﺎﺣﺔ ۰۲ ﺃﻣﺑﻳﺭ ۱...
- Página 119 ﺗﺄﻛﺩ ﻣﻥ ﺃﻥ ﺍﻟﺣﻣﻝ ﺍﻟﻭﺍﻗﻊ ﻋﻠﻰ ﺃﻱ ٍ ﻣﻥ ﺍﻟﻣﻘﺎﺑﺱ ﻻ ﻳﺗﺟﺎﻭﺯ ٥ ﺍﻟﻣﻘﺑﺱ ﺭﻗﻡ ﺍﻟﻁﺎﻗﺔ ﺍﻟﻣﺗﺎﺣﺔ ﺍﻟﺧﺎﺻﺔ ﺑﻪ ﻭﺍﻟﻣﺑﻳﻧﺔ ﺃﺩﻧﺎﻩ ﻭﻣﻥ ﺃﻥ ﺍﻟﺣﻣﻝ ﺍﻟﻛﻠﻲ .ﻻ ﻳﺗﺟﺎﻭﺯ ﺍﻟﺗﻳﺎﺭ ﺍﻟﻛﻠﻲ ﺍﻟﻣﺗﺎﺡ :ﺍﻟﺗﻳﺎﺭ ﺍﻟﻛﻠﻲ ﺍﻟﻣﺗﺎﺡ (EG4000CX) ۰٫۰۳ ﺃﻣﺑﻳﺭ (EG5000CX) ٥٫۷۳ ﺃﻣﺑﻳﺭ (EG6500CXS·EG6500CX) ۸٫٥٤ ﺃﻣﺑﻳﺭ ﺍﻟﻁﺎﻗﺔ ﺍﻟﻣﺗﺎﺣﺔ ﺍﻟﻣﻘﺎﺑﺱ...
- Página 120 ﺍﺳﺗﺧﺩﺍﻡ ﺍﻟﻣﻭﻟﺩ RAH ﺍﻟﻧﻭﻉ ۱ ﺍﻟﻣﻘﺑﺱ ﺭﻗﻡ ۲ ﺍﻟﻣﻘﺑﺱ ﺭﻗﻡ ﺗﺄﻛﺩ ﻣﻥ ﺃﻥ ﺍﻟﺣﻣﻝ ﺍﻟﻭﺍﻗﻊ ﻋﻠﻰ ﺃﻱ ٍ ﻣﻥ ﺍﻟﻣﻘﺎﺑﺱ ﻻ ﻳﺗﺟﺎﻭﺯ ﺍﻟﻁﺎﻗﺔ ﺍﻟﻣﺗﺎﺣﺔ ﺍﻟﺧﺎﺻﺔ ﺑﻪ ﻭﺍﻟﻣﺑﻳﻧﺔ ﺃﺩﻧﺎﻩ ﻭﻣﻥ ﺃﻥ ﺍﻟﺣﻣﻝ ﺍﻟﻛﻠﻲ .ﻻ ﻳﺗﺟﺎﻭﺯ ﺍﻟﺗﻳﺎﺭ ﺍﻟﻛﻠﻲ ﺍﻟﻣﺗﺎﺡ :ﺍﻟﺗﻳﺎﺭ ﺍﻟﻛﻠﻲ ﺍﻟﻣﺗﺎﺡ (EG5000CX) ۲٫۸۱...
- Página 121 ﺍﺳﺗﺧﺩﺍﻡ ﺍﻟﻣﻭﻟﺩ ﺗﻁﺑﻳﻕ ﺍﻟﺗﻳﺎﺭ ﺍﻟﻣﺑﺎﺷﺭ .ﻳﻣﻛﻥ ﺍﺳﺗﺧﺩﺍﻡ ﺃﻁﺭﺍﻑ ﺗﻭﺻﻳﻝ ﺍﻟﺗﻳﺎﺭ ﺍﻟﻣﺑﺎﺷﺭ ﻟﺷﺣﻥ ﺑﻁﺎﺭﻳﺎﺕ ﺍﻟﺳﻳﺎﺭﺍﺕ ﺫﺍﺕ ۲۱ ﻓﻭﻟﺕ ﻓﻘﻁ ﻗﻡ ﺑﺗﻭﺻﻳﻝ ﻛﺑﻝ ﺍﻟﺷﺣﻥ ﺑﺄﻁﺭﺍﻑ ﺗﻭﺻﻳﻝ ﺍﻟﺗﻳﺎﺭ ﺍﻟﻣﺑﺎﺷﺭ ﻭﺃﻁﺭﺍﻑ ﺗﻭﺻﻳﻝ ﺍﻟﺑﻁﺎﺭﻳﺔ ﻓﻲ ﺍﻟﺗﺭﺗﻳﺏ ﺍﻟﻣﺭﻗﻡ ﻛﻣﺎ ۱ . .ﻫﻭ ﻣﺑﻳﻥ (+) )۱( ﺇﻟﻰ ﻁﺭﻑ ﺗﻭﺻﻳﻝ ﺍﻟﺑﻁﺎﺭﻳﺔ ﺍﻟﻣﻭﺟﺏ (+) )۲( ﺇﻟﻰ...
- Página 122 ﺇﻳﻘﺎﻑ ﺗﺷﻐﻳﻝ ﺍﻟﻣﺣﺭﻙ .OFF ﻓﻲ ﺣﺎﻟﺔ ﺍﻟﻁﻭﺍﺭﺉ، ﺃﺩﺭ ﻣﻔﺗﺎﺡ ﺍﻟﻣﺣﺭﻙ ﺇﻟﻰ ﺍﻟﻭﺿﻊ ﺇﻳﻘﺎﻑ :ﺃﺛﻧﺎء ﺍﻻﺳﺗﺧﺩﺍﻡ ﺍﻟﻌﺎﺩﻱ .ﻗﻡ ﺑﺈﻳﻘﺎﻑ ﺗﺷﻐﻳﻝ ﺍﻟﺟﻬﺎﺯ ﺍﻟﻣﻭﺻﻝ ﻭﺍﺳﺣﺏ ﺍﻟﻘﺎﺑﺱ ۱ . .OFF ﺃﺩﺭ ﻗﺎﻁﻊ ﺩﺍﺋﺭﺓ ﺍﻟﺗﻳﺎﺭ ﺍﻟﻣﺗﺭﺩﺩ ﺇﻟﻰ ﺍﻟﻭﺿﻊ ﺇﻳﻘﺎﻑ ۲ . LD1H ﺍﻟﻧﻭﻉ RAH ﻭKH ﻭREH ﻭRH ﻭMH ﻭS1H ﺍﻷﻧﻭﺍﻉ ﻗﺎﻁﻊ...
- Página 123 ﺍﻟﺻﻳﺎﻧﺔ ﺟﺩﻭﻝ ﺍﻟﺻﻳﺎﻧﺔ (۳) ﻓﺗﺭﺓ ﺍﻟﺻﻳﺎﻧﺔ ﺍﻟﻌﺎﺩﻳﺔ ﺻﻔﺣﺔ ﻛﻝ ﺳﻧﺔ ﺃﻭ ﻛﻝ ٦ ﺃﺷﻬﺭ ﻛﻝ ۳ ﺃﺷﻬﺭ ﺃﻭﻝ ﺷﻬﺭ ﺃﻭ ﻛﻝ ﻣﺭﺓ ﻳﺗﻡ ﺍﻟﻘﻳﺎﻡ ﺑﻬﺎ ﻛﻝ ﺷﻬﺭ ﻣﺣﺩﺩ ﺃﻭ ﻛﻝ ﻓﺗﺭﺓ ﺳﺎﻋﺎﺕ ۰۰۳ ﺳﺎﻋﺔ ﺃﻭ ۰۰۱ ﺳﺎﻋﺔ ﺃﻭ ۰٥ ﺳﺎﻋﺔ ۰۲...
- Página 124 ﺍﻟﺻﻳﺎﻧﺔ ﺗﻐﻳﻳﺭ ﺯﻳﺕ ﺍﻟﻣﺣﺭﻙ .ﺍﻓﺗﺢ ﻏﻁﺎء ﻓﺗﺣﺔ ﻣﻝء ﺍﻟﺯﻳﺕ ﻭﺳﺩﺍﺩﺓ ﺗﺻﺭﻳﻑ ﺍﻟﺯﻳﺕ ﻟﺗﺻﺭﻳﻑ ﺍﻟﺯﻳﺕ ۱ . ﺻﺎﻣﻭﻟﺔ ﻣﻧﻊ ﺍﻟﺗﺳﺭﺏ ()ﺍﺳﺗﺑﺩﻟﻬﺎ ﺳﺩﺍﺩﺓ ﺗﺻﺭﻳﻑ ﺍﻟﺯﻳﺕ ﻏﻁﺎء ﻓﺗﺣﺔ ﻣﻝء ﺍﻟﺯﻳﺕ .ﻗﻡ ﺑﺗﺭﻛﻳﺏ ﺳﺩﺍﺩﺓ ﺗﺻﺭﻳﻑ ﺍﻟﺯﻳﺕ، ﻭﻣﻥ ﺛﻡ ﺷﺩﻫﺎ ﺑﺈﺣﻛﺎﻡ ۲ . (ﻋﺯﻡ ﺍﻟﺩﻭﺭﺍﻥ: ٥٫۲۲ ﻥ.ﻡ )٥۲٫۲ ﻛﺟﻡ ﻕ.ﻡ .(۱۱...
- Página 125 ﺍﻟﺻﻳﺎﻧﺔ ﺻﻳﺎﻧﺔ ﻣﻧﻅﻑ ﺍﻟﻬﻭﺍء .ﺃﺯﻝ ﻏﻁﺎء ﻣﻧﻅﻑ ﺍﻟﻬﻭﺍء ﻣﻊ ﻣﺭﺍﻋﺎﺓ ﻋﺩﻡ ﺇﻟﺣﺎﻕ ﺍﻟﺿﺭﺭ ﺑﻪ ۱ . .)۱( ﻗﻡ ﺑﺈﺭﺧﺎء ﻣﺷﺎﺑﻙ ﻏﻁﺎء ﻣﻧﻅﻑ ﺍﻟﻬﻭﺍء ﻭﺳﺣﺏ ﻏﻁﺎء ﻣﻧﻅﻑ ﺍﻟﻬﻭﺍء .)۲( ﻗﻡ ﺑﺗﺣﺭﻳﺭ ﺍﻟﺧﻁﺎﻓﺎﺕ ﻣﻥ ﻣﺳﺎﻣﻳﺭ ﺍﻟﺗﺛﺑﻳﺕ .)۳( ﻗﻡ ﺑﺈﺯﺍﻟﺗﻬﺎ ﺇﻟﻰ ﺍﻟﺟﺎﻧﺏ ﺍﻷﻳﻣﻥ ﻣﻥ ﺃﻧﺑﻭﺏ ﺍﻹﻁﺎﺭ .)٤( ﺃﺯﻝ...
- Página 126 ﺍﻟﺻﻳﺎﻧﺔ .ﻗﻡ ﺑﺗﺭﻛﻳﺏ ﻋﻧﺻﺭ ﻣﻧﻅﻑ ﺍﻟﻬﻭﺍء ﻋﻠﻰ ﻋﻠﺑﺔ ﻣﻧﻅﻑ ﺍﻟﻬﻭﺍء ۲ . .ﺇﻋﺎﺩﺓ ﺗﺭﻛﻳﺏ ﻏﻁﺎء ﻣﻧﻅﻑ ﺍﻟﻬﻭﺍء ۳ . .)۱( ﻗﻡ ﺑﻭﺿﻊ ﻏﻁﺎء ﻣﻧﻅﻑ ﺍﻟﻬﻭﺍء ﻓﻭﻕ ﻋﻠﺑﺔ ﻣﻧﻅﻑ ﺍﻟﻬﻭﺍء .)۲( ﻗﻡ ﺑﺗﺛﺑﻳﺕ ﺍﻟﺧﻁﺎﻓﺎﺕ ﻋﻠﻰ ﻣﺳﺎﻣﻳﺭ ﺍﻟﺗﺛﺑﻳﺕ ﺑﺈﺣﻛﺎﻡ .)۳( ﺍﺩﻓﻊ ﻏﻁﺎء ﻣﻧﻅﻑ ﺍﻟﻬﻭﺍء ﻟﻘﻔﻝ ﺍﻟﻣﺷﺎﺑﻙ ﺍﻟﺧﻁﺎﻑ...
- Página 127 ﺍﻟﺻﻳﺎﻧﺔ ﺻﻳﺎﻧﺔ ﺷﻣﻌﺔ ﺍﻹﺷﻌﺎﻝ (NGK) BPR5ES :ﺷﻣﻌﺔ ﺍﻻﺣﺗﺭﺍﻕ ﺍﻟﻣﻭﺻﻰ ﺑﻬﺎ .ﻻ ﺗﻌﻣﺩ ﺃﺑ ﺩ ًﺍ ﺇﻟﻰ ﺍﺳﺗﺧﺩﺍﻡ ﺷﻣﻌﺔ ﺍﺣﺗﺭﺍﻕ ﻣﻊ ﻧﻁﺎﻕ ﺣﺭﺍﺭﻱ ﻏﻳﺭ ﺻﺣﻳﺢ ﺃﺯﻝ ﻏﻁﺎء ﺷﻣﻌﺔ ﺍﻹﺷﻌﺎﻝ ﺛﻡ ﻗﻡ ﺑﺈﺯﺍﻟﺔ ﺷﻣﻌﺔ ۱ . ﻣﻔﺗﺎﺡ ﺷﻣﻌﺔ ﺍﻹﺷﻌﺎﻝ .ﺍﻹﺷﻌﺎﻝ ﺑﺎﺳﺗﺧﺩﺍﻡ ﻣﻔﺗﺎﺡ ﺷﻣﻌﺔ ﺍﻹﺷﻌﺎﻝ .ﻗﻡ...
- Página 128 ﺍﻟﺻﻳﺎﻧﺔ ﺗﻧﻅﻳﻑ ﻁﺎﺳﺔ ﺍﻟﺗﺭﺳﻳﺏ ﺍﻟﺑﻧﺯﻳﻥ ﻣﺎﺩﺓ ﻗﺎﺑﻠﺔ ﻟﻼﺷﺗﻌﺎﻝ ﻭﺍﻻﻧﻔﺟﺎﺭ ﻓﻲ ﻅﻝ ﻅﺭﻭﻑ ﻣﻌﻳﻧﺔ. ﻻ ﺗﻌﻣﺩ ﺇﻟﻰ ﺍﻟﺗﺩﺧﻳﻥ ﺃﻭ ﺇﺷﻌﺎﻝ ﺃﻟﺳﻧﺔ ﺍﻟﻠﻬﺏ ﺃﻭ .ﺷﻣﻌﺎﺕ ﺇﺷﻌﺎﻝ ﻓﻲ ﺍﻟﻣﻧﻁﻘﺔ :ﻧﻭﻉ ﺫﺍﺕ ﻣﺣﺭﻙ ﺗﺷﻐﻳﻝ ﻛﻬﺭﺑﺎﺋﻲ ۱ . . ﻭﺇﺯﻝ ﺍﻟﻣﻔﺗﺎﺡOFF ﺃﺩﺭ ﻣﻔﺗﺎﺡ ﺍﻟﻣﺣﺭﻙ ﺇﻟﻰ ﺍﻟﻭﺿﻊ ﺇﻳﻘﺎﻑ :ﻧﻭﻉ...
- Página 129 ﺍﻟﺻﻳﺎﻧﺔ (ﺍﻟﻔﻳﻭﺯ )ﻧﻭﻉ ﻣﺣﺭﻙ ﺍﻟﺗﺷﻐﻳﻝ ﺍﻟﻛﻬﺭﺑﺎﺋﻲ ﻓﻘﻁ .ﺇﺫﺍ ﺍﺣﺗﺭﻕ ﺍﻟﻔﻳﻭﺯ، ﻟﻥ ﻳﻌﻣﻝ ﻣﺣﺭﻙ ﺍﻟﺗﺷﻐﻳﻝ ﻓﻲ ﺣﺎﻝ ﺇﺧﻔﺎﻕ ﺍﻟﻔﻳﻭﺯ، ﻗﻡ ﺑﺗﺣﺩﻳﺩ ﺳﺑﺏ ﺍﻹﺧﻔﺎﻕ ﻭﻗﻡ ﺑﺈﺻﻼﺣﻪ ﻗﺑﻝ ﺍﻻﺳﺗﻣﺭﺍﺭ ﻓﻲ ﺍﻟﺗﺷﻐﻳﻝ. ﺇﺫﺍ ﺍﺳﺗﻣﺭ ﺇﺧﻔﺎﻕ .ﺗﺷﻐﻳﻝ ﺍﻟﻔﻳﻭﺯ، ﺗﻭﻗﻑ ﻋﻥ ﺍﺳﺗﺧﺩﺍﻡ ﺍﻟﻣﻭﻟﺩ ﻭﺍﺗﺻﻝ ﺑﻭﻛﻳﻝ ﺍﻟﺻﻳﺎﻧﺔ ﺍﻟﺧﺎﺹ ﺑﻙ ....
- Página 130 ﺍﻟﺗﺧﺯﻳﻥ ﺍﻟﺑﻧﺯﻳﻥ ﻣﺎﺩﺓ ﻗﺎﺑﻠﺔ ﻟﻼﺷﺗﻌﺎﻝ ﻭﺍﻻﻧﻔﺟﺎﺭ ﻓﻲ ﻅﻝ ﻅﺭﻭﻑ ﻣﻌﻳﻧﺔ. ﻻ ﺗﻌﻣﺩ ﺇﻟﻰ ﺍﻟﺗﺩﺧﻳﻥ ﺃﻭ ﺇﺷﻌﺎﻝ ﺃﻟﺳﻧﺔ ﺍﻟﻠﻬﺏ ﺃﻭ .ﺷﻣﻌﺎﺕ ﺇﺷﻌﺎﻝ ﻓﻲ ﺍﻟﻣﻧﻁﻘﺔ .ﻗﻡ ﺑﺗﺻﺭﻳﻑ ﺍﻟﻭﻗﻭﺩ ﻣﻥ ﺧﺯﺍﻥ ﺍﻟﻭﻗﻭﺩ ۱ . ﺑﺭﻏﻲ ﺍﻟﺗﺻﺭﻳﻑ ﻗﻡ ﺑﺈﺭﺧﺎء ﺑﺭﻏﻲ ﺍﻟﺗﺻﺭﻳﻑ، ﺛﻡ ﻗﻡ ﺑﺗﺻﺭﻳﻑ ﺍﻟﻭﻗﻭﺩ ﻣﻥ ۲...
- Página 131 ﺗﺣﺭﻱ ﺍﻟﺧﻠﻝ ﻭﺇﺻﻼﺣﻪ :ﺇﺫﺍ ﺗﻌﺫﺭ ﺑﺩء ﺗﺷﻐﻳﻝ ﺍﻟﻣﺣﺭﻙ ﺃﻋﺩ ﺗﻌﺑﺋﺔ ﺧﺯﺍﻥ ﻻ ﻫﻝ ﻳﻭﺟﺩ ﻭﻗﻭﺩ ﻓﻲ .ﺍﻟﻭﻗﻭﺩ ﺍﻟﺧﺯﺍﻥ؟ ﻧﻌﻡ ﺫﺭﺍﻉ ﺻﻣﺎﻡ ﺍﻟﻭﻗﻭﺩ ﻓﻲ ﻻ ﻫﻝ ﺫﺭﺍﻉ ﺻﻣﺎﻡ ﺍﻟﻭﻗﻭﺩ .ON ﻭﺿﻊ ﺍﻟﺗﺷﻐﻳﻝ ؟ON ﻓﻲ ﻭﺿﻊ ﺍﻟﺗﺷﻐﻳﻝ ﻧﻌﻡ ﻣﻔﺗﺎﺡ ﺍﻟﻣﺣﺭﻙ ﻓﻲ ﻭﺿﻊ ﻻ...
- Página 132 ﺗﺣﺭﻱ ﺍﻟﺧﻠﻝ ﻭﺇﺻﻼﺣﻪ :(ﻣﺣﺭﻙ ﺍﻟﺗﺷﻐﻳﻝ ﻻ ﻳﺩﻭﺭ )ﻧﻭﻉ ﻣﺣﺭﻙ ﺍﻟﺗﺷﻐﻳﻝ ﺍﻟﻛﻬﺭﺑﺎﺋﻲ ﻓﻘﻁ ﻧﻌﻡ ﺍﺳﺗﺑﺩﻝ ﺍﻟﻔﻳﻭﺯ ﻫﻝ ﺍﺣﺗﺭﻕ ﺍﻟﻔﻳﻭﺯ؟ .(۳٤ )ﺍﻧﻅﺭ ﺻﻔﺣﺔ ﻻ ﻧﻌﻡ .ﻗﻡ ﺑﺷﺣﻥ ﺍﻟﺑﻁﺎﺭﻳﺔ ﻫﻝ ﻧﻔﺩ ﺷﺣﻥ ﺍﻟﺑﻁﺎﺭﻳﺔ؟ ﻻ ﺇﺫﺍ ﻛﺎﻥ ﻣﺣﺭﻙ ﺍﻟﺗﺷﻐﻳﻝ ﻻ ﻳﺩﻭﺭ، ﻗﻡ ﺑﺄﺧﺫ ﺍﻟﻣﻭﻟﺩ ﺇﻟﻰ .ﻭﻛﻳﻝ...
- Página 133 ﺗﺣﺭﻱ ﺍﻟﺧﻠﻝ ﻭﺇﺻﻼﺣﻪ :DC ﻻ ﺗﻭﺟﺩ ﻛﻬﺭﺑﺎء ﻓﻲ ﻣﻘﺎﺑﺱ ﺍﻟﺗﻳﺎﺭ ﺍﻟﻣﺑﺎﺷﺭ ﺍﺩﻓﻊ ﻭﺍﻗﻲ ﺩﺍﺋﺭﺓ ﺍﻟﺗﻳﺎﺭ ﺍﻟﻣﺑﺎﺷﺭ ﻫﻝ ﻭﺍﻗﻲ ﺩﺍﺋﺭﺓ ﺍﻟﺗﻳﺎﺭ ﻻ .ON ﺇﻟﻰ ﻭﺿﻊ ﺍﻟﺗﺷﻐﻳﻝ ﺍﻟﻣﺑﺎﺷﺭ ﻓﻲ ﻭﺿﻊ ؟ON ﺍﻟﺗﺷﻐﻳﻝ ﻧﻌﻡ ﺧﺫ ﺍﻟﻣﻭﻟﺩ ﺇﻟﻰ ﻭﻛﻳﻝ .ﺍﻟﺻﻳﺎﻧﺔ ﺍﻟﺧﺎﺹ ﺑﻙ :ﻋﻧﺩ ﺗﻭﻗﻑ ﺍﻟﻣﺣﺭﻙ ﻻ...
- Página 134 ﺍﻟﻣﻭﺍﺻﻔﺎﺕ ﺍﻷﺑﻌﺎﺩ EG6500CXS EG6500CX EG5000CX EG4000CX ﺍﻟﻁﺭﺍﺯ EBDC EBCC EBFC EBHC ﻛﻭﺩ ﺍﻟﻭﺻﻑ ٤٤۸ ﻣﻡ ۱۸٦ ﻣﻡ ﺍﻟﻁﻭﻝ ۰۳٥ ﻣﻡ ﺍﻟﻌﺭﺽ ۱۷٥ ﻣﻡ ﺍﻻﺭﺗﻔﺎﻉ ۰٫۷۸ ﻛﺟﻡ ۰٫٤۸ ﻛﺟﻡ ٥٫۲۸ ﻛﺟﻡ ۰٫۱۷ ﻛﺟﻡ (ﺍﻟﺟﺎﻑ )ﺍﻟﻭﺯﻥ ﺍﻟﻣﺣﺭﻙ GX390H1 GX340H1 GX270H ﺍﻟﻁﺭﺍﺯ ﺭﺑﺎﻋﻲ ﺍﻷﺷﻭﺍﻁ، ﺻﻣﺎﻡ ﻋﻠﻭﻱ، ﺃﺣﺎﺩﻱ ﺍﻷﺳﻁﻭﺍﻧﺔ...
- Página 135 ﺍﻟﻣﻭﺍﺻﻔﺎﺕ ﺍﻟﻣﻭﻟﺩ EG4000CX ﺍﻟﻁﺭﺍﺯ LD1H ﺍﻟﻧﻭﻉ ۰۲۲ ﻓﻭﻟﺕ ۰۲۱ ﻓﻭﻟﺕ/۰٤۲ ﻓﻭﻟﺕ ﻣﻌﺩﻝ ﺍﻟﻔﻭﻟﺕ ﺧﺭﺝ ﺍﻟﺗﻳﺎﺭ ۰٥ ﻫﺭﺗﺯ ۰٦ ﻫﺭﺗﺯ ﻣﻌﺩﻝ ﺍﻟﺗﺭﺩﺩ ٥٫٤۱ ﺃﻣﺑﻳﺭ ۰٫۰۳ ﺃﻣﺑﻳﺭ/۰٫٥۱ ﺃﻣﺑﻳﺭ ﺍﻟﺗﻳﺎﺭﺍﻟﻣﻌﺎﻳﺭ ﺍﻟﻣﺗﺭﺩﺩ ۲٫۳ ﻛﻳﻠﻭﻓﻭﻟﺕ ٦٫۳ ﻛﻳﻠﻭﻓﻭﻟﺕ ﻣﻌﺩﻝ ﺍﻟﺧﺭﺝ ٦٫۳ ﻛﻳﻠﻭﻓﻭﻟﺕ ۰٫٤ ﻛﻳﻠﻭﻓﻭﻟﺕ ﺍﻟﺧﺭﺝ ﺍﻷﻗﺻﻰ...
- Página 136 ﺗﺭﻛﻳﺏ ﺃﺟﺯﺍء ﺍﻟﻁﻘﻡ ﺃﺟﺯﺍء ﺍﻟﻁﻘﻡ ﺍﻟﻘﻳﺎﺳﻳﺔ EG6500CXS :ﻧﻭﻉ ﻣﺣﺭﻙ ﺍﻟﺗﺷﻐﻳﻝ ﺍﻟﻛﻬﺭﺑﺎﺋﻲ ﻁﻘﻡ ﺩﺭﺝ ﺍﻟﺑﻁﺎﺭﻳﺔ .ﻗﻡ ﺑﺗﺭﻛﻳﺏ ﺍﻷﻧﺑﻭﺏ ﺍﻟﻭﺍﻗﻲ ﻟﻠﺑﻁﺎﺭﻳﺔ ﻋﻠﻰ ﺍﻹﻁﺎﺭ ۱ . .ﻗﻡ ﺑﺗﺛﺑﻳﺕ ﺩﺭﺝ ﺍﻟﺑﻁﺎﺭﻳﺔ ﻋﻠﻰ ﺍﻷﻧﺑﻭﺏ ﺍﻟﻭﺍﻗﻲ ﻟﻠﺑﻁﺎﺭﻳﺔ ﻭﺷﺩ ﺍﻟﺑﺭﺍﻏﻲ .ﻗﻡ ﺑﺗﻭﺟﻳﻪ ﻛﺑﻝ ﺑﺎﺩﺉ ﺍﻟﺗﺷﻐﻳﻝ ﺃﺳﻔﻝ ﺍﻟﺧﺯﺍﻥ ﻭﻗﻡ ﺑﺗﻭﺻﻳﻠﻪ ﺑﺻﻣﺎﻡ ﺍﻟﻠﻑ ﺍﻟﻠﻭﻟﺑﻲ ﻟﻣﺣﺭﻙ ﺍﻟﺗﺷﻐﻳﻝ ۲...
- Página 137 ﺗﺭﻛﻳﺏ ﺃﺟﺯﺍء ﺍﻟﻁﻘﻡ (ﻛﺑﻝ ﻣﺣﺭﻙ ﺍﻟﺗﺷﻐﻳﻝ )ﻣﻭﺟﺏ ﻛﺑﻝ ﺗﺄﺭﻳﺽ ﺍﻟﺑﻁﺎﺭﻳﺔ ﻣﺭﺑﻁ ﺍﻟﻛﺑﻝ ﺻﻣﺎﻡ ﺍﻟﻠﻑ ﺍﻟﻠﻭﻟﺑﻲ ﻟﻣﺣﺭﻙ ﺍﻟﺗﺷﻐﻳﻝ (۱٦) (٦) (۱۷) (۳) (۲) (۱) (٤) (٥) (۷) (۸) (۱٤) (۱۳) (۱۱) (۱۲) (۹) (۱٥) (۱۰) ۱ )۹( ﺩﺭﺝ ﺍﻟﺑﻁﺎﺭﻳﺔ ۲ )۱( ﺍﻟﺑﺭﻏﻲ ﺍﻟﺧﺎﺹ ﺑﻣﺟﻣﻭﻋﺔ ﺍﻟﺑﻁﺎﺭﻳﺔ ۱...
- Página 138 ﺗﺭﻛﻳﺏ ﺃﺟﺯﺍء ﺍﻟﻁﻘﻡ ﺃﺟﺯﺍء ﺍﻟﻁﻘﻡ ﺍﻻﺧﺗﻳﺎﺭﻳﺔ ﺗﺭﻛﻳﺏ ﻁﻘﻡ ﺍﻟﻌﺟﻼﺕ ﺍﻷﺭﺑﻌﺔ ﻗﻡ ﺑﺗﺭﻛﻳﺏ ﻟﻭﺣﺔ ﺍﻟﻘﻔﻝ ﻭﺍﻟﻌﺟﻼﺕ ﺍﻷﺭﺑﻌﺔ ﻋﻠﻰ ﻋﻣﻭﺩ ﺍﻟﻌﺟﻠﺔ ﺑﺎﺳﺗﺧﺩﺍﻡ ﺍﻟﻔﻠﻛﺎﺕ ﺍﻟﻌﺎﺩﻳﺔ ﻭﺍﻟﻣﺳﺎﻣﻳﺭ ۱ . .ﺍﻟﻣﻧﻔﺻﻠﺔ .ﻗﻡ ﺑﺗﺭﻛﻳﺏ ﻋﻣﻭﺩ ﺍﻟﻌﺟﻠﺔ ﺍﻷﻣﺎﻣﻳﺔ ﻋﻠﻰ ﺍﻟﺟﺎﻧﺏ ﺍﻷﻣﺎﻣﻲ ﺑﺎﻟﻘﺭﺏ ﻣﻥ ﺍﻟﻣﺣﺭﻙ .ﻗﻡ ﺑﺗﺭﻛﻳﺏ ﻣﺟﻣﻭﻋﺔ ﻋﻣﻭﺩ ﺍﻟﻌﺟﻠﺔ ﺑﺎﻟﻣﻭﻟﺩ ﺑﺎﺳﺗﺧﺩﺍﻡ ﺛﻣﺎﻧﻲ ﺑﺭﺍﻏﻲ ﺳﺩﺍﺳﻳﺔ ﻗﻳﺎﺱ ۸ × ٦۱ ﻣﻡ ۲...
- Página 139 ﻣﺫﻛﺭﺓ ٤٤...
- Página 140 ﻣﺫﻛﺭﺓ ٤٥...
- Página 141 ﻣﺫﻛﺭﺓ ٤٦...
- Página 142 Honda Motor Co., Ltd. 2018 4MZ30603 英 西 アラ 00X4M-Z30-6031 Printed in China...