Publicidad
Idiomas disponibles
Idiomas disponibles
Enlaces rápidos
Bedienungsanleitung
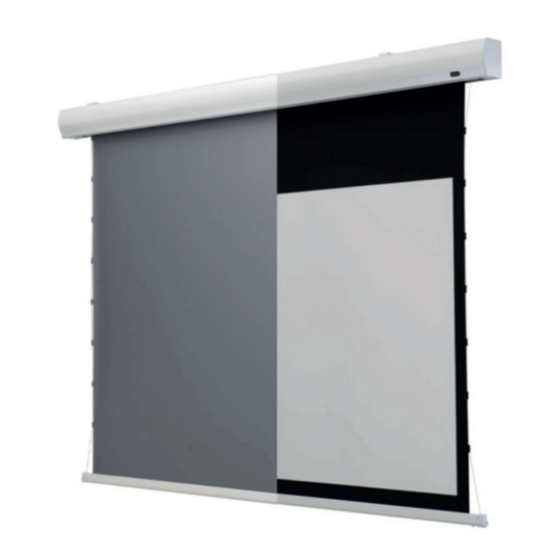
celexon Leinwand Motor
HomeCinema Tension
Vielen Dank für den Kauf dieses Produkts.
Für eine optimale Leistung und Sicherheit lesen Sie diese Anweisungen bitte sorgfältig
durch, bevor Sie dieses Produkt anschließen oder betreiben. Bitte bewahren Sie diese
Anleitung für eine spätere Verwendung auf.
Version: 32422_111
Publicidad

Manuales relacionados para Celexon Leinwand Motor HomeCinema Tension

Resumen de contenidos para Celexon Leinwand Motor HomeCinema Tension
- Página 1 Bedienungsanleitung celexon Leinwand Motor HomeCinema Tension Vielen Dank für den Kauf dieses Produkts. Für eine optimale Leistung und Sicherheit lesen Sie diese Anweisungen bitte sorgfältig durch, bevor Sie dieses Produkt anschließen oder betreiben. Bitte bewahren Sie diese Anleitung für eine spätere Verwendung auf.
- Página 2 Beschädigungen am Produkt zu finden sind. Sollten Sie äußerliche Beschädigungen an dem Gerät oder unerwartete oder unübliche Funktionsweisen feststellen, darf das Produkt nicht weiter genutzt werden. Kontaktieren Sie umgehend den Händler, bei dem Sie das Produkt gekauft haben oder celexon direkt (Web: www.celexon.de, Mail: info@celexon.de) für weitere Informationen. •...
- Página 3 (Web: www.celexon.de, Mail: info@celexon.de). • Technische Änderungen und Irrtümer vorbehalten. Der Hersteller übernimmt keine Verantwortung für Sachschäden oder Personenschäden, wenn die Leinwand außerhalb der empfohlenen Spezifikationen verwendet wird, oder bei unsachgemäßer Installation. Verwenden Sie diese Leinwand nicht in der Nähe von Heizungen oder Klimaanlagen.
- Página 4 HAFTUNGSAUSSCHLUSS Die Angaben in diesem Dokument können ohne vorherige Ankündigung durch den Hersteller geändert werden. Änderungen werden jeweils in den folgenden Versionen dieses Handbuchs ergänzt. Irrtümer ausgeschlossen. PFLEGEHINWEIS Reinigen Sie die Leinwand NIEMALS mit Alkohol oder anderen Reinigungsmit- teln, die Lösungsmittel enthalten. Benutzen Sie nur ein weiches und sauberes Tuch.
- Página 5 LIEFERUMFANG a) 1x Leinwand b) 2x Wand- und Decken- d) 1x Innensechskant- c) 8x Schraube für Wand- montagebügel schlüssel und Deckenmontagebügel e) 2x Fernbedienung f) 2x Batterie g) 1x Triggerkabel h) 1x IR Empfänger (1x Infrarot, 1x Funk) i) 8x Kunststoff-Dübel j) Bedienungsanleitung k) Ösen für Hängemon- l) 2x RJ12 Stecker...
- Página 6 Vor Beginn einer Montagevariante muss der Montagebügel (b) auf seine Grundposition eingestellt werden. Hierzu drehen Sie die untere Sicherheitsschraube an dem Montagebügel (b) ge- gen den Uhrzeigersinn, damit der Bügel sich öffnet. Drehen Sie die Schraube nicht komplett auf, nur bis sich der Bügel lockert und dieser rückseitig in die Gehäusenuten passt.
- Página 7 MONTAGE AN DER DECKE (GESCHRAUBT) ACHTUNG! Stellen Sie sicher, dass Sie einen tragfähigen Untergrund haben Für die Montage an einer massiven Stein-/ Betondecke verwenden Sie bit- te die Kunststoff-Dübel (i). Zeichnen Sie eine Linie, um die beiden Monta- gebügel in Flucht zu installieren. Nutzen Sie die Montagebügel als Vorla- ge und markieren Sie die Löcher mithilfe eines Bleistiftes auf der Decke.
- Página 8 MONTAGE AN DER DECKE (HÄNGEND) ACHTUNG! Stellen Sie sicher, dass Sie einen tragfähigen Untergrund haben Für die Montage an einer massiven Stein-/ Betondecke verwenden Sie bitte die Kunststoff-Dübel (i). Zeichnen Sie eine gerade Linie um die bei- den Montagebügel in Flucht zueinander zu installieren. Montieren Sie an den oberen Teil des Bügels die Ösen (k).
- Página 9 Bedienung der Fernbedienungen Drücken Sie die „Auf“ Taste auf der Fernbedienung. Die Leinwand wird automatisch bis zur oberen Endposition fahren und automatisch stoppen. Drücken Sie die „Stopp“ Taste auf der Fernbedienung. Die Bewegung der Leinwand wird unverzüglich gestoppt. Drücken Sie die „Ab“ Taste auf der Fernbedienung. Die Leinwand wird automatisch bis zur unteren Endposition fahren und automatisch stoppen.
- Página 10 Funk-Trigger Programmier-Taste Sender Adapter USB auf 3,5 mm Buchse* Technische Daten Spannung: AC/DC 12V Frequenz: 433.92MHz Sendeleistung: ≤ 10 Milliwatt Distanz: max. 20 m *Der Adapter USB auf 3,5 mm Buchse ist immer dann notwendig, wenn der Projektor keine 3,5 mm 12V Trigger Buchse vorhanden hat. Anlernen des Triggers: Variante 1: 1.
- Página 11 BELEGUNG RS485 AUSGANG: Anschlussart (Gekennzeichnet als 485-A weißes Kabel | 485-B schwarzes Kabel) Kommunikationspartner Baud rate: 9600 Daten bit: Stop bit: Check bit: None Kommunikationsprotokoll 485-A weißes Kabel Start 485-A Adresse Befehl Befehls- Check code code code werts (CRC16) 0x55 Befehl Daten crcH...
- Página 12 ID im Controller, steuert die Rückkehr des Antwortsignals an den Host und es ertönt 5x Ton. Damit ist die Operation abgeschlossen. Die Einstellung der Stopp-Punkte ist möglich. Bitte fordern Sie für diesen Vorgang die Anleitung bei Ihrem Fachhändler oder direkt über www.celexon.de an.
- Página 13 Adresse: Gutenbergstraße 2, 48282 Emsdetten, DE Produktname: celexon Leinwand Motor HomeCinema Tension Hiermit erklärt celexon Europe GmbH, dass das celexon Leinwand Motor HomeCinema Tension der Richtlinie 2014/53/EU entspricht. Die EU-Kon- formitätserklärung kann unter folgender Adresse heruntergeladen werden: www.celexon.de/zertifikate Das Symbol weist auf die getrennte Rücknahme elektrischer und elektro- nischer Geräte in EU-Ländern hin.
- Página 14 Operating instructions celexon Electric HomeCinema Tension Thank you for purchasing this product. For optimum performance and safety, please read these instructions carefully before connecting or operating this product. Please retain these instructions for future reference Version: 32422_071...
- Página 15 If you notice any external damage to the unit or any unexpected or unusual functioning, the product must not be used any further. Immediately contact the dealer from whom you purchased the product or celexon directly (Web: www.celexon.co.uk, Mail: info@celexon.co.uk) for further information.
- Página 16 • If you are unsure about the use of the product, please contact specialist personnel, your dealer or celexon directly (Web: www.celexon.co.uk, Mail: info@celexon.co.uk). • Technical changes and errors expected. The manufacturer accepts no responsibility for damage to property or personal injury, if the screen is used outside the recommended specifications, or in the event of improper installation.
- Página 17 DISCLAIMER The information in this document is subject to change without notice by the manufacturer. Changes will be added to subsequent versions of this manual. Errors expected. CARE INSTRUCTIONS NEVER clean the screen with alcohol or other cleaning agents containing solvents.Use only a soft and clean cloth.
- Página 18 IN THE BOX a) 1x Screen b) 2x Wall and ceiling c) 8x Screw for wall and d) 1x Hexagon socket key mounting bracket ceiling mounting brackets e) 2x Remote control (1x f) 2x battery g) 1x Trigger cable h) 1x IR receiver infrared, 1x radio) i) 8x Plastic dowels j) Operating instructions...
- Página 19 Before starting an installation variant, the assembly bracket (b) must be set to its basic position. To do this, turn the lower safety screw on the mounting bracket (b) counterclockwise so that the bracket opens. Do not turn the screw completely, but only until the bracket loosens and it fits into the grooves on the back of the housing.
- Página 20 MOUNTING ON THE CEILING (SCREWED) ATTENTION! Make sure that you have a load-bearing surface For mounting on a solid stone/concrete ceiling, please use the plastic do- wels (i). Draw a line to install the two mounting brackets in alignment. Use the mounting brackets as a template and mark the holes with a pencil.
- Página 21 MOUNTING ON THE CEILING (HANGING) ATTENTION! Make sure that you have a load-bearing substrate For mounting on a solid stone/concrete ceiling, please use the plastic dowels (i). Determine the position of the mounting brackets (b) by the height of the projection screen surface. Draw a straight line to ensure the two mounting brackets are aligned with each other.
- Página 22 Operating the remote controls Press the „Up“ button on the remote control. The screen will automatically move to the upper end position and stop automatically. Press the „Stop“ button on the remote. The movement of the screen stops immediately. Press the „Down“ button on the remote control. The screen will automatically move to the lower end position and stop automatically.
- Página 23 Radio Trigger Programming button Transmitter Adapter USB to 3,5 mm jack* Technical data Voltage: AC/DC 12 V Frequency 433.92 MHz + 100 KHz Voltage transmission: 10 Milliwatt Distance: max. 20 m *The USB to 3.5 mm socket adapter is necessary if the projector does not have a 3.5 mm trigger socket.
- Página 24 ASSIGNMENT RS485 OUTPUT: Connection type (Marked as 485-A white cable | 485-B black cable) Communication partner Baud rate: 9600 Data bit: Stop bit: Check bit: None Communication protocol 485-A white cable Start 485-A Address Com- Com- Check code code mand mand (CRC16) code...
- Página 25 A tone will then sound 5 times. This completes the operation It is possible to set the stop points. Please request the instructions for this procedure from your specialist dealer or directly via www.celexon.com.
- Página 26 Gutenbergstraße 2, 48282 Emsdetten, DE Product name: celexon Electric HomeCinema Tension Hereby celexon Europe GmbH declares that the celexon Electric HomeCinema Tension complies with the directive 2014/53/EU. The EU declaration of confor- mity can be downloaded from the following address: www.celexon.de/zertifikate The symbol indicates the separate collection of electrical and electronic devices in EU countries.
- Página 27 Gutenbergstraße 2, 48282 Emsdetten, DE Product name: celexon Electric HomeCinema Tension Hereby celexon Europe GmbH declares that the radio equipment type celexon Electric HomeCinema Tension complies with the Radio Equipment Regulations 2017. The UK declaration of conformity can be downloaded from the following address: www.celexon.de/zertifikate...
- Página 28 Manuel d’utilisation celexon HomeCinema motorisé tensionné Nous vous remercions d’avoir acheté ce produit. Pour une performance et une sécurité optimales, veuillez lire attentivement ces inst- ructions avant de brancher ou d’utiliser ce produit. Veuillez à conserver ces instructions pour une utilisation ultérieure.
- Página 29 (Web: www.celexon.fr, E-mail: info@celexon.fr) pour de plus amples informations. •...
- Página 30 • Si vous n’êtes pas sûr du produit lors de l’utilisation, veuillez contacter une person- ne spécialisée, votre commerçant ou celexon directement (Web: www.celexon.fr, E-mail: info@celexon.fr). • Sous réserve de modifications et d’erreurs techniques.
- Página 31 CLAUSE DE NON-RESPONSABILITÉ Les informations contenues dans ce document peuvent sans avis préalable être modifiées par le fabricant. Les modifications seront ajoutées dans la versi- on suivante du mode d’emploi. Sauf indication contraire. CONSEILS D’ENTRETIEN Ne nettoyez JAMAIS la toile avec de l’alcool ou d’autres produits de nettoyage contenant des solvants.
- Página 32 CONTENU LIVRÉ a) 1x écran de projection b) 2x équerres de montage d) 1x clé hexagonale 6 pans c) 8x vis pour montage des pour mur/plafond étriers e) 2x télécommandes (1x f) 2x batteries g) 1x câble trigger h) 1x récepteur infrarouge infrarouge, 1x sans fil) i) 8x chevilles plastique j) Mode d’emploi...
- Página 33 Avant de commencer une variante de montage, l’équerre de montage (b) doit être réglée sur en position zéro. Tournez la vis de sécurité inférieure de l’équerre de montage (b) dans le sens inverse des aiguilles d’une montre pour ouvrir l’équerre. N’ouvrez pas la vis complètement mais juste suffisamment pour que l’équerre se desserre et s’adapte dans les rainures du carter.
- Página 34 MONTAGE AU PLAFOND (VISSÉ) ATTENTION ! Assurez-vous d’utiliser un support solide Pour le montage sur un mur massif en pierre/béton, veuillez utiliser les chevilles en matière synthétique (i). Déterminer la position des équerres de montage (b) en fonction de la dimension du carter et de la hauteur de la toile de projection.
- Página 35 MONTAGE AU PLAFOND (EN SUSPENSION) ATTENTION ! Assurez-vous d’utiliser un support solide Pour le montage sur un mur massif en pierre/béton, veuillez utiliser les chevilles en matière synthétique (i). Déterminer la position des équerres de montage (b) en fonction de la dimension du carter et de la hauteur de la toile de projection.
- Página 36 Utilisation des fonctions des télécommandes Lorsque vous appuyez sur le bouton „Haut“ de la télécommande. L‘écran remonte automatiquement vers sa position finale et s‘arrête automatiquement. Lorsque vous appuyez sur le bouton „ARRET“ de la télécommande. L´écran s‘arrête immédiatement. Lorsque vous appuyez sur le bouton „BAS“ de la télécommande.
- Página 37 Trigger RF sans fil Bouton de programmation Emetteur Adaptateur USB vers prise 3,5mm* Données techniques Voltage : AC/DC 12V Fréquence : 433.92MHz + 100KHz Puissance : 10 milliwatt Portée : max. 20m *Un adaptateur USB vers une prise 3,5 mm est nécessaire si le vidéoprojecteur ne possè- de pas de prise trigger 3,5 mm 12V.
- Página 38 Lorsque le vidéoprojecteur est allumé, l‘émetteur déclenche l‘écran et ce- lui-ci se descend. Lorsque le vidéoprojecteur est éteint, l‘émetteur déclen- che l‘écran qui cette fois-ci remonte automatiquement. Veuillez noter que selon le modèle du vidéoprojecteur et le mode réglé, le trig- ger est actif seulement à...
- Página 39 à l‘hôte. Une tonalité est alors émise à 5 reprise. L‘opération est alors terminée. Il est possible de définir les points de butée . Veuillez demander les instructions pour cette procédure à votre revendeur spécialisé ou directement via www.celexon.com.
- Página 40 Gutenbergstraße 2, 48282 Emsdetten, DE Nom du produit: celexon HomeCinema motorisé tensionné Par la présente, celexon Europe GmbH déclare que le produit celexon HomeCinema motorisé tensionné est conforme à la directive 2014/53/EU. La déclaration de conformité UE peut être téléchargée à l‘adresse suivante: www.celexon.de/zertifikate...
- Página 41 Manual de usuario celexon Motor HomeCinema Tensión Gracias por comprar este producto. Para un rendimiento y seguridad óptima, lea atentamente estas instrucciones antes de conectar o utilizar este producto. Conserve estas instrucciones para futuras consultas. Versión: 32422_071...
- Página 42 Si observa algún daño externo en la unidad o un funcionamiento inespe- rado o inusual, no siga utilizando el producto. Póngase inmediatamente en con- tacto con el distribuidor al que compró el producto o directamente con celexon: www.celexon.es; info@celexon.es para obtener más información.
- Página 43 él. Además, una instalación o uso incorrecto puede invalidar la garantía. • Si tiene dudas sobre el uso del producto, póngase en contacto con personal cualificado, con su distribuidor o directamente con celexon: www.celexon.es; info@celexon.es. • Se reservan cambios y errores técnicos.
- Página 44 EXONERACIÓN DE RESPONSABILIDAD La información de este documento puede ser modificada por el fabricante sin previo aviso. Los cambios se añadirán a las versiones posteriores de este ma- nual. Excepto los errores. RECOMENDACIONES DE MANTENIMIENTO NUNCA limpie la lona con alcohol u otros productos de limpieza que contengan disolventes.
- Página 45 CONTENIDO DE LA ENTREGA a) 1x Pantalla b) 2x Soportes de montaje d) 1x Llave Allen c) 8x Tornillos para el en la pared y en el techo soporte de montaje en la pared y en el techo e) 2x Mandos a distancia : f) 2x Pilas AAA g) 1x Cable de trigger h) 1x Receptor IR...
- Página 46 Antes de iniciar una variante de montaje, el soporte de montaje (b)debe estar en su posición básica. Para ello, gire el tornillo de seguridad inferior del soporte de montaje (b) en sentido contra- rio a las agujas del reloj para que el soporte se abra. No desen- rosque el tornillo completamente, sólo hasta que el soporte se afloje y encaje en las ranuras de la parte posterior de la carcasa.
- Página 47 MONTAJE EN EL TECHO (ATORNILLADO) ATENCIÓN: Asegúrese de utilizar una superficie que soporte la carga. Para el montaje en un techo sólido de piedra/hormigón, utilice los tacos de plástico (i). Fije la posición de los soportes de montaje (b) en función de las dimensiones de la carcasa y de la altura de la superficie de la pan- talla de proyección.
- Página 48 MONTAJE EN EL TECHO (COLGADO) ATENCIÓN: Asegúrese de utilizar una superficie que soporte la carga. Para el montaje en un techo sólido de piedra/hormigón, utilice los tacos de plástico (i). Establezca la posición de los soportes de montaje (b) en función de las dimensiones de la carcasa y de la altura de la superficie de la pantalla de proyección.
- Página 49 Funcionamiento de los mandos a distancia Pulse la tecla „Arriba“ del mando a distancia. La pantalla se moverá automáticamente a la posición final superior y se detendrá automáticamente. Pulse el botón „Stop“ del mando a distancia. El movimiento de la pantalla se detiene inmediatamente. Pulse la tecla „Abajo“...
- Página 50 Trigger por radio frecuencia Botón de programación Transmisor/Emisor Adaptador USB-A conector de 3,5 mm* Datos técnicos Tensión: AC/DC 12V Frecuencia: 433,92 MHz + 100KHz Transmisión de tensión: 10 milivatios Distancia: máx. 20 m El adaptador de USB-A conector de 3,5 mm es siempre necesario si el proyec- tor no tiene conexión de 3,5 mm 12 V.
- Página 51 ASIGNACIÓN SALIDA RS485: Tipo de conexión (Señalizado como 485-A cable blanco | 485-B cable negro) Proveedor de comunicación Velocidad en baudios: 9600 Bit de datos: Bit de parada: 1 Bit de control: Ninguno None Protocolo de comunicación 485-A cable blanco Inicie 485-A Dirección Comando...
- Página 52 5 pitidos. Así se completa la operación. Es posible fijar los puntos de final de recorrido. Solicite las instrucciones de este procedimiento a su distribuidor especializado o directamente a través de www.celexon.es...
- Página 53 Gutenbergstraße 2, 48282 Emsdetten, DE Nombre del producto: celexon Motor HomeCinema Tensión Por la presente, celexon Europe GmbH declara que el celexon Motor HomeCinema Tensión cumple con la Directiva 2014/53/UE. La declara- ción de conformidad de la UE puede descargarse en la siguiente dirección: www.celexon.de/zertifikate...
- Página 54 Manuale di istruzioni celexon schermo motorizzato HomeCinema Tension Gentile Cliente, celexon ringrazia l´acquisto questo prodotto. Prima di utilizzare lo schermo leggere attentamente le istruzioni e conservare il manuale dopo la consultazione. Version: 32422_111...
- Página 55 La mancata osservazione delle indicazioni sopracitate puó causare danni a persone, allo schermo o ai dispositivi ad esso collegati. La garanzia non copre danni dovuti ad un‘installazione o ad un uso non idonei. • In caso di dubbi sull‘utilizzo del prodotto, rivolgersi direttamente o celexon Europe...
- Página 56 GmbH (info@celexon.it) o a installatori specializzati. • Le informazioni presenti all´interno di questo manuale possono subire modifiche senza alcun preavviso. Versioni successive del presente manuale possono dunque contenere correzioni/aggiunte. Il produttore non si assume alcuna responsabilità per danni a persone o cose in caso di utilizzo scorretto dello schermo o errata installazione.
- Página 57 ESCLUSIONE DI RESPONSABILITÀ Le informazioni contenute in questo documento sono soggette a modifiche senza preavviso da parte del produttore. Le modifiche saranno apportate nelle versioni successive di questo manuale. Il produttore non garantisce o assicura la garanzia della correttezza delle informazioni contenute in questo documen- INDICAZIONI SULLA CURA DEL PRODOTTO Pulire la superficie dello schermo da asciutta solo con un panno morbido.
- Página 58 CONTENUTO DELLA FORNITURA a) 1x schermo b) 2x staffa per fissaggio a d) 1x chiave esagonale c) 8x viti M8x60mm per parete/soffitto staffe per fissaggio parete/ soffitto e) 2x telecomando (1x inf- f) 2x batterie AAA g) 1x cavo trigger h) 1x ricevitore infrarossi rarossi, 1x radiofrequenza) i) 8x tasselli in plastica...
- Página 59 Prima di iniziare l’installazione è necessario posizionare ogni staffa di montaggio (b) nel suo assetto originario: stringere in senso antiorario la vite di sicurezza inferiore fino all’apertura della staffa. Non girare la vite completamente ma solo fino a quando la staffa si allenta. MONTAGGIO DELLO SCHERMO A PARETE Attenzione! Il fissaggio a parete è...
- Página 60 MONTAGGIO A SOFFITTO CON VITI Attenzione! L´installazione è possibile solo su superfici portanti. Per il montaggio su muri portanti di pietra/cemento utilizzare i tasselli in plastica (i). Prima di fissare le staffe di montaggio (b) considerare le dimensioni del cassonetto e l’altezza del telo di proiezione. Utilizzando una livella, tracciare una linea orizzontale per fissare entrambe le staffe di montaggio alla stessa altezza.
- Página 61 MONTAGGIO A SOFFITTO CON GANCI Attenzione! Il fissaggio a parete è possibile solo su superfici portanti Per il montaggio su soffitti in pietra/cemento utilizzare i tasselli in plastica (i). Prima di fissare le staffe di montaggio (b) considerare le dimensioni del cassonetto e l’altezza del telo di proiezione.
- Página 62 Funzionamento dei telecomandi Premere il tasto con la freccia rivolta verso l’alto. Lo schermo risalirà fino al punto di arresto superiore e si fermerà automaticamente. Premere il tasto centrale di stop per fermare il telo. Premere il tasto con la freccia rivolta verso il basso. Il telo scenderà...
- Página 63 Trigger radiofrequenza tasto di programmazione trigger radiofrequenza / emettitore adattatore USB > jack 3,5 mm Specifiche tecniche Tensione: AC/DC 12V Frequenza: 433.92MHz Tensione collegamento: ≤ 10 Milliwatt Distanza: max. 20 m * L´adattatore USB > jack 3.5mm è sempre necessario se il proiettore è privo di interfac- cia Trigger 12V 3.5 mm.
- Página 64 lo schermo che inizia a risalire fino a chiudersi completamente. Si prega di notare che, a seconda del proiettore e della modalità impostata, la funzio- ne di trigger si attiva solo dopo lo spegnimento del proiettore. ASSEGNAZIONE USCITA RS485 Tipologia di collegamento (Contrassegnato come 485-A: cavo bianco | 485-B: cavo nero) Partner comunicazione Velocità...
- Página 65 5 volte. L‘operazione è stata completata. È possibile regolare i punti di arresto. Richiedete le istruzioni per questa procedura al vostro rivenditore specializzato o direttamente su www.celexon.it.
- Página 66 Gutenbergstraße 2, 48282 Emsdetten, DE nome del prodotto: celexon schermo motorizzato HomeCinema Tension Con la presente, celexon Europe GmbH dichiara che il prodotto celexon scher- mo motorizzato HomeCinema Tension è conforme alla direttiva 2014/53/EU. La dichiarazione di conformità UE può essere scaricata al seguente indirizzo: www.celexon.de/zertifikate...
- Página 67 Instrukcja obsługi celexon ekran elektryczny Home Cinema z napinaczami Dziękujemy za zakup produktu marki celexon. Aby zapewnić optymalne działanie i bezpieczeństwo, należy uważnie przeczytać ninie- jszą instrukcję, przed podłączeniem lub obsługą tego produktu. Proszę zachować tę instrukcję do wykorzystania w przyszłości.
- Página 68 W przypadku zauważenia jakichkolwiek zewnętrznych uszkodzeń urządzenia lub nieoczekiwanego bądź nietypowego działania, nie należy kontynuować montażu/ używania produktu. W takim przypadku należy poinformować sprzedawcę lub pro- ducenta o zaistniałej sytuacji: (www.celexon.pl, info@celexon.pl) w celu uzyskania dalszych informacji. • Aby zapewnić bezproblemowe działanie, produkt może być używany wyłącznie w pomieszczeniach zamkniętych.
- Página 69 Nieprawidłowy montaż lub użytkowanie może również spowodować unieważnie- nie gwarancji. • W przypadku wątpliwości dotyczących użytkowania produktu należy skontak- tować się ze sprzedawcą lub bezpośrednio firmą celexon (strona internetowa: www.celexon.pl, Mail: info@celexon.pl). • Zmiany techniczne i błędy zastrzeżone. Producent nie ponosi odpowiedzialności za szkody materialne i osobowe, jeśli ekran pro- jekcyjny jest używany poza zalecanymi specyfikacjami, lub w przypadku niewłaściwego...
- Página 70 WYŁĄCZENIE ODPOWIEDZIALNOŚCI Informacje zawarte w tym dokumencie mogą ulec zmianie bez wcześniejs- zego powiadomienia ze strony producenta. Zmiany będą dodawane do kole- jnych wersjach niniejszej instrukcji. Błędy zastrzeżone. INSTRUKCJA PIELĘGNACJI NIGDY nie należy czyścić ekranu alkoholem ani innymi środkami czyszczący- mi, które zawierają...
- Página 71 WYPOSAŻENIE DOSTARCZANE W KOMPLECIE a) 1x Ekran projekcyjny b) 2x uchwyty montażowe c) 8x śuby d) 1x imbus e) 2x Pilot zdalnego stero- f) 2x baterie do pilota g) 1x kabel trigger h) 1x odbiornik wania (IR i RF) i) 8x kołki plastikowe j) instrukcja obsługi k) uchwyty do montażu l) 2x wtyczka RJ12...
- Página 72 Przed rozpoczęciem wariantu montażowego, uchwyt mon- tażowy (b) musi być ustawiony w pozycji podstawowej. W tym celu należy obrócić dolną śrubę zabezpieczającą na wsporni- ku montażowym (b) w kierunku przeciwnym do ruchu wska- zówek zegara, tak aby wspornik się otworzył. Nie należy całko- wicie dokręcać...
- Página 73 MONTAŻ NA SUFICIE (BEZPOŚREDNIO) UWAGA! Proszę się upewnić, że powierzchnia, którą używasz jest nośna W przypadku montażu na litym kamieniu/betonowym suficie, należy użyć kołków plastikowych (i). Proszę ustalić pozycję w zależności od widza i wysokość powierzchni ekranu projekcyjnego. Proszę określić położenie uchwytów montażowych (b).
- Página 74 MONTAŻ NA SUFICIE (NA HAKACH) UWAGA! Proszę się upewnić, że powierzchnia, którą używasz jest nośna W przypadku montażu na litym kamieniu/betonowym suficie, należy użyć kołków plastikowych (i). Proszę ustalić pozycję w zależności od wid- za i wysokość powierzchni ekranu projekcyjnego. Proszę określić położe- nie uchwytów montażowych (b).
- Página 75 Obsługa pilotów zdalnego sterowania Naciśnij przycisk „w górę“ na pilocie: ekran automatycznie przesunie się do górnej pozycji końcowej i zatrzyma się automatycznie. Naciśnij przycisk „Stop“ na pilocie. Ruch ekranu natychmiast się zatrzymuje. Naciśnij przycisk „w dół“ na pilocie. Ekran automatycznie przesunie się...
- Página 76 Wyzwalacz radiowy Przycisk programowania Nadajnik Adapter USB 3,5mm Dane techniczne Napięcie: AC/DC 12V Częstotliwość: 433.92MHz + 100KHz Przekazywanie napięcia: 10 miliwatów Odległość: maks. 20 m *Adapter USB do gniazda 3,5 mm jest zawsze konieczny, jeśli projektor nie posiada gniazda wyzwalacza 3,5 mm 12V. Parowanie wyzwalacza: Wariant 1: 1.
- Página 77 się. Gdy projektor jest wyłączony, nadajnik uruchamia ekran i ekran ws- uwa się do kasety. Proszę zwrócić uwagę, że w zależności od projektora i ustawionego trybu, funkcja wyzwalania jest jest aktywowana dopiero po zakończeniu procesu wyłączania projektora. PRZYPISANIE WYJŚCIA RS485: Rodzaj złącza (oznaczone jako 485-A przewód biały | 485-B przewód czarny) Porty komunikacyjne...
- Página 78 Kod startowy: 485-A 0x55 Kod startowy: 485-B 0xAA Adres urządzenia: 4 bajty (ID0 jest najwyższy, ID3 najniższy) W przypadku wspólnego sterowania, adres urządzenia to 0x0000000000. Jeżeli kontrola jest przeprowadzana wspólnie, a identy- fikator nie jest wyraźnie wymieniony, 485-B nie reaguje. Kod kontrolny: sprawdzany przez CRC16 (kod startowy + adres + kod komendy + wartość...
- Página 79 Nazwa produktu: celexon ekran elektryczny Home Cinema z napinaczami Firma celexon Europe GmbH oświadcza niniejszym, że bezprzewodowy sys- tem celexon ekran elektryczny Home Cinema z napinaczami jest zgodny z dyrektywą 2014/53/EU. Deklarację zgodności UE można pobrać z następujące- go adresu: www.celexon.de/zertifikate Symbol ten oznacza selektywną...
- Página 80 Handleiding celexon scherm Motor HomeCinema Tension Hartelijk dank voor uw aankoop van dit product. Voor optimale prestaties en veiligheid moet u deze aanwijzingen zorgvuldig doorlezen voordat u dit product aansluit of gebruikt. Bewaar deze handleiding voor later gebruik. Versie: 32422_111...
- Página 81 Mocht u beschadigingen aan de buitenkant van het apparaat of een onverwachte of ongebruikelijke werking constateren, mag het product niet verder worden gebruikt. Neem voor meer informatie onmiddellijk contact op met de dealer waarbij u het product hebt gekocht of rechtstreeks met celexon (internet: www.celexon.nl, e-mail: info@celexon.nl). •...
- Página 82 • Als u twijfelt bij het gebruik van het product, neem dan contact op met vak- personeel, uw dealer of rechtstreeks met celexon (internet: www.celexon.nl, e-mail: info@celexon.nl). • Technische wijzigingen en fouten zijn voorbehouden.
- Página 83 UITSLUITING VAN AANSPRAKELIJKHEID De informatie in dit document kan zonder voorafgaande kennisgeving door de fabrikant worden gewijzigd. Wijzigingen worden telkens in de volgende versies van dit handboek aangevuld. Fouten voorbehouden. VERZORGINGSAANWIJZING Reinig het scherm NOOIT met alcohol of andere reinigingsmiddelen die op- losmiddel bevatten.
- Página 84 LEVERINGSOMVANG a) 1x scherm b) 2x wand- en plafond- d) 1x inbussleutel c) 8x schroef voor wand- en montagebeugel plafondmontagebeugels e) 2x afstandsbediening f) 2x batterij g) 1x triggerkabel h) 1x IR-ontvanger (1x infrarood, 1x draadloos) i) 8x kunststof plug j) handleiding k) ogen voor hangmontage l) 2x RJ12 stekker...
- Página 85 Voor aanvang van een montagevariant moet de montagebeu- gel (b) op de basispositie worden ingesteld. Hiervoor draait u de onderste veiligheidsschroef op de montagebeugel (b) links- om, zodat de beugel opengaat. Draai de schroef niet helemaal los, maar zover tot de beugel loskomt en deze aan de achter- kant in de behuizingsgroeven past.
- Página 86 MONTAGE AAN HET PLAFOND (VASTGESCHROEFD) LET OP! Zorg ervoor, dat u een dragende ondergrond hebt Voor de montage aan een massief stenen betonnen plafond moet u de kunststof pluggen (i) gebruiken. Teken een lijn om de beide montagebeu- gels op één lijn te installeren. Gebruik de montagebeugels als sjabloon en markeer de gaten met een potlood op het plafond.
- Página 87 MONTAGE AAN HET PLAFOND (HANGEND) LET OP! Zorg ervoor, dat u een dragende ondergrond hebt Voor de montage aan een massief stenen betonnen plafond moet u de kunststof pluggen (i) gebruiken. Teken een rechte lijn om de beide mon- tagebeugels op één lijn ten opzichte van elkaar te installeren. Monteer de ogen (k) op het bovenste deel van de beugel.
- Página 88 Bediening van de afstandsbedieningen Druk de 'Omhoog'-toets op de afstandsbediening in. Het scherm zal automatisch tot de bovenste eindpositie bewegen en automatisch stoppen. Druk de 'Stop'-toets op de afstandsbediening in. De beweging van het scherm wordt onmiddellijk gestopt. Druk de 'Omlaag'-toets op de afstandsbediening in. Het scherm zal automatisch tot de onderste eindpositie bewegen en automatisch stoppen.
- Página 89 Draadloze trigger Programmeertoets Zender Adapter USB naar 3,5 mm bus* Technische gegevens Spanning: AC/DC 12 V Frequentie: 433,92 MHz Zendvermogen: ≤ 10 milliwatt Afstand: max. 20 m *De adapter USB naar 3,5 mm bus is altijd nodig als de projector niet over een 3,5 mm 12 V Trigger-bus beschikt.
- Página 90 BEZETTING RS485-UITGANG: Aansluitmethode (Aangeduid als 485-A witte kabel | 485-B zwarte kabel) Communicatiepartner Baudrate: 9600 Gegevens bit: 8 Stop bit: Check bit: None Communicatieprotocol 485-A witte kabel Start 485-A adres Com- Com- Check code code mando- mando- (CRC16) code waarde 0x55 Com- Gege-...
- Página 91 5x een toon. Daarmee is het proces afgerond. De instelling van de stoppunten is mogelijk. Vraag voor deze procedure de handleiding bij uw dealer of direct via www.celexon.de aan.
- Página 92 Adres: Gutenbergstraße 2, 48282 Emsdetten, DE Productnaam: celexon scherm Motor HomeCinema Tension Hiermee verklaart celexon Europe GmbH, dat het celexon scherm Motor HomeCinema Tension voldoet aan de richtlijn 2014/53/EU. De EU-con- formiteitsverklaring kan op het volgende adres worden gedownload: www.celexon.de/zertifikate Het symbool wijst op de gescheiden inzameling van elektrische en elek- tronische apparaten in EU-landen.
- Página 93 Bruksanvisning celexon Projektorduk motordriven HomeCinema Tension Tack för att du har köpt denna produkt. För optimal prestanda och säkerhet, läs dessa instruktioner noggrant innan du ansluter eller använder produkten. Spara också dessa instruktioner för framtida referens. Version: 32422_071...
- Página 94 är skadad, kontrollera också om produkten är skadad. Om du märker någon yttre skada på enheten eller oväntad eller ovanlig funktion, fortsätt inte att använda produkten. Kontakta omedelbart den återförsäljare som du köpte produkten av eller celexon direkt (webb: www.celexon.se, e-post: info@celexon.se) för ytterligare information. •...
- Página 95 • Om du är osäker på hur produkten ska användas, kontakta kvalificerad personal, din återförsäljare eller celexon direkt (webb: www.celexon.se, e-post: info@celexon.se). • Tekniska ändringar och fel förbehålles. Tillverkaren tar inget ansvar för skador på egendom eller personskador om duken an- vänds utanför de rekommenderade specifikationerna eller om den är felaktigt instal-...
- Página 96 ANSVARSFRISKRIVNING Informationen i detta dokument kan ändras av tillverkaren utan förhandsbes- ked. Ändringar kommer att läggas till i senare versioner av denna handbok. Fel förbehållna. SKÖTSELRÅD Rengör ALDRIG duken med alkohol eller andra rengöringsmedel som innehål- ler lösningsmedel. Använd endast en mjuk och ren trasa. Vid behov kan smuts avlägsnas från ytan med en mild tvållösning (max.
- Página 97 LEVERANSENS OMFATTNING a) 1x Projektorduk b) 2x Vägg- och takmonte- c) 8x Skruvar för vägg- och d) 1x Insexsnyckel ringsfäste takmonteringsfäste e) 2x Fjärrkontroll (1x f) 2x Batteri g) 1x Utlösarkabel h) 1x IR mottagare Infrafröd, 1x Radio) i) 8x Plastpluggar j) Bruksanvisning k) Öglor för upphängnings- l) 2x RJ12-anslutning...
- Página 98 Innan en monteringsvariant påbörjas måste monteringsfästet (b) ställas in i sitt grundläge. För att göra detta vrider du den nedre säkerhetsskruven på monteringsfästet (b) moturs så att fästet öppnas. Skruva inte loss skruven helt, utan bara tills fästet lossnar och passar in i spåren på baksidan av höljet. Ta bort transportskyddet mellan viktstången och höljet.
- Página 99 MONTERING I TAKET (SKRUVAD) OBS! Se till att du har ett bärande underlag För montering på ett fast sten- eller betongtak, använd plastpluggar (i). Rita en rak linje för att montera monteringsfästena i linje med varandra. Använd monteringsfästena som mall och markera hålen i taket med en penna.
- Página 100 MONTERING I TAKET (VIA ÖGLOR) OBS! Se till att du har ett bärande underlag För montering på ett fast sten- eller betongtak, använd plastpluggar (i). Rita en rak linje för att montera monteringsfästena i linje med varandra. Montera öglorna (k) på fästets övre del. Fäst fästena med öglorna ordentligt på...
- Página 101 Användning av fjärrkontrollerna Tryck på knappen „Upp“ på fjärrkontrollen. Skärmen flyttas automatiskt till det övre ändläget och stannar automatiskt. Tryck på knappen „Stopp“ på fjärrkontrollen. Skärmens rörelse stoppas omedelbart. Tryck på knappen „Down“ på fjärrkontrollen. Skärmen kommer att flyttas till det nedre ändläget och och stannar automatiskt. Koppla ihop radiofjärrkontrollen Radiofjärrkontrollen är redan kopplad till den integrerade mottagaren på...
- Página 102 Radioutlösare Programmeringsknapp Sändare Adapter USB till 3,5 mm jack* Tekniska data Spänning: AC/DC 12V Frekvens: 433.92MHz + 100KHz Spänningsöverföring: 10 Milliwatt Avstånd: max. 20 m *Adaptern USB till 3,5 mm uttag är alltid nödvändig om projektorn inte har ett 3,5 mm 12V-uttag.
- Página 103 TILLDELNING RS485-UTGÅNG: Anslutningstyp (Märkt som 485-A vit kabel | 485-B svart kabel) Kommunikationspartner Baud rate: 9600 Daten bit: Stop bit: Check bit: None Kommunikationsprotokoll 485-A vit kabel Start 485-A Adresse Kom- Kom- Kontrollkod code mando mando- (CRC16) värde 0x55 Kom- Värde crcH crcL...
- Página 104 10 sekunder. När styrenheten tar emot kommandot lagrar styrenheten ID:t i styrenheten, kontrollerar returen av svarssignalen till värden och 5x tonljud. Med detta är operationen avslutad. Det är möjligt att justera stopppunkterna. Begär anvisningar för detta förfarande från din återförsäl- jare eller direkt via www.celexon.de.
- Página 105 Adress: Gutenbergstraße 2, 48282 Emsdetten, DE Produktnamn: celexon Projektorduk motordriven HomeCinema Tension Härmed förklarar celexon Europe GmbH att celexon Projektorduk mo- tordriven HomeCinema Tension uppfyller kraven i direktiv 2014/53/EU. EU-försäkran om överensstämmelse kan laddas ner från följande adress: www.celexon.de/zertifikate Symbolen visar att elektrisk och elektronisk utrustning samlas in separat i EU-länderna.