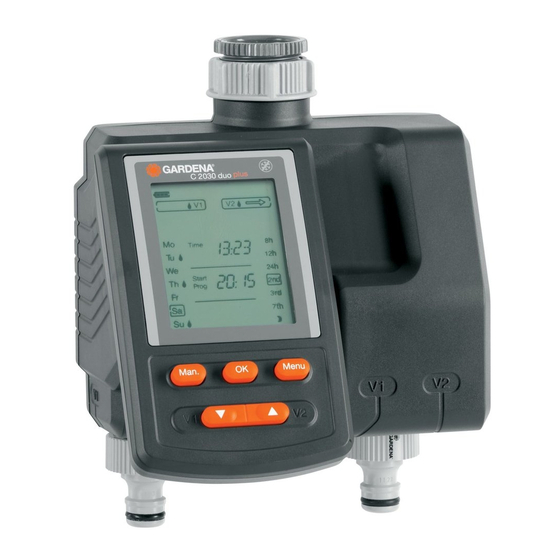
Tabla de contenido

Publicidad

Idiomas disponibles
  • ES

Idiomas disponibles

  • ESPAÑOL, página 68

Enlaces rápidos

1874-20.960.01_02.07.2011_GARDENA.qxp 18.07.2011 12:43 Seite 1
GARDENA
D
Betriebsanleitung
Bewässerungscomputer
GB
Operating Instructions
Water Computer
F
Mode d'emploi
Programmateur d'arrosage
NL
Instructies voor gebruik
Besproeiingscomputer
I
Istruzioni per l'uso
Computer per irrigazione
E
Manual de instrucciones
Programador de riego
P
Instruções de manejo
Computador de rega
®
C 2030 duo plus
Art. 1874

Publicidad

Tabla de contenido

Solución de problemas

loading

Resumen de contenidos para Gardena C 2030 duo plus

  • Página 1 1874-20.960.01_02.07.2011_GARDENA.qxp 18.07.2011 12:43 Seite 1 GARDENA ® C 2030 duo plus Art. 1874 Betriebsanleitung Bewässerungscomputer Operating Instructions Water Computer Mode d’emploi Programmateur d’arrosage Instructies voor gebruik Besproeiingscomputer Istruzioni per l’uso Computer per irrigazione Manual de instrucciones Programador de riego Instruções de manejo...
  • Página 2: Tabla De Contenido

    ..........1. Einsatzgebiet Ihres GARDENA Bewässerungscomputers Ordnungsgemäßer Der GARDENA Bewässerungscomputer ist für die private Benut- Gebrauch : zung im Haus- und Hobbygarten für den ausschließlichen Einsatz im Außenbereich zur Steuerung von Regnern und Bewässerungs-...
  • Página 3: Funktion

    1874-20.960.01_02.07.2011_GARDENA.qxp 18.07.2011 12:43 Seite 3 Der Bewässerungscomputer darf nur senk- Der Mindestbetriebsdruck beträgt 0,5 bar, recht mit der Überwurfmutter nach oben mon- der maximale Betriebsdruck 12 bar. tiert werden, um ein Eindringen von Wasser Zugbelastungen vermeiden. in das Batteriefach zu verhindern. v Nicht am angeschlossenen Schlauch Die Mindestwasserabgabemenge für eine ziehen.
  • Página 4 1874-20.960.01_02.07.2011_GARDENA.qxp 18.07.2011 12:43 Seite 4 Die Anzeige-Ebene kann jederzeit durch Drücken der Menu- Taste gewechselt werden. Alle Programm-Daten, die bis dahin geändert und mit der OK-Taste bestätigt wurden, werden ge- speichert. Wenn während einer programmierten Bewässerung geänderte Daten mit der OK-Taste bestätigt werden, wird das Ventil geschlossen.
  • Página 5: Inbetriebnahme

    1874-20.960.01_02.07.2011_GARDENA.qxp 18.07.2011 12:43 Seite 5 2 Balken 1 Balken 0 Balken Rahmen blinkt Batterie halb voll Batterie schwach Batterie fast leer Batterie leer Ventil öffnet. Ventil öffnet. Ventil öffnet noch. Ventil öffnet nicht. Funktion des Bewässe- Funktion des Bewässe- Bewässerungs- Bewässerungs- rungscomputers noch rungscomputers noch...
  • Página 6 3. OK-Taste drücken. Der Sensor ist abgemeldet. Zum Anschluss älterer Sensoren (mit 2-poligem Stecker) wird das GARDENA Adapter-Kabel Art. 1189-00.600.45 benötigt, welches über den GARDENA Service bezogen werden kann. Diebstahl-Sicherung Um den Bewässerungscomputer gegen Diebstahl zu sichern, kann montieren (optional) : die GARDENA Diebstahlsicherung Art.-Nr.
  • Página 7: Programmierung

    1874-20.960.01_02.07.2011_GARDENA.qxp 18.07.2011 12:44 Seite 7 5. Programmierung Zur Erstellung des Programms kann das Steuerteil abgenom- men und die Programmierung mobil vorgenommen werden (siehe 4. Inbetriebnahme „ Batterie einlegen“ ). Die Programmierung kann jederzeit durch Drücken der Man.- Aktuelle Uhrzeit und Taste abgebrochen werden.
  • Página 8 1874-20.960.01_02.07.2011_GARDENA.qxp 18.07.2011 12:44 Seite 8 Bewässerungsprogramm A) Zeitgesteuerte Bewässerung : eingeben : ï ð 1. Programm für Ventil 1 ( V1) oder Ventil 2 (V2 ) mit den [Ebene 3] -Tasten (V1/ V2) wählen (nicht möglich wenn zuvor die aktuelle Uhrzeit und der Wochentag eingegeben wurden). 2.
  • Página 9 Zeit- punkt. B) Sensor-Direktsteuerung Voraussetzung : mindestens ein GARDENA Bodenfeuchtesensor ist angeschlossen (siehe 4. Inbetriebnahme). Bewässerung nachts (20 – 6 Uhr), wenn der Sensor trocken dry meldet. Ein zuvor erstelltes Programm der Zeitgesteuerten Bewässerung bleibt dabei erhalten, wird aber nicht ausgeführt.
  • Página 10: Manuelle Bewässerung

    1874-20.960.01_02.07.2011_GARDENA.qxp 18.07.2011 12:44 Seite 10 Beispiel : Bewässerungs-Dauer = 10 Minuten Die Bewässerung beginnt, wenn der Sensor zwischen 20 und 6 Uhr trocken (Sensor dry) meldet und endet wenn der Sensor feucht (Sensor wet) meldet oder spätestens nach 10 Minuten. 2 Stunden nach Bewässerungsende wird bei trocken (Sensor dry) erneut eine Bewässerung gestartet und bei feucht (Sensor wet) weitere 2 Stunden nicht bewässert usw.
  • Página 11 1874-20.960.01_02.07.2011_GARDENA.qxp 18.07.2011 12:44 Seite 11 3. Während die Bewässerungsdauer-Minuten blinken, kann die 0 : 00 Bewässerungsdauer mit den -Tasten (zwischen 0 : 59 ) geändert (Bsp. Minuten) und mit der OK-Taste bestätigt werden. 4. Man.-Taste drücken, um das Ventil vorzeitig zu schließen. Das Ventil wird geschlossen.
  • Página 12: Außerbetriebnahme

    1874-20.960.01_02.07.2011_GARDENA.qxp 18.07.2011 12:44 Seite 12 6. Außerbetriebnahme Lagern / Überwintern : 1. Zur Schonung der Batterie sollte diese entnommen werden (siehe 4. Inbetriebnahme). Dabei bleiben die Programme erhalten. Wenn die Batterie im Frühjahr wieder eingelegt wird, muss nur die Uhrzeit und der Wochentag neu eingegeben werden.
  • Página 13: Lieferbares Zubehör

    Verbindungskabel und blinkt / blinken Sensor prüfen oder Sensor abmelden. Bei sonstigen Störungen bitten wir Sie, sich mit dem GARDENA Service in Verbindung zu setzen. Reparaturen dürfen nur von GARDENA Servicestellen oder von GARDENA autorisierten Fachhändlern durchgeführt werden. 9. Lieferbares Zubehör GARDENA Art.-Nr.
  • Página 14: Technische Daten

    Zentralen Reparatur-Service Serviceleistungen – Bearbeitungsdauer in unserem Hause max. 5 Arbeitstage • Einfache und kostengünstige Rücksendung an GARDENA durch Abhol-Service (nur innerhalb von Deutschland) – Abholung innerhalb von 2 Tagen • Kompetente Beratung bei Störungen / Reklamationen durch unseren Technischen Service •...
  • Página 15 Schweiz 0848 800 464 info gardena.ch GARDENA gewährt für dieses Produkt 2 Jahre Garantie (ab Kauf- Garantie datum). Diese Garantieleistung bezieht sich auf alle wesentlichen Mängel des Gerätes, die nachweislich auf Material- oder Fabri- kationsfehler zurückzuführen sind. Sie erfolgt durch die Ersatz- lieferung eines einwandfreien Gerätes oder durch die kostenlose...
  • Página 16: Where To Use Your Gardena Water Computer

    ..........1. Where to Use Your GARDENA Water Computer Intended use : The GARDENA Water Computer is intended for private use in domestic and hobby gardens, exclusively for outdoor use, to control sprinklers and watering systems. The Water Computer has two separate outlets and can be used e.g.
  • Página 17: Function

    1874-20.960.01_02.07.2011_GARDENA.qxp 18.07.2011 12:44 Seite 17 The minimum water output to ensure correct Avoid tensile strain. functioning of the Water Computer is 20 - 30 l / h v Do not pull the hose connected to the per outlet. E.g. for controlling the Micro-Drip Water Computer.
  • Página 18 1874-20.960.01_02.07.2011_GARDENA.qxp 18.07.2011 12:44 Seite 18 The display level can be changed at any time by pressing the Menu button. All programme data changed up to this time and confirmed with the OK button is saved. If data is changed during programmed irrigation and confirmed with the OK button then the valve is closed.
  • Página 19: Initial Operation

    1874-20.960.01_02.07.2011_GARDENA.qxp 18.07.2011 12:44 Seite 19 2 Bars 1 Bar 0 Bar flashing Frame is flashing Battery half full Battery low Battery almost flat Battery flat Valve opens. Valve opens. Valve still opens. Valve does not open. The Water Computer The Water Computer The Water Computer The Water Computer is guaranteed to...
  • Página 20 / wet will be displayed. 3. Press OK button. The sensor has been deactivated. To connect older sensors (with 2-pin connector), the GARDENA Adapter Cable 1189-00.600.45 is required, which can be pro- cured from GARDENA Service. Fit anti-theft device...
  • Página 21: Programming

    1874-20.960.01_02.07.2011_GARDENA.qxp 18.07.2011 12:44 Seite 21 5. Programming To set the programme, the controller can be removed and mobile programming can be carried out (see 4. Initial Operation “Inserting battery” ). Programming can be discontinued at any time by pressing the Set current time Man.
  • Página 22 1874-20.960.01_02.07.2011_GARDENA.qxp 18.07.2011 12:44 Seite 22 Entering watering A) Scheduled watering : programme : ï ð 1. Select programme for Valve 1 ( V1) or Valve 2 (V2 [Level 3] with the buttons (V1/ V2), (not possible if the current time of day and weekday have been previously entered). 2.
  • Página 23 B) Direct sensor control Prerequisite : at least one GARDENA Soil Moisture Sensor is connected (see 4. Initial Operation). Watering nights (20:00 – 06:00), if the sensor registers dry.
  • Página 24: Manual Watering

    1874-20.960.01_02.07.2011_GARDENA.qxp 18.07.2011 12:44 Seite 24 Example : Watering duration = 10 minutes Watering begins when the sensor registers dry (Sensor dry) between 20:00 and 06:00, and ends when the sensor registers wet (Sensor wet) or after 10 minutes at the latest. 2 hours after the end of watering, if dry is registered (Sensor dry), watering is again initiated and with wet (Sensor wet) there is no further watering etc.
  • Página 25: Storage

    1874-20.960.01_02.07.2011_GARDENA.qxp 18.07.2011 12:44 Seite 25 3. Whilst the watering time in minutes is flashing, the watering duration can be modified with the button (between 0 : 00 0 : 59 ) (example: minutes) and confirm with the OK-key. 4. Press Man.-key to close the valve early. The valve is closed.
  • Página 26: Maintenance

    Important : Make sure that the unit is disposed of via your municipal recycling collection centre. Disposing of flat batteries : v Please return flat batteries to a GARDENA dealer or dispose of them properly at your nearest recycling centre. Only dispose of batteries when they are flat.
  • Página 27: Available Accessories

    Check Connection Cable and is flashing sensor or deactivate sensor. In the event of other faults please contact GARDENA Service. Repairs should only be carried out by GARDENA service centres or dealers authorised by GARDENA. 9. Available accessories GARDENA Art.
  • Página 28: Service / Warranty

    If you have any problems with your Water Computer, please contact our Customer Service or return the defective unit together with a short description of the problem directly to one of the GARDENA Service Centres listed on the back of this leaflet.
  • Página 29: Domaine D'utilisation Du Programmateur Gardena

    ....... 1. Domaine d’utilisation du programmateur GARDENA Utilisation conforme à Le programmateur GARDENA est destiné à un usage privé dans la destination : le jardin. Il est exclusivement conçu pour être utilisé à l’extérieur en vue de commander des arroseurs et des systèmes d’irrigation.
  • Página 30: Fonctionnement

    1874-20.960.01_02.07.2011_GARDENA.qxp 18.07.2011 12:44 Seite 30 La quantité de débit minimum d’eau pour un et 12 bar maximum. bon fonctionnement du programmateur d’arro- Evitez les charges de traction. sage est de 20 à 30 l / h par sortie. v Ne tirez pas sur le tuyau fixé sur votre Pour commander par ex.
  • Página 31 1874-20.960.01_02.07.2011_GARDENA.qxp 18.07.2011 12:44 Seite 31 Il est possible à tout moment de changer le niveau d’affichage en appuyant sur la touche Menu. Toutes les données du pro- gramme modifiées jusqu’à présent et validées par la touche OK seront enregistrées. Si les données modifiées sont validées avec la touche OK lors d’un arrosage programmé, la valve se ferme.
  • Página 32: Mise En Service

    1874-20.960.01_02.07.2011_GARDENA.qxp 18.07.2011 12:44 Seite 32 2 barres 1 barre 0 barre clignote Le cadre clignote Pile à moitié pleine Pile faible Pile presque vide Pile vide Vanne ouverte. Vanne ouverte. Vanne s’ouvre encore. Vanne ne s’ouvre pas. Fonctionnement du Fonctionnement du Programmateur Programmateur programmateur...
  • Página 33 SAV GARDENA. Adaptation de la sécurité Pour prévenir le vol du programmateur, vous pouvez commander anti-vol (en option) : auprès du Service Après-Vente GARDENA le collier anti-vol, réf. 1815-00.791.00. 1. Vissez le collier avec la vis sur la face arrière du pro- grammateur.
  • Página 34: Programmation

    1874-20.960.01_02.07.2011_GARDENA.qxp 18.07.2011 12:44 Seite 34 5. Programmation Pour établir le programme d’arrosage, vous avez la possibilité de détacher l’unité de commande et d’effectuer la programma- tion à distance (voir 4. Mise en service “ Insertion de la pile ” ). La programmation peut être interrompue à...
  • Página 35 1874-20.960.01_02.07.2011_GARDENA.qxp 18.07.2011 12:44 Seite 35 Sélection de programmes A) Arrosage par programmation : d’arrosage : ï 1. Sélectionner le programme pour la vanne 1 ( V1) ou la [niveau 3] ð vanne 2 (V2 ) en appuyant sur les touches (V1/ V2) (cette action n’est pas possible si l’heure actuelle et le jour de la semaine ont été...
  • Página 36 établie. B) Capteur commande directe Condition : au moins une sonde d’humidité GARDENA est branchée (cf. 4. Mise en marche).L’arrosage se fait de nuit (entre 20 heures et 6 heures), si le capteur signale sec dry.
  • Página 37: Arrosage Manuel

    1874-20.960.01_02.07.2011_GARDENA.qxp 18.07.2011 12:44 Seite 37 Exemple : Durée d’arrosage = 10 minutes L’arrosage démarre quand la sonde d’humidité signale sec entre 20 heures et 6 heures (capteur dry) et se termine si le capteur signale humide (capteur wet) ou au plus tard au bout de 10 minutes maximum.
  • Página 38 1874-20.960.01_02.07.2011_GARDENA.qxp 18.07.2011 12:44 Seite 38 3. Pendant le clignotement de cette position Minutes, vous pouvez modifier la durée d’arrosage avec les touches (entre 0 : 00 0 : 59 ) (par ex. minutes) et validez la sélection avec la touche OK. 4.
  • Página 39: Mise Hors Service

    1874-20.960.01_02.07.2011_GARDENA.qxp 18.07.2011 12:44 Seite 39 6. Mise hors service Rangement / 1. Pour ménager les piles, retirez-les (cf. 4. Mise en marche). stockage Ceci n’affecte pas les programmes. pendant l’hiver : Si les piles sont réinsérées au printemps, il suffit de saisir l’heure et le jour de la semaine.
  • Página 40: Accessoires Disponibles

    En cas de survenance d’autres problèmes, veuillez contacter le service après- vente GARDENA. Les réparations sont réservées aux points de service après-vente GARDENA ou aux revendeurs spécialisés agréés par GARDENA. 9. Accessoires disponibles Sonde d’humidité...
  • Página 41: Caractéristiques Techniques

    2 ans à compter du jour de l’achat. Elle comprend le remplace- ment gratuit des pièces défectueuses ou de l’appareil, le choix en étant laissé à la libre initiative de GARDENA. En tout état de cause s’applique la garantie légale couvrant toutes les consé- quences des défauts ou vices cachés (article 1641 et suivants...
  • Página 42: Inzetgebied Van Uw Gardena Besproeiingscomputer

    ..........1. Inzetgebied van uw GARDENA besproeiingscomputer Gebruik volgens de De GARDENA besproeiingscomputer is bestemd voor privé- voorschriften : gebruik rondom huis en tuin en is uitsluitend geschikt voor gebruik buitenshuis voor de aansturing van sproeiers en besproeiingssys- temen.
  • Página 43: Functie

    1874-20.960.01_02.07.2011_GARDENA.qxp 18.07.2011 12:44 Seite 43 3. Functie Met de besproeiingscomputer kan de tuin op elk gewenst tijdstip van de dag via elk van de beide uitgangen tot 3-maal daags (om de 8 uur) volautomatisch worden besproeid. Hierbij kunnen sproei- ers, een Sprinkler-System- of druppelbesproeiings-installatie voor het besproeien ingezet worden.
  • Página 44 1874-20.960.01_02.07.2011_GARDENA.qxp 18.07.2011 12:44 Seite 44 Het weergave-level kan op elk gewenst tijdstip door indrukken van de Menu-toets worden gewisseld. Alle programmagegevens die tot op dat moment werden gewijzigd en met de OK-toets werden bevestigd, worden opgeslagen. Wanneer gewijzigde gegevens tijdens een geprogrammeerde besproeiing met de OK-toets worden bevestigd, wordt het ventiel gesloten.
  • Página 45: Ingebruikname

    1874-20.960.01_02.07.2011_GARDENA.qxp 18.07.2011 12:44 Seite 45 2 streepjes 1 streepje 0 streepje knippert kader knippert Batterij half vol Batterij zwak Batterij bijna leeg Batterij leeg Ventiel gaat open. Ventiel gaat open. Ventiel gaat nog open. Ventiel gaat niet open. Functie van de Functie van de Besproeiingscomputer Besproeiingscomputer...
  • Página 46 3. OK-toets indrukken. De sensor is afgemeld. Voor de aansluiting van oudere sensors (met 2-polige stekkers) wordt de GARDENA adapterkabel 1189-00.600.45 benodigd, die bij de GARDENA Service kan worden besteld. Diefstalbeveiliging Om uw besproeiingscomputer tegen diefstal te beveiligen kunt monteren (optioneel) : u de GARDENA diefstalbeveiliging art.
  • Página 47: Programmering

    1874-20.960.01_02.07.2011_GARDENA.qxp 18.07.2011 12:44 Seite 47 5. Programmering Om het programma in te stellen kan het besturingsgedeelte eraf gehaald en de programmering mobiel uitgevoerd worden (zie 4. Ingebruikname „Batterij plaatsen“ ). De programmering kan op elk gewenst tijdstip door indrukken van de Man.-toets worden afgebroken. Alle tot dat tijdstip gewij- Actuele tijd en weekdag zigde en met de OK-toets bevestigde programmagegevens wor- instellen :...
  • Página 48 1874-20.960.01_02.07.2011_GARDENA.qxp 18.07.2011 12:44 Seite 48 Besproeiingsprogramma A) Tijdgestuurde besproeiing : invoeren : ï ð 1. Programma voor ventiel 1 ( V1) of ventiel 2 (V2 ) met [Level 3] -toetsen (V1 / V2) selecteren (niet mogelijk wanneer tevoren de actuele tijd en de weekdag werden ingevoerd). 2.
  • Página 49 / sluit volautomatisch en besproeit dus op het geprogrammeerde tijdstip. B) Sensor-directe besturing Vereiste : minstens één GARDENA bodemvochtigheidssensor is aangesloten (zie 4. Inbedrijfname). Besproeiing ’s nachts (20 – 6 uur), wanneer de sensor droog dry meldt. Een tevoren aange- maakt programma voor de tijdgestuurde besproeiing blijft hierbij behouden, wordt echter niet uitgevoerd.
  • Página 50 1874-20.960.01_02.07.2011_GARDENA.qxp 18.07.2011 12:44 Seite 50 Voorbeeld : Besproeiingsduur = 10 minuten. De besproeiing begint, wanneer de sensor tussen 20 en 6 uur droog (sensor dry) meldt en stopt wanneer de sensor vochtig (sensor wet) meldt of uiterlijk na 10 minuten. 2 uren na het stoppen van de besproeiing start de besproeiing bij droog (sensor dry) opnieuw, bij vochtig (sensor wet) wordt weer 2 uren met besproeien gewacht enz.
  • Página 51 1874-20.960.01_02.07.2011_GARDENA.qxp 18.07.2011 12:44 Seite 51 3. Terwijl de minuten van de besproeiingsduur knipperen, kan 0 : 00 de besproeiingsduur met de -toetsen (tussen 0 : 59 ) gewijzigd worden (bijv. minuten) en met de OK-toets bevestigd worden. 4. Man.-toets indrukken om het ventiel voortijdig te sluiten. Het ventiel wordt gesloten.
  • Página 52: Buitenbedrijfstelling

    1874-20.960.01_02.07.2011_GARDENA.qxp 18.07.2011 12:44 Seite 52 6. Buitenbedrijfstelling Opslaan / 1. Om de batterij te ontzien, deze uit het batterijvak nemen overwinteren : (zie 4. Inbedrijfname). Daarbij blijven de programma’s behouden. Wanneer de batterij in het voorjaar weer wordt teruggeplaatst, moeten alleen het tijdstip en de weekdag opnieuw worden ingevoerd.
  • Página 53: Leverbare Accessoires

    / knipperen controleren of sensor afmelden. Bij overige storingen verzoeken wij u contact op te nemen met de GARDENA servicedienst. Reparaties mogen alleen worden uitgevoerd door de GARDENA servicedienst of door vakhandelaren die door GARDENA zijn geautoriseerd. 9. Leverbare accessoires GARDENA art.
  • Página 54: Technische Gegevens

    1 jaar 11. Service / Garantie Bij garantie is de service gratis. GARDENA geeft op dit product 2 jaar garantie (vanaf de aan- koopdatum). Deze garantie heeft betrekking op alle wezenlijke defecten aan het toestel, die aanwijsbaar op materiaal- of fabri- cagefouten berusten.
  • Página 55: Settore Di Utilizzo Del Vostro Computer Per Irrigazione

    ......... 1. Settore di utilizzo del Vostro Computer per irrigazione Uso conforme : Il computer per irrigazione GARDENA è destinato al settore hobbistico privato. Concepito per uso all’aperto, è l’ideale per far funzionare in automatico singoli irrigatori o interi impianti d’irrigazione.
  • Página 56 1874-20.960.01_02.07.2011_GARDENA.qxp 18.07.2011 12:44 Seite 56 La quantità minima di acqua erogata per garan- Evitare di forzare l’attacco del computer per tire una funzione di commutazione sicura irrigazione. del computer per irrigazione è di 20 - 30 l / h v Non tirare il tubo collegato. per ogni uscita.
  • Página 57 1874-20.960.01_02.07.2011_GARDENA.qxp 18.07.2011 12:44 Seite 57 Il livello operativo può essere cambiato in qualunque momento premendo il tasto Menu. Vengono salvati tutti i dati di programma fino ad allora modificati e confermati con il tasto OK. Se si con- ferma una modifica dei dati durante un’irrigazione programmata, la valvola viene chiusa.
  • Página 58: Messa In Uso

    1874-20.960.01_02.07.2011_GARDENA.qxp 18.07.2011 12:44 Seite 58 2 Barre 1 Barra 0 Barra lampeggiante Il simbolo della batteria lampeggia Batteria carica a metà Batteria debole Batteria quasi scarica Batteria scarica La valvola si apre. La valvola si apre. La valvola si apre ancora. La valvola non si apre. La funzionalità...
  • Página 59 Il sensore è disattivato. Per il collegamento dei sensori più vecchi (connettore a 2 poli) è necessario l’adattatore GARDENA 1189-00.600.45, che può essere acquistato attraverso il servizio di assistenza GARDENA. Sicurezza antifurto Per impedire eventuali furti, è possibile fissare sul retro del (optional) : watertimer elettronico una speciale staffa di sicurezza, art.
  • Página 60 1874-20.960.01_02.07.2011_GARDENA.qxp 18.07.2011 12:44 Seite 60 5. Programmazione Per impostare il programma è possibile rimuovere il modulo di comando ed eseguire la programmazione (vedere 4. Messa in uso “ Inserimento della batteria” ). La programmazione può essere interrotta in qualsiasi momento Impostazione premendo il tasto Man.
  • Página 61 1874-20.960.01_02.07.2011_GARDENA.qxp 18.07.2011 12:44 Seite 61 Inserimento del programma A) Irrigazione temporizzata : di irrigazione : ï ð 1. Selezionare il programma per la valvola 1 ( V1) o 2 (V2 [Livello 3] con i tasti (V1 / V2) (ciò non è possibile se in precedenza sono stati immessi il giorno della settimana e l’ora attuale).
  • Página 62: Comando Diretto Del Sensore

    / giorno programmati. B) Comando diretto del sensore Presupposto : è collegato almeno un GARDENA Tester d’umidità (v. 4. Messa in funzione). Irrigazione notturna (ore 20 – 6), se il sensore segnala condizioni asciutte dry. Il programma di irriga- zione temporizzata precedentemente creato rimane invariato, ma non viene eseguito.
  • Página 63 1874-20.960.01_02.07.2011_GARDENA.qxp 18.07.2011 12:44 Seite 63 Esempio : Durata irrigazione = 10 minuti. L’irrigazione inizia quando il sensore segnala condizioni asciutte (dry) tra le 20 e le 6 e termina quando il sensore segnala condi- zioni bagnate (wet) o al più tardi dopo 10 minuti. 2 ore dopo la fine dell’irrigazione viene riattivata un’irrigazione se il sensore segnala condizioni asciutte (dry), mentre non ha luogo nessuna irrigazione per altre 2 ore e max.
  • Página 64: Interventi Di Fine Stagione

    1874-20.960.01_02.07.2011_GARDENA.qxp 18.07.2011 12:44 Seite 64 3. Se i minuti relativi alla durata irrigazione lampeggiano, è pos- 0 : 00 0 : 59 sibile modificare la durata con i tasti (tra (es. minuti) e confermare con il tasto OK. 4. In qualunque momento è possibile interrompere un’irrigazione in corso, sia manuale che automatica, premendo il tasto Man.
  • Página 65: Anomalie Di Funzionamento

    1874-20.960.01_02.07.2011_GARDENA.qxp 18.07.2011 12:44 Seite 65 2. Conservare il modulo di comando e l’unità valvole al riparo da gelo e in un luogo asciutto. Smaltimento : Non smaltire insieme ai normali rifiuti domestici. Utilizzare sempre gli appositi contenitori di raccolta. (conforme a: RL 2002 / 96 / EC) v Importante : l’apparecchio va smaltito consegnandolo al centro di smaltimento municipale.
  • Página 66: Accessori Disponibili

    I sensori 1 e 2 lampeggiano sore o disattivare il sensore. In caso di altre anomalie, contattare il Centro di Assistenza Tecnica GARDENA. Le riparazioni devono essere eseguite esclusivamente dai Centri di Assistenza Tecnica GARDENA o dai rivenditori autorizzati GARDENA.
  • Página 67: Dati Tecnici

    Assistenza Centro Assistenza Tecnica Nazionale, tel. 199.400.169. Garanzia Questo prodotto GARDENA è coperto da garanzia legale (nella Comunità Europea per 24 mesi a partire dalla data di acquisto) relativamente a tutti i difetti sostanziali imputabili a vizi di fabbrica- zione o di materiale impiegato. Il prodotto in garanzia potrà essere,...
  • Página 68: Programador C 2030 Duo Plus Gardena

    ..........1. Aplicaciones del GARDENA Programador de riego Uso adecuado El programador de riego GARDENA está destinado al jardín privado para el uso exclusivo en el exterior para el control de aspersores e instalaciones de riego. El programador de riego tiene dos salidas separadas y ejecuta el riego automáticamente...
  • Página 69 1874-20.960.01_02.07.2011_GARDENA.qxp 18.07.2011 12:44 Seite 69 El programador de riego sólo se debe montar La presión de servicio mínima es de 0,5 bar, en sentido vertical, con la tuerca racor hacia la máxima 12 bar. arriba, para evitar que entre agua en el com- Evitar las cargas de tracción.
  • Página 70 1874-20.960.01_02.07.2011_GARDENA.qxp 18.07.2011 12:44 Seite 70 El nivel de indicación se puede cambiar en todo momento pulsando la tecla Menu. Se memorizan todos los datos de programa modificados hasta el momento y confirmados con la tecla OK. Si se confirman con la tecla OK datos modificados durante un riego programado, se cerrará...
  • Página 71: Puesta En Marcha

    1874-20.960.01_02.07.2011_GARDENA.qxp 18.07.2011 12:44 Seite 71 2 barras 1 barra 0 barra parpadea Barra parpadea Pila semi cargada Pila baja Pila casi vacía Pila vacía Válvula se abre. Válvula se abre. Válvula todavía se abre. Válvula no se abre. Funcionamiento del Funcionamiento del El programador de riego El programador de programador de riego...
  • Página 72 3. Pulsar la tecla OK. El sensor queda desconectado. Para la conexión a sensores antiguos (con clavija de enchufe de 2 polos) se requiere el cable adaptador GARDENA 1189- 00.600.45 que se puede adquirir del departamento de asisten- cia técnica de GARDENA.
  • Página 73: Programación

    1874-20.960.01_02.07.2011_GARDENA.qxp 18.07.2011 12:44 Seite 73 5. Programación El componente de control se puede quitar. De este modo se puede ajustar el programa de riego con independencia del lugar de instalación del temporizador (ver capítulo 4. Puesta en servicio “ Colocar la pila ” ). La programación se puede interrumpir en todo momento pulsan- Ajuste de la hora actual do la tecla Man.
  • Página 74: Riego Por Temporizador

    1874-20.960.01_02.07.2011_GARDENA.qxp 18.07.2011 12:44 Seite 74 Introducir programa de A) Riego por temporizador : riego: ï 1. Seleccionar programa para válvula 1 ( V1) o válvula 2 [Nivel 3] ð ) con las teclas (V1/ V2) (no es posible si se ha entrado antes la hora actual y el día de la semana).
  • Página 75: Mando Directo Del Sensor

    B) Mando directo del sensor Condición: se ha conectado por lo menos un sensor de hume- dad GARDENA (ver capítulo 4. Puesta en marcha). Riego por la noche (20 – 6 horas) si el sensor señaliza seco = dry. En este caso se mantendrá...
  • Página 76: Riego Manual

    1874-20.960.01_02.07.2011_GARDENA.qxp 18.07.2011 12:44 Seite 76 Ejemplo : Duración de riego = 10 minutos El riego comienza en el momento en el que el sensor señalice entre las 20 y las 6 horas “seco” (sensor dry) y termina al seña- lizar el sensor “humedad” (sensor wet) o bien tras 10 minutos a más tardar.
  • Página 77 1874-20.960.01_02.07.2011_GARDENA.qxp 18.07.2011 12:44 Seite 77 3. Mientras los minutos de duración del riego parpadeen, se puede modificar la duración del riego con las teclas 0 : 00 0 : 59 (entre ) (por ejemplo, minutos) y confirmar con la tecla OK. 4.
  • Página 78: Puesta Fuera De Servicio

    1874-20.960.01_02.07.2011_GARDENA.qxp 18.07.2011 12:44 Seite 78 6. Puesta fuera de servicio Conservación 1. La pila se deberá retirar para la conservación de la misma (ver capítulo 4. Puesta en marcha). durante el invierno / Almacenamiento : Los programas se conservan. Al volver a colocar la pila en primavera, habrá...
  • Página 79: Accesorios Disponibles

    En otros casos de avería, póngase en contacto con el servicio posventa de GARDENA. Las reparaciones se deben confiar exclusivamente a puntos de servicio técnico de GARDENA o comercios especializados autorizados por GARDENA.
  • Página 80: Datos Técnicos

    En caso de garantía, las prestaciones del servicio son gratuitas para usted. Para este producto GARDENA concede una garantía de 2 años (a partir de la fecha de compra). Esta garantía se refiere a todos los defectos esenciales del producto que tengan de origen defec- tos de materiales o de fabricación.
  • Página 81: Computador De Rega Gardenac 2030 Duo Plus

    1. Campo de aplicação do computador de rega Utilização adequada : O computador de rega GARDENA foi concebido para o uso priva- do no jardim do lar e de lazer, para a aplicação exclusivamente externa, apropriado para o comando de aspersores e sistemas de rega.
  • Página 82 1874-20.960.01_02.07.2011_GARDENA.qxp 18.07.2011 12:44 Seite 82 O computador de rega deve ser montado ape- A pressão mínima de funcionamento é de nas na vertical, com a porca de capa virada 0,5 bar, a pressão máxima de funcionamento para cima, para evitar a penetração de água de 12 bar.
  • Página 83 1874-20.960.01_02.07.2011_GARDENA.qxp 18.07.2011 12:44 Seite 83 O nível de indicação pode ser alterado em qualquer altura, pre- mindo a tecla Menu. Todos os dados do programa que foram alterados até então e confirmados com a tecla OK são memori- zados. Se, durante uma rega programada, dados alterados forem confirmados com a tecla OK, a válvula é...
  • Página 84: Colocação Em Funcionamento

    1874-20.960.01_02.07.2011_GARDENA.qxp 18.07.2011 12:44 Seite 84 2 barras 1 barra 0 barra pisca Rectângulo pisca Bateria pelo meio Bateria fraca Bateria quase vazia Bateria vazia Válvula abre. Válvula abre. Válvula por abrir. Válvula não abre. Funcionamento do Funcionamento do Computador de rega Computador de rega computador de rega computador de rega...
  • Página 85 3. Premir a tecla OK. 1. O sensor está desactivado. Para a conexão de sensores mais antigos (com ficha de 2 pólos) é necessário o cabo adaptador GARDENA 1189-00.600.45, que pode ser obtido através do GARDENA Service. Montagem da protecção...
  • Página 86 1874-20.960.01_02.07.2011_GARDENA.qxp 18.07.2011 12:44 Seite 86 5. Programação Para elaborar o programa, é possível retirar a unidade de comando e a programação pode ser efectuada de modo móvel (ver 4. Colocação em funcionamento “ Colocar bateria ” ). A programação pode ser cancelada em qualquer altura, premin- Ajuste da hora e do dia do a tecla Man.
  • Página 87 1874-20.960.01_02.07.2011_GARDENA.qxp 18.07.2011 12:44 Seite 87 Ajustar o programa A) Rega com temporização : de rega : ï 1. Seleccionar o programa para a válvula 1 ( V1) ou válvula 2 [Nível 3] ð ) com as teclas (V1/V2) (não é possível, se a hora e o dia de semana actuais tiverem sido introduzidos ante- riormente).
  • Página 88: Comando Directo Por Sensor

    B) Comando directo por sensor Condição: estar ligado pelo menos um sensor de humidade do solo GARDENA (ver ponto 4, Colocação em funcionamento). Rega durante a noite (20 – 6 horas), quando o sensor indicar o estado seco dry. Um programa de rega com temporização cria- do anteriormente é...
  • Página 89 1874-20.960.01_02.07.2011_GARDENA.qxp 18.07.2011 12:44 Seite 89 Exemplo : Duração da rega = 10 minutos. A rega é iniciada quando o sensor indica o estado de seco (sen- sor dry) entre as 20 e as 6 horas, e termina quando o sensor indica humidade (sensor wet), ou o mais tardar após 10 minutos.
  • Página 90 1874-20.960.01_02.07.2011_GARDENA.qxp 18.07.2011 12:44 Seite 90 3. Enquanto os minutos da duração da rega estiverem a piscar, pode alterar-se a duração da rega com o botão rotativo (entre 0 : 00 0 : 59 ) (por exemplo, minutos) e confirmar com a tecla OK.
  • Página 91: Colocação Fora De Serviço

    1874-20.960.01_02.07.2011_GARDENA.qxp 18.07.2011 12:44 Seite 91 6. Colocação fora de serviço Armazenamento 1. Para protecção da pilha, esta deve ser removida (durante o (ver o ponto 4. Colocação em funcionamento). tempo frio) : Os programas mantêm-se inalterados. Quando a pilha for recolocada na Primavera, será...
  • Página 92: Acessórios Que Podem Ser Fornecidos

    No caso de outras avarias, contacte o serviço de assistência GARDENA. As reparações podem ser executadas somente por serviços de assistência GARDENA ou por comerciantes autorizados. 9. Acessórios que podem ser fornecidos...
  • Página 93: Dados Técnicos

    11. Assistência / Garantia Os trabalhos de assistência executados sob garantia são gratuitos. A GARDENA garante este produto durante 2 anos (a contar da data de aquisição). Esta garantia cobre essencialmente todos os defeitos do aparelho que se provem ser devido ao material ou falhas de fabrico.
  • Página 94 We expressly point out that, in accordance with the product liability law, we are not liable for any damage caused by our units if it is due to improper repair or if parts exchanged are not original GARDENA parts or parts approved by us, and, if the repairs were not carried out by a GARDENA Service Centre or an authorised specialist.
  • Página 95 EU-richtlijnen, de EU-veiligheidsstandaard en de voor het pro- duct specifieke standaard. Bij een niet met ons afgestemde verandering aan het apparaat verliest deze verklaring haar geldigheid. Hinterlegte Dokumentation: GARDENA Technische Dokumentation E. Renn 89079 Ulm Dichiarazione di conformità alle norme UE Deposited Documentation: GARDENA Technical Documentation E.
  • Página 96 South Africa (Pty.) Ltd. Lautatarhankatu 8 B / PL 3 Belgium GARDENA Nederland B.V. P.O. Box 11534 00581 HELSINKI GARDENA Belgium NV / SA Postbus 50176 Vorna Valley 1686 info @ gardena.fi Sterrebeekstraat 163 1305 AD ALMERE Phone: (+ 27) 11 315 02 23...

Este manual también es adecuado para:

1874

Tabla de contenido