
Manuales relacionados para Cameo OPUS H5


Resumen de contenidos para Cameo OPUS H5
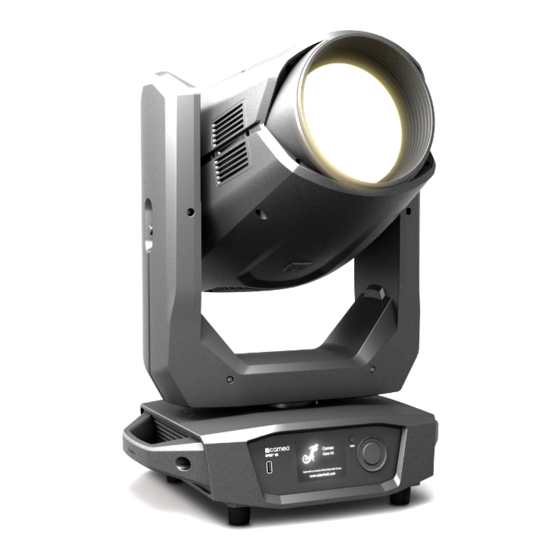
- Página 1 USER´S MANUAL BEDIENUNGSANLEITUNG MANUEL D´UTILISATION MANUAL DE USUARIO INSTRUKCJA OBSŁUGI MANUALE D´USO ANIMATION WHEEL OPUS H5 BEAM SPOT WASH HYBRID MOVING HEAD CLOH5...
-
Página 2: Tabla De Contenido
CONTENTS / INHALTSVERZEICHNIS / CONTENU / CONTENIDO / TREŚĆ / CONTENUTO ENGLISH ESPAÑOL SAFETY INFORMATION MEDIDAS DE SEGURIDAD INTRODUCTION INTRODUCCIÓN CONNECTIONS, OPERATING AND DISPLAY ELEMENTS CONEXIONES, ELEMENTOS DE MANEJO Y ELEMENTOS OPERATION DE VISUALIZACIÓN W-DMX™ MANEJO W-DMX™ STATUS W-DMX™ CONTROL MENU (Control) ESTADO W-DMX™... -
Página 3: Safety Information
This device was developed and produced under the highest standards of quality in order to ensure smooth operation for many years. Please read these operating instructions carefully so that you can use your new Cameo Light product quickly and optimally. You can find more information on Cameo Light on our website WWW.CAMEOLIGHT.COM. - Página 4 36. The appliance is not to be used by persons (including children) with reduced physical, sensory or mental capabilities, or lack of experience and knowledge. 37. Children must be instructed not to play with the device. 38. If the power cord of the device is damaged, do not use the device. The power cord must be replaced by an adequate cable or assembly from an authorized service center.
-
Página 5: Introduction
Neutrik powerCON TRUE1 mains input socket. Operating voltage 100–240 V AC/50–60 Hz. A suitable mains cable with powerCON TRUE1 plug is included. POWER OUT Neutrik powerCON TRUE1 mains output socket.. Facilitates power supply to other CAMEO lights. Ensure that the total power consumption of all devices connected to the device does not exceed the given ampere (A) value. - Página 6 FUSE Fuse holder for 5 x 20 mm micro fuses. IMPORTANT: Replace the fuse only with a fuse of the same type and value. In the event of repeated fuse failure, please contact an authorised service centre. DMX IN Male 3-pin and 5-pin XLR sockets for connection to a DMX control device (e.g. DMX console). Only use the ports alternatively. DMX OUT Female 3-pin or 5-pin XLR sockets for sending the DMX control signal.
-
Página 7: Usb Interface
USB INTERFACE USB interface for updating the device firmware. In the Service menu, set the status for USB Update to Yes. When available, download the latest firmware from the product page at www.cameolight.com, unzip it and copy the files to a folder without special characters on a USB stick. -
Página 8: Operation
NOTES When the lamp is correctly connected to the mains supply, the Cameo logo is shown on the display during start-up and motor reset along with details of the device model. After this process, the spotlight is ready for operation and the previously activated operating mode is launched. - Página 9 MAIN DISPLAY DMX AND W-DMX OPERATING MODE The top line of the display shows whether a control signal is available at the device, the middle field shows the DMX start address, the DMX mode and the address following the start address set in the device, corresponding to the number of channels of the DMX mode. The bottom line displays the device head temperature, lamp mode and W-DMX status.
-
Página 10: W-Dmx
MAIN DISPLAY SLAVE AND STATIC MODE The top line of the display shows whether a control signal is available on the device and the middle field shows the SLAVE or STATIC mode with the selected scene (Run Scene x). The bottom line displays the device head temperature, lamp mode and W-DMX status. If the control signal is interrupted in slave mode, the characters in the display start flashing and “None”... -
Página 11: Control Menu (Control)
CONTROL MENU (Control) The control menu enables selection of the various operating modes and their settings in the relevant sub-menus. DMX OPERATION VIA XLR INPUT Starting from the main display, press the rotary-push encoder to enter the main menu. Select the Control menu by turning the encoder and pressing the encoder. - Página 12 See the table below for information on the sub-menu items in the W-DMX menu and the relevant setting options. Protocol WDMX Select by turning the encoder, confirm by pressing, change value or status by turning, confirm by pressing. Back with BACK. DMX Address Setting the DMX start address 001–512...
-
Página 13: Slave Mode
OPERATION VIA SACN PROTOCOL Starting from the main display, press the rotary-push encoder to enter the main menu. Select the Control menu by turning and pressing the encoder. By turning the encoder you can now select the menu item Protocol, confirm by pressing the encoder and then select sACN by turning the encoder and confirm by pressing the encoder. - Página 14 encoder. By turning the encoder you can now select the menu item Protocol, confirm by pressing the encoder and then select Static by turning the encoder and confirm by pressing the encoder. Information on the sub-menu items in the Static menu and the relevant setting options are to be found in the tables below. Protocol Static Select by turning, confirm by pressing, Edit Scene...
-
Página 15: System Settings (Settings)
SYSTEM SETTINGS (Settings) Starting from the main display, press the rotary-push encoder to enter the main menu. Turn the encoder to select the system Settings menu and press the encoder. This will take you to the sub-menu for editing the sub-menu items, see table: Settings Select by turning, confirm by pressing, change value or status by turning, confirm by pressing. -
Página 16: Dimmer Curves
Motor Pan Reverse Does not reverse pan direction Reverses pan direction Tilt Reverse Does not reverse tilt direction Reverses tilt direction Angle 630° pan angle 540° pan angle Feedback Automatic position correction is disabled Automatic position correction is enabled Color Stand Standard rotation of color wheel on color change position... -
Página 17: Device Information (Info)
DEVICE INFORMATION (Info) Starting from the main display, press the rotary-push encoder to enter the main menu. Turn the encoder to select the Info menu for device information and press the encoder. In order to have the required information displayed, select the relevant menu item by turning the encoder and then press the encoder to confirm. -
Página 18: Service Menu (Service)
SERVICE MENU (Service) Starting from the main display, press the rotary-push encoder to enter the main menu. Select Quicklight by turning the Service encoder and press the encoder to confirm. This takes you to the Service menu, see table: Service Select by turning, confirm by pressing, select command by turning, confirm by pressing. -
Página 19: Quicklight
QUICKLIGHT Set up a scene quickly and easily using the basic Moving Head functions without an external controller. Starting from the main display, press the rotary-push encoder to enter the main menu. Select Quicklight by turning the encoder and press the encoder to confirm. Now select the desired menu item again by turning the encoder, pressing the encoder and setting the value from 000 to 255 as desired (change value by turning, confirm by pressing, back with BACK). -
Página 20: Installation And Mountng
INSTALLATION AND MOUNTNG Thanks to its integrated rubber feet, the lamp can be positioned in a suitable location on a level surface. Traverse installation can be achie- ved with the help of two Omega brackets, which are attached to the base of the device . - Página 21 Fully disconnect the spotlight from the mains (pull out the plug)! Loosen the two bayonet screws on the rear head cover (quarter turn counter clockwise) and remove the cover from the spotlight head. In doing so, take care not to damage the cover’s protective earth cable. Disconnect the two cables for power supply to the lamp from the contacts at the connectors.
-
Página 22: Calibrating The Lamp
CALIBRATING THE LAMP Important: Calibration of the lamp may be carried out by qualified personnel only. If you do not have these qualifications, do not attempt to adjust a lamp yourself. Consult a qualified professional instead. A hot discharge lamp is under high pressure and can therefore spontaneously explode. Let the lamp cool for at least 30 minutes before opening it. -
Página 23: Dmx Technology
DMX TECHNOLOGY DMX-512 DMX (Digital Multiplex) is the designation for a universal transmission protocol for communications between corresponding devices and controllers. A DMX controller sends DMX data to the connected DMX device(s). The DMX data is always transmitted as a serial data stream that is forwarded from one connected device to the next via the "DMX IN"... -
Página 24: Technical Data
TECHNICAL DATA Product number: CLOH5 Product type: Discharge Moving Light Type: Moving Head Number of lamps: Type of lamp: 471 W Osram Color temperature (lamp): Cool white 7500 K Color mixing: Color reproduction High CRI Filter >90 Number of colors: color 13 + open and continuous positioning wheel: Number of gobos:... -
Página 25: Manufacturer´s Declarations
MANUFACTURER´S DECLARATIONS MANUFACTURER‘S WARRANTY & LIMITATIONS OF LIABILITY You can find our current warranty conditions and limitations of liability at: https://cdn-shop.adamhall.com/media/pdf/MANUFACTURERS- DECLARATIONS_CAMEO.pdf. To request warranty service for a product, please contact Adam Hall GmbH, Adam-Hall-Str. 1, 61267 Neu Anspach / Email: Info@adamhall.com / +49 (0)6081 / 9419-0. CORRECT DISPOSAL OF THIS PRODUCT (valid in the European Union and other European countries with a differentiated waste collection system) This symbol on the product, or on its documents indicates that the device may not be treated as household waste. -
Página 26: Deutsch
Dieses Gerät wurde unter hohen Qualitätsanforderungen entwickelt und gefertigt, um viele Jahre einen reibungslosen Betrieb zu gewähr- leisten. Bitte lesen Sie diese Bedienungsanleitung sorgfältig, damit Sie Ihr neues Produkt von Cameo Light schnell und optimal einsetzen können. Weitere Informationen über Cameo Light erhalten Sie auf unserer Website WWW.CAMEOLIGHT.COM. - Página 27 (Staub, Nikotin, Nebel etc.) regelmäßig von qualifiziertem Fachpersonal gewartet bzw. gesäubert werden (keine Garantieleistung), um Überhitzung und Fehlfunktionen zu vermeiden. 34. Der Abstand zu brennbaren Materialien muss mindestens 0,5 m betragen. 35. Netzleitungen zur Spannungsversorgung mehrerer Geräte müssen mindestens 1,5 mm² Aderquerschnitt aufweisen. In der EU müssen die Leitungen H05VV-F, oder gleichartig, entsprechen.
-
Página 28: Einführung
Neutrik powerCON TRUE1 Netzeingangsbuchse. Betriebsspannung 100 - 240V AC / 50 - 60Hz. Ein geeignetes Netzkabel mit powerCON TRUE1 Gerätestecker befindet sich im Lieferumfang. POWER OUT Neutrik powerCON TRUE1 Netzausgangsbuchse. Dient der Netzversorgung weiterer CAMEO Scheinwerfer. Achten Sie darauf, dass die gesamte Stromaufnahme aller angeschlossenen Geräte den auf dem Gerät in Ampere (A) angegebenen Wert nicht überschreitet. - Página 29 FUSE Sicherungshalter für 5 x 20mm Feinsicherungen. WICHTIGER HINWEIS: Ersetzen Sie die Sicherung ausschließlich durch eine Sicherung des gleichen Typs und mit gleichen Werten. Sollte die Sicherung wiederholt auslösen, wenden Sie sich bitte an ein autorisiertes Servicezentrum. DMX IN Männliche 3- und 5-Pol XLR-Buchsen zum Anschließen eines DMX-Kontrollgeräts (z.B. DMX-Pult). Verwenden Sie die Anschlüsse aus- schließlich alternativ.
-
Página 30: Usb-Schnittstelle
USB-SCHNITTSTELLE USB-Schnittstelle zum Updaten der Geräte-Firmware. Stellen Sie im Service-Menü den Status bei USB Update auf Yes. Laden Sie, sobald verfügbar, die aktuelle Firmware von der Produktseite auf www.cameolight.com, entpacken sie und kopieren die Dateien in einen Ordner ohne Sonderzeichen auf einen USB-Stick. Trennen Sie den Moving Head vom Stromnetz und allen Input-Anschlüssen (DMX / Ethernet), schließen den USB-Stick an der USB-Schnittstelle an und verbinden den Moving Head wieder mit dem Stromnetz. -
Página 31: Bedienung
BEDIENUNG HINWEISE Sobald der Scheinwerfer korrekt am Stromnetz angeschlossen ist, wird während des Startvorgangs und des Motoren-Resets das Cameo Logo mit Informationen zum Gerätemodell im Display angezeigt. Nach diesem Vorgang ist der Scheinwerfer betriebsbereit und die Betriebsart, die zuvor aktiviert war, wird gestartet. - Página 32 HAUPTANZEIGE DMX UND W-DMX BETRIEBSART In der oberen Zeile des Displays wird angezeigt, ob ein Steuersignal am Gerät anliegt, im mittleren Feld die DMX-Startadresse, der DMX-Mo- dus und die auf die im Gerät eingestellte Startadresse folgende Adresse, entsprechend der Kanalanzahl des DMX-Modus. In der unteren Zeile wird die Temperatur des Gerätekopfs, der Lampenmodus und der W-DMX Status angezeigt.
-
Página 33: W-Dmx
HAUPTANZEIGE SLAVE UND STATIC BETRIEBSART In der oberen Zeile des Displays wird angezeigt, ob ein Steuersignal am Gerät anliegt und im mittleren Feld die Betriebsart SLAVE oder STATIC mit der ausgewählten Szene (Run Scene x). In der unteren Zeile wird die Temperatur im Gerätekopf, der Lampenmodus und der W-DMX Status angezeigt. -
Página 34: Kontrollmenü (Control)
KONTROLLMENÜ (Control) Das Kontrollmenü ermöglicht die Auswahl der verschiedenen Betriebsarten und deren Einstellungen in den entsprechenden Untermenüs. DMX-BETRIEB VIA XLR-EINGANG Ausgehend von der Hauptanzeige gelangen Sie durch Drücken auf den Dreh-Drück-Encoder in das Hauptmenü. Wählen Sie durch Drehen des Encoders das Kontrollmenü Control aus und drücken auf den Encoder. Durch Drehen des Encoders wählen Sie nun den Menüpunkt Protocol aus, bestätigen durch Drücken auf den Encoder und wählen dann wiederum durch Drehen des Encoders DMX aus und bestätigen durch Drücken auf den Encoder. - Página 35 Informationen zu den Untermenüpunkten im W-DMX-Menü und den entsprechenden Einstelloptionen finden Sie in der Tabelle unterhalb. Protocol WDMX Auswahl durch Drehen des Encoders, bestätigen durch Drücken, Wert bzw. Status ändern durch Drehen, bestätigen durch Drücken. Zurück mit BACK. DMX Address Einstellen der DMX-Startadresse 001 - 512 DMX Mode...
- Página 36 BETRIEB VIA SACN PROTOKOLL Ausgehend von der Hauptanzeige gelangen Sie durch Drücken auf den Dreh-Drück-Encoder in das Hauptmenü. Wählen Sie durch Drehen des Encoders das Kontrollmenü Control aus und drücken auf den Encoder. Durch Drehen des Encoders wählen Sie nun den Menüpunkt Protocol aus, bestätigen durch Drücken auf den Encoder und wählen dann wiederum durch Drehen des Encoders sACN aus und bestätigen durch Drücken auf den Encoder.
- Página 37 STANDALONE-BETRIEB STATIC Ausgehend von der Hauptanzeige gelangen Sie durch Drücken auf den Dreh-Drück-Encoder in das Hauptmenü. Wählen Sie durch Drehen des Encoders das Kontrollmenü Control aus und drücken auf den Encoder. Durch Drehen des Encoders wählen Sie nun den Menüpunkt Protocol aus, bestätigen durch Drücken auf den Encoder und wählen dann wiederum durch Drehen des Encoders Static aus und bestätigen durch Drücken auf den Encoder.
-
Página 38: Systemeinstellungen (Settings)
SYSTEMEINSTELLUNGEN (Settings) Ausgehend von der Hauptanzeige gelangen Sie durch Drücken auf den Dreh-Drück-Encoder in das Hauptmenü. Wählen Sie durch Drehen des Encoders das Menü für die Systemeinstellungen Settings aus und drücken auf den Encoder. Daraufhin gelangen Sie in das Untermenü zum Editieren der Untermenüpunkte, siehe Tabelle: Settings Auswahl durch Drehen, bestätigen durch Drücken, Wert bzw. - Página 39 Motor Pan Reverse Keine Umkehrung der Pan Bewegungsrichtung Umkehrung der Pan Bewegungsrichtung Tilt Reverse Keine Umkehrung der Tilt Bewegungsrichtung Umkehrung der Tilt Bewegungsrichtung Angle 630° Pan-Winkel 540° Pan-Winkel Feedback Automatische Positionskorrektur deaktiviert Automatische Positionskorrektur aktiviert Color Stand Standarddrehung des Farbrads bei Farbwechsel Position (Standard) Short...
-
Página 40: Geräteinformationen (Info)
GERÄTEINFORMATIONEN (Info) Ausgehend von der Hauptanzeige gelangen Sie durch Drücken auf den Dreh-Drück-Encoder in das Hauptmenü. Wählen Sie durch Drehen des Encoders das Menü für die Geräteinformationen Info aus und drücken auf den Encoder. Um die gewünschten Informationen anzeigen zu lassen, wählen Sie den entsprechenden Menüpunkt durch Drehen des Encoders aus und bestätigen durch Drücken auf den Encoder. Info Auswahl durch Drehen des Encoders, bestätigen durch Drücken, zurück mit BACK Firmware... -
Página 41: Service-Menü (Service)
SERVICE-MENÜ (Service) Ausgehend von der Hauptanzeige gelangen Sie durch Drücken auf den Dreh-Drück-Encoder in das Hauptmenü. Wählen Sie durch Drehen des Encoders Service aus und drücken zum Bestätigen auf den Encoder. Daraufhin gelangen Sie in das Service-Menü, siehe Tabelle: Service Auswahl durch Drehen, bestätigen durch Drücken, Befehl auswählen durch Drehen, bestätigen durch Drücken. -
Página 42: Quicklight
QUICKLIGHT Stellen Sie eine Szene mit den Basisfunktionen des Moving Heads ohne externen Controller schnell und unkompliziert ein. Ausgehend von der Hauptanzeige gelangen Sie durch Drücken auf den Dreh-Drück-Encoder in das Hauptmenü. Wählen Sie durch Drehen des Encoders Quicklight aus und drücken zum Bestätigen auf den Encoder. Den gewünschten Menüpunkt wählen Sie nun wiederum durch Drehen des Encoders aus, drücken auf den Encoder und stellen den Wert nach Wunsch von 000 bis 255 ein (Wert ändern durch Drehen, bestätigen durch Drücken, zurück mit BACK). -
Página 43: Aufstellung Und Montage
AUFSTELLUNG UND MONTAGE Dank der integrierten Gummifüße kann der Scheinwerfer an einer geeigneten Stelle auf eine ebene Fläche gestellt werden. Die Montage an einer Traverse erfolgt mit Hilfe zweier Omega-Bügel, die an der Gerätebasis befestigt werden . Zwei Omega-Bügel sind im Lieferumfang enthalten, geeignete Traversenklemmen sind optional erhältlich. - Página 44 Trennen Sie den Scheinwerfer allpolig vom Stromnetz (Stecker ziehen)! Lösen Sie die beiden Bajonett-Schrauben der hinteren Kopfabdeckung (Vierteldrehung gegen Uhrzeigersinn) und nehmen die Abdeckung vom Scheinwerferkopf. Achten Sie dabei darauf, dass das Schutzleiterkabel von der Abdeckung nicht beschädigt wird. Ziehen Sie die beiden Kabel für die Spannungsversorgung des Leuchtmittels an den Steckern von den Kontakten. Drücken Sie das Leuchtmittel gegen die Fassung und drehen es dabei gegen den Uhrzeigersinn aus der Fassung (Achtel Umdrehung).
-
Página 45: Justieren Des Leuchtmittels
JUSTIEREN DES LEUCHTMITTELS Wichtige Hinweise: Das Justieren des Leuchtmittels darf nur von dafür ausgebildetem Fachpersonal durchgeführt werden. Wenn Sie diese Qualifi- kation nicht haben, versuchen Sie nicht, das Leuchtmittel selbst zu justieren, sondern nutzen Sie die Hilfe von professionellen Unternehmen. Eine heiße Entladungslampe steht unter hohem Druck und kann daher spontan explodieren. -
Página 46: Dmx Technik
DMX TECHNIK DMX-512 DMX (Digital Multiplex) ist die Bezeichnung für ein universelles Übertragungsprotokoll für die Kommunikation zwischen entsprechenden Geräten und Controllern. Ein DMX-Controller sendet DMX-Daten an das/die angeschlossene(n) DMX-Gerät(e). Die DMX-Datenübertragung erfolgt stets als serieller Datenstrom, der über die an jedem DMX-fähigen Gerät vorhandenen DMX IN- und DMX OUT-Anschlüsse (XLR-Steckverbinder) von einem angeschlossenen Gerät an das nächste weitergeleitet wird, wobei die maximale Anzahl der Geräte 32 nicht überschreiten darf. -
Página 47: Technische Daten
TECHNISCHE DATEN Artikelnummer: CLOH5 Produktart: Discharge Moving Light Typ: Moving Head Anzahl Leuchtmittel: Typ Leuchtmittel: 471 W Osram Farbtemperatur (Leucht- Kaltweiß 7500 K mittel): Farbmischfunktion: Farbwiedergabe High CRI Filter >90 Farbrad Anzahl Farben: 13 + offen und kontiniuerliches Positionieren Anzahl Gobos: 22 + offen (13 fix + 9 rotierend) Effekte: 2x Prismenebenen (einfach + vierfach), Animationsrad, Frostfilter... -
Página 48: Herstellererklärungen
HERSTELLERERKLÄRUNGEN HERSTELLERGARANTIE & HAFTUNGSBESCHRÄNKUNG Unsere aktuellen Garantiebedingungen und Haftungsbeschränkung finden Sie unter: https://cdn-shop.adamhall.com/media/pdf/ MANUFACTURERS-DECLARATIONS_CAMEO.pdf. Im Service Fall wenden Sie sich bitte an Adam Hall GmbH, Adam-Hall-Str. 1, 61267 Neu Anspach / E-Mail Info@adamhall.com / +49 (0)6081 / 9419-0. KORREKTE ENTSORGUNG DIESES PRODUKTS (Gültig in der Europäischen Union und anderen europäischen Ländern mit Mülltrennung) Dieses Symbol auf dem Produkt oder dazugehörigen Dokumenten weist darauf hin, dass das Gerät am Ende der Produktlebenszeit nicht zusammen mit dem normalen Hausmüll entsorgt werden darf, um Umwelt- oder Personenschäden durch unkontrollierte Abfallentsorgung zu vermeiden. -
Página 49: Francais
Cet appareil a été développé et fabriqué en appliquant des exigences de qualité très élevées: il garantit des années de fonctionnement sans problème.Veuillez lire attentivement ce Manuel Utilisateur : vous apprendrez rapidement à utiliser votre appareil Cameo Light de façon optimale. - Página 50 34. Respectez une distance minimale de 0,5m par rapport à des matériaux inflammables. 35. Si vous désirez alimenter plusieurs projecteurs simultanément, les conducteurs du câble secteur doivent posséder une section minimale de 1,5 mm². Dans l’Union Européenne, les câbles électriques doivent être de type H05VV-F ou équivalent. Adam Hall propose des câbles secteur adaptés.
-
Página 51: Introduction
TRUE1 est inclus à la livraison. POWER OUT (SORTIE D’ALIMENTATION) Embase secteur de sortie Neutrik powerCON TRUE1. Permet d’alimenter d’autres projecteurs CAMEO. S’assurer que la consommation totale de tous les appareils connectés ne dépasse pas la valeur en ampères (A) indiquée sur l’appareil. - Página 52 DMX IN (ENTRÉE DMX) Connecteurs XLR mâles à 3 et 5 broches pour le raccordement d’un contrôleur DMX (par ex. une console DMX). Utiliser les raccordements uniquement en alternance. DMX OUT (SORTIE DMX) Connecteurs XLR femelles à 3 et 5 broches pour le renvoi du signal de commande DMX. Utiliser les raccordements uniquement en alter- nance.
- Página 53 Décompresser et copier les fichiers sur une clé USB dans un dossier ne comportant aucun caractère spécial. Déconnecter la lyre du réseau électrique et de toutes les connexions d’entrée (DMX/Ethernet), insérer la clé USB dans l’interface USB, puis raccorder à nouveau la lyre au réseau électrique.
-
Página 54: Mode D'emploi
REMARQUES Si le projecteur est correctement branché sur le secteur, le logo Cameo accompagné d’informations sur le modèle d’appareil s’affiche à l’écran pendant la phase de démarrage et de réinitialisation du moteur. À l’issue de cette phase, le projecteur est opérationnel et le mode de fonctionnement précédemment activé... - Página 55 AFFICHAGE PRINCIPAL DES MODES DE FONCTIONNEMENT DMX ET W-DMX La ligne supérieure de l’écran indique si un signal de commande est délivré, l’adresse de départ DMX dans le champ central, le mode DMX et l’adresse suivant l’adresse de départ définie dans l’appareil, en fonction du nombre de canaux du mode DMX. La ligne inférieure indique la température de la tête de l’appareil, le mode de la lampe et l’état DMX.
-
Página 56: W-Dmx
AFFICHAGE PRINCIPAL SLAVE ET MODE DE FONCTIONNEMENT STATIQUE La ligne supérieure de l’écran indique si un signal de commande est délivré au niveau de l’appareil, et le champ central affiche le mode de fonctionnement SLAVE ou STATIC avec la scène sélectionnée (Run Scene x). La ligne inférieure indique la température à l’intérieur de la tête de l’appareil, le mode de la lampe et l’état DMX. -
Página 57: Panneau De Commande (Control)
PANNEAU DE COMMANDE (Control) Le panneau de commande permet de sélectionner les différents modes de fonctionnement et leurs réglages dans les sous-menus corre- spondants. FONCTIONNEMENT DMX VIA UNE ENTRÉE XLR À partir de l’affichage principal, appuyer sur l’encodeur rotatif à bouton-poussoir pour accéder au menu principal. Tourner l’encodeur pour sélectionner le panneau de commande Control, puis appuyer sur l’encodeur. - Página 58 Vous trouverez les informations sur les options de sous-menu du menu W-DMX et les options de réglage correspondantes dans le tableau ci-dessous. Protocol WDMX Tourner l’encodeur pour sélectionner, appuyer pour valider, tourner pour modifier la valeur ou l’état, appuyer pour valider. Retour avec BACK.
-
Página 59: Mode De Fonctionnement Slave
FONCTIONNEMENT VIA LE PROTOCOLE SACN À partir de l’affichage principal, appuyer sur l’encodeur rotatif à bouton-poussoir pour accéder au menu principal. Tourner l’encodeur pour sélectionner le panneau de commande Control, puis appuyer sur l’encodeur. Tourner l’encodeur pour sélectionner l’option de menu Protocol, appuyer sur l’encodeur pour valider et sélectionner ensuite sACN en faisant tourner l’encodeur, puis appuyer sur l’encodeur pour valider. - Página 60 FONCTIONNEMENT AUTONOME STATIC À partir de l’affichage principal, appuyer sur l’encodeur rotatif à bouton-poussoir pour accéder au menu principal. Tourner l’encodeur pour sélectionner le panneau de commande Control, puis appuyer sur l’encodeur. Tourner l’encodeur pour sélectionner l’option de menu Protocol, appuyer sur l’encodeur pour valider et sélectionner ensuite Static en faisant tourner l’encodeur, puis appuyer sur l’encodeur pour valider.
-
Página 61: Paramètres Du Système (Settings)
PARAMÈTRES DU SYSTÈME (Settings) À partir de l’affichage principal, appuyer sur l’encodeur rotatif à bouton-poussoir pour accéder au menu principal. Tourner l’encodeur pour sélectionner le menu des paramètres du système Settings, puis appuyer sur l’encodeur. Cette action permet d’accéder au sous-menu pour la modification des options de sous-menu, voir tableau : Paramètres Tourner pour sélectionner, appuyer pour valider, tourner pour modifier la valeur ou l’état, appuyer pour valider. -
Página 62: Courbes De Dimmer
Motor Pan Reverse Pas d’inversion de la direction du mouvement de l’axe Pan Inversion de la direction du mouvement de l’axe Pan Tilt Reverse Pas d’inversion de la direction du mouvement de l’axe Tilt Inversion de la direction du mouvement de l’axe Tilt Angle Angle Pan 630°... -
Página 63: Informations Sur L'appareil (Info)
INFORMATIONS SUR L’APPAREIL (Info) À partir de l’affichage principal, appuyer sur l’encodeur rotatif à bouton-poussoir pour accéder au menu principal. Tourner l’encodeur pour sélectionner le menu des informations sur l’appareil Info, puis appuyer sur l’encodeur. Pour afficher les informations souhaitées, sélectionner l’option de menu correspondante en tournant l’encodeur, puis appuyer sur l’encodeur pour valider. -
Página 64: Menu De Service (Service)
MENU DE SERVICE (Service) À partir de l’affichage principal, appuyer sur l’encodeur rotatif à bouton-poussoir pour accéder au menu principal. Tourner l’encodeur pour sélectionner Service, puis appuyer sur l’encodeur pour valider. Vous accédez ensuite au menu de service, voir tableau : Service Tourner l’encodeur pour sélectionner, appuyer pour valider, tourner pour sélectionner la commande, appuyer pour valider. -
Página 65: Quicklight
QUICKLIGHT Configurer une scène rapidement et facilement à l’aide des fonctions de base de la lyre asservie sans contrôleur externe. À partir de l’affichage principal, appuyer sur l’encodeur rotatif à bouton-poussoir pour accéder au menu principal. Sélectionner Quicklight en tournant l’encodeur et appuyer sur l’encodeur pour valider. -
Página 66: Installation Et Montage
INSTALLATION ET MONTAGE Grâce aux pieds en caoutchouc intégrés, le projecteur peut être placé à un endroit approprié sur une surface plane. Le montage sur traverse s’effectue à l’aide de deux omégas de fixation à installer sur la base de l’appareil . - Página 67 Débrancher complètement le projecteur du réseau électrique (retirer la prise) ! Dévisser les deux vis à baïonnette situées à l’arrière du capot (quart de tour dans le sens antihoraire) et retirer le capot de la tête du projecteur. Veiller à ce que le câble du conducteur de protection ne soit pas endommagé par le capot. Débrancher les connecteurs des deux câbles d’alimentation de la lampe de leurs contacts.
-
Página 68: Réglage De La Lampe
RÉGLAGE DE LA LAMPE Remarques importantes : Le réglage de la lampe ne peut être réalisé que par un professionnel qualifié. Sans la qualification requise, ne pas essayer de régler vous-même la lampe, mais faire appel à une entreprise professionnelle. Une lampe à décharge chaude est soumise à une pression élevée et peut donc exploser spontanément. Laisser refroidir le projecteur au moins 30 minutes avant de l’ouvrir. -
Página 69: Technique Dmx
TECHNIQUE DMX DMX-512 Le terme DMX (Digital Multiplex) désigne un protocole de transport universel permettant la communication entre des appareils et des contrôleurs à ce format. Un contrôleur DMX envoie des données DMX aux appareils DMX qui lui sont connectés. Les données DMX sont transportées sous forme d'un flux série, renvoyé... -
Página 70: Caractéristiques Techniques
CARACTÉRISTIQUES TECHNIQUES Référence : CLOH5 Catégorie de produit : Lyre à décharge Type : lyre Nombre de lampes : Type de lampe : 471 W Osram Température chromatique Blanc froid 7500 K (lampe) : Fonction de mélange de couleurs : Restitution des couleurs Filtre IRC élevé > 90 Nombre de couleurs de la 13 + position ouverte et positionnement continu roue chromatique :... -
Página 71: Declarations
DECLARATIONS GARANTIE FABRICANT & LIMITATION DE RESPONSABILITÉ Nos conditions actuelles de garantie et de limitation de responsabilité sont disponibles à l‘adresse suivante : https://cdn-shop.adamhall.com/ media/pdf/MANUFACTURERS-DECLARATIONS_CAMEO.pdf. Pour les réparations, veuillez contacter Adam Hall GmbH, Adam-Hall-Str. 1, 61267 Neu Anspach / E-Mail Info@adamhall.com / +49 (0)6081 / 9419-0. TRI ET MISE AUX DÉCHETS CORRECTE DE CE PRODUIT (Valid in the European Union and other European countries with waste separation) (Applicable dans l‘Union Européenne et les autres pays européens pratiquant le tri des déchets) La présence de ce symbole sur le... -
Página 72: Español
Este equipo está diseñado y fabricado con los estándares de calidad más exigentes, para garantizar un correcto funcionamiento durante muchos años.Lea atentamente este manual de usuario para poder aprovechar rápidamente toda la funcionalidad de su nuevo producto de Cameo Light. Más información sobre Cameo Light en la web WWW.CAMEOLIGHT.COM. MEDIDAS DE SEGURIDAD 1. - Página 73 33. La acumulación de polvo y otras partículas en el interior del equipo puede causar daños. Dependiendo de las condiciones ambientales (polvo, nicotina, niebla, etc.), deberá realizarse periódicamente el mantenimiento o la limpieza del equipo por personal especializado, para evitar cualquier sobrecalentamiento o fallo de funcionamiento (mantenimiento y limpieza no cubiertos por la garantía). 34.
-
Página 74: Introducción
POWER OUT Toma de salida de alimentación Neutrik powerCON TRUE1. Sirve para alimentar otros focos CAMEO. Asegúrese de que el consumo de corriente total de todos los equipos conectados no supere el valor en amperios (A) indicado en el equipo. -
Página 75: Antena Para W-Dmx
FUSE Portafusibles para fusibles sensibles de 5 x 20 mm. NOTA IMPORTANTE: El fusible deberá sustituirse exclusivamente por otro del mismo tipo y con las mismas características técnicas. Si el fusible salta de forma recurrente, diríjase a un centro de servicio técnico autorizado. DMX IN Conectores XLR macho de 3 y 5 pines para conectar un controlador DMX (por ejemplo, una mesa DMX). -
Página 76: Puerto Usb
PUERTO USB Puerto USB para actualizar el firmware del equipo. En el menú de servicio, ajuste el estado de USB Update en Yes. En cuanto haya disponible un nuevo firmware, descárguelo de la página de producto en www.cameolight.com, descomprímalo y copie los archivos en una carpeta sin caracteres especiales en una memoria USB. -
Página 77: Manejo
En cuanto el foco esté correctamente conectado a la red eléctrica, durante el proceso de arranque y reinicio de los motores aparecerá el logotipo de CAMEO con información sobre el modelo del equipo. Después de este procedimiento, el foco estará listo para funcionar y se iniciará... -
Página 78: Pantalla Principal De Los Modos Operativos Dmx Y W-Dmx
PANTALLA PRINCIPAL DE LOS MODOS OPERATIVOS DMX Y W-DMX En la línea superior de la pantalla se muestra si existe una señal de control en el equipo, en el campo intermedio se muestra la dirección inicial DMX, el modo DMX y la dirección siguiente a la dirección inicial ajustada en el equipo, según el número de canales del modo DMX. En la fila inferior se muestran la temperatura de la cabeza del equipo, el modo de la lámpara y el estado W-DMX. -
Página 79: Pantalla Principal De Los Modos Operativos Slave Y Static
PANTALLA PRINCIPAL DE LOS MODOS OPERATIVOS SLAVE Y STATIC En la línea superior de la pantalla se muestra si existe una señal de control en el equipo y en el campo intermedio se muestra el modo operativo SLAVE o STATIC con la escena seleccionada (Run Scene x). En la fila inferior se muestran la temperatura de la cabeza del equipo, el modo de la lámpara y el estado W-DMX. -
Página 80: Menú De Control (Control)
MENÚ DE CONTROL (Control) El menú de control permite seleccionar los distintos modos operativos y sus ajustes en los submenús correspondientes. MODO DMX MEDIANTE ENTRADA XLR Partiendo de la pantalla principal, si pulsa el mando giratorio y pulsable accederá al menú principal. Gire el mando giratorio para seleccionar el menú... -
Página 81: Funcionamiento Mediante Protocolo Art-Net
Encontrará información sobre las subopciones del menú W-DMX y las opciones de ajuste correspondientes en la siguiente tabla. Protocol WDMX Girar el mando giratorio para seleccionar y pulsarlo para confirmar la selección. Girar este mando para cambiar valores o estados y pulsarlo para confirmar los cambios. -
Página 82: Funcionamiento Mediante Protocolo Sacn
FUNCIONAMIENTO MEDIANTE PROTOCOLO SACN Partiendo de la pantalla principal, si pulsa el mando giratorio y pulsable accederá al menú principal. Gire el mando giratorio para seleccionar el menú Control y pulse dicho mando para confirmar su selección. Gire el mando giratorio para seleccionar la opción de menú Protocol, pulse el mando para confirmar y vuelva a girarlo para seleccionar sACN. - Página 83 Partiendo de la pantalla principal, si pulsa el mando giratorio y pulsable accederá al menú principal. Gire el mando giratorio para seleccionar el menú Control y pulse dicho mando para confirmar su selección. Gire el mando giratorio para seleccionar la opción de menú Protocol, pulse el mando para confirmar y vuelva a girarlo para seleccionar Static.
-
Página 84: Configuración Del Sistema (Settings)
CONFIGURACIÓN DEL SISTEMA (Settings) Partiendo de la pantalla principal, si pulsa el mando giratorio y pulsable accederá al menú principal. Gire el mando giratorio para seleccionar el menú de ajustes de sistema Settings y púlselo. Después, accederá al submenú para editar las opciones del submenú, vea la tabla: Settings Girar para seleccionar, pulsar para confirmar, girar para cambiar valores o estados, pulsar para confirmar. -
Página 85: Curvas De Atenuación
Motor Pan Reverse Sin inversión del sentido de giro horizontal Inversión del sentido de giro horizontal Tilt Reverse Sin inversión del sentido de giro vertical Inversión del sentido de giro vertical Angle Ángulo de giro horizontal de 630° Ángulo de giro horizontal de 540° Feedback Sin corrección automática de la posición Se activa la corrección automática de la posición... -
Página 86: Información Del Equipo (Info)
INFORMACIÓN DEL EQUIPO (Info) Partiendo de la pantalla principal, si pulsa el mando giratorio y pulsable accederá al menú principal. Gire el mando giratorio para seleccionar el menú de información del equipo Info y pulse dicho mando para confirmar su selección. Para que aparezca la información deseada, gire el mando giratorio para seleccionar la opción de menú... -
Página 87: Menú De Servicio (Service)
MENÚ DE SERVICIO (Service) Partiendo de la pantalla principal, si pulsa el mando giratorio y pulsable accederá al menú principal. Gire el mando giratorio para seleccionar el menú Service y púlselo para confirmar. Accederá al menú de servicio, véase la tabla: Servicio Girar para seleccionar, pulsar para confirmar, girar para seleccionar el comando, pulsar para confirmar. -
Página 88: Quicklight
QUICKLIGHT Ajuste una escena con las funciones básicas de la cabeza móvil sin controlador externo de manera fácil y rápida. Partiendo de la pantalla principal, si pulsa el mando giratorio y pulsable accederá al menú principal. Gire el mando giratorio para seleccionar el menú Quicklight y púlselo para confirmar. -
Página 89: Instalación Y Montaje
INSTALACIÓN Y MONTAJE Gracias a los pies de goma integrados, el foco puede instalarse en un lugar adecuado sobre una superficie nivelada. El montaje en travesaño se realiza fijando dos soportes de montaje Omega en la base del equipo . El volumen de suministro incluye dos soportes de montaje Omega;... - Página 90 Desconecte totalmente el foco de la red eléctrica (desconecte el enchufe). Afloje los dos tornillos de bayoneta de la cubierta trasera de la cabeza (un cuarto de vuelta en el sentido contrario al de las agujas del reloj) y retire la cubierta de la cabeza del foco. Al hacerlo, tenga cuidado de no dañar el cable de conexión a tierra de la cubierta. Desconecte ambos cables de alimentación eléctrica de la lámpara separando los conectores de los contactos.
-
Página 91: Ajuste De La Lámpara
AJUSTE DE LA LÁMPARA Indicaciones importantes: El ajuste de la lámpara solo puede ser realizado por personal que disponga de la cualificación específica pertinente. Si no está cualificado para ello, no intente ajustar la lámpara por su cuenta: recurra a una empresa profesional. Una lámpara de descarga caliente está... -
Página 92: Tecnología Dmx
TECNOLOGÍA DMX DMX512 DMX (Digital Multiplex) es el nombre de un protocolo universal utilizado como medio de comuni- cación entre dispositivos y controladores. El controlador DMX envía datos DMX a los equipos DMX conectados. Los datos DMX se envían como datos serie que se transmiten de equipo a equipo a través de los conectores XLR «DMX IN»... -
Página 93: Datos Técnicos
DATOS TÉCNICOS Número de artículo: CLOH5 Clase de producto: Cabeza móvil de descarga Tipo: Cabeza móvil Número de lámparas: Tipo de lámpara: Osram de 471 W Temperatura de color Blanco frío 7500 K (lámpara): Función de mezcla de colores: Reproducción de colores High CRI Filter >90 Número de colores en la 13 + posición vacía y posicionamiento continuo... -
Página 94: Declaración Del Fabricante
Refrigeración de la carcasa: Ventiladores controlados por temperatura Dimensiones (anchura x altu- 436 x 662 x 312 mm ra x profundidad, sin soporte de montaje): Peso: 27,3 kg Otras características: Cable de alimentación de 1 m con conector Neutrik powerCON TRUE1 y 2 soportes de montaje Omega incluidos en la entrega. -
Página 95: Polski
To urządzenie zostało zaprojektowane i wyprodukowane przy zastosowaniu najwyższych kryteriów jakościowych w celu zapewnienia wieloletniej bezawaryjnej eksploatacji. Proszę starannie przeczytać niniejszą instrukcję obsługi, aby móc jak najszybciej zacząć użytkować ten produkt marki Cameo Light. Więcej informacji na temat Cameo Light znajdą Państwo na naszej stronie internetowej pod adresem WWW.CAMEOLIGHT.COM. - Página 96 32. Instalacja urządzenia powinna odbywać się, gdy urządzenie nie jest podłączone do źródła zasilania (należy wyjąć wtyczkę z gniazda). 33. Kurz i inne osady wewnątrz urządzenia mogą je uszkodzić. W zależności od warunków otoczenia (kurz, nikotyna, opary itp.) urządzenie powinno być konserwowane lub czyszczone przez wykwalifikowanego specjalistę (usługa nieobjęta gwarancją), aby zapobiec przegrza- niu i nieprawidłowemu działaniu.
-
Página 97: Wprowadzenie
Sieciowe gniazdo wejściowe Neutrik powerCON TRUE1. Napięcie robocze 100–240 V AC / 50–60 Hz. W zestawie znajduje się także odpow- iedni kabel sieciowy. POWER OUT Gniazdo wyjściowe Neutrik powerCON TRUE1. Źródło zasilania dla dodatkowych reflektorów CAMEO. Całkowity pobór prądu wszystkich podłączonych urządzeń nie może przekroczyć wartości w amperach (A) podanej na urządzeniu. - Página 98 FUSE Oprawa na czułe bezpieczniki 5 x 20 mm. WAŻNA WSKAZÓWKA: Bezpiecznik wymieniaj wyłącznie na bezpiecznik tego samego typu i o tych samych parametrach. Jeżeli bezpiecznik zadziała powtórnie, należy zwrócić się do autoryzowanego centrum serwisowego. DMX IN 3- i 5-stykowe złącze męskie XLR do podłączenia kontrolera DMX (np. pulpitu DMX). Przyłącza używać tylko alternatywnie. DMX OUT 3- i 5-stykowe złącze żeńskie XLR do przekazywania sygnału sterującego DMX.
- Página 99 INTERFEJS USB Interfejs USB do aktualizacji oprogramowania sprzętowego urządzenia. W menu serwisowym (Service) podczas aktualizacji USB (USB Update) ustawić status na Tak (Yes). Gdy tylko będzie to możliwe, pobrać najnowsze oprogramowanie układowe ze strony produktu pod adresem www.cameolight.com, rozpakować je i skopiować do folderu o nazwie bez znaków specjalnych w pamięci USB. Odłączyć ruchomą głowicę...
-
Página 100: Obsługa
Po prawidłowym podłączeniu reflektora do zasilania podczas uruchamiania urządzenia i resetowania silników na wyświetlaczu pojawi się logo marki Cameo oraz informacje o modelu urządzenia. Następnie reflektor jest gotowy do pracy w ostatnio wybranym trybie. Jeśli przez około dwie minuty nie nastąpi wprowadzenie żadnych danych, automatycznie włączy się ekran główny. Aby w podmenu przejść... - Página 101 EKRAN GŁÓWNY — TRYBY PRACY DMX I W-DMX W górnym wierszu wyświetlacza pokazuje się informacja, czy i jaki sygnał sterujący dociera do urządzenia, środkowe pole pokazuje adres startowy DMX, tryb DMX i adres następujący po adresie startowym ustawionym w urządzeniu, odpowiadający liczbie kanałów trybu DMX. W dolnym wierszu jest wyświetlana temperatura głowicy urządzenia, tryb pracy lampy i stan W-DMX.
-
Página 102: W-Dmx
EKRAN GŁÓWNY — TRYBY PRACY SLAVE I STATIC W górnym wierszu wyświetlacza pokazuje się informacja, czy i jaki sygnał sterujący dociera do urządzenia, a środkowe pole pokazuje tryb SLAVE lub STATIC z wybraną sceną (Run Scene x). W dolnym wierszu jest wyświetlana temperatura w głowicy urządzenia, tryb pracy lampy i stan W-DMX. -
Página 103: Menu Sterowania (Control)
MENU STEROWANIA (Control) Menu sterowania umożliwia wybór różnych trybów pracy i ich ustawień w odpowiednich podmenu. TRYB PRACY DMX PRZEZ WEJŚCIE XLR Jeśli wyświetlany jest ekran główny i naciśnięte zostanie pokrętło enkodera, nastąpi przejście do menu głównego. Obracając pokrętło enkodera, wybrać menu sterowania Control i nacisnąć enkoder. Obracając pokrętło enkodera, można wybrać pozycję menu Protocol i potwierdzić, naciskając pokrętło. - Página 104 Informacje na temat pozycji podmenu w menu W-DMX i odpowiednich opcji ustawień znajdują się w poniższej tabeli. Protocol WDMX Wybrać opcję przez obrócenie enkodera, potwierdzić przez naciśnięcie, zmienić wartość lub stan przez obrócenie oraz potwierdzić przez naciśnięcie. Powrót następuje za pomocą przycisku BACK. DMX Address Ustawianie adresu startowego DMX 001–512...
- Página 105 TRYB PRACY ZA POŚREDNICTWEM PROTOKOŁU SACN Jeśli wyświetlany jest ekran główny i naciśnięte zostanie pokrętło enkodera, nastąpi przejście do menu głównego. Obracając pokrętło enkodera, wybrać menu sterowania Control i nacisnąć enkoder. Obracając pokrętło enkodera można wybrać pozycję menu Protocol i potwierdzić, naciskając pokrętło enkodera oraz wybrać ponownie sACN, obracając enkoder i potwierdzić, naciskając go. Informacje na temat pozycji podmenu w menu sACN i odpowiednich opcji ustawień...
- Página 106 TRYB STANDALONE STATIC Jeśli wyświetlany jest ekran główny i naciśnięte zostanie pokrętło enkodera, nastąpi przejście do menu głównego. Obracając pokrętło enkodera, wybrać menu sterowania Control i nacisnąć enkoder. Obracając pokrętło enkodera można wybrać pozycję menu Protocol i potwierdzić, naciskając pokrętło enkodera oraz wybrać ponownie Static, obracając enkoder i potwierdzić, naciskając go. Informacje na temat pozycji podmenu w menu Static i odpowiednich opcji ustawień...
-
Página 107: Ustawienia Systemu (Settings)
USTAWIENIA SYSTEMU (Settings) Jeśli wyświetlany jest ekran główny i naciśnięte zostanie pokrętło enkodera, nastąpi przejście do menu głównego. Obrócić pokrętło enkodera, aby wybrać menu ustawień systemowych Settings, a następnie nacisnąć pokrętło. Nastąpi przeniesienie do podmenu edycji elementów podmenu, patrz tabela: Settings Wybrać... -
Página 108: Krzywe Ściemniania
Motor Pan Reverse Zmiana kierunku obrotu w poziomie wyłączona Zmiana kierunku obrotu w poziomie włączona Tilt Reverse Zmiana kierunku obrotu w pionie wyłączona Zmiana kierunku obrotu w pionie włączona Angle 630° — kąt funkcji Pan 540° — kąt funkcji Pan Feedback Automatyczna korekta pozycji głowicy wyłączona Automatyczna korekta pozycji głowicy włączona... -
Página 109: Informacje O Urządzeniu (Info)
INFORMACJE O URZĄDZENIU (Info) Jeśli wyświetlany jest ekran główny i naciśnięte zostanie pokrętło enkodera, nastąpi przejście do menu głównego. Obrócić pokrętło enkodera, aby wybrać menu informacji o urządzeniu Info, a następnie nacisnąć pokrętło. Aby wyświetlić żądane informacje, należy wybrać odpowiednią pozycję menu, obracając pokrętło enkodera, a następnie potwierdzić przez jego naciśnięcie. Info Wybrać, obracając pokrętło enkodera, potwierdzić, naciskając je, a następnie wrócić... -
Página 110: Menu Serwisowe (Service)
MENU SERWISOWE (Service) Jeśli wyświetlany jest ekran główny i naciśnięte zostanie pokrętło enkodera, nastąpi przejście do menu głównego. Należy wybrać menu Service, obracając pokrętło enkodera, i nacisnąć enkoder. Nastąpi przejście do menu serwisowego, patrz tabela: Service Wybieranie opcji przez obrócenie enkodera, potwierdzenie przez naciśnięcie, wybieranie polecenia przez obrócenie oraz potwierdzenie przez naciśnięcie. -
Página 111: Quicklight
QUICKLIGHT Konfiguracja sceny odbywa się szybko i łatwo za pomocą podstawowych funkcji ruchomej głowicy bez zewnętrznego sterownika. Jeśli wyświetlany jest ekran główny i naciśnięte zostanie pokrętło enkodera, nastąpi przejście do menu głównego. Należy wybrać menu Quicklight, obracając pokrętło enkodera, i nacisnąć enkoder. Następnie ponownie wybrać żądaną pozycję menu, obracając pokrętło enkodera, nacisnąć... -
Página 112: Ustawianie I Montaż
USTAWIANIE I MONTAŻ Gumowe nóżki służą do ustawienia reflektora w odpowiednim miejscu na płaskiej powierzchni. Do montażu reflektora na trawersie służą dwa uchwyty Omega, które należy przymocować do podstawy urządzenia . Uchwyty Omega są zawarte w zestawie, natomiast zaciski do trawersu są... - Página 113 Odłącz wszystkie bieguny od sieci zasilania (wyjmij wtyczkę)! Poluzuj dwie śruby bagnetowe pokrywy tylnej głowicy (obróć o ćwierć obrotu w lewo) i zdejmij pokrywę z głowicy reflektora. Upewnij się, że przewód ochronny kabla nie został uszkodzony przez pokrywę. Odłącz dwa kable zasilające lampy na złączach od styków. Dociśnij źródło światła do oprawki i obróć...
-
Página 114: Regulacja Źródła Światła
REGULACJA ŹRÓDŁA ŚWIATŁA Ważne wskazówki: Regulację źródła światła może przeprowadzać tylko odpowiednio wykwalifikowany personel. Użytkownik bez odpowiednich kwalifikacji nie powinien samodzielnie regulować źródła światła, lecz skorzystać z pomocy profesjonalnych firm. W rozgrzanej lampie rozładowczej panuje wysokie ciśnienie, dlatego może dojść do eksplozji. Przed otwarciem reflektora odczekaj przynajmniej 30 minut, aby ostygł. -
Página 115: Technika Dmx
TECHNIKA DMX DMX-512 DMX (Digital Multiplex) to nazwa uniwersalnego protokołu transmisji do komunikacji między odpowiednimi urządzeniami a kontrolerami. Kontroler DMX wysyła dane DMX do podłączonych urządzeń DMX. Transmisja danych DMX następuje zawsze w formie szeregowego strumienia danych, który jest przekazywany z jednego urządzenia do następnego przez znajdujące się w każdym urządzeniu obsługującym standard DMX złącza „DMX IN”... -
Página 116: Dane Techniczne
DANE TECHNICZNE Numer artykułu: CLOH5 Rodzaj produktu: Discharge Moving Light Typ: Moving Head Liczba źródeł światła: Typ źródła światła: 471 W Osram Temperatura barwowa Zimna biel 7500 K (źródło światła): Funkcja mieszania kolorów: Odwzorowanie kolorów Filtr High CRI >90 Liczba kolorów w kole barw: 13 + otwór i ciągłe pozycjonowanie Liczba gobo: 22 + otwór (13 stałych + 9 obrotowych) -
Página 117: Deklaracje Producenta
DEKLARACJE PRODUCENTA GWARANCJA PRODUCENTA I OGRANICZENIE ODPOWIEDZIALNOŚCI Nasze aktualne warunki gwarancji i informacje dotyczące ograniczenia odpowiedzialności znajdą Państwo na stronie: https://cdn-shop. adamhall.com/media/pdf/MANUFACTURERS-DECLARATIONS_CAMEO.pdf. W razie konieczności skorzystania z serwisu proszę skontaktować się z firmą Adam Hall GmbH, Adam-Hall-Str. 1, 61267 Neu Anspach / e-mail Info@adamhall.com / +49 (0)6081 / 9419-0. PRAWIDŁOWA UTYLIZACJA NINIEJSZEGO PRODUKTU (Obowiązuje w Unii Europejskiej i innych krajach europejskich stosujących system sortowania odpadów) Niniejszy symbol na produk- cie lub związanych z nim dokumentach wskazuje, iż... -
Página 118: Italiano
Questo dispositivo è stato sviluppato e prodotto in conformità con elevati standard qualitativi che ne garantiscono il regolare funzionamento per molti anni. Leggete attentamente questo manuale d‘uso per utilizzare al meglio il vostro nuovo prodotto Cameo Light. Per maggiori informazioni su Cameo Light consultare la nostra pagina Web WWW.CAMEOLIGHT.COM. - Página 119 34. La distanza dai materiali infiammabili deve essere di almeno 0,5 m. 35. I cavi di rete utilizzati per l’alimentazione elettrica di più dispositivi devono avere una sezione di almeno 1,5 mm². I cavi impiegati nell’Unione Europea devono essere di tipo H05VV-F o simile. Adam Hall offre cavi idonei. Tali cavi consentono di collegare più dispositivi dalla presa di uscita POWER OUT di un apparecchio alla presa POWER IN di un altro dispositivo.
-
Página 120: Introduzione
TRUE1 in dotazione. POWER OUT Presa di uscita Neutrik powerCON TRUE1. Serve per l'alimentazione di altri proiettori CAMEO. Assicurarsi che il totale della potenza assorbita di tutti i dispositivi collegati all'apparecchio non superi il valore indicato in ampere (A). -
Página 121: Codificatore Rotativo/A Pressione
FUSE Portafusibili per microfusibili (5 x 20 mm). NOTA IMPORTANTE: Sostituire il fusibile solo con un altro dello stesso tipo e con gli stessi valori. Se il fusibile continua a saltare, rivolgersi a un centro di assistenza autorizzato. DMX IN Connettore XLR maschio a 3 e a 5 poli per il collegamento di un dispositivo di controllo DMX (ad es. - Página 122 INTERFACCIA USB Porta USB per l'aggiornamento del firmware del dispositivo. Nel menu Service impostare lo stato USB Update su Yes. Non appena disponibile, scaricare il firmware aggiornato dalla pagina del prodotto su www.cameolight.com, decomprimerlo e copiare i file in una cartella su una chiavetta USB senza caratteri speciali.
-
Página 123: Utilizzo
Non appena il proiettore viene correttamente collegato alla rete elettrica, durante la procedura di avvio e il reset dei motori sul display viene visualizzato il logo Cameo con informazioni sul modello di apparecchio. Al termine della procedura il proiettore è pronto e viene avviata la modalità... - Página 124 SCHERMATA PRINCIPALE DMX E MODALITÀ DI FUNZIONAMENTO W-DMX La riga superiore della schermata indica se sull'apparecchio è presente un segnale di controllo, il campo centrale mostra l'indirizzo di avvio DMX, la modalità DMX e l'indirizzo successivo all'indirizzo di avvio impostato nell'apparecchio, corrispondente al numero di canali della modalità...
-
Página 125: W-Dmx
SCHERMATA PRINCIPALE MODALITÀ SLAVE E STATIC La riga superiore della schermata indica se sull'apparecchio è presente un segnale di controllo e il campo centrale la modalità operativa SLAVE o STATIC con la scena selezionata (Run Scene x). La riga in basso mostra la temperatura della testa del dispositivo, la modalità della lampada e lo stato W-DMX. -
Página 126: Menu Di Controllo (Control)
MENU DI CONTROLLO (Control) Il menu di controllo consente di selezionare le varie modalità di funzionamento e le relative impostazioni dai sottomenu corrispondenti. FUNZIONAMENTO DMX TRAMITE INGRESSO XLR Premere il codificatore rotativo/a pressione per accedere al menu principale dalla schermata principale. Selezionare il menu di controllo Control ruotando e successivamente premendo il codificatore. - Página 127 Le informazioni sulle voci del menu W-DMX e sulle relative impostazioni si trovano nella tabella sottostante. Protocol WDMX Selezionare ruotando il codificatore, confermare premendo, modificare il valore o lo stato ruotando e confermare premendo. Tornare indietro con BACK. DMX Address Impostazione dell'indirizzo di avvio DMX 001 - 512 DMX Mode...
- Página 128 FUNZIONAMENTO TRAMITE PROTOCOLLO SACN Premere il codificatore rotativo/a pressione per accedere al menu principale dalla schermata principale. Selezionare il menu di controllo Control ruotando e successivamente premendo il codificatore. Ruotare il codificatore per selezionare la voce di menu Protocol, confermare premendo il codificatore e, ruotando nuovamente il codificatore, selezionare sACN e confermare premendolo.
- Página 129 MODALITÀ DI FUNZIONAMENTO STAND-ALONE STATIC Premere il codificatore rotativo/a pressione per accedere al menu principale dalla schermata principale. Selezionare il menu di controllo Control ruotando e successivamente premendo il codificatore. Ruotare il codificatore per selezionare la voce di menu Protocol, confermare premendo il codificatore e, ruotando nuovamente il codificatore, selezionare Static e confermare premendolo.
-
Página 130: Impostazioni Di Sistema (Settings)
IMPOSTAZIONI DI SISTEMA (Settings) Premere il codificatore rotativo/a pressione per accedere al menu principale dalla schermata principale. Ruotando il codificatore selezionare il menu delle impostazioni di sistema Settings, quindi premere il codificatore. Si accede così al sottomenu per la modifica delle voci di sottomenu, v. tabella: Settings Selezionare ruotando, confermare premendo, modificare il valore o lo stato ruotando e confermare premendo. -
Página 131: Curve Dimmer
Motore Pan Reverse Nessuna inversione della direzione di giro orizzontale Inversione della direzione di giro orizzontale Tilt Reverse Nessuna inversione della direzione di giro verticale Inversione della direzione di giro verticale Angle Angolo pan 630° Angolo pan 540° Feedback Correzione della posizione automatica disattivata Correzione della posizione automatica attivata Color Stato (Stan-... -
Página 132: Informazioni Sul Dispositivo(Info)
INFORMAZIONI SUL DISPOSITIVO(Info) Premere il codificatore rotativo/a pressione per accedere al menu principale dalla schermata principale. Ruotando il codificatore, selezionare il menu Info con le informazioni sul dispositivo, quindi premere il codificatore. Per visualizzare le informazioni desiderate, selezionare la voce di menu corrispondente ruotando il codificatore, quindi confermare premendo il codificatore. Informazioni Selezione ruotando il codificatore, conferma premendo, indietro con BACK. -
Página 133: Menu Assistenza (Service)
MENU ASSISTENZA (Service) Premere il codificatore rotativo/a pressione per accedere al menu principale dalla schermata principale. Selezionare Service ruotando il codificatore, quindi premere il codificatore per confermare. Si accede così al menu Assistenza, v. tabella: Assistenza Selezionare ruotando, confermare premendo, selezionare il comando ruotando e confermare premendo. Tornare indietro con BACK. Default Values Factory Ripristino delle impostazioni di fabbrica... -
Página 134: Quicklight
QUICKLIGHT Impostare una scena in modo semplice e veloce utilizzando le funzioni di base della testa mobile senza un controller esterno. Premere il codificatore rotativo/a pressione per accedere al menu principale dalla schermata principale. Selezionare Quicklight ruotando il codificatore, quindi premere il codificatore per confermare. Ora selezionare nuovamente la voce di menu desiderata ruotando il codificatore, premere il codificatore e impostare il valore da 000 a 255 come desiderato (modificare il valore ruotando, confermare premendo, tornare indietro con BACK). -
Página 135: Installazione E Montaggio
INSTALLAZIONE E MONTAGGIO Grazie ai piedini in gomma integrati, il proiettore può essere collocato in un punto adatto su una superficie piana. Il montaggio a una traver- sa viene effettuato tramite due staffe a omega, fissate alla base del dispositivo . - Página 136 Scollegare tutti i poli del proiettore dalla rete elettrica (estrarre la spina)! Allentare le due viti a baionetta del coperchio protettivo posteriore (un quarto di giro in senso antiorario) e rimuovere il coperchio dalla testa del proiettore. Assicurarsi che il cavo del conduttore di protezione non venga danneggiato dal coperchio. Scollegare i due cavi di alimentazione della lampada dai connettori dai contatti.
-
Página 137: Regolazione Della Lampada
REGOLAZIONE DELLA LAMPADA Note importanti: La regolazione della lampada deve essere eseguita solo da personale specializzato. Se non si dispone di queste qualifiche, evitare di effettuare l’installazione autonomamente. Ricorrere invece all’ausilio di professionisti. Una lampada a scarica calda è sottoposta ad alta pressione e può quindi esplodere spontaneamente. Lasciare raffreddare il proiettore per almeno 30 minuti prima di aprirlo. -
Página 138: Tecnologia Dmx
TECNOLOGIA DMX DMX512 DMX (Digital Multiplex) è la sigla di un protocollo di trasmissione universale per la comunicazione tra dispositivi e controller. Un controller DMX invia dati DMX ai dispositivi DMX collegati. I dati DMX vengono sempre trasmessi come flusso di dati seriale, che viene inoltrato da un dispositivo collegato al successivo attraverso le connessioni (connettori XLR) DMX IN e DMX OUT presenti per ogni dispositivo DMX compatibile, per un massimo di 32 dispositivi. -
Página 139: Dati Tecnici
DATI TECNICI Codice articolo: CLOH5 Tipologia di prodotto: Discharge Moving Light Tipo: Testa mobile Numero lampade: Tipo di lampada: 471 W Osram Temperatura del colore Bianco freddo 7500 K (lampada): Funzione mix cromatico: Resa cromatica Filtro High CRI >90 Ruota colori numero colori: 13 + libero e posizionamento continuo Numero di gobo: 22 + libero (13 fissi + 9 rotanti) -
Página 140: Dichiarazioni Del Produttore
DICHIARAZIONI DEL PRODUTTORE MANUFACTURER’S WARRANTY & LIMITATION OF LIABILITY Le nostre attuali condizioni di garanzia e la limitazione di responsabilità sono consultabili alla pagina: https://cdn-shop.adamhall.com/media/ pdf/MANUFACTURERS-DECLARATIONS_CAMEO.pdf. In caso di assistenza, rivolgersi a Adam Hall GmbH, Adam-Hall-Str. 1, 61267 Neu Anspach / E-mail Info@adamhall.com / +49 (0)6081 / 9419-0. CORRETTO SMALTIMENTO DEL PRODOTTO (In vigore nell‘Unione Europea e in altri Paesi europei in cui si attui la raccolta differenziata) Questo simbolo apposto sul prodotto o sui relativi documenti indica che, per evitare danni all‘ambiente e alle persone causati da uno smaltimento incontrollato dei rifiuti,... -
Página 141: Dmx
DMX CONTROL / DMX STEUERUNG / PILOTAGE DMX / CONTROL DMX / STEROWANIE DMX / CONTROLLO DMX Standard Extended Function Values Sub-Group 0% to 100% Pan fine 0% to 100% Tilt 0% to 100% Tilt Tilt fine 0% to 100% Dimmer 0% to 100% Dimmer... - Página 142 Color off (open) Open -> Deep Red Deep Red Deep Red -> Medium Blue Medium Blue Medium Blue -> Yellow Yellow Yellow -> Magenta Magenta Magenta -> Deep Green Deep Green Deep Green -> Lavender Lavender Lavender -> Peacock Peacock Peacock ->...
- Página 143 Open Open with Flat Field Filter Open -> Gobo1 Gobo 1 Gobo 1 -> Gobo 2 Gobo 2 Gobo 2 -> Gobo 3 Gobo 3 Gobo 3 -> Gobo 4 Gobo 4 Gobo 4 -> Gobo 5 Gobo 5 Gobo 5 -> Gobo 6 Gobo 6 Gobo 6 ->...
- Página 144 Gobo Position 0° ... 540° Gobo Rotation, fast -> slow, fwd Gobo 1 Rotation Gobo Rotation Stop Gobo Rotation, slow -> fast -> , bwb Gobo 1 Rotation Gobo indexing fine fine Open Gobo 1 Gobo 1 -> Gobo 2 Gobo 2 Gobo 2 ->...
- Página 145 Zoom narrow to wide Zoom Zoom fine narrow to wide Focus 0% to 100% Focus Focus fine 0% to 100% no Prism Prism 1 Prism 1 Prism 1 (6x linear) Prism position 0° ... 540° Prism rotation, fast -> slow, fwd Prism 1 rotation Prism rotation Prism rotation Stop...
- Página 146 Blackout while Color moving off (hold 3s) no function Invert Pan on (hold 3s) Invert Pan off (hold 3s) Invert Tilt on (hold 3s) Invert Tilt off (hold 3s) Pan Angle 540° (hold 3s) Pan Angle 630° (hold 3s) no function Lamp on (hold 3s) Lamp off (hold 3s) Lamp Mode Standard (hold 3s)
- Página 148 CAMEOLIGHT.COM Adam Hall GmbH | Adam-Hall-Str. 1 | 61267 Neu-Anspach | Germany Phone: +49 6081 9419-0 | adamhall.com REV: 01...