
Manuales relacionados para Klarstein 10032915


Resumen de contenidos para Klarstein 10032915
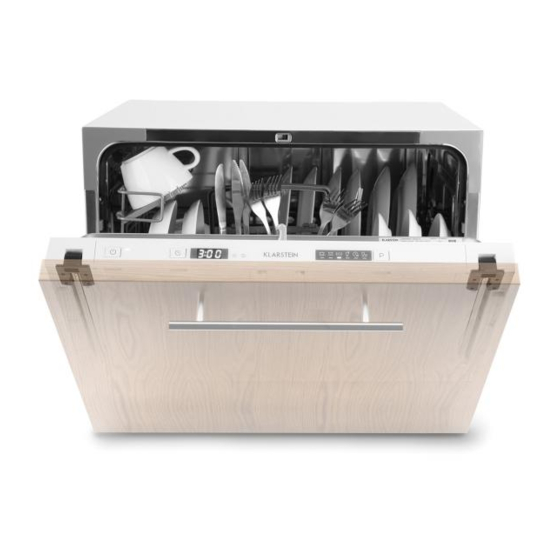
- Página 1 Einbau-Geschirrspüler Einbau-Geschirrspüler Built-in Dishwasher Lave-vaisselle encastrable Lavavajillas empotrado Lavastoviglie a incasso 10032915...
-
Página 3: Tabla De Contenido
Sehr geehrter Kunde, wir gratulieren Ihnen zum Erwerb Ihres Gerätes. Lesen Sie die folgenden Hinweise sorgfältig durch und befolgen Sie diese, um möglichen Schäden vorzubeugen. Für Schäden, die durch Missachtung der Hinweise und unsachgemäßen Gebrauch entstehen, übernehmen wir keine Haftung. Scannen Sie den QR-Code, um Zugriff auf die aktuellste Bedienungsanleitung und weitere Informationen rund um das Produkt zu erhalten. -
Página 4: Produktdatenblatt
PRODUKTDATENBLATT Angaben nach Deligiertenverordnung (EU) 1059/2010 vom 28. September 2010 Hersteller Chal-Tec GmbH Modellkennung 10032915 Nennkapazität in Standardgedecken Energieeffizienzklasse jährlicher Energieverbrauch (AE 174 kW Leistungsaufnahme im ausgeschalteten Zustand 0,45 W Leistungsaufnahme im eingeschalteten Zustand 0,49 W gewichteter jährlicher Wasserverbrauch (AW... -
Página 5: Sicherheitshinweise
SICHERHEITSHINWEISE Lesen Sie sich alle Hinweise durch und bewahren Sie die Anleitung zum Nachschlagen gut auf. Allgemeine Sicherheitshinweise • Das Gerät ist nicht für den kommerziellen Gebrauch, sondern nur für Gebrauch im Haushalt und in ähnlichen Umgebungen vorgesehen. • Kinder über 8 Jahren, physisch und körperlich eingeschränkte Menschen sollten das Gerät nur benutzen, wenn sie vorher von einer Aufsichtsperson ausführlich mit den Funktionen und den Sicherheitsvorkehrungen vertraut gemacht wurden. -
Página 6: Kurzanleitung
KURZANLEITUNG Gerät einschalten Drücken Sie auf die Power-Taste und öffnen Sie die Tür. Spülmittel einfüllen Befüllen Sie das große Fach (A) vor jedem Spülpro- gramm. Befüllen Sie das kleine Fach nur bei Programmen mit Vorwäsche. Klarspüler überprüfen Über die Anzeige C erkennen Sie, ob sich noch genug Klarspüler in der Kammer befindet. -
Página 7: Geräteübersicht Und Bedienfeld
GERÄTEÜBERSICHT UND BEDIENFELD vorne hinten Front view Back View 1 Spülmaschinensalzbehälter 6 Sprüharme 2 Reinigungsmittelkammer 7 Becherablage 3 Besteckkorb 8 Korb 4 Filtersystem 8 Wassereinlassöffnun9 5 Klarspülbehälter 10 Wasserauslassöffnung... - Página 8 1 Power-Taste: Gerät ein- und ausschalten. Salz-Anzeige leuchtet wenn Spülsalz nachge- füllt werden muss. Zeitverzögerter Start: Drücken Sie die Taste wenn Sie möchten, dass das Gerät erst später startet. Waschprogramm-Auswahl: Drücken Sie mehr- mals auf die Taste und wählen Sie das gewünschte Programm aus.
-
Página 9: Installation
INSTALLATION • Stellen Sie das Gerät in der Nähe eines Wasserzulaufs bzw. Abflusses und einer Steckdose auf. • Achten Sie darauf, dass die Schläuche und der Stecker jederzeit zugänglich sind. Gerät aufstellen Stellen Sie das Gerät am bevorzugten Ort auf. Die Rückseite sollte zur Wand zeigen, Die Seiten zum Einbauschrank oder einer Wand. - Página 10 1 b Montage mit Türverkleidung Beidseitig Zugänge für Electrical, drain Stromvesorgung, Wasserzulauf und and water supply Wasserablauf line entrances, both sides. Platz im Einbauschrank Space of cabinet 2 Türverkleidung Das Gewicht der Türverkleidung sollte mindestens 3 kg und höchstens 4 kg betragen. decorative panel Türverkleidung Maße A und B hängen vom Griff...
- Página 11 4 Anbringen der Türverkleidung (falls erforderlich) 3 Anbringen der Türverkleidung (falls erforderlich) Stellfuß supporting foot...
- Página 12 5 Stellen Sie den Geschirrspüler in die Öffnung, aber nicht vollständig. Die Standfüße zuerst mit der Auflagefläche ausrichten dann das Gerät vollständig hineinstellen. Blende Decorative panel...
- Página 13 6 Türverkleidung montieren Gehen Sie vor wie im Bild unten. Erste montiere Sie die Scharniere zwischen der Schrankauflage und der Türverkleidung mit insgesamt 16 Schrauben. Decorative panel Türverkleidung 16 Schrauben Screw,in all 16 Screw, in all 8 8 Schrauben Cabinet base board Auflagefläche...
- Página 14 Wasserzulauf anbringen und abnehmen Verwenden Sie für den Anschluss neue Schläuche. Benutzen Sie keine alten Schläuche. Der Wasserdruck muss zwischen 0.04-1 MPa betragen. Falls der Druck darunter liegt, fragen Sie einen Fachbetrieb um Rat. • Zulaufschlauch anbringen: Wickeln Sie den Sicherheits-Zulaufschlauch komplett von der Halterung an der Geräterückseite.
-
Página 15: Vor Dem Ersten Betrieb
Abwasser auffangen Falls sich ihr Abfluss mehr als 1 Meter unter dem Gerät befindet können Sie das Wasser nicht direkt in den Abfluss leiten. In diesem Fall müssen Sie das Abwasser in einem entsprechenden Auffangbehälter auffangen, der sich tiefer als der Wasserauslasses befinden muss. Verlängerungsschlauch Falls Sie einen Verlängerungsschlauch benötigen, verwenden Sie einen ähnlichen Typ und achten Sie darauf, dass er nicht länger als 4 Meter ist. - Página 16 • Entfernen Sie den Korb und schrauben Sie den Deckel des Salzbehälter auf (1). • Geben Sie vor der ersten Wäsche einen Liter Wasser in den Salzbehälter. • Stecken Sie den mitgelieferten Trichter in den Salzbehälter und geben Sie etwa 1,5 kg Spülsalz hinzu (2). Es ist normal, wenn etwas Wasser aus dem Behälter läuft.
- Página 17 Klarspüler einfüllen Der Klarspüler sorgt dafür, dass das Wasser keine Tropfen auf dem Geschirr bildet, die Flecken und Streifen hinterlassen können. Das Gerät ist für flüssigen Klarspüler ausgelegt. Die Klarspülkammer befindet sich innen an der Tür, neben der Spülmittelkammer. Um Spülmittel einzufüllen, öffnen Sie die Verschlusskappe und füllen Sie Klarspüler ein, bis die Kontrollanzeige schwarz ist.
- Página 18 Klarspülmenge einstellen Die Klarspülmenge lässt sich in 4-6 Stufen verstellen. Beginnen Sie mit Stufe 4. Wenn es zu Fleckenbildung und schlechter Trocknung kommt erhöhen Sie die Klarspülmenge, indem Sie den Deckel zur Kammer abnehmen und die Wahlscheibe auf 5 drehen. Falls es danach immer noch Probleme mit Fleckenbildung und Trocknung gibt, erhöhen sie die Klarspülmenge solange auf die nächste Stufe bis das Geschirr fleckenfrei ist.
- Página 19 So befüllen Sie die Spülmittelkammer: Zum Öffnen drücken Push latch to open • Falls die Kammer geschlossen ist, drücken Sie auf die Verriegelung, um sie zu öffnen. • Geben Sie das Spülmittel erst unmittelbar vor dem Start hinein. • Benutzen Sie nur Spülmittel, die ausdrücklich für Geschirrspüler geeignet sind. Füllen Sie das Spülmittel in die richtige Kammer: A = Hauptkammer für das Spülmittel B = Kammer für das Vorspülmittel.
-
Página 20: Geschirrspüler Richtig Beladen
GESCHIRRSPÜLER RICHTIG BELADEN • Wir empfehlen Ihnen nur Geschirr zu verwenden, das für Geschirrspüler geeignet ist. • Benutzen Sie nur milde Spülmittel, wie unter „Spülmittelarten“ im vorherigen Kapitel beschrieben. • Für hitzeempfindliches Geschirr empfehlen wir ein Programm mit geringerer Temperatur. •... - Página 21 Richtige Beladung der Körbe und Besteckablagen Geschirr Tassen Servierschüssel Untertassen Glasses Servierteller Schüssel großeTeller tiefe Teller Kuchenteller Besteckkorb Servierlöffel Besteck 1 Gabeln 2 Esslöffel 3 Dessertlöffel 4 Teelöffel 5 Messer 6 Servierlöffel 7 Soßenkelle 8 Servierkabeln 1 Forks Legen Sie das Besteck einzeln in die Besteckablage entsprechend den vorgegebenen Positionen (siehe 2 Soup spoons Abbildung) und achten Sie darauf, dass sich das Geschirr nicht berührt oder überlappt, da es richtig sauber wird.
-
Página 22: Spülprogramme
SPÜLPROGRAMME Spülmittel Laufzeit Verbrauch Verbrauch Programm Beschreibung Spülzyklus Vor/Haupt Minuten Liter Für stark verschmutzte Vorwäsche (50 °C) Teile, wie Töpfen, Pfannen Wäsche (70 °C) 3/15 g oder und Geschirr mit angetrock- Spülen 3-in-1-Tab Intensive Intensiv neten Essensresten. Spülen (70 °C) Trocknen Für unempfindliches, Vorwäsche... -
Página 23: Inbetriebnahme Und Bedienung
INBETRIEBNAHME UND BEDIENUNG Programm starten/anhalten 1. Ziehen Sie die Körbe heraus, beladen Sie sie und schieben Sie die Körbe wieder ins Gerät. 2. Füllen Sie das Spülmittel ein und schließen Sie die Klappe. 3. Stecken Sie den Stecker in die Steckdose und drehen Sie den Wasserhahn voll auf. 4. -
Página 24: Reinigung Und Pflege
REINIGUNG UND PFLEGE Filtersystem Der Filter verhindert, dass grobe Rückstände und andere große Essensreste in die Pumpe gelangen. Das Filtersystem besteht aus einem Grobfilter, einen Flachfilter (Hauptfilter) und einem Feinfilter. Grobfilter (C) Grobe Rückstände, wie Knochen oder Glassplitter werden vom Grobfilter aufgenommen. - Página 25 Geschirrspüler reinigen • Reinigen Sie das Bedienfeld mit einem leicht feuchten Lappen und trocknen Sie es danach sorgfältig ab. • Pflegen Sie das Gehäuse mit einem geeigneten Polierwachs. • Benutzen Sie zur Reinigung keine scharfen Gegenstände, Scheuerschwämme oder aggressive Reinigungsmittel. •...
-
Página 26: Fehlersuche Und Fehlerbehebung
FEHLERSUCHE UND FEHLERBEHEBUNG Fehler Mögliche Ursache Lösung Der Geschirrspüler Die Sicherung ist raus oder Ersetzen Sie die Sicherung oder legen Sie den startet nicht. kaputt. Schalter wieder um. Entfernen Sie alle anderen Geräte, die am selbst Stromkreislauf hängen. Kein Strom. Versichern Sie sich, dass das Gerät eingeschaltet, die Tür fest geschlossen ist und das Netzkabel fest in der Steckdose steckt. - Página 27 Fehler Mögliche Ursache Lösung Klopfgeräusche im Der Sprüharm schlägt gegen Unterbrechen Sie das Programm und platzieren Innenraum. einen Gegenstand im Korb. Sie das Geschirr so, dass der Sprüharm nicht be- hindert wird. Rasselnde Geräusche Das Geschirr steht nicht sicher. Unterbrechen Sie Programm und platzieren Sie im Innenraum.
-
Página 28: Konformitätserklärung
Fehlercodes Bei einigen Störungen zeigt das Display einen Fehlercode an, um Sie zu warnen: Code Bedeutung Mögliche Ursache Wasserzufuhr gestört. Der Hahn ist nicht geöffnet, die Wasserzufuhr ist unterbrochen oder der Wasserdruck ist zu gering. Die erforderliche Tempera- Fehlfunktion des Heizelements tur wird nicht erreicht. - Página 29 Dear Customer, Congratulations on purchasing this equipment. Please read this manual carefully and take care of the following hints to avoid damages. Any failure caused by ignoring the items and cautions mentioned in the instruction manual are not covered by our warranty and any liability.
-
Página 30: Product Fiche
PRODUCT FICHE Information according to Commission Delegated Regulation (EU) 1059/2010 Manufacturer Chal-Tec GmbH Type / Description 10032915 Standard place settings Energy efficiency class Annual energy consumption (AE 174 kW Energy consumption of the standard cleaning cycle Power consumption in off-mode 0.45 W... -
Página 31: Safety Instructions
SAFETY INSTRUCTIONS Read all the safety and operating instructions carefully and retain them for future reference. • This appliance is intended to be used in household and similar applications such as: staff kitchen areas in shops, offices and other working environments; farm houses; by clients in hotels, motels and other residen- tial type environments;... -
Página 32: Quick Operation Guide
QUICK OPERATION GUIDE Press the Power switch button to switch on the appliance, Open the door. Switch on the appliance Fill the detergent Big Compartment (A): with each wash cycle. dispenser Small Compartment (B): for programmes with prewash only. Check the rinse aid level Check the rinse aid level panel (C) if provided. -
Página 33: Product Description And Control Panel
PRODUCT DESCRIPTION AND CONTROL PANEL Front view Back View 1 Salt container 6 Spray arms 2 Detergent dispenser 7 Cup shelf 3 Cutlery basket 8 Basket 4 Filter assembly 9 Inlet pipe connector 5 Rinse aid dispenser 10 Drain pipe connector... - Página 34 1 Power Button: To turn on/off the power supply. Salt warning light : To be on when the softener needs to be refilled. 2 Delay button : To press the button to delay. Program indicator: Intensive, Normal, ECO, Glass, 90 min, Rapid. Display screen: to show the reminding time and the state(running state, delay time etc ).
-
Página 35: Installation
INSTALLATION • The installation position of dishwasher should be near the existing inlet and drain hoses and power cord. • One side of the cabinet sink should be chosen to facilitate the connection of drain hoses of the dishwasher. Positioning the appliance Position the appliance in the desired location. - Página 36 1 b Installation with decorative door Electrical, drain Electrical, drain and water supply and water supply line entrances, line entrances, both sides both sides. Space of cabinet Space of cabinet 2 Türverkleidung The weight of the decorative panel should be min 3 kg - max 4 kg.
- Página 37 4 Install the supporting feet into the base 3 Assemble the decorative panel. (if required) supporting foot supporting foot...
- Página 38 5 Install the dishwasher in aperture,but not full, as figure, supporting feet, let its bottom align aperture’s base, then push dishwasher full.. Cabinet base board Fix the hinge with screws, in all 16 Decorative panel...
- Página 39 6 Türverkleidung montieren Assemble the decorative door on the dishwasher, as figure. First install screw between the cabinet base board and decorative panel,in all 16;then pull glide from out door groove ,case 8-screw between decorative panels and glide. Decorative panel 16 Schrauben Screw,in all 16 Screw, in all 8...
-
Página 40: Important
Water Supply Hose The appliance must be connected to the water mains using new hose-sets. The old hose- sets should not be reused. Water pressure must be between 0,04 MPa and 1 MPa. If the pressure is below the minimum consult our Service Department for advice. •... -
Página 41: Before First Use
Drain Excess Water If the sink is 1000 higher from the floor, the excess water in hoses cannot be drained directly into the sink. It will be necessary to drain excess water from hoses into a bowl or suitable container that is held outside and lower than the sink. - Página 42 • Remove the basket and then unscrew and remove the cap from the salt container. • Before first wash, add 1 lt. of water in the salt container of your machine. • Place the end of the funnel (supplied) into the hole and introduce about 1kg of salt. •...
- Página 43 Fill the Rinse Aid Dispenser The rinse aid is released during the final rinse to prevent water from forming droplets on your dishes. That can leave spots and streaks. It also improves drying by allowing water to sheet off the dishes. Your dishwasher is designed to use liquid rinse aids.
- Página 44 Adjusting Rinse Aid Dispenser The rinse aid dispenser has six or four settings. Always start with the dispenser set on „4“. If spots and poor drying are problems, increase the amount of rinse aid dis- pensed by removing the dispenser lid and rotating the dial to „5“. If the dishes still are not drying properly or are spotted, adjust the dial to the next higher number until your dishes are spot-free.
- Página 45 Refilling the Detergent Dispenser: Push latch to open If the lid is closed: press release button. The lid springs open. Always add the detergent just before starting each wash cycle. Use only detergent specifically made for use in dishwashers. Keep your detergent fresh and dry. Fill in Detergent •...
-
Página 46: Loading The Dishwasher
LOADING THE DISHWASHER • Consider buying utensils which are identified as dishwasher-proof. • Use a mild detergent that is described as ‚kind of dishes‘ . If necessary, seek further information from deter- gent manufacturers. • For particular items, select a programme with as low a temperature. •... - Página 47 Loading the baskets correctly Dishes Cups Medium serving bowl Saucers Glasses Oval platter Dish Dinner plates Soup plates Dessert dishes Cutlery basket Serving spoons Cutlery 1 Forks 2 Soup spoons 3 Dessert spoons 4 Teaspoon 5 Knives 6 Serving spoons 7 Gravy ladles 8 Serving forks 1 Forks...
-
Página 48: Washing Programmes
WASHING PROGRAMMES Cycle Selection Description of Detergent Time Energy Water Program Information Cycle pre/main liter For heaviest soiled crockery, Pre-wash (50 °C) and normally soiled pots Wash (70 °C) 3/15 g or pans dishes etc with dried Rinse 3-in-1 Intensive Intensive on soiling. -
Página 49: Use And Operation
USE AND OPERATION Starting a Wash Cycle 1. Draw out the basket. Pour in the detergent. 2. Insert the plug into the socket. . Make sure that the water supply is turned on to full pressure. 3. Press the program button , the wash program will be changed as follows direction: Intensive >... -
Página 51: Cleaning And Care
CLEANING AND CARE Filtering System The filter prevent larger remnants of food or other objects from getting inside the pump. The filter system consists of a coarse filter, a flat (Main filter) and a micro filter (fine filter). Coarse filter (C) Larger items, such as pieces of bone or glass, that could block the drain are trapped in the coarse filter. - Página 52 Caring for the Dishwasher • The control panel can be cleaned by using a lightly dampened cloth and dry thoroughly. • The exterior use a good appliance polish wax. • Never use sharp objects, scouring pads or harsh cleaners on any part of the dishwasher. •...
-
Página 53: Troubleshooting
TROUBLESHOOTING Problem Possible Causes What to do Dishwasher doesn‘t Fuse blown, or the circuit Replace fuse or reset circuit breaker. Remove any start. breaker tripped. other appliances sharing the same circuit with the dishwasher. Power supply is not turned on. Make sure the dishwasher is turned on and the door is closed securely. - Página 54 knocking noise in the The sp ay arm is knocking Interrupt the programme, and rearrange the items wash cabinet. against an item in a basket. which are obstructing the spray arm. Rattling noise in the Item of crockery are insecure Interrupt the programme, and rearrange the items wash cabinet.
-
Página 55: Disposal Considerations
Error Codes When some malfunctions come on, the appliance will display error codes to warn you: Code Meanings Possible Cause Longer inlet time. Faucets is not opened, or water intake is restricted,or water pres- sure is too low. Overflow. Some element of dishwasher leaks. If overflow occurs, turn off the main water supply before calling a service. - Página 56 Chère cliente, cher client, Toutes nos félicitations pour l’ a cquisition de ce nouvel appareil. Veuillez lire attentivement et respecter les instructions de ce mode d’ e mploi afin d’ é viter d’ é ventuels dommages. Nous ne saurions être tenus pour responsables des dommages dus au non-respect des consignes et à...
-
Página 57: Fiche De Données Produit
FICHE DE DONNÉES PRODUIT Informations selon la réglementation déléguée (UE) 1059/2010 du 28 septembre 2010 Fabricant Chal-Tec GmbH Référence du modèle 10032915 Capacité nominale de couverts standard Classe d'efficacité énergétique Consommation annuelle d'énergie (AE 174 kW Consommation éteint 0,45 W... -
Página 58: Consignes De Sécurité
CONSIGNES DE SÉCURITÉ Lisez toutes les instructions et gardez-les pour vous y référer ultérieurement. Consignes générales de sécurité • L'appareil n'est pas destiné à un usage commercial, mais uniquement pour un usage domestique et similaire. • Les enfants de plus de 8 ans, les personnes physiquement ou psychiquement handicapées ne doivent utiliser l'appareil que s'ils ont été... -
Página 59: Guide De Démarrage Rapide
GUIDE DE DÉMARRAGE RAPIDE Démarrage de l'appareil Appuyez sur la touche Power et ouvrez la porte Remplir de produit de Remplissez le grand compartiment (A) avant chaque programme de lavage lavage Vérification du liquide de Le témoin C vous permet de détecter s'il se trouve rinçage encore assez de liquide de rinçage dans la chambre. -
Página 60: Aperçu De L'appareil Et Panneau De Commande
APERÇU DE L‘APPAREIL ET PANNEAU DE COMMANDE avant arrière Front view Back View 1 Compartiment de sel régénérant 6 Bras de lavage 2 Compartiment de produit de lavage 7 Support pour les verres 3 Panier à couverts 8 Panier 4 Système de filtration 8 Ouverture d'admission d'eau 5 Réservoir de liquide de rinçage 10 Ouverture d'évacuation d'eau... - Página 61 1 Touche power pour allumer ou éteindre l'appareil Témoin de sel qui s‘allume lorsqu‘il est néces- saire de faire l‘appoint Démarrage différé : appuyez sur cette touche si vous souhaitez que l'appareil démarre plus tard Choix du programme de lavage : appuyez plusi- eurs fois sur la touche et choisissez votre program- L‘écran affiche la durée restante et le statut de la machine...
-
Página 62: Installation
INSTALLATION • Placez l'appareil près d'une admission ou d'une évacuation d'eau et d'une prise de courant. • Assurez-vous que les tuyaux et la fiche restent toujours accessibles. Installation de l'appareil Installez l'appareil à l'emplacement choisi. Le dos doit être dirigé vers le mur, les côtés vers la niche d'encastrement ou un mur. - Página 63 1 b Montage avec habillage de porte Ouvertures des deux côtés Electrical, drain pour l‘alimentation électrique, and water supply l‘alimentation en eau et l‘évacuation line entrances, both sides. Espace d‘encastrement Space of cabinet 2 Habillage de porte Le poids de l‘habillage de porte doit être compris entre 3 kg minimum et 4 kg.
- Página 64 4 Montage de l‘habillage de porte (si nécessaire) 3 Montage de l‘habillage de porte (si nécessaire) Pieds réglable supporting foot...
- Página 65 5 Placez le lave-vaisselle dans l‘ouverture, mais ne l‘insérez pas complètement. Alignez d‘abord les pieds avec la surface d‘appui puis placez l‘appareil complètement en place. Panneau décoratif Decorative panel...
- Página 66 6 Montage de l‘habillage de porte Procédez comme sur l'illustration ci-dessous. Montez d'abord les charnières entre le support de la niche et le panneau de porte avec 16 vis au total. Decorative panel Habillage de porte 16 vis Screw,in all 16 Screw, in all 8 8 vis Cabinet base board...
- Página 67 Installation et démontage de l‘admission d‘eau Pour le branchement, utilisez des tuyaux neufs. N'utilisez pas de tuyaux usagés. La pression de l'eau doit être comprise entre 0.04-1 MPa. Si la pression est inférieure, demandez conseil à un professionnel. • Installation de l'admission d'eau : Déroulez complètement le tuyau d'entrée de sécurité...
-
Página 68: Avant La Première Utilisation
Récupération des eaux usées Si votre évacuation se trouve plus d'un mètre au-dessous de l'appareil, vous ne pouvez pas diriger les eaux usées directement dans l'évacuation. Dans ce cas, vous devez récupérer les eaux usées dans un bac récupérateur à cet effet qui doit être situé... - Página 69 • Retirez le panier et dévissez le couvercle du réservoir à sel (1). • Ajouter un litre d'eau dans le récipient à sel avant de le premier lavage. • Placez l'entonnoir fourni dans le réservoir à sel et ajoutez environ 1,5 kg de sel de rinçage (2). Il est normal qu'un peu d'eau s'écoule du conteneur.
- Página 70 Ajout du liquide de rinçage Le produit de rinçage empêche l'eau de former des gouttes sur la vaisselle, ce qui peut laisser des taches et des traces. L'appareil est conçu pour un produit de rinçage liquide. Le réservoir de liquide de rinçage est situé à...
- Página 71 Réglage de la quantité de liquide de rinçage La quantité de liquide de rinçage se règle en 4-6 niveaux. Commencez par le niveau 4. Si vous remarquez une coloration et un mauvais séchage, augmentez la quantité de produit de rinçage en retirant le couvercle de la chambre et en tournant le bouton sur 5.
- Página 72 Comment remplir le réservoir de produit vaisselle : appuyez pour ouvrir Push latch to open • Si le réservoir est fermé, appuyez sur le loquet pour l'ouvrir. • Ajoutez le détergent juste avant de lancer un programme. • Utilisez uniquement des détergents spécialement conçus pour les lave-vaisselle. Versez le détergent dans le bon réservoir : A = réservoir principal pour le produit de lavage B = réservoir pour le produit de prélavage.
-
Página 73: Comment Charger Correctement Le Lave-Vaisselle
COMMENT CHARGER CORRECTEMENT LE LAVE-VAISSELLE • Nous recommandons d'utiliser uniquement des plats adaptés aux lave-vaisselle. • Utilisez uniquement un détergent doux tel que décrit dans le chapitre précédent des "types de détergents". • Pour la vaisselle sensible à la chaleur, nous recommandons un programme avec une température plus basse. •... - Página 74 Chargement correct des paniers et supports à couverts Vaisselle Tassen Servierschüssel Tasses Saladiers Verres Untertassen Sous-tasses Glasses Bols Plats de service Servierteller Schüssel Grande assiette großeTeller tiefe Teller Assiette creuse Kuchenteller Besteckkorb Assiette à dessert Panier à couverts Servierlöffel Cuillère à servir Couverts 1 Fourchettes 2 Cuillères à...
-
Página 75: Programmes De Lavage
PROGRAMMES DE LAVAGE Produit de Consom- Consom- Durée en Programme Description Cycle de lavage prélavage / mation mation en minutes lavage litres Pour les pièces très sales, prélavage (50 °C) 4/20 g ou telles que les casseroles, les lavage (65 °C) 3-in-1-Tab- poêles et les plats avec des rinçage... -
Página 76: Mise En Marche Et Utilisation
MISE EN MARCHE ET UTILISATION Démarrer /mettre en pause un programme 1. Retirez les paniers, chargez-les et remettez-les dans l'appareil. 2. Versez le détergent et fermez le clapet. 3. Insérez la fiche dans la prise et ouvrez le robinet d'eau à fond. 4. -
Página 77: Nettoyage Et Entretien
NETTOYAGE ET ENTRETIEN Système de filtration Le filtre empêche les résidus grossiers et autres restes de nourriture importants d'entrer dans la pompe. Le système de filtration se compose d'un filtre grossier, d'un filtre plat (filtre principal) et d'un filtre fin. Filtre à... - Página 78 Nettoyage du lave-vaisselle • Nettoyez le panneau de commande avec un chiffon légèrement humide, puis séchez-le soigneusement. • Soignez le boîtier avec une cire à polir appropriée. • N'utilisez pas d'objets pointus, de tampons à récurer ou de produits nettoyants agressifs pour le nettoyage. •...
-
Página 79: Identification Et Résolution Des Problèmes
IDENTIFICATION ET RÉSOLUTION DES PROBLÈMES Problème Cause possible Solution Le lave-vaisselle ne Le fusible s'est déclenché ou Remplacer le fusible ou actionnez l'interrupteur. démarre pas. est hors service. Retirez tous les autres appareils connectés au même circuit. Pas de courant. Assurez-vous que l'appareil est sous tension, que la porte est bien fermée et que le câble d'alimentation est bien branché... - Página 80 Problème Cause possible Solution Cognements à Le bras d'aspersion se cogne Interrompez le programme et placez la vaisselle de l'intérieur. contre un objet dans le panier. façon à ne pas gêner le bras de lavage. Bruits de cliquetis à La vaisselle n'est pas bien Interrompez le programme et placez la vaisselle de l'intérieur.
-
Página 81: Informations Sur Le Recyclage
Codes erreurs Pour certains dysfonctionnements, l'écran affiche un code erreur pour vous avertir : Code Signification Cause possible Problème d'arrivée d'eau Le robinet n'est pas ouvert, l'arrivée d'eau est coupée, ou la pres- sion d'eau est insuffisante La température nécessaire Dysfonctionnement de l'élément chauffant n'a pas pu être atteinte Fuite d'eau... - Página 82 Estimado cliente, Le felicitamos por la adquisición de este producto. Lea atentamente el siguiente manual y siga cuidadosamente las instrucciones de uso con el fin de evitar posibles daños. La empresa no se responsabiliza de los daños ocasionados por un uso indebido del producto o por haber desatendido las indicaciones de seguridad.
-
Página 83: Ficha Técnica Del Producto
FICHA TÉCNICA DEL PRODUCTO Información según el Reglamento europeo (UE) 1059/2010 del 28 de septiembre de 2010 Fabricante Chal-Tec GmbH Identificación del producto 10032915 Capacidad nominal en cargas estándar Clase de eficiencia energética Consumo anual de energía (AE 174 kW... -
Página 84: Indicaciones De Seguridad
INDICACIONES DE SEGURIDAD Lea atentamente todas las indicaciones y conserve este manual para consultas posteriores. Advertencias generales de seguridad • Este aparato no ha sido concebido para un uso comercial, sino doméstico o para entornos similares. • Los niños mayores de 8 años y las personas con discapacidades físicas o psíquicas solamente podrán utilizar el aparato si han sido previamente instruidas sobre su uso y conocen las indicaciones de seguridad. -
Página 85: Guía De Inicio Rápido
GUÍA DE INICIO RÁPIDO Encender aparato Pulse el botón Power y abra la puerta Rellenar lavavajillas Rellene el compartimento grande (A) antes de cada programa de lavado. Rellene el compartimento pequeño para programas con prelavado. Comprobar abrillantador Mediante el indicador C detectará si hay suficiente abrillantador en el compartimento. -
Página 86: Vista General Del Aparato Y Panel De Control
VISTA GENERAL DEL APARATO Y PANEL DE CONTROL Parte delantera Parte trasera Front view Back View 1 Recipiente para sal 6 Aspersores 2 Compartimento para lavavajillas 7 Recipiente para los vasos 3 Cesto para cubiertos 8 Cesta 4 Sistema de filtrado 8 Orificio de entrada de agua 5 Recipiente para abrillantador 10 Desagüe... - Página 87 1 Botón power: encender y apagar aparato Indicador de sal se ilumina cuando debe añadir sal de lavado Inicio programado: pulse el botón cuando desee que el aparato se ponga en marcha de manera programada. Selección de programa de lavado: pulse varias veces el botón y seleccione el programa deseado.
-
Página 88: Instalación
INSTALACIÓN • Coloque el aparato cerca de un desagüe y de una toma de corriente. • Asegúrese de que el enchufe y la manguera no queden atrapados. Instalar el aparato Coloque el aparato en un lugar más apropiado. La parte trasera debe estar orientada a la pared, los lados hacia una pared o un armario empotrado. - Página 89 1 b Montage avec habillage de porte Accesos a ambos lados Electrical, drain para suministro eléctrico, and water supply abastecimiento de agua y desagüe line entrances, both sides. Espacio del mueble Space of cabinet 2 Puerta decorativa El peso de la puerta decorativa debe situarse entre 3 y 4 kg.
- Página 90 4 Montage de l‘habillage de porte (si nécessaire) 3 Montar la puerta decorativa (en caso necesario) Patas supporting foot...
- Página 91 5 Introduzca el lavavajillas en el orificio, pero no completamente. Oriente primero las patas a la superficie de apoyo y luego introduzca completamente el aparato. Panel decorativo Decorative panel...
- Página 92 6 Montar la puerta decorativa Proceda del como se indica en la imagen inferior. Primero monte la bisagra entre la base del armario y la puerta decorativa con 16 tornillos en total. Decorative panel Recubrimiento de la puerta 16 Tornillos Screw,in all 16 Screw, in all 8 8 tornillos...
-
Página 93: Importante
Conectar y desconectar la toma de agua Para realizar la conexión, utilice siempre mangueras nuevas. No utilice mangueras antiguas. La presión del agua debe estar comprendida entre 0,04 y 1 MPa. En caso de que la presión sea menor, pida asesoramiento a un técnico especializado. -
Página 94: Antes De La Primera Operación
Recoger aguas grises En caso de que su desagüe se encuentre a más de 1 metro del aparato no podrá canalizar las aguas grises directamente en él. En este caso deberá recogerlas en un depósito que tendrá que estar situado por debajo de la salida de agua del aparato. - Página 95 • Retire la cesta y desenrosque la tapa del depósito para sal (1). • Antes del primer lavado, añada 1 litro de agua al depósito de sal. • Acople el embudo incluido en el envío al depósito de sal y añada 1,5 kg de sal (2). Es normal si sale un poco de agua del depósito.
- Página 96 Añadir abrillantador La función del abrillantador es asegurar que el agua no deje gotas en la vajilla y eliminar todas las manchas y marcas. El aparato está diseñado para usarse con abrillantadores líquidos. El depósito para el abrillantador se encuentra en la puerta, al lado del depósito para el detergente. Para añadir el abrillantador, desbloquee la tapa e introduzca el líquido hasta que el indicador de control se vuelva negro.
- Página 97 Ajustar la cantidad de abrillantador Puede ajustar la cantidad de abrillantador en 4-6 niveles. Comience en el nivel 4. Si se crean marcas de agua y el secado es deficiente, aumente la cantidad de abrillantador retirando la tapa y moviendo la rueda de selección al número 5. En caso de que las marcas persistan, aumente de nuevo la cantidad de abrillantador y coloque la rueda de selección en el número 6 hasta que la vajilla quede libre de marcas.
- Página 98 Cómo llenar el depósito de detergente: Pulsar para abrir Push latch to open • Si el depósito está cerrado, pulse en el cierre para abrirlo. • Introduzca el detergente justo antes de iniciar el lavado. • Utilice solamente detergentes indicados para este lavavajillas. Añada el detergente al depósito correcto: A = depósito principal para el detergente B = depósito para añadir detergente en el prelavado...
-
Página 99: Cómo Cargar Correctamente El Lavavajillas
CÓMO CARGAR CORRECTAMENTE EL LAVAVAJILLAS • Recomendamos utilizar solamente vajilla indicada para el lavavajillas. • Utilice solamente detergentes con poca alcalinidad, descritos en la sección anterior. • Para la vajilla sensible al calor le recomendamos un programa a baja temperatura. •... - Página 100 Carga correcta del cesto y de los compartimentos para los cubiertos Vajilla Tassen Servierschüssel Tasas Platillos Vasos Platillos Untertassen Glasses Cuencos Platos para servir Servierteller Schüssel Platos llanos großeTeller Platos hondos tiefe Teller Kuchenteller Besteckkorb Platos de postre Cesto para cubiertos Servierlöffel Fuentes para servir Cubiertos...
-
Página 101: Programas De Lavado
PROGRAMAS DE LAVADO Detergente Prelavado/ Tiempo Consumo Consumo Programa Descripción Ciclo de lavado Lavado Minutos Litro principal Para vajilla con un elevado Prelavado (50 °C) 4/20 g ou grado de suciedad, como Lavado (65 °C) 3-in-1-Tab- ollas, sartenes y vajilla con Aclarado 1,25 12,5... -
Página 102: Puesta En Funcionamiento
PUESTA EN FUNCIONAMIENTO Iniciar/detener un programa 1. Extraiga las bandejas, rellénelas y vuelva a colocarlas en su sitio. 2. Añada detergente y cierre la tapa. 3. Conecte el enchufe a la toma de corriente. 4. Pulse varias veces en el botón de programa y seleccione uno de los programas que se mostrarán en el siguiente orden: Intensivo >... -
Página 103: Limpieza Y Cuidado
LIMPIEZA Y CUIDADO Sistema de filtración El filtro evita que los grandes residuos y restos de comida lleguen a la bomba. El sistema de filtración se compone de un filtro grueso, un filtro plano (principal) y un microfiltro. Filtro grueso (C) Los residuos grandes, como huesos o trozos de vidrio, quedarán atrapados en el filtro grueso. - Página 104 Limpiar el lavavajillas • Limpie el panel de control con un paño ligeramente húmedo y séquelo con cuidado. • Lave la carcasa con cera de pulir adecuada para la máquina. • No utilice objetos afilados, estropajos ni productos de limpieza agresivos. •...
-
Página 105: Detección Y Reparación De Anomalías
DETECCIÓN Y REPARACIÓN DE ANOMALÍAS Anomalía Posible causa Solución El lavavajillas no se El fusible se ha fundido o ha Sustituya los fusibles o vuelva a encender el enciende. saltado. interruptor de suministro eléctrico. Retire todos los dispositivos que dependan de la misma fuente de alimentación. - Página 106 Anomalía Posible causa Solución Sonidos de golpes El brazo aspersor está cho- Interrumpa el programa y coloque la vajilla de tal en el interior de la cando contra un objeto de la manera que no toque el brazo aspersor. máquina. bandeja.
-
Página 107: Indicaciones Sobre La Retirada Del Aparato
Códigos de error Algunas averías se indican en el monitor con un código de error para avisarle del problema: Código Significado Posible causa Avería en la toma de agua El grifo no está abierto, la entrada de agua se ha interrumpido o la presión del agua es demasiado baja. - Página 108 Gentile Cliente, La ringraziamo per aver acquistato il dispositivo. La preghiamo di leggere attentamente le seguenti istruzioni per l’uso e di seguirle per evitare possibili danni tecnici. Non ci assumiamo alcuna responsabilità per danni scaturiti da una mancata osservazione delle avvertenze di sicurezza e da un uso improprio del dispositivo. Scansionare il codice QR seguente, per accedere al manuale d’uso più...
-
Página 109: Scheda Del Prodotto
SCHEDA DEL PRODOTTO Dati in relazione al Regolamento delegato (UE) 1059/2010 del 28 settembre 2010. Produttore Chal-Tec GmbH Codice di riconoscimento del modello 10032915 Capacità nominale in coperti standard Classe di efficienza energetica Consumo energetico annuale (AE 174 kW Potenza assorbita da spenta... -
Página 110: Avvertenze Di Sicurezza
AVVERTENZE DI SICUREZZA Leggere tutte le avvertenze e conservare il manuale per future consultazioni. Avvertenze generiche • Il dispositivo non è adatto ad uso commerciale, ma solo casalingo e in ambienti simili. • Bambini a partire da 8 anni e persone con limitate capacità fisiche e psichiche possono utilizzare il dispositivo solo se sono stati istruiti da una persona responsabile del loro controllo riguardo alle funzioni e alle procedure di sicurezza. -
Página 111: Guida Rapida
GUIDA RAPIDA Accendere il dispositivo Premere Power e aprire lo sportello. Aggiungere il detergente Riempire il contenitore grande (A) prima di ogni lavaggio. Riempire il contenitore piccolo solo per programmi con prelavaggio. Controllare il brillantante L’indicazione C mostra se c’ è brillantante a sufficienza. Controllare il sale L’indicazione C mostra se c’... -
Página 112: Descrizione Del Prodotto E Pannello Di Controllo
DESCRIZIONE DEL PRODOTTO E PANNELLO DI CONTROLLO Fronte Retro Front view Back View 1 Contenitore del sale 6 Rotori di lavaggio 2 Vano del detergente 7 Ripiano dei bicchieri 3 Cestello delle posate 8 Cestello 4 Sistema di filtraggio 9 Apertura di afflusso dell’ a cqua 5 Contenitore del brillantante 10 Apertura di scarico dell’... - Página 113 1 Power: accendere e spegnere il dispositivo L’indicazione del sale indica la necessità di ag- giungere sale. Avvio ritardato: premere il tasto se si desidera av- viare il programma più tardi Selezione del programma di lavaggio: premere più volte il tasto e selezionare il programma deside- rato Display: mostra il tempo rimanente e lo stato del dispositivo...
-
Página 114: Installazione
INSTALLAZIONE • Posizionare il dispositivo vicino a un punto di afflusso e scarico dell’ a cqua e a una presa elettrica. • Assicurarsi che i tubi flessibili e la spina siano accessibili in ogni momento. Posizionamento del dispositivo Posizionare il dispositivo nel luogo desiderato. Il retro deve essere rivolto verso la parete. I lati verso il mobile in cui è... - Página 115 1 b Montaggio con rivestimento dello sportello Passaggi su entrambi i lati per Electrical, drain alimentazione, afflusso e scarico and water supply acqua. line entrances, both sides. Luogo nel mobile d’incasso Space of cabinet 2 Rivestimento dello sportello Il peso del rivestimento dello sportello deve essere di minimo 3 kg e massimo 4 kg.
- Página 116 4 Montare il rivestimento dello sportello (se necessario) 3 Montare il rivestimento dello sportello (se necessario) Piede d’ a ppoggio supporting foot...
-
Página 117: Panello Decorativo
5 Posizionare la lavastoviglie nell’apertura, ma non completamente. Regolare prima i piedi d’appoggio con la superficie e poi inserire completamente il dispositivo. Panello decorativo Decorative panel... - Página 118 6 Montare il rivestimento dello sportello Procedere come indicato nell’immagine sottostante. Prima montare le cerniere tra i ripiani del mobile e il rivestimento dello sportello con un totale di 16 viti Decorative panel Rivestimento dello sportello 16 viti Screw,in all 16 Screw, in all 8 Superficie di appoggio 8 viti...
-
Página 119: Importante
Montare e smontare l’ingresso dell´acqua Utilizzare nuovi tubi flessibili per il collegamento. Non utilizzare tubi vecchi. La pressione dell’ a cqua deve essere tra 0,04-1 MPa. Se la pressione è inferiore, consultare un tecnico. • Montare il tubo di afflusso: srotolare completamente il tubo di afflusso di sicurezza dal supporto sul retro del dispositivo. -
Página 120: Avvertenze Per Il Primo Utilizzo
Raccogliere l’acqua di scarico Se lo scarico si trova oltre a 1 metro sotto al dispositivo, non è possibile condurre l’ a cqua direttamente nello scarico. In tal caso, è necessario raccogliere l’ a cqua in un contenitore appropriato, che si trova più in profon- dità... - Página 121 • Rimuovere il cestello e svitare il tappo del contenitore per il sale (1). • Aggiungere un litro di acqua nel contenitore del sale prima del primo lavaggio. • Inserire l’imbuto incluso in consegna nel contenitore e aggiungere 1,5 kg di sale per lavastoviglie (2). La fuoriuscita di acqua dal contenitore è...
- Página 122 Inserire il brillantante Il brillantante evita la formazione di gocce d’ a cqua sulle stoviglie, che lasciano macchie e aloni. Il dispositivo è progettato per l’uso di brillantante liquido. Il vano per il brillantante si trova all’interno dello sportello, accanto al contenitore del detergente per i piatti.
- Página 123 Impostare la quantità di brillantante La quantità di brillantante può essere impostata su 4-6 livelli. Iniziare con il livello 4. Se ci sono troppe macchie e l’ a sciugatura non è buona, aumentare il livello rimuovendo il tappo e girando la manopola su 5. Se continuano a esserci problemi con macchie e asciugatura, aumentare il livello fino a quando le stoviglie sono prive di macchie e aloni.
- Página 124 Come riempire il contenitore del detergente Premere per aprire Push latch to open • Se il contenitore è chiuso, premere sul blocco per aprirlo. • Mettere il detergente appena prima di avviare il programma. • Utilizzare solo detergente per lavastoviglie. Mettere il detergente nel vano corretto A = vano principale per il detergente B = vano per il detergente di prelavaggio...
-
Página 125: Caricare Correttamente La Lavastoviglie
CARICARE CORRETTAMENTE LA LAVASTOVIGLIE • Consigliamo di utilizzare solo stoviglie adatte alla lavastoviglie. • Utilizzare solo detergenti delicati, come descritto nel capitolo precedente “Tipi di detergenti per piatti”. • Per stoviglie sensibili al calore, consigliamo programmi a bassa temperatura. • Per evitare danni, non togliere bicchieri e posate dalla lavastoviglie subito dopo la fine del programma. Stoviglie e posate non adatte Stoviglie e posate non adatte Stoviglie e posate parzialmente adatte... - Página 126 Caricamento corretto dei cestelli e del ripiano per le posate Stoviglie Tassen Servierschüssel Tazze Ciotole grandi Bicchieri Piattini Untertassen Glasses Ciotole Piatti per servire Servierteller Schüssel Piatti grandi großeTeller Piatti fondi tiefe Teller Kuchenteller Besteckkorb Piatti per torte Cestello delle posate Servierlöffel Cucchiai per servire...
-
Página 127: Programmi Di Lavaggio
PROGRAMMI DI LAVAGGIO Detergente Durata in Consumo Consumo lavaggio Programma Descrizione Ciclo di lavaggio minuti litri pre/princi- pale Per sporco ostinato, come Prelavaggio (50 °C) pentole, padelle e stoviglie Lavaggio (65 °C) 4/20 g o Intenso con resti di cibo induriti Risciacquo 3-in-1-Tabb 1,25... -
Página 128: Messa In Funzione E Utilizzo
MESSA IN FUNZIONE E UTILIZZO Avviare/interrompere un programma 1. Tirare fuori i cestelli, caricarli e reinserirli nel dispositivo. 2. Mettere il detergente per piatti e chiudere lo sportello. 3. Attaccare la spina e aprire completamente il rubinetto dell’ a cqua. 4. -
Página 129: Pulizia E Manutenzione
PULIZIA E MANUTENZIONE Sistema di filtraggio Il filtro evita che grossi residui e resti di cibo finiscano nella pompa. Il sistema di filtraggio è composto da filtro grossolano, filtro piatto (filtro principale) e filtro fine. Filtro grossolano (C) Il filtro raccoglie residui grossi, come ossa o schegge di vetro. - Página 130 Pulire la lavastoviglie • Pulire il pannello di controllo con un panno leggermente umido e asciugarlo poi con cura. • Trattare l’ a lloggiamento con una cera lucidante adatta. • Non utilizzare oggetti taglienti, spugne abrasive o detergenti aggressivi per la pulizia. •...
-
Página 131: Ricerca E Risoluzione Dei Problemi
RICERCA E RISOLUZIONE DEI PROBLEMI Problema Possibile causa Soluzione La lavastoviglie non Il fusibile è disconnesso o Sostituire il fusibile o riposizionare l’interruttore. si avvia. guasto. Rimuovere tutti gli altri dispositivo nello stesso circuito di corrente Non c’ è corrente. Assicurarsi che il dispositivo sia acceso, lo sportello chiuso e il cavo sia collegato alla presa elettrica. - Página 132 Problema Possibile causa Soluzione Rumori dal vano Il rotore sbatte contro qualche Interrompere programma riposizionare interno. oggetto nel cestello. l’ o ggetto, in modo che non impedisca il libero mo- vimento del rotore. Rumori sferraglianti Le stoviglie non sono posizio- Interrompere il programma e riposizionare le sto- dal vano interno.
-
Página 133: Smaltimento
Codici di errore Alcuni malfunzionamenti vengono indicati con un codice sul display, in modo da dare avvertimento: Codice Significato Possibile causa Problemi nell’ a fflusso Il rubinetto non è aperto, l’ a fflusso è interrotto o la pressione d’ a cqua. dell’...