
Manuales relacionados para Cameo CLDROPP4


Resumen de contenidos para Cameo CLDROPP4
- Página 1 USER´S MANUAL BEDIENUNGSANLEITUNG MANUEL D´UTILISATION MANUAL DE USUARIO INSTRUKCJA OBSŁUGI MANUALE D´USO DROP P4 OUTDOOR UPLIGHT RGBWA+UV WITH W-DMX™ CLDROPP4...
-
Página 2: Tabla De Contenido
CONTENTS / INHALTSVERZEICHNIS / CONTENU / CONTENIDO / TREŚĆ / CONTENUTO ENGLISH ESPAÑOL SAFETY INFORMATION MEDIDAS DE SEGURIDAD INTRODUCTION INTRODUCCIÓN CONNECTIONS, OPERATING AND DISPLAY ELEMENTS CONEXIONES, ELEMENTOS DE MANEJO Y ELEMENTOS OPERATION DE VISUALIZACIÓN IR REMOTE CONTROL (optional) MANEJO DIFFUSERS MANDO A DISTANCIA POR INFRARROJOS (opcional) SET-UP AND INSTALLATION DIFUSORES... -
Página 3: English
This device was developed and produced under the highest standards of quality in order to ensure smooth operation for many years. Please read these operating instructions carefully so that you can use your new Cameo Light product quickly and optimally. You can find more information on Cameo Light on our website WWW.CAMEOLIGHT.COM. - Página 4 36. The appliance is not to be used by persons (including children) with reduced physical, sensory or mental capabilities, or lack of experience and knowledge. 37. Children must be instructed not to play with the device. 38. If the power cord of the device is damaged, do not use the device. The power cord must be replaced by an adequate cable or assembly from an authorized service center.
-
Página 5: Introduction
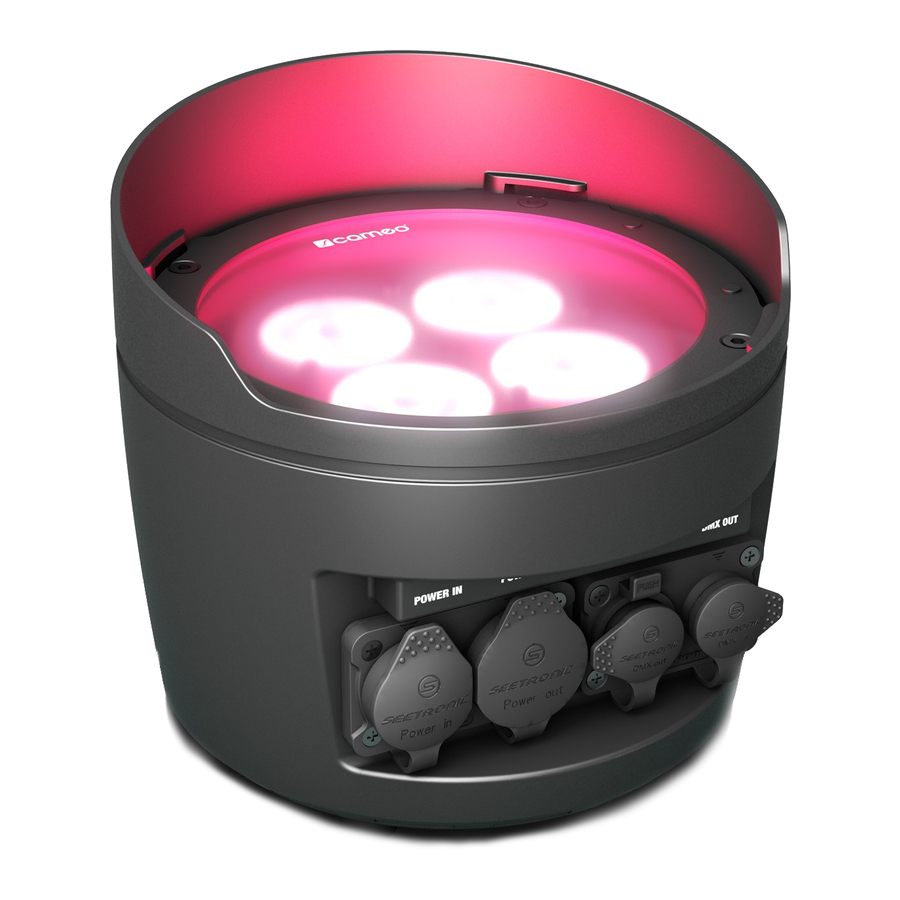
POWER OUT TRUE 1 compatible mains output socket for supplying power to additional Cameo headlights (for maximum output current, see label on back of housing). When not in use, always close with the appropriate rubber sealing cap. -
Página 6: Rubber Feet
OLED DISPLAY The OLED display shows the currently activated mode (main display 1), the spotlight status (main display 2 = W-DMX status), the menu items in the editing menu and the numerical value or operating mode in certain menu items. Switch between both main displays by briefly pressing ENTER and DOWN at the same time. -
Página 7: Operation
• As soon as the spotlight is switched on, the following are displayed in succession: “Software Update Please Wait..." (for service purposes only), “Welcome to Cameo”, the model name and the software version. After this process, the spotlight is ready for operation and the previously activated operating mode is launched. -
Página 8: W-Dmx™ Status
W-DMX™ To pair the W-DMX receiver with a W-DMX compatible transmitter, W-DMX must be activated (W-DMX On) in the receiver's menu under Wireless Settings. The Reset command must be also executed under the same menu item (select Reset and confirm with ENTER). The receiver is now in pairing standby and waiting for a pairing request from a transmitter. - Página 9 Mode Slave DMX DELAY Menu Menu DMX Mode DMX Address The DMX Delay function is a simple way to create a running light effect with a large number of spotlights that are all the same model DMX Address DMX Address 3 CH 001 - 510 and that are all running the same software version.
- Página 10 6 CH DMX Mode by DMX? No/Yes Static Color Macro Auto Loop User Color Stand Alone Stand Alone 7 CH DMX Delay Delay 0.0s Slave Slave 13CH01 Stand Alone Settings Settings 13CH02 Mode Slave DMX Delay DMX Delay By DMX? DMX Delay System Info System Info...
- Página 11 Settings Settings 13CH02 Cyan Cold White System Info System Info 20 CH Menu Stand Alone Auto Program x Menu DMX Delay DMX Address Static Program 1 Dimmer DMX Address Group DMX Mode Color Macro Speed DMX Mode by DMX? No/Yes STANDALONE MODE LOOP DMX Delay Auto...
-
Página 12: Slave Mode
Slave User Color 1.Step Menu Stand Alone User Color Color x Settings 2.Step Color 1 DMX Address Static Color 1 Dimmer 3.Step Blackout System Info DMX Mode Color Macro Strobe 4.Step ------- DMX Delay Auto Color 8 Stand Alone Loop Green SLAVE MODE Menu... - Página 13 DMX Address Slave 01 - 06 DMX Mode DMX Delay Stand Alone Slave SYSTEM SETTINGS (Settings) Settings Starting from main display 1, press MENU to enter the main menu. Using UP and DOWN, select the menu item Settings and confirm System Info with ENTER.
-
Página 14: Ir Remote Control (Optional)
DMX Address DMX Mode DMX Delay Stand Alone Slave SYSTEM INFORMATION (System Info) Settings Starting from main display 1, press MENU to enter the main menu. Using UP and DOWN, select the menu item System Info and confirm System Info with ENTER. -
Página 15: Diffusers
FL (Flash/Stroboscope) Pressing the button for setting the strobe immediately activates the Static operating mode. The strobe effect can now be set using the + and - buttons. The values for the stroboscope effect correspond to the values in channel 2 of the DMX table 4CH and channel 3 of the tables 13CH1 and 20CH (the set value is shown in the display). -
Página 16: Set-Up And Installation
SET-UP AND INSTALLATION Thanks to the wide stand and mounting bracket, the spotlight can be positioned in a suitable location on a level surface. Installation on a truss is possible with a suitable truss clamp, which is attached to the mounting bracket . -
Página 17: Dmx Technology
DMX TECHNOLOGY DMX-512 DMX (Digital Multiplex) is the designation for a universal transmission protocol for communications between corresponding devices and controllers. A DMX controller sends DMX data to the connected DMX device(s). The DMX data is always transmitted as a serial data stream that is forwarded from one connected device to the next via the "DMX IN"... -
Página 18: Technical Data
TECHNICAL DATA Product number: CLDROPP4 Product type: LED wash light Type: Outdoor spotlight Color spectrum LED: RGBWA+UV Number of LEDs: LED type: 15 W PWM frequency: 800 Hz Beam angle: Beam Angle 22° / Field Angle 38° 1. Filter Medium BA 32°... -
Página 19: Manufacturer´s Declarations
MANUFACTURER´S DECLARATIONS MANUFACTURER‘S WARRANTY & LIMITATIONS OF LIABILITY You can find our current warranty conditions and limitations of liability at: https://cdn-shop.adamhall.com/media/pdf/MANUFACTURERS- DECLARATIONS_CAMEO.pdf. To request warranty service for a product, please contact Adam Hall GmbH, Adam-Hall-Str. 1, 61267 Neu Anspach / Email: Info@adamhall.com / +49 (0)6081 / 9419-0. CORRECT DISPOSAL OF THIS PRODUCT (valid in the European Union and other European countries with a differentiated waste collection system) This symbol on the product, or on its documents indicates that the device may not be treated as household waste. -
Página 20: Deutsch
Dieses Gerät wurde unter hohen Qualitätsanforderungen entwickelt und gefertigt, um viele Jahre einen reibungslosen Betrieb zu gewähr- leisten. Bitte lesen Sie diese Bedienungsanleitung sorgfältig, damit Sie Ihr neues Produkt von Cameo Light schnell und optimal einsetzen können. Weitere Informationen über Cameo Light erhalten Sie auf unserer Website WWW.CAMEOLIGHT.COM. - Página 21 (Staub, Nikotin, Nebel etc.) regelmäßig von qualifiziertem Fachpersonal gewartet bzw. gesäubert werden (keine Garantieleistung), um Überhitzung und Fehlfunktionen zu vermeiden. 34. Der Abstand zu brennbaren Materialien muss mindestens 0,5 m betragen. 35. Netzleitungen zur Spannungsversorgung mehrerer Geräte müssen mindestens 1,5 mm² Aderquerschnitt aufweisen. In der EU müssen die Leitungen H05VV-F, oder gleichartig, entsprechen.
-
Página 22: Einführung
Lieferumfang. Bei Nichtgebrauch bitte stets mit der dazugehörenden Gummidichtkappe verschließen. POWER OUT TRUE 1 kompatible Netzausgangsbuchse für die Spannungsversorgung weiterer Cameo Scheinwerfer (maximaler Ausgangsstrom siehe Aufdruck auf der Gehäuserückseite). Bei Nichtgebrauch bitte stets mit der dazugehörenden Gummidichtkappe verschließen. - Página 23 OLED-DISPLAY Das OLED-Display zeigt die aktuell aktivierte Betriebsart (Hauptanzeige 1), den Scheinwerfer-Status (Hauptanzeige 2 = W-DMX-Status) die Menüpunkte im Bearbeitungsmenü und den Zahlenwert bzw. Betriebszustand in bestimmten Menüpunkten an. Zum Wechseln zwischen den beiden Hauptanzeigen drücken Sie gleichzeitig kurz auf ENTER und DOWN, in das Bearbeitungsmenü gelangen nur ausgehend von Hauptanzeige 1.
-
Página 24: Bedienung
• Nach dem Einschalten des Scheinwerfers wird während des Startvorgangs nacheinander „Software Update Please Wait“ (nur für Ser- vicezwecke), „Welcome to Cameo“, die Modellbezeichnung und die Softwareversion im Display angezeigt. Nach diesem Vorgang ist der Scheinwerfer betriebsbereit und die Betriebsart, die zuvor aktiviert war, wird gestartet. -
Página 25: Dmx-Startadresse Einstellen
W-DMX™ Zum Koppeln des W-DMX Receivers (Empfänger) mit einem W-DMX kompatiblen Transmitter (Sender) muss im Menü des Receivers unter Wireless Settings W-DMX eingeschaltet werden (W-DMX On) und im gleichen Menüpunkt der Befehl Reset ausgeführt werden (Reset auswählen und mit ENTER bestätigen). Der Receiver befindet sich nun in Koppelbereitschaft und wartet auf die Kopplungsanfrage eines Transmitters. - Página 26 Mode Mode Mode Mode Mode Static Color Macro Auto Loop User Color Mode Slave DMX DELAY Mit Hilfe der Funktion DMX Delay kann auf einfache Weise mit einer beliebig großen Anzahl Scheinwerfern des gleichen Modells und Softwarestands ein Lauflichteffekt realisiert werden, der sonst nur mit einem geeigneten DMX-Controller und aufwändiger Programmierung Menu Menu DMX Mode...
- Página 27 Menu DMX Delay DMX Address DMX Address 3 CH 001 - 510 DMX Address Group DMX Mode DMX Mode 4 CH DMX Mode by DMX? No/Yes DMX Delay DMX Delay 6 CH DMX Delay Delay 0.0s Mode Mode Mode Mode Mode Stand Alone Stand Alone...
- Página 28 System Info Turquoise White Stand Alone Stand Alone 7 CH Cyan Cold White Slave Slave 13CH01 Settings Settings 13CH02 Menu Stand Alone Auto Program x System Info System Info 20 CH DMX Address Static Program 1 Dimmer STAND-ALONE-BETRIEBSART LOOP DMX Mode Color Macro Speed Menu...
- Página 29 DMX Delay Auto Loop 4 Fadetime 0%-100% Delay 0.0s - 2.0s Stand Alone Loop User Color Menu Stand Alone Color x Slave User Color 1.Step DMX Address Static Color 1 Dimmer Settings 2.Step Color 1 DMX Mode Color Macro Strobe System Info 3.Step Blackout...
- Página 30 DMX Address Slave 01 - 06 DMX Mode DMX Delay Stand Alone Slave SYSTEMEINSTELLUNGEN (Settings) Settings Ausgehend von Hauptanzeige 1 gelangen Sie durch Drücken auf MENU in das Hauptmenü. Mit Hilfe der Bedienfelder UP und DOWN wählen System Info Sie nun den Menüpunkt Settings aus und bestätigen mit ENTER. Menu DMX Address DMX Mode...
-
Página 31: Ir Fernbedienung (Optional)
DMX Address DMX Mode DMX Delay Stand Alone Slave SYSTEMINFORMATIONEN (System Info) Settings Ausgehend von Hauptanzeige 1 gelangen Sie durch Drücken auf MENU in das Hauptmenü. Mit Hilfe der Bedienfelder UP und DOWN wählen System Info Sie nun den Menüpunkt System Info aus und bestätigen mit ENTER. Menu DMX Address DMX Mode... -
Página 32: Streuscheiben
FL (Flash / Stroboskop) Sobald Sie die Taste zum Einstellen des Stroboskops drücken, wird die Betriebsart Statischer Modus aktiviert. Der Stroboskop-Effekt kann nun mit Hilfe der Tasten + und - nach Wunsch eingestellt werden. Die Werte beim Stroboskop-Effekt entsprechen dabei den Werten im Kanal 2 der DMX-Tabelle 4CH und Kanal 3 der Tabellen 13CH1 und 20CH (der eingestellte Wert wird im Display angezeigt). -
Página 33: Aufstellung Und Montage
AUFSTELLUNG UND MONTAGE Dank des breiten Stand- bzw. Montagebügels kann der Scheinwerfer an einer geeigneten Stelle auf eine ebene Fläche gestellt werden. Die Montage an einer Traverse erfolgt mit Hilfe einer Traversenklemme, die am Montagebügel befestigt wird . Geeignete Traversenklemmen sind optional erhältlich. -
Página 34: Dmx Technik
DMX TECHNIK DMX-512 DMX (Digital Multiplex) ist die Bezeichnung für ein universelles Übertragungsprotokoll für die Kommunikation zwischen entsprechenden Geräten und Controllern. Ein DMX-Controller sendet DMX-Daten an das/die angeschlossene(n) DMX-Gerät(e). Die DMX-Datenübertragung erfolgt stets als serieller Datenstrom, der über die an jedem DMX-fähigen Gerät vorhandenen DMX IN- und DMX OUT-Anschlüsse (XLR-Steckverbinder) von einem angeschlossenen Gerät an das nächste weitergeleitet wird, wobei die maximale Anzahl der Geräte 32 nicht überschreiten darf. -
Página 35: Technische Daten
TECHNISCHE DATEN Artikelnummer: CLDROPP4 Produktart: LED Wash Light Typ: Outdoor Scheinwerfer Farbspektrum LED: RGBWA+UV LED Anzahl: LED Typ: 15 W PWM Frequenz: 800 Hz Abstrahlwinkel: Beam Angle 22° / Field Angle38° 1. Filter Medium BA 32° 2. Filter Wide BA 45°... -
Página 36: Herstellererklärungen
HERSTELLERERKLÄRUNGEN HERSTELLERGARANTIE & HAFTUNGSBESCHRÄNKUNG Unsere aktuellen Garantiebedingungen und Haftungsbeschränkung finden Sie unter: https://cdn-shop.adamhall.com/media/pdf/ MANUFACTURERS-DECLARATIONS_CAMEO.pdf. Im Service Fall wenden Sie sich bitte an Adam Hall GmbH, Adam-Hall-Str. 1, 61267 Neu Anspach / E-Mail Info@adamhall.com / +49 (0)6081 / 9419-0. KORREKTE ENTSORGUNG DIESES PRODUKTS (Gültig in der Europäischen Union und anderen europäischen Ländern mit Mülltrennung) Dieses Symbol auf dem Produkt oder dazugehörigen Dokumenten weist darauf hin, dass das Gerät am Ende der Produktlebenszeit nicht zusammen mit dem normalen Hausmüll entsorgt werden darf, um Umwelt- oder Personenschäden durch unkontrollierte Abfallentsorgung zu vermeiden. -
Página 37: Francais
Cet appareil a été développé et fabriqué en appliquant des exigences de qualité très élevées: il garantit des années de fonctionnement sans problème.Veuillez lire attentivement ce Manuel Utilisateur : vous apprendrez rapidement à utiliser votre appareil Cameo Light de façon optimale. - Página 38 34. Respectez une distance minimale de 0,5m par rapport à des matériaux inflammables. 35. Si vous désirez alimenter plusieurs projecteurs simultanément, les conducteurs du câble secteur doivent posséder une section minimale de 1,5 mm². Dans l’Union Européenne, les câbles électriques doivent être de type H05VV-F ou équivalent. Adam Hall propose des câbles secteur adaptés.
-
Página 39: Introduction
POWER OUT (SORTIE D’ALIMENTATION) Embase secteur de sortie compatible TRUE 1 pour l’alimentation en tension de projecteurs Cameo supplémentaires (courant de sortie maxi- mum : voir marquage à l’arrière du boîtier). Mettre systématiquement le cache étanche en caoutchouc quand l’embase n’est pas utilisée. -
Página 40: Touches De Commande Tactiles
ÉCRAN OLED L’afficheur OLED indique le mode de fonctionnement actuellement activé (écran principal 1), l’état du projecteur (écran principal 2 = état W-DMX), les options du menu d’édition et la valeur numérique ou l’état de fonctionnement dans certaines options de menu. Pour passer d’un écran principal à... -
Página 41: Œillet De Sécurité
• Après la mise sous tension du projecteur s’affichent successivement à l’écran pendant la phase de démarrage les mentions : « Software Update Please Wait... » (uniquement à des fins de maintenance), un message de bienvenue (« Welcome to Cameo »), la référence du modèle et la version du logiciel. Le projecteur est ensuite opérationnel et le mode de fonctionnement précédemment activé est lancé. - Página 42 W-DMX™ Pour coupler un récepteur W-DMX à un émetteur compatible W-DMX, il faut activer W-DMX (W-DMX On) sous Wireless Settings (pa- ramètres sans fil) dans le menu du récepteur et d’exécuter la commande Reset (réinitialiser) au même point de menu (sélectionner Reset et confirmer par ENTER).
- Página 43 Static Color Macro Auto Loop User Color Mode Slave DMX DELAY (DÉCALAGE DMX) Grâce à la fonction DMX Delay, il est possible de créer facilement un effet de chenillard avec un nombre illimité de projecteurs du même Menu Menu DMX Mode DMX Address modèle et de la même version logicielle, ce qui nécessite habituellement un contrôleur DMX spécifique et une programmation complexe.
-
Página 44: Mode De Fonctionnement Stand Alone Static
Menu DMX Delay DMX Address Fixture Status DMX Address DMX Address 3 CH 001 - 510 DMX Address Group DMX Mode DMX Mode 4 CH DMX Mode by DMX? No/Yes DMX Delay DMX Delay 6 CH DMX Delay Delay 0.0s Stand Alone Stand Alone 7 CH... -
Página 45: Mode De Fonctionnement Stand Alone Loop
Settings Green Warm White DMX Delay DMX Delay 6 CH System Info Turquoise White Stand Alone Stand Alone 7 CH Cyan Cold White Slave Slave 13CH01 Settings Settings 13CH02 Menu Stand Alone Auto Program x System Info System Info 20 CH MODE DE FONCTIONNEMENT STAND ALONE LOOP DMX Address Static... -
Página 46: Mode Slave
Stand Alone Loop Delay 0.0s - 2.0s Slave User Color 1.Step User Color Menu Stand Alone Color x 2.Step Color 1 Settings DMX Address Static Color 1 Dimmer System Info 3.Step Blackout DMX Mode Color Macro Strobe 4.Step ------- DMX Delay Auto Color 8 MODE SLAVE... - Página 47 DMX Address Slave 01 - 06 DMX Mode DMX Delay Stand Alone Slave PARAMÈTRES DU SYSTÈME (Settings) Settings À partir de l’écran principal 1, appuyer sur MENU pour accéder au menu principal. Sélectionner l’option de menu Settings à l’aide des System Info touches de commande UP et DOWN, et appuyer sur ENTER pour valider.
-
Página 48: Fonction De Verrouillage Manuelle
DMX Address DMX Mode DMX Delay Stand Alone Slave INFORMATIONS SYSTÈME (System Info) Settings À partir de l’écran principal 1, appuyer sur MENU pour accéder au menu principal. Utiliser ensuite les touches de commande UP et DOWN System Info pour sélectionner l’option de menu System Info et appuyer sur ENTER pour valider. Menu DMX Address DMX Mode... -
Página 49: Diffuseurs
FL (Flash/stroboscope) Dès lors que la touche de réglage du stroboscope est actionnée, le mode statique est activé. L’effet stroboscopique peut maintenant être réglé à volonté à l’aide des touches + et -. Les valeurs de l'effet stroboscopique correspondent aux valeurs du canal 2 de la table DMX 4 CH et du canal 3 des tables 13 CH 1 et 20 CH (la valeur réglée s’affiche à... -
Página 50: Installation Et Montage
INSTALLATION ET MONTAGE Grâce à l’étrier fixe et de montage large, le projecteur peut être placé à un endroit approprié sur une surface plane. Le montage sur traverse s’effectue à l’aide d’un dispositif de serrage spécifique fixé sur l’étrier de montage . -
Página 51: Technique Dmx
TECHNIQUE DMX DMX-512 Le terme DMX (Digital Multiplex) désigne un protocole de transport universel permettant la communication entre des appareils et des contrôleurs à ce format. Un contrôleur DMX envoie des données DMX aux appareils DMX qui lui sont connectés. Les données DMX sont transportées sous forme d'un flux série, renvoyé... -
Página 52: Caractéristiques Techniques
CARACTÉRISTIQUES TECHNIQUES Référence : CLDROPP4 Catégorie de produit : Projecteur wash à LED Type : Projecteur à usage extérieur Spectre de couleurs des RGBWA+UV LED : Nombre de LED : Type de LED : 15 W Fréquence du signal PWM : 800 Hz Angle de dispersion : Beam Angle 22° / Field Angle 38°... -
Página 53: Declarations
DECLARATIONS GARANTIE FABRICANT & LIMITATION DE RESPONSABILITÉ Nos conditions actuelles de garantie et de limitation de responsabilité sont disponibles à l‘adresse suivante : https://cdn-shop.adamhall.com/ media/pdf/MANUFACTURERS-DECLARATIONS_CAMEO.pdf. Pour les réparations, veuillez contacter Adam Hall GmbH, Adam-Hall-Str. 1, 61267 Neu Anspach / E-Mail Info@adamhall.com / +49 (0)6081 / 9419-0. TRI ET MISE AUX DÉCHETS CORRECTE DE CE PRODUIT (Valid in the European Union and other European countries with waste separation) (Applicable dans l‘Union Européenne et les autres pays européens pratiquant le tri des déchets) La présence de ce symbole sur le... -
Página 54: Español
Este equipo está diseñado y fabricado con los estándares de calidad más exigentes, para garantizar un correcto funcionamiento durante muchos años.Lea atentamente este manual de usuario para poder aprovechar rápidamente toda la funcionalidad de su nuevo producto de Cameo Light. Más información sobre Cameo Light en la web WWW.CAMEOLIGHT.COM. MEDIDAS DE SEGURIDAD 1. - Página 55 33. La acumulación de polvo y otras partículas en el interior del equipo puede causar daños. Dependiendo de las condiciones ambientales (polvo, nicotina, niebla, etc.), deberá realizarse periódicamente el mantenimiento o la limpieza del equipo por personal especializado, para evitar cualquier sobrecalentamiento o fallo de funcionamiento (mantenimiento y limpieza no cubiertos por la garantía). 34.
-
Página 56: Introducción
POWER OUT Toma de salida de alimentación compatible con TRUE 1 para la alimentación eléctrica de otros focos Cameo (vea la corriente de salida máxima impresa en la parte posterior de la carcasa del equipo). Si no se va a utilizar, debe mantenerse siempre cerrado con la tapa de sellado de goma correspondiente. -
Página 57: Pantalla Oled
PANTALLA OLED La pantalla OLED muestra el modo operativo activado actualmente (pantalla principal 1), el estado del foco (pantalla principal 2 = estado de W-DMX), las opciones del menú de edición y el valor numérico o el estado operativo en determinadas opciones del menú. Para cambiar entre ambas pantallas principales, pulse brevemente ENTER y DOWN al mismo tiempo. -
Página 58: Manejo
• Tras encender el foco, durante el proceso de arranque se mostrarán de forma consecutiva en pantalla los mensajes «Software Update Please Wait...» (Actualización del software, espere) (solo con fines de servicio técnico) y «Welcome to Cameo» (Bienvenidos a Cameo), así... -
Página 59: Intensidad De La Señal Rf
W-DMX™ Para emparejar el W-DMX Receiver (receptor) a un W-DMX Transmitter compatible (transmisor), es necesario activar W-DMX en Wireless Settings (W-DMX On) y ejecutar el comando Reset en la misma opción de menú (seleccione Reset y confirme con ENTER). Ahora el receptor está... - Página 60 Static Color Macro Auto Loop User Color Mode Slave DMX DELAY Con la función DMX Delay se puede crear un efecto de luces en movimiento de manera sencilla con un gran número de focos del mismo Menu Menu DMX Mode DMX Address modelo y con la misma versión de software, lo que normalmente solo se podría hacer con un controlador DMX adecuado y mucha progra- DMX Address...
- Página 61 DMX Address Group DMX Delay DMX Delay 6 CH DMX Mode by DMX? No/Yes Mode Mode Mode Mode Mode Stand Alone Stand Alone 7 CH DMX Delay Delay 0.0s Static Color Macro Auto Loop User Color Slave Slave 13CH01 Stand Alone Settings Settings 13CH02...
- Página 62 Cyan Cold White Settings Settings 13CH02 System Info System Info 20 CH Menu Stand Alone Auto Program x DMX Address Static Program 1 Dimmer Menu DMX Delay DMX Mode Color Macro Speed DMX Address Group MODO AUTÓNOMO LOOP DMX Delay Auto Program 6 Auto Delay...
-
Página 63: Modo Esclavo
Stand Alone Loop Delay 0.0s - 2.0s Slave User Color 1.Step User Color Menu Stand Alone Color x 2.Step Color 1 Settings DMX Address Static Color 1 Dimmer System Info 3.Step Blackout DMX Mode Color Macro Strobe 4.Step ------- DMX Delay Auto Color 8 MODO ESCLAVO... - Página 64 DMX Address Slave 01 - 06 DMX Mode DMX Delay Stand Alone Slave CONFIGURACIÓN DEL SISTEMA (Settings) Settings Partiendo de la pantalla principal 1, si pulsa MENU accederá al menú principal. Ahora, utilice los botones UP y DOWN para seleccionar la System Info opción de menú...
-
Página 65: Función De Bloqueo Manual
DMX Address DMX Mode DMX Delay Stand Alone Slave INFORMACIÓN DEL SISTEMA (System Info) Settings Partiendo de la pantalla principal 1, si pulsa MENU accederá al menú principal. Ahora, utilice los botones UP y DOWN para seleccionar la System Info opción de menú... -
Página 66: Difusores
FL (flash / estrobo) Al pulsar el botón para ajustar el estrobo, se activa el modo operativo estático. Ahora se puede ajustar el efecto de estrobo como se desee con los botones + y -. Los valores del efecto de estrobo corresponden a los valores del canal 2 de la tabla DMX 4 CH y del canal 3 de las tablas 13 CH 1 y 20 CH (el valor ajustado aparece en la pantalla). -
Página 67: Instalación Y Montaje
INSTALACIÓN Y MONTAJE Gracias al amplio soporte de apoyo y montaje, el foco puede instalarse en un lugar adecuado sobre una superficie nivelada. El montaje en un travesaño se realiza con una abrazadera apta para travesaño. Esta abrazadera se fija en el soporte de montaje . -
Página 68: Tecnología Dmx
TECNOLOGÍA DMX DMX512 DMX (Digital Multiplex) es el nombre de un protocolo universal utilizado como medio de comuni- cación entre dispositivos y controladores. El controlador DMX envía datos DMX a los equipos DMX conectados. Los datos DMX se envían como datos serie que se transmiten de equipo a equipo a través de los conectores XLR «DMX IN»... -
Página 69: Datos Técnicos
DATOS TÉCNICOS Número de artículo: CLDROPP4 Clase de producto: Washer LED Tipo: Foco para exteriores Espectro cromático del RGBWA+UV LED: Cantidad de LED: Tipo de LED: 15 W Frecuencia de la modula- 800 Hz ción por ancho de pulsos: Ángulo de dispersión: 22°... -
Página 70: Declaración Del Fabricante
DECLARACIÓN DEL FABRICANTE GARANTÍA DEL FABRICANTE Y LIMITACIÓN DE RESPONSABILIDAD Consulte nuestras condiciones de garantía y limitaciones de responsabilidad en: https://cdn-shop.adamhall.com/media/pdf/MANUFACTU- RERS-DECLARATIONS_CAMEO.pdf. En caso de necesitar servicio técnico, póngase en contacto con Adam Hall GmbH, Adam-Hall-Str. 1, 61267 Neu Anspach (Alemania); correo electrónico Info@adamhall.com; +49 (0)6081 / 9419-0. ELIMINACIÓN CORRECTA DE ESTE PRODUCTO (Aplicable en la Unión Europea y en los países europeos que dispongan de un sistema de recogida selectiva) El símbolo que aparece sobre el producto o en la documentación adjunta indica que al final de la vida útil del equipo, no deberá... -
Página 71: Polski
To urządzenie zostało zaprojektowane i wyprodukowane przy zastosowaniu najwyższych kryteriów jakościowych w celu zapewnienia wieloletniej bezawaryjnej eksploatacji. Proszę starannie przeczytać niniejszą instrukcję obsługi, aby móc jak najszybciej zacząć użytkować ten produkt marki Cameo Light. Więcej informacji na temat Cameo Light znajdą Państwo na naszej stronie internetowej pod adresem WWW.CAMEOLIGHT.COM. - Página 72 32. Instalacja urządzenia powinna odbywać się, gdy urządzenie nie jest podłączone do źródła zasilania (należy wyjąć wtyczkę z gniazda). 33. Kurz i inne osady wewnątrz urządzenia mogą je uszkodzić. W zależności od warunków otoczenia (kurz, nikotyna, opary itp.) urządzenie powinno być konserwowane lub czyszczone przez wykwalifikowanego specjalistę (usługa nieobjęta gwarancją), aby zapobiec przegrza- niu i nieprawidłowemu działaniu.
-
Página 73: Wprowadzenie
IP65. Nieużywane gniazdo należy zabezpieczać gumową zaślepką. POWER OUT Gniazdo wyjściowe zgodne z TRUE 1 do zasilania kolejnych reflektorów Cameo (maksymalny prąd wyjściowy — patrz nadruk na tylnej części obudowy). Nieużywane gniazdo należy zabezpieczać gumową zaślepką. - Página 74 WYŚWIETLACZ OLED Wyświetlacz OLED pokazuje bieżący tryb pracy (ekran główny 1), stan reflektora (ekran główny 2 = stan W-DMX), pozycje w menu edycji oraz wartość liczbową lub stan pracy w poszczególnych pozycjach menu. Aby przełączać się między dwoma głównymi wyświetlaczami, należy krótko nacisnąć...
-
Página 75: Obsługa
• Po włączeniu reflektora podczas procesu uruchamiania wyświetlana jest następująca sekwencja komunikatów: „Software Update Please Wait...” (tylko do celów serwisowych), „Welcome to Cameo”, a także nazwa modelu i wersji oprogramowania. Następnie reflektor jest gotowy do pracy w ostatnio wybranym trybie. -
Página 76: Ustawianie Adresu Startowego Dmx
W-DMX™ Aby sparować odbiornik W-DMX z transmiterem (nadajnikiem) kompatybilnym z W-DMX, funkcja W-DMX musi być włączona (W-DMX On) w menu odbiornika w sekcji Wireless Settings (Ustawienia sieci bezprzewodowej), a polecenie Reset musi być wykonane w tej samej pozycji menu (wybierz Reset i potwierdź przyciskiem ENTER). Odbiornik jest teraz w stanie gotowości do sparowania i czeka na żądanie z nadajnika. - Página 77 Mode Mode Mode Mode Mode Static Color Macro Auto Loop User Color Mode Slave DMX DELAY Za pomocą funkcji DMX Delay można w prosty sposób stworzyć efekt ruchomego światła przy użyciu dowolnej liczby reflektorów tego samego modelu i tej samej wersji oprogramowania, co w innym przypadku byłoby możliwe tylko przy zastosowaniu odpowiedniego kont- Menu Menu DMX Mode...
- Página 78 DMX Address Group DMX Delay DMX Delay 6 CH DMX Mode by DMX? No/Yes Mode Mode Mode Mode Mode Stand Alone Stand Alone 7 CH DMX Delay Delay 0.0s Static Color Macro Auto Loop User Color Slave Slave 13CH01 Stand Alone Settings Settings 13CH02...
- Página 79 System Info Turquoise White Stand Alone Stand Alone 7 CH Cyan Cold White Slave Slave 13CH01 Settings Settings 13CH02 Menu Stand Alone Auto Program x System Info System Info 20 CH DMX Address Static Program 1 Dimmer TRYB PRACY STANDALONE LOOP DMX Mode Color Macro Speed...
- Página 80 Stand Alone Loop Delay 0.0s - 2.0s Slave User Color 1.Step User Color Menu Stand Alone Color x 2.Step Color 1 Settings DMX Address Static Color 1 Dimmer System Info 3.Step Blackout DMX Mode Color Macro Strobe 4.Step ------- DMX Delay Auto Color 8 TRYB SLAVE...
- Página 81 DMX Address Slave 01 - 06 DMX Mode DMX Delay Stand Alone Slave USTAWIENIA SYSTEMU (Settings) Settings Rozpoczynając od ekranu głównego 1, należy nacisnąć przycisk MENU, aby wejść do menu głównego. Przyciskami UP i DOWN wybierz System Info pozycję menu Settings i potwierdź przyciskiem ENTER. Menu DMX Address DMX Mode...
-
Página 82: Pilot Zdalnego Sterowania (Opcjonalny)
DMX Address DMX Mode DMX Delay Stand Alone Slave INFORMACJE O SYSTEMIE (System Info) Settings Rozpoczynając od ekranu głównego 1, należy nacisnąć przycisk MENU, aby wejść do menu głównego. Przyciskami UP i DOWN wybierz System Info pozycję menu System Info i potwierdź przyciskiem ENTER. Menu DMX Address DMX Mode... -
Página 83: Dyfuzory
FL (Flash / Stroboskop) Zaraz po naciśnięciu przycisku stroboskopu włącza się tryb statyczny. Efekt stroboskopu można teraz dowolnie regulować za pomocą przycisków + i -. Wartości dla efektu stroboskopowego odpowiadają wartościom kanału 2 w tabeli DMX 4CH i kanału 3 w tabelach 13CH1 i 20CH (ustawiona wartość... -
Página 84: Ustawianie I Montaż
USTAWIANIE I MONTAŻ Do ustawienia reflektora w odpowiednim miejscu na płaskiej powierzchni służy szeroki stojak lub uchwyt montażowy. Aby zamontować urządzenie na kratownicy, konieczny jest specjalny zacisk do kratownic, przytwierdzany do uchwytu montażowego . Odpowiednie zaciski do trawersów są dostępne jako opcja. Upewnij się, że urządzenie jest solidnie przymocowane. Zabezpiecz reflektor przeznaczoną do tego liną, przeciągając ją... -
Página 85: Technika Dmx
TECHNIKA DMX DMX-512 DMX (Digital Multiplex) to nazwa uniwersalnego protokołu transmisji do komunikacji między odpowiednimi urządzeniami a kontrolerami. Kontroler DMX wysyła dane DMX do podłączonych urządzeń DMX. Transmisja danych DMX następuje zawsze w formie szeregowego strumienia danych, który jest przekazywany z jednego urządzenia do następnego przez znajdujące się w każdym urządzeniu obsługującym standard DMX złącza „DMX IN”... -
Página 86: Dane Techniczne
DANE TECHNICZNE Numer artykułu: CLDROPP4 Rodzaj produktu: Reflektor LED Wash Light Typ: Reflektor zewnętrzny Widmo kolorów LED: RGBWA+UV Liczba diod LED: Typ diod LED: 15 W Częstotliwość modulacji 800 Hz PWM: Kąt rozwarcia wiązki Beam Angle 22° / Field Angle 38°... -
Página 87: Deklaracje Producenta
DEKLARACJE PRODUCENTA GWARANCJA PRODUCENTA I OGRANICZENIE ODPOWIEDZIALNOŚCI Nasze aktualne warunki gwarancji i informacje dotyczące ograniczenia odpowiedzialności znajdą Państwo na stronie: https://cdn-shop. adamhall.com/media/pdf/MANUFACTURERS-DECLARATIONS_CAMEO.pdf. W razie konieczności skorzystania z serwisu proszę skontaktować się z firmą Adam Hall GmbH, Adam-Hall-Str. 1, 61267 Neu Anspach / e-mail Info@adamhall.com / +49 (0)6081 / 9419-0. PRAWIDŁOWA UTYLIZACJA NINIEJSZEGO PRODUKTU (Obowiązuje w Unii Europejskiej i innych krajach europejskich stosujących system sortowania odpadów) Niniejszy symbol na produk- cie lub związanych z nim dokumentach wskazuje, iż... -
Página 88: Italiano
Questo dispositivo è stato sviluppato e prodotto in conformità con elevati standard qualitativi che ne garantiscono il regolare funzionamento per molti anni. Leggete attentamente questo manuale d‘uso per utilizzare al meglio il vostro nuovo prodotto Cameo Light. Per maggiori informazioni su Cameo Light consultare la nostra pagina Web WWW.CAMEOLIGHT.COM. - Página 89 34. La distanza dai materiali infiammabili deve essere di almeno 0,5 m. 35. I cavi di rete utilizzati per l’alimentazione elettrica di più dispositivi devono avere una sezione di almeno 1,5 mm². I cavi impiegati nell’Unione Europea devono essere di tipo H05VV-F o simile. Adam Hall offre cavi idonei. Tali cavi consentono di collegare più dispositivi dalla presa di uscita POWER OUT di un apparecchio alla presa POWER IN di un altro dispositivo.
-
Página 90: Introduzione
IP65 in dotazione. In caso di mancato utilizzo, chiudere sempre con il relativo tappo ermetico in gomma. POWER OUT Presa di uscita compatibile con TRUE1 per l’alimentazione elettrica di altri proiettori CAMEO (corrente di uscita massima: v. incisione sul retro dell'alloggiamento). In caso di mancato utilizzo, chiudere sempre con il relativo tappo ermetico in gomma. -
Página 91: Piedini In Gomma
DISPLAY OLED Il display OLED mostra la modalità di funzionamento attualmente attivata (schermata principale 1), lo stato dei proiettori (schermata principale 2 = stato di W-DMX), le voci di menu nel menu operativo e il valore numerico o lo stato operativo in determinate voci di menu. Per passare da una schermata principale all'altra premere brevemente e contemporaneamente ENTER e DOWN. -
Página 92: Utilizzo
• Dopo l'accensione del proiettore, durante la procedura di avvio sul display vengono visualizzati in successione i messaggi "Software Update Please Wait..." (solo per manutenzione) e "Welcome to Cameo", seguiti dall'indicazione del modello e della versione del software. Al termine della procedura il proiettore è pronto e viene avviata la modalità di funzionamento precedentemente attivata. - Página 93 W-DMX™ Per accoppiare un ricevitore W-DMX con un trasmettitore W-DMX compatibile, richiamare il comando Wireless Settings W-DMX (W-DMX On) dal menu del ricevitore ed eseguire il comando Reset nella stessa voce di menu (selezionare "Reset" e confermare con ENTER). Il ricevitore è...
- Página 94 Static Color Macro Auto Loop User Color Mode Slave DMX DELAY Con l'ausilio della funzione DMX Delay è possibile creare facilmente un effetto chaser con un numero qualsiasi di proiettori dello stesso Menu Menu DMX Mode DMX Address modello e della stessa versione software, che altrimenti si potrebbe ottenere solo con un idoneo controller DMX e una programmazione DMX Address DMX Address 3 CH...
- Página 95 DMX Address Group DMX Delay DMX Delay 6 CH DMX Mode by DMX? No/Yes Mode Mode Mode Mode Mode Stand Alone Stand Alone 7 CH DMX Delay Delay 0.0s Static Color Macro Auto Loop User Color Slave Slave 13CH01 Stand Alone Settings Settings 13CH02...
- Página 96 Cyan Cold White Settings Settings 13CH02 System Info System Info 20 CH Menu Stand Alone Auto Program x DMX Address Static Program 1 Dimmer Menu DMX Delay DMX Mode Color Macro Speed DMX Address Group MODALITÀ DI FUNZIONAMENTO STAND-ALONE LOOP DMX Delay Auto Program 6...
- Página 97 Slave User Color 1.Step Menu Stand Alone User Color Color x Settings 2.Step Color 1 DMX Address Static Color 1 Dimmer 3.Step Blackout System Info DMX Mode Color Macro Strobe 4.Step ------- DMX Delay Auto Color 8 Stand Alone Loop Green MODALITÀ...
- Página 98 DMX Address Slave 01 - 06 DMX Mode DMX Delay Stand Alone Slave IMPOSTAZIONI DI SISTEMA (Settings) Settings Premere MENU dalla schermata principale 1 per accedere al menu principale. Con i tasti UP e DOWN selezionare la voce di menu Settings System Info e confermare con ENTER.
-
Página 99: Telecomando A Infrarossi (Opzionale)
DMX Address DMX Mode DMX Delay Stand Alone Slave INFORMAZIONI DI SISTEMA (System Info) Settings Premere MENU dalla schermata principale 1 per accedere al menu principale. Con i tasti UP e DOWN selezionare la voce di menu System System Info Info e confermare con ENTER. -
Página 100: Diffusori
FL (Flash/stroboscopio) Non appena si preme il tasto per impostare lo stroboscopio, si attiva la modalità di funzionamento statica. L'effetto stroboscopico può ora essere regolato a piacere con i tasti + e -. I valori dell'effetto stroboscopio corrispondono ai valori del canale 2 della tabella DMX 4CH e del canale 3 delle tabelle 13CH1 e 20CH (il valore impostato viene visualizzato sul display). -
Página 101: Installazione E Montaggio
INSTALLAZIONE E MONTAGGIO Grazie all'ampia staffa di montaggio o di supporto, il proiettore può essere collocato in un punto adatto su una superficie piana. Il montaggio su una traversa viene effettuato tramite un apposito morsetto per traverse, da fissare alla staffa di montaggio . -
Página 102: Tecnologia Dmx
TECNOLOGIA DMX DMX512 DMX (Digital Multiplex) è la sigla di un protocollo di trasmissione universale per la comunicazione tra dispositivi e controller. Un controller DMX invia dati DMX ai dispositivi DMX collegati. I dati DMX vengono sempre trasmessi come flusso di dati seriale, che viene inoltrato da un dispositivo collegato al successivo attraverso le connessioni (connettori XLR) DMX IN e DMX OUT presenti per ogni dispositivo DMX compatibile, per un massimo di 32 dispositivi. -
Página 103: Dati Tecnici
DATI TECNICI Codice articolo: CLDROPP4 Tipologia di prodotto: Wash Light a LED Tipo: Proiettori da esterni Spettro cromatico LED: RGBWA+UV Numero di LED: Tipo di LED: 15 W Frequenza PWM: 800 Hz Angolo di emissione: Beam Angle 22° / Field Angle 38°... -
Página 104: Dichiarazioni Del Produttore
DICHIARAZIONI DEL PRODUTTORE MANUFACTURER’S WARRANTY & LIMITATION OF LIABILITY Le nostre attuali condizioni di garanzia e la limitazione di responsabilità sono consultabili alla pagina: https://cdn-shop.adamhall.com/media/ pdf/MANUFACTURERS-DECLARATIONS_CAMEO.pdf. In caso di assistenza, rivolgersi a Adam Hall GmbH, Adam-Hall-Str. 1, 61267 Neu Anspach / E-mail Info@adamhall.com / +49 (0)6081 / 9419-0. CORRETTO SMALTIMENTO DEL PRODOTTO (In vigore nell‘Unione Europea e in altri Paesi europei in cui si attui la raccolta differenziata) Questo simbolo apposto sul prodotto o sui relativi documenti indica che, per evitare danni all‘ambiente e alle persone causati da uno smaltimento incontrollato dei rifiuti,... -
Página 105: Dmx
DMX CONTROL / DMX STEUERUNG / PILOTAGE DMX / CONTROL DMX / STEROWANIE DMX / CONTROLLO DMX The DMX Delay channel of each DMX mode is only enabled, if by DMX? in the menu item DMX Delay is set to Yes. Der Kanal DMX Delay ist in den DMX-Modi nur aktiviert, wenn im Menüpunkt DMX Delay unter by DMX? Yes eingestellt ist. - Página 106 Pink Warm White White Cold White Color Jumping stop Color Jumping speed slow -> fast Color Fading speed slow -> fast Color Macro User Color_1 (override RGB- User Color_2 WA+UV) User Color_3 User Color_4 User Color_5 User Color_6 User Color_7 User Color_8 no function 0,1s - 10s (0,1s Steps)
- Página 107 13 Channel Mode 1 Function Values Sub-Group Dimmer 0% to 100% Dimmer Dimmer fine 0% to 100% Strobe open Strobe closed Pulse Random, slow -> fast Ramp up Random, slow -> fast Multifunctional Strobe functions Ramp down Random, slow -> fast Strobe Random Strobe effect, slow ->...
- Página 108 0,1s - 10s (0,1s Steps) Color Macro Transition Time between 11s - 119s (1s Steps) Crossfade Color Macros 2m - 4m50s (10s Steps) 5m - 15m (1m Steps) Bulb White (2700K) Halogen White (3200K) Color Temperature Neutral White (4000K) Studio White (5600K) Daylight White (6500K) 1800K - 7500K No Delay...
- Página 109 No Chase, Color Macro 1 is on Jump 10,0s -> 4,0s Chase Jump 4,0s -> 0,1s Chase Fade 10,0s -> 4,0s Fade 4,0s -> 0,1s Color off Amber Yellow warm Yellow Green Turquoise Cyan Blue Lavender Mauve Magenta Pink Color Macros 1 Color Macro Warm White White...
- Página 110 Color off Amber Yellow warm Yellow Green Turquoise Cyan Blue Lavender Mauve Magenta Pink Warm White Color Macro Color Macro White Cold White Color Jumping stop Color Jumping speed slow -> fast Color Fading speed slow -> fast User Color_1 User Color_2 User Color_3 User Color_4...
- Página 112 CAMEOLIGHT.COM Adam Hall GmbH | Adam-Hall-Str. 1 | 61267 Neu-Anspach | Germany Phone: +49 6081 9419-0 | adamhall.com REV: 01...