Tabla de contenido
Publicidad
Idiomas disponibles
Idiomas disponibles
Enlaces rápidos
PH-60C Swiv-L-Punch™ Head Instructions
for all equipment and material being used before operating this tool
to reduce the risk of serious personal injury.
SAVE THESE INSTRUCTIONS!
• Keep your fingers and hands away from the punch head during
the punch cycle. Your fingers or hands can be crushed, fractured or
amputated if they are caught between the punch dies or the compo-
nents and any other object.
• Do not use on energized electrical lines to reduce the risk of elec-
trical shock, severe injury and death. Tool is not insulated. Use
appropriate work procedures and personal protective equipment when
working near energized electrical lines.
• Large forces are generated during product use that can break or
throw parts and cause injury. Stand clear during use and wear ap-
propriate protective equipment, including eye protection.
• Do not handle punch head while punching. The punch head con-
tains high pressure oil during punching. High pressure oil escaping
from punch head can penetrate the skin and cause serious injury. If oil
is injected under the skin, seek immediate medical attention.
• Never repair a damaged head. A head that has been welded,
ground, drilled or modified in any manner can break during use. Only
replace components as indicated in these instructions. Discard dam-
aged heads to reduce the risk of injury.
If you have any questions concerning this RIDGID
• Contact your local RIDGID distributor.
• Visit RIDGID.com to find your local RIDGID contact point.
• Contact Ridge Tool Technical Service Department at rtctechservic -
es@emerson.com, or in the U.S. and Canada call (800) 519-3456.
Description
The RIDGID
®
Swiv-L-Punch™ Head is designed for use with punches
and dies (such as knockout punches) to punch holes through sheet ma-
terials such as mild or stainless steel.
The tool is available either as an interchangeable head (For RIDGID
RE 6/ RE 60 or ILSCO Electrical Tool) or as part of a dedicated tool
(RIDGID
®
RE-600 series tools).
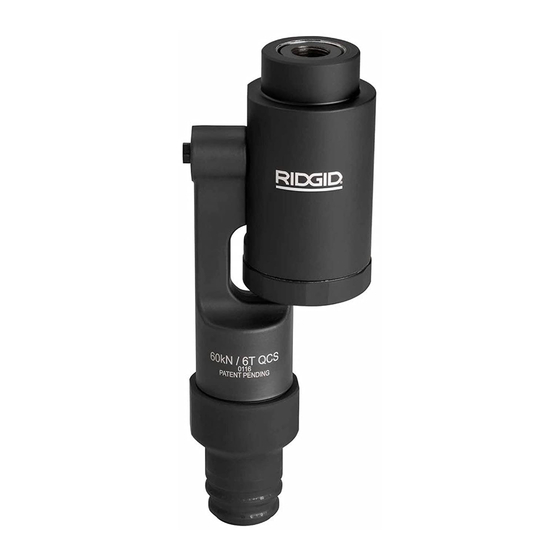
The Punch Head can rotate and articulate 360 degrees for better access
in tight areas.
360° Articulation
¾" – 16 UNF Thread For
Draw Stud
Figure 1 – PH-60C Swiv-L-Punch Head (Interchangeable version)
Specification
Material Thickness .............Mild Steel – Up to 10 gauge
Max. Punch Diameter...........Up to 5" (120 mm) in 12 gauge mild steel
Draw Stud Thread ................
QCS Coupling Type............6T QCS and 60kN QCS
Maximum Output Force......14,600 lbf (64 kN)
Interchangeable Head
Weight.................................4.4 lb (2.0 kg)
Punching capacity depends on a variety of factors including punch
size/configuration, material thickness, type, and hardness. Holes may not
be able to be completed in all cases based on these and other variables.
Printed 1/17
The Emerson logo and RIDGID logo are registered trademarks of Emerson Electric Co. or RIDGID, Inc. in the U.S. and other countries.
EC42593
WARNING
Read and understand
these instructions, the
electrical tool instruc-
tions, and the warn-
ings and instruc tions
®
product:
QCS Coupling
(0.134", 3.4 mm)
Stainless Steel – Up to 12 gauge
(0.109", 2.8 mm)
and 14 gauge stainless steel
Up to 2" (50,8 mm) in 10 gauge mild steel
and 14 gauge stainless steel
3
/
" – 16 UNF
4
All other trademarks belong to their respective holders.
Inspection/Maintenance
Inspect the Punch Head before each use for issues that could affect safe
use.
1. Remove battery from electrical tool.
2. Clean any oil, grease or dirt from the tool and head, including han-
dles and controls. This aids inspection and helps prevent the ma-
chine from slipping from your grip.
3. Inspect the head for:
• Proper assembly and completeness.
• Wear, corrosion or other damage.
• Oil Leaks. If the draw stud piston ex-
tends past the tool face (Figure 2), the
oil is low. Have the punch head serviced
– do not attempt to add oil.
• Presence and readability of head mark-
ings.
• See electrical tool manual for inspec-
tion and maintenance of the QCS cou-
pling.
If any issues are found, do not use head until corrected.
4. Inspect the electrical tool and any other equipment being used as
directed in their instructions. Make sure other knockout components
are in good working condition.
5. Lubricate the head pivot points with a light weight general purpose
lubricating oil. Wipe off any excess oil.
Set Up/Operation
These instructions are generalized for many types of knockout punches
and dies. Follow the specific instructions for the set up and operation of
the knockout punch and die being used.
1. Determine the thickness and type of material to be punched. Make
sure there is only a single thickness of material to be punched. De-
termine the hole size you wish to punch. Select the appropriate
matched punch and die set per manufacturer's specifications.
2. Make sure all equipment is inspected and set up per manufacturer's
instructions.
3. Mark the hole location and if needed drill a pilot hole
larger than the draw stud (E.g. for a
®
(22 mm) pilot hole.)
4. Remove battery from electrical tool. Thread the draw stud com-
pletely into the Punch Head unit. The thread must be fully engaged
to ensure proper operation, but does not need to be tight.
5. Place any needed spacer(s) over the draw stud, followed by the
punch die. Place the cupped half of the die facing away from the tool.
6. Insert the draw stud through the pilot hole in the material to be
punched.
7. Thread the matching punch half of the die onto the draw
the cutting edges toward the material. Tighten by hand until there
are no gaps between the head, spacer(s), die, material and punch.
If there are gaps between the parts, the dies will not be square to the
material and could damage the equipment or cause injury.
A thread adapter is available for use with punches with 1
threads to convert for use with ¾" - 16 UNF draw studs. Fully thread
adapter into the punch as shown in Figure 3 inset.
Punch Die
Spacer(s)
(If Needed)
Figure 3 – Setting Up The Punch Head
Make sure that the punch is fully threaded onto the draw stud. Do
not operate with the punch partially threaded onto the draw stud,
this could damage the stud. If the punch will not fully thread onto
the draw stud, a spacer may need to be removed.
8. Changing Heads with QCS Coupling – See electrical tool manual.
©2017 RIDGID, Inc.
Tool Face
Draw Stud
Piston
Figure 2 – Punch Head
3
/
" draw stud, drill a
4
Punch
Material
Optional
1
1
/
– 12
8
Adapter
Oil Low
1
/
" (3 mm)
8
7
/
"
8
stud
with
1
/
" - 12
8
999-999-526.09
REV. B
Publicidad
Tabla de contenido

Manuales relacionados para RIDGID Swiv-L-Punch PH-60C


Resumen de contenidos para RIDGID Swiv-L-Punch PH-60C
- Página 1 ©2017 RIDGID, Inc. Printed 1/17 999-999-526.09 The Emerson logo and RIDGID logo are registered trademarks of Emerson Electric Co. or RIDGID, Inc. in the U.S. and other countries. EC42593 REV. B All other trademarks belong to their respective holders.
-
Página 2: Caractéristiques Techniques
• Consulter le point de vente RIDGID le plus proche ; quages de la tête. • Vous rendre sur le site RIDGID.com pour obtenir les coordonnées du • Consultez le manuel de l’appareil pour les consignes d’inspection point de vente RIDGID le plus proche ;... -
Página 3: Préparation Et Utilisation
• Use el cabezal punzonador PH-60C Swiv-L-Punch™ solamente 8. Changement de têtes équipées d’un raccord rapide QCS – Se re- con una herramienta eléctrica RE 6 o RE 60 de RIDGID ® . El uso de porter au manuel de la pince électrique. -
Página 4: Especificación
PH-60C Swiv-L-Punch™ Head Instructions La herramienta está disponible en forma de cabezal intercambiable (para Puesta en marcha y operación la herramienta RE 6/RE 60 de RIDGID ® o la herramienta eléctrica de Estas instrucciones son generales para muchos tipos de punzones y ILSCO) o en forma de una herramienta dedicada (herramientas de la troqueles sacabocados. - Página 5 44133 Juego métrico de punzones y troqueles sacabocados de M 16, 20, 25, Das Werkzeug ist entweder als Wechselkopf (für RIDGID® RE 6/ RE 60 oder ILSCO Elektrowerkzeug) oder als Teil eines eigenen Werkzeugs (Werkzeuge 32, 40, dos pernos de tracción, tres espaciadores y acoplamiento de der RIDGID®...
-
Página 6: Vorbereitung Und Betrieb
PH-60C Swiv-L-Punch™ Head Instructions • Im Handbuch des Elektrogeräts können Sie sich über Inspektion und Halten Sie den Betriebsschalter nicht fest, bis das Werkzeug au- HINWEIS Wartung der QCS-Kupplung informieren. tomatisch zurückgezogen wird. Dadurch könnte die Stanzvorrichtung in der Stanzbacke gestaucht werden, sodass beide Teile beschädigt werden Wenn Probleme festgestellt wurden, diese zuerst beheben, bevor der könnten. - Página 7 Wanneer problemen worden laag Dit gereedschap is verkrijgbaar als een verwisselbare kop (voor RIDGID® RE 6/ vastgesteld, de kop niet gebruiken tot RE 60 of ILSCO elektrisch gereedschap), of als onderdeel van een specifiek deze gerepareerd is. werktuig (werktuigen van de RIDGID® RE-600 reeks).
- Página 8 Toebehoren L’utensile è disponibile o come testa intercambiabile (Per l’Utensile elettrico RE 6/RE 60 o ILSCO RIDGID® ) o come parte di un utensile dedicato (utensili della serie RE-600 RIDGID® ). Catalogusnr. Beschrijving La Testa di foratura può...
- Página 9 PH-60C Swiv-L-Punch™ Head Instructions 3. Ispezionare la testa per verificare: Accertarsi che il punzone sia interamente filettato sul perno di ac- Lato anteriore dell‘attrezzo coppiamento. Non attivare se il punzone è parzialmente filettato sul • Montaggio adeguato e accurato. perno di accoppiamento, questo potrebbe danneggiare il montante. •...
-
Página 10: Especificações
A ferramenta está disponível como uma cabeça substituível (para ferramen- Configuração/Funcionamento tas elétricas RIDGID® RE 6/RE 60 ou ILSCO) ou como parte de uma ferramen- Estas são instruções gerais para muitos tipos de punçonadoras de orifí- ta dedicada (ferramentas RIDGID® série RE-600). - Página 11 23478 Conjunto de Punçonadora Extractora com 1/2”, 3/4”, 1”, 11/4”, 11/2”, 2” Verktyget finns dels som utbytbart huvud (för RIDGID®RE 6/ RE 60 el- e Caixa ler ILSCO elverktyg) eller som en del i ett specialverktyg (verktyg i serien RIDGID®RE-600).
- Página 12 PH-60C Swiv-L-Punch™ Head Instructions 3. Kontrollera verktygshuvudet avseende: Kontrollera att stansen är helt fastgängad på dragtappen. Använd Verktygsyta inte utrustningen med stansen delvis fastgängad på dragtappen ef- • Korrekt och fullständig montering. tersom detta kan skada tappen. Om stansen inte gängas fast ordent- •...
- Página 13 Værktøjet fås enten med et udskifteligt hoved (til elektrisk værktøj RE 6/ Opsætning/drift RE 60 fra RIDGID® eller elektrisk værktøj fra ILSCO) eller som del af et værktøj, Disse anvisninger er af generel karakter og gældende for mange fors- der er beregnet til et bestemt formål (værktøjer i RE-600-serien fra RIDGID® ).
- Página 14 Verktøyet er tilgjengelig enten som et utskiftbart hode (For RIDGID® RE 6/ RE 60 eller ILSCO Electrical Tool) eller som del av et dedikert verktøy (RIDGID® 11. Sluk for det elektriske værktøj, og fjern stansen fra hullet. Vær op- verktøy i RE-600-serien).
- Página 15 PH-60C Swiv-L-Punch™ Head Instructions 3. Inspiser hodet for: 8. Bytte hoder med QCS-kobling – Se håndboken for el-verktøy. Verktøyflate • Korrekt montering og at det er komplett. 9. Installer verktøyets batteri med tørre hender. • Slitasje, korrosjon eller annen skade. 10.
-
Página 16: Tekniset Tiedot
5. Voitele pään nivelkohdat ohuella yleisvoiteluöljyllä. Pyyhi ylimääräi- nen ja ruostumaton teräs. nen öljy. Työkalu on saatavana joko vaihtopäänä (malleihin RIDGID® RE 6/ RE 60 tai Asennus ja käyttö ILSCO-sähkötyökalu) tai osana kyseistä työkalua (RIDGID® RE-600-mallisar- Nämä ohjeet on yleistetty koskemaan useita erityyppisiä reikälävistimiä... - Página 17 23478 Lävistinsarja 1/2”, 3/4”, 1”, 11/4”, 11/2”, 2” ja kotelo Narzędzie jest dostępne albo jako wymienna głowica (do narzędzia elek- trycznego RIDGID® RE 6/ RE 60 lub ILSCO), albo jako część dedykowanego 23492 Lävistinsarja 21/2”, 3”, 31/2”, 4” ja kotelo narzędzia (narzędzia serii RIDGID®...
-
Página 18: Wyposażenie Dodatkowe
Pokud máte nějaké dotazy týkající se tohoto výrobku RIDGID®: 8. Wymienianie głowic z użyciem sprzęgła QCS – Zobacz instrukcję obsłu- • Spojte se s místním obchodním zástupcem pro výrobky RIDGID. gi narzędzia elektrycznego. • Navštivte www.RIDGID.com a vyhledejte místní kontaktní místo pro 9. - Página 19 Tento nástroj je dostupný buď jako vyměnitelná hlava (pro elektrické ná- Nastavení/Provoz stroje RIDGID® RE 6/ RE 60 nebo ILSCO) nebo jako součást speciálního ná- Tyto pokyny se obecně vztahují na mnoho druhů vylamovacích raznic a stroje (řada nástrojů RIDGID® RE-600).
-
Página 20: Technické Údaje
Sada vylamovacích razicích vložek w/1/2”, 3/4”, 1”, 11/4”, 11/2”, 2” a pouzdro Náradie je k dispozícii buď ako výmenná hlavica (pre elektrické náradie RIDGID® RE 6/ RE 60 alebo ILSCO), alebo ako súčasť špecializovaného náradia 23492 Sada vylamovacích razicích vložek w/21/2”, 3”, 31/2”, 4” a pouzdro (náradie modelového radu RIDGID®... - Página 21 Spúšťací vypínač uvoľnite hneď po dokončení otvoru. • Vizitaţi www.RIDGID.com pentru a găsi punctul dvs. local de contact RIDGID. Nedržte spúšťací vypínač stlačený, kým sa prístroj automa- • Contactaţi Departamentul Serviciilor Tehnice Ridge Tool la POZNÁMKA...
- Página 22 Unealta este disponibilă fie ca un cap interschimbabil (Pentru RIDGID® RE 6/ 1. Determinaţi grosimea şi tipul de material ce trebuie ştanţat. Asigu- RE 60 sau maşina-unealtă electrică ILSCO) sau ca piesă a unei unelte dedica- raţi-vă...
- Página 23 23478 Set matriţă poanson decupare circulară w/1/2”, 3/4”, 1”, 11/4”, 11/2”, 2” A szerszám cserélhető fejként (a RIDGID® RE 6/ RE 60 vagy ILSCO elektromos şi cutie szerszámgéphez), ill. célszerszám részeként (RIDGID® RE-600 sorozatú szer- számok) is elérhető.
- Página 24 10. Kezét a fejtől, ill. egyéb mozgó alkatrészektől távol tartva működtes- se az elektromos szerszámgépet annak kezelési útmutatója szerint. Εάν έχετε οποιαδήποτε απορία σχετικά με το παρόν προϊόν RIDGID®: Mihelyt a lyuk elkészült, engedje el a működtető kapcsolót. • Επικοινωνήστε με τον τοπικό διανομέα RIDGID.
-
Página 25: Τεχνικά Χαρακτηριστικά
Αυτό το εργαλείο διατίθεται είτε ως εναλλάξιμη κεφαλή (Για το ηλεκτρικό χρησιμοποιείτε, σύμφωνα με τις οδηγίες τους. Βεβαιωθείτε ότι τα εργαλείο RIDGID® RE 6/ RE 60 ή ILSCO) ή ως μέρος ειδικού εργαλείου (Εργα- υπόλοιπα εξαρτήματα διάτρησης ελασμάτων είναι σε καλή κατάστα- λεία... - Página 26 σης από την οπή. Προσέξτε τυχόν αιχμηρές ακμές. kao što su blagi ili nehrđajući čelik. Βοηθητικά εξαρτήματα Ovaj je alat dostupan ili kao zamjenjiva glava (za RIDGID® RE 6/ RE 60 ili ILSCO električni alat) ili kao dio namjenskog alata (alata serije RIDGID® RE-600). Αρ. κατα- Udarna glava može se rotirati i ugibati za 360 stupnjeva radi lakšeg pristupa...
- Página 27 Slika 3 – postavljanje glave za probijanje V primeru kakršnih koli vprašanj glede tega izdelka RIDGID®: • Obrnite se na krajevnega distributerja RIDGID. Provjerite da je preša potpuno zavijena na vijak za izvlačenje. Ne •...
-
Página 28: Tehnični Podatki
5. Namažite vse tečaje glave z lahkim večnamenskim oljem. Odvečno primer plavljeno ali nerjavno jeklo. olje obrišite. To orodje je na voljo kot izmenljiva glava (za električno orodje RIDGID® RE 6/ RE 60 ali ILSCO) ali kot del namenskega orodja (orodja serije RIDGID® RE-600). Priprava/uporaba Prebojna glava se lahko obrača in zgiba za 360 stopinj za lažji dostop v te-... - Página 29 (kao što su nokaut probojci) za bušenje rupa kroz lim od običnog ili nerđajućeg čelika. Ovaj je alat dostupan ili kao zamenjiva glava (za RIDGID® RE 6/ RE 60 ili ILSCO električni alat) ili kao deo namenskog alata (alata serije RIDGID® RE-600).
-
Página 30: Dodatna Oprema
11. ISKLJUČITE električni alat i uklonite probojac iz rupe. Pazite na oštre сварена, прошлифована, рассверлена или модифицирована каким- ivice. либо способом, может разрушиться во время использования. Заме- няйте компоненты только согласно указаниям настоящей инструкции. Для снижения риска травмы выбрасывайте поврежденные головки. Если у вас возникли вопросы, касающиеся изделий RIDGID®:... -
Página 31: Технические Характеристики
• Обратитесь к местному дистрибьютору RIDGID. 3. Проведите осмотр головки и проверьте: инструмента • Войдите на сайт www.RIDGID.com в сети интернет и найдите контакт- • Правильность сборки и комплектацию. ный телефон местного дистрибьютора RIDGID. • Отсутствие износа, коррозии или ино- Втулка... -
Página 32: Дополнительные Принадлежности
) le b rl kte kullanılmak üzere tasarlanmıştır. 11. Выключите электроинструмент и извлеките пробойник из от- Alet değ şt r leb l r b r kafa (RIDGID® RE 6/ RE 60 veya ILSCO Elektr kl Alet ç n) veya верстия. Остерегайтесь острых кромок. - Página 33 PH-60C Swiv-L-Punch™ Head Instructions Muayene/Bakım Pançın çekme saplaması üzer ne tamamen lerlet ld ğ nden em n olun. Çekme saplaması üzer ne kısmen lerlet lm ş pançı çalıştırma- Zımba Kafasını her kullanımdan önce kullanımı etk leyeb lecek sorunlar yın, bu saplamaya zarar vereb l r. Panç çekme saplamasına tamamen açısından nceley n.
- Página 34 қызмет көрсету бойынша электр құралының нұсқаулығын матрицамен (тесіп өтетін пуансон сияқты) пайдалануға арналған. қараңыз. Құрал өзара алмастырылатын бас (RIDGID® RE 6/ RE 60 немесе ILSCO электр Ақаулық табылса, түзетілгенше басты пайдаланбаңыз. құралы үшін) немесе арнаулы құрал бөлігі (RIDGID® RE-600 сериясындағы...
- Página 35 PH-60C Swiv-L-Punch™ Head Instructions Пуансон Пуансон Материал Матрица Бөлгіштер Қосымша 11/8 – 12 (Егер қажет болса) жалғағышы 3-сурет – Пуансон басын орнату Пуансон созылған тіске толықтай оралғандығын тексеріңіз. Тіске жартылай оралған пуансонды қолданбаңыз, бұл тістерді зақымдауы мүмкін. Пуансон созылған тіске толық оралмаса, бөлгішті алып тастау қажет...
- Página 36 PH-60C Swiv-L-Punch™ Head Instructions Manufacturer: CE-vastaavuus RIDGE TOOL COMPANY Tämä laite on sähkömagneettista yhteensopivuutta koskevan Euroopan 400 Clark Street yhteisön direktiivin 2004/108/EC mukainen käyttäen seuraavia standardeja: Elyria, Ohio 44035-6001 EN 61326-1:2006, EN 61326-2-1:2006. U.S.A. Zgodność z dyrektywami Unii Europejskiej Authorized Representative: Ten przyrząd spełnia wymagania Dyrektywy Zgodności Elektromagnetycznej RIDGE TOOL EUROPE Komisji Europejskiej 2004/108/EC, zgodnie z następującymi normami:...