
Manuales relacionados para Kyocera DP-7150


Resumen de contenidos para Kyocera DP-7150
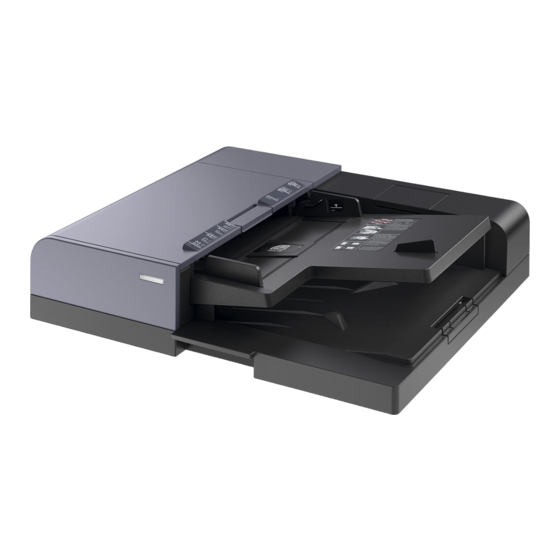
- Página 1 DP-7150 INSTALLATION GUIDE GUIDE D’INSTALLATION GUÍA DE INSTALACION INSTALLATIONSANLEITUNG GUIDA ALL’INSTALLAZIONE...
- Página 2 (EN) In case of installing it in the following product, install it referring to the installation procedures described in the service manual. (FR) En cas d’ installation dans le produit suivant, reportez-vous aux procédures d’ installation figurant dans le manuel de service. (ES) En caso de instalar la unidad en el siguiente producto, consulte los procedimientos de instalación que se describen en el manual de servicio para instalarla.
- Página 3 G(M4x10) I(M3x8) 100V For Taiwan 120V (North America / 230V (Europe) Latin America) (EN) Be sure to remove any tape and/or cushioning materials from the parts supplied. (FR) Veillez à retirer les morceaux de bande adhésive et/ou les matériaux de rembourrage des pièces fournies.
- Página 6 G(M4x10) G(M4x10) I(M3x8) I(M3x8)
- Página 8 20mm 20mm 20mm 20mm [Operation check] 1.To check the machine operation, prepare original (a) where 4 lines (b) are drawn 20 mm from the edges of the A3 sheet and 1 line (c) is drawn at its center. 2.Connect the power plug of the MFP into the wall outlet and turn the main power switch on. 3.Set the original (a) on the DP and perform a test copy to check the operation and the copy example.
- Página 9 20mm 20mm 20mm 20mm 4.Compare original (a) with the copy example. If the gap exceeds the reference value, perform the following adjustments according to the type of the gap. Check images of the DP after checking and adjusting images of the MFP. For details, see the service manual. NOTICE: If there is any image fogging, adjust the U068 DP scanning position.
- Página 10 Be sure to adjust in the following order. If not, the adjustment cannot be performed correctly. For checking the angle of leading edge, see page 10. <Reference value> Simplex copying: within ±3.0 mm; Duplex copying: within ±4.0 mm For checking the angle of trailing edge, see page 14. <Reference value>...
- Página 11 For checking the leading edge timing, see page 20. <Reference value> Within ±2.5 mm For checking the center line, see page 22. <Reference value> Simplex copying: within ±2.0 mm; Duplex copying: within ±3.0 mm When using the original for adjustment, automatic adjustment of magnification, leading edge timing and center line can be performed at a time.
- Página 12 [Checking the angle of leading edge] 1.Check the horizontal gap between line (1) of original (a) and line (2) of copy example positions. If the gap exceeds the reference value, adjust the gap according to the following procedure. <Reference value> For single copying: The horizontal gap of line (2) should be within ±3.0 mm. For duplex copying: The horizontal gap of line (2) should be within ±4.0 mm.
- Página 13 (EN) (IT) Adjust the position of the DP unit (A). Regolare la posizione dell'unità DP (A). Loosen the adjusting screw (5). Allentare la vite di regolazione (5). For copy example (d): Slide the DP unit (A) to the machine rear ( ). Per un esempio di copia (d): For copy example (e): Slide the DP unit (A) to the machine front ( ).
- Página 15 8.Perform a test copy. 9.Repeat the steps above until the gap of line (2) of copy example shows the following reference values. <Reference value> For single copying: The horizontal gap of line (2) should be within ±3.0 mm. For duplex copying: The horizontal gap of line (2) should be within ±4.0 mm. 10.After the adjustment, install the inner cover (4) which is removed in step 3.Close the DP cover (3).
- Página 16 3mm/4mm 3mm/4mm [Checking the angle of trailing edge] 1.Check the gap between line (1) of original (a) and line (2) of copy example. If the gap exceeds the reference value, perform the following adjustment. <Reference value> For simplex copying: Within ±3.0 mm For duplex copying: Within ±4.0 mm [Vérification de l’angle du bord arrière] 1.Vérifiez l’écart entre la ligne (1) de l’original (a) et la ligne (2) de l’exemple de copie.
- Página 17 (EN) (IT) Adjust the height of DP. Regolazione dell’altezza del DP Loosen the nut (3). Allentare il dado (3). For copy example (f): Loosen the adjusting screw (4). Per un esempio di copia (f): Allentare la vite di regolazione (4). For copy example (g): Tighten the adjusting screw (4).
- Página 19 3mm/4mm 3mm/4mm 12.Make a proof copy again. 13.Repeat steps 1 to 12 until line (2) of copy example shows the following the reference values. <Reference value> For simplex copying: Within ±3.0 mm For duplex copying: Within ±4.0 mm 12.Effectuez à nouveau une copie de test. 13.Répétez les étapes 1 à...
- Página 20 -1.5% +1.5% [Checking the magnification] 2. Use the maintenance mode U070 to adjust the sub scan direction. 1.Check the gap between line (1) of original (a) and line (2) (3) of copy Sub Scan(F): Adjusts the scanner sub-scan magnification (front side) example.
- Página 21 -1.5% +1.5% 3. Adjust the values. 5. Repeat the steps 2 to 4 above until the gap of line (2) (3) of copy For the shorter length copy example (h)(j): Increases the value. example shows the reference value. For the longer length copy example (i)(k): Decreases the value. <Reference value>...
- Página 22 2.5mm 2.5mm [Checking the leading edge timing] Use the maintenance mode U071 to adjust the timing. 1.Check the gap between line (1) on original (a) and line (2) of copy Front Head: Adjusts the leading edge timing (front side) example. If the gap exceeds the reference value, adjust the gap Front Tail: Adjusts the trailing edge timing (front side) according to the following procedure.
- Página 23 2.5mm 2.5mm 3.Adjust the values. 5.Repeat the steps 2 to 4 above until the gap of line (2) of copy example For the shorter leading edge timing, copy examples (l): Decreases the shows the reference value. value. <Reference value> For the longer leading edge timing, copy examples (m): Increases the Vertical gap of line (2): within ±2.5 mm value.
- Página 24 2mm/ 2mm/ [Checking the center line] 2.Use the maintenance mode U072 to adjust the timing. 1.Check the gap between center line (1) on original (a) and center line Front: Adjusts the center line (front side) (2) of copy example. If the gap exceeds the reference value, adjust the Back: Adjusts the center line (rear side) gap according to the following procedure.
- Página 25 2mm/ 2mm/ 3. Adjust the values. 5.Repeat the steps 2 to 4 above until the gap of line (2) of copy example If the center moves more front, copy example (n): Decreases the value. shows the reference value. If the center moves inner, copy sample (o): Increases the value. <Reference value>...
- Página 26 [Automatic adjustment using the original for adjustment] 3.Set the original on the DP face up and press the key to carry out Start If there is no DP auto adjustment origina surface adjustment. 1.Set the maintenance mode U411 and press [DP Auto Adj] to output the 4.If appears on the display, the adjustment is completed.
- Página 27 149 1mm A(149 5mm) 74 1mm Using a DP auto adjustment original 3.If appears on the display, the adjustment is completed. "OK" 1.Direct F and R of the DP auto adjustment original upward, and set the If the number appears, the adjustment failed. Check the original set original from the place where F and R are marked.
- Página 28 2021.11 303V35671003...