Tabla de contenido
Publicidad
Idiomas disponibles
Idiomas disponibles
Enlaces rápidos
Publicidad
Capítulos
Tabla de contenido

Manuales relacionados para Classe CA-M400


Resumen de contenidos para Classe CA-M400
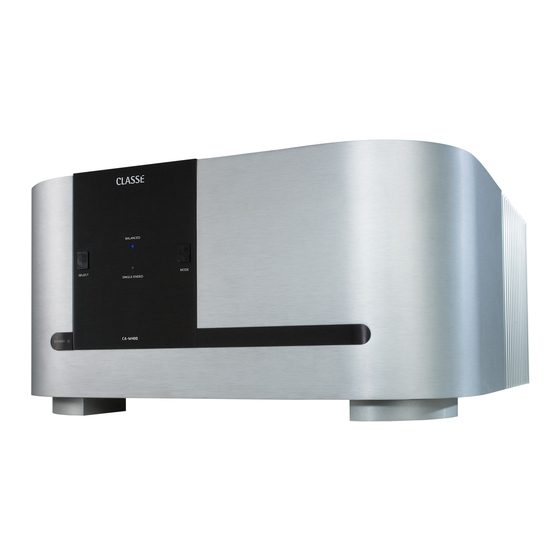
- Página 1 Owner’s Manual CA-M400 Power Amplifier Manuel d’utilisation CA-M400 Amplificateur de Puissance Bedienungsanleitung CA-M400 Endstufe Manuale di Istruzioni CA-M400 Amplificatore finale di potenza Manual de Instrucciones CA-M400 Etapa de Potencia Gebruiksaanwijzing CA-M400 Mono Eindversterker...
- Página 2 (Electromagnetic Compatibility) and LVD (Low Voltage Directive) standards of the European Community. Classe products are designed to comply with international directives on the Restriction of Hazardous Substances (RoHS) in electrical and electronic equipment and the disposal of Waste Electrical and Electronic Equipment (WEEE).
-
Página 3: Important Safety Instructions
Important Safety Instructions Caution: Please read and observe all warnings and instructions in this owner’s manual and all those marked on the unit. Retain this owner’s manual for future reference. 1. Do not attempt to service this product yourself. Do not open the cover for any reason. There are no user-serviceable parts inside. -
Página 4: Tabla De Contenido
Contents Welcome to the Classé family................5 a word about installation ..................5 Unpacking and Placement................6 unpacking your amplifier ..................6 placement......................6 ventilation ......................6 custom installations ....................7 serial number......................7 register your purchase!...................7 operating voltage ....................7 warm up/break-in period ..................8 please read this manual…..................8 Special Design Features ...................9 highly refined circuit design...................9 extensive listening tests ..................9... -
Página 5: Welcome To The Classé Family
You will find the warranty registration card at the end of the separate warranty policy booklet, enclosed. a word about installation Every effort has been made to make the Classé CA-M400 simple and straightforward to install and use. Still, we have no way to evaluate many other variables such as the size and shape of your room, its acoustics, and the associated equipment you have chosen to use with your amplifier. -
Página 6: Unpacking And Placement
The vents on both the bottom and the top of the CA-M400 must be kept free from any obstruction which would reduce the flow of air through the unit. Avoid... -
Página 7: Custom Installations
It will take only a minute or so. Please complete the card now, before you forget. operating voltage The CA-M400 power amplifier is set at the factory (internally) for 100V, 120V, 230V, or 240V AC mains operation, as appropriate for the country in which it is to be sold (230V only in European Union countries, in compliance with CE regulations). -
Página 8: Warm Up/Break-In Period
The CA-M400 includes protection circuitry that will prevent the amplifier from operating at dangerously high or low voltages. • At startup: the AC mains voltage must be within a range of approximately -15% to +10% of its nominal value at startup, or the amplifier will not turn on. -
Página 9: Special Design Features
Special Design Features highly refined All Classé analog amplification stages are based on circuits that have been circuit design extensively optimized over many years of continuous development. By starting with excellent circuit designs and working with them over the years, we are able to discover the many small refinements that add up to superlative performance, in a variety of applications. -
Página 10: Extraordinary Longevity
extraordinary longevity Another benefit of having worked with highly refined circuit designs so extensively over many years is that we have vast experience in what works well over the long term. By using only the highest quality parts to begin with, and then using them in an informed way as a result of both accelerated aging experiments and actual long- term experience, we are able to design and manufacture products which we are confident will stand the test of time. -
Página 11: Front Panel
�������� ������ ���� ������ ����� ������� ������� Front Panel Standby button & LED indicator The front panel Standby button will toggle the amplifier between operate, its fully operational state, and a standby mode that leaves the amplifier off, yet ready to respond to system commands via any of the supported control options (e.g. - Página 12 Also, it is a good practice to physically disconnect any and all valuable electronics from the AC mains during electrical storms, as a lightning strike anywhere near your home can put a tremendous surge on the AC mains that can easily damage any piece of electronics, no matter how well designed and protected.
-
Página 13: Rear Panel
������� ��� ��� ������� ���� ���� ���� ���� ��� ������ ���� �� ��� ����� �� ��� �� ��� �� �� Rear Panel The following descriptions are intended as a quick reference, should you have any questions about your new product. Please see the next section (entitled Initial Setup) for specific advice on incorporating your new amplifier into your system. - Página 14 For this reason, we strongly recommend using the balanced analog interconnections between your Classé components wherever possible. The pin assignments of these XLR input connectors are: Pin 1: Signal ground Pin 2: Signal + (non-inverting) Pin 3: Signal – (inverting) Connector ground lug: chassis ground These pin assignments are consistent with the standard adopted by the Audio Engineering Society (AES14-1992).
- Página 15 (Many high quality loudspeakers also offer two sets of connections on their speakers. Generally, one set of the connections on the loudspeaker feeds the portion of the speaker’s crossover network that supplies the woofer with its signal; the other set of connections connects to the portion of the crossover that supplies the rest of the speaker with the midrange and high frequencies.) Although the binding posts on your Classé...
- Página 16 For more information, please contact your dealer and ask about home automation systems. AC Mains Input An IEC standard power cord (supplied) is used with the CA-M400. Plug the cord into the IEC receptacle on the rear panel, and the other end into a suitable wall outlet.
- Página 17 Danger! Potentially dangerous voltages and current capabilities exist within your power amplifier, even when disconnected from AC mains. Do not attempt to open any portion of the amplifier’s cabinet. There are no user-serviceable parts inside your power amplifier. All service of this product must be referred to a qualified Classé...
-
Página 18: Initial Setup
Initial Setup Your new Classé amplifier is quite simple to set up and enjoy. Please follow the steps outlined below in order to safely set up and use your new amplifier. Important: The AC mains connection should be the last connection you make on your new power amplifier. -
Página 19: Configuring Amplifier Turn-On Delay/Amp No
configuring amplifier In a system that contains multiple Classé amplifiers, you may set the turn-on delay/amp no. number of seconds of turn-on delay for each amplifier, allowing each to turn on in the order you have specified, rather than all at once. This number also acts as an ID when using the CAN Bus. -
Página 20: Care And Maintenance
Double-check all your connections. We understand that this step sounds redundant, but it is worth the extra minute or two it might take just to ensure that all connections are correct and secure before plugging the power cables to the AC outlets.. Turn on all the other components in your system, and then turn on your amplifier. -
Página 21: Troubleshooting
If the LED continues to blink, there is a fault condition in the amplifier itself. It should be powered down, disconnected from the AC mains and taken to your Classe dealer for service. • If it powers up without any difficulty, power it back down and reconnect only the inputs. - Página 22 The AC mains fuse is blown. There is a specific troubleshooting procedure for a blown AC mains fuse, since this rare occurrence sometimes indicates a significant problem. Please use the following steps, in order: a. Disconnect your amplifier from the AC mains, as well as from its input connections and speaker connections, and remove the fuse cover on the rear of the unit.
-
Página 23: Specifications
Specifications Classé Audio reserves the right to make improvements without notice. ■ Power output 400W continuous rms @ 8Ω 800W continuous rms @ 4Ω ■ Frequency response 10Hz – 22kHz (+0/-0.1dB) 10Hz – 155kHz (+0/-3.0dB) ■ Phase better than -10° @ 22kHz ■... - Página 24 Cet appareil a été testé et satisfait totalement aux normes concernant les appareils numériques de Classe B, selon le chapitre 15 des normes FCC. Ces limites concernent une protection raisonnable contre les risques d’interférences dans une installation résidentielle. Cet appareil génère, utilise et peut rayonner une énergie radiofréquence, ce qui, s’il n’est pas installé...
-
Página 25: Importantes Instructions Concernant La Sécurité
Importantes instructions concernant la sécurité Attention : Veuillez lire et observer toutes les instructions et recommandations de ce manuel d’utilisation, ainsi que celles inscrites sur l’appareil lui-même. Conservez soigneusement ce manuel d’utilisation. 1. Ne tentez pas de réparer vous-même l’appareil. Ne jamais retirer son capot, pour quelque raison que ce soit. - Página 26 Sommaire Bienvenue dans la famille Classé ..............27 Un mot concernant l’installation................27 Déballage et installation ................28 Déballage de votre amplificateur .................28 Installation......................28 Ventilation ......................28 Installations particulières ..................29 Numéro de série ....................29 Enregistrez votre achat !..................29 Tension d’alimentation..................29 Période de rodage/mise en chauffe ..............30 Veuillez lire ce manuel d’utilisation…...
-
Página 27: Bienvenue Dans La Famille Classé
Vous trouverez cette carte de garantie à la fin du livret de garantie séparé contenu dans l’emballage. Tous les efforts nécessaires ont été accomplis pour rendre le Classé CA-M400 Un mot concernant l’installation simple et évident à... -
Página 28: Déballage Et Installation
Déballage et installation Déballage de Veuillez déballer soigneusement votre amplificateur de puissance suivant les votre amplificateur instructions fournies, et retirez tous ses accessoires du carton d’emballage. Prenez garde lorsque vous soulevez l’amplificateur, car il est assez lourd. Important ! Conservez tous les éléments du carton d’emballage et ce dernier pour tout transport futur. -
Página 29: Installations Particulières
Cela ne vous prendra qu’une minute. Veuillez s’il vous plaît compléter la carte maintenant. Ensuite, vous allez oublier… Tension d’alimentation L’amplificateur de puissance CA-M400 est réglé en usine (de manière interne) sur une tension d’alimentation de 100 V, ou 120 V, ou 230 V, ou 240 V, suivant le pays dans lequel il a été... -
Página 30: Période De Rodage/Mise En Chauffe
Le CA-M400 intègre un circuit de protection qui évite à l’amplificateur de fonctionner sous une tension d’alimentation trop forte ou trop faible. • À l’allumage : la tension d’alimentation doit se trouver dans une fourchette d’environ – 15 % à + 10 % de sa valeur nominale, ou l’amplificateur ne s’allumera pas. -
Página 31: Caractéristiques Particulières De La Conception
Caractéristiques particulières de la conception Conception très Tous les étages analogiques d’amplification Classé sont basés sur des circuits qui sophistiquée des circuits ont été grandement améliorés au fil des années d’un développement continuel. En débutant avec des schémas électroniques excellents et en les travaillant ensuite pendant des années, nous avons pu découvrir des raffinements subtils mais essentiels, garantissant des performances absolument exceptionnelles dans une grande variété... -
Página 32: Fiabilité Extraordinaire
Fiabilité extraordinaire Un des autres avantages de travailler depuis de nombreuses années sur des circuits électroniques sophistiqués, maintes et maintes fois améliorés, concerne l’expérience que nous avons de leur fiabilité à long terme. En utilisant uniquement des composants de très haute qualité, et en connaissant parfaitement leur comportement face à... -
Página 33: Face Avant
�������� ������ ���� ������ ����� ������� ������� Face avant Touche de mise en veille Standby et diode LED indicatrice La touche de mise en veille Standby de la face avant permet de basculer l’amplificateur entre son mode de fonctionnement normal et son mode de veille Standby qui “... - Página 34 C’est aussi une excellente habitude que de débrancher physiquement du secteur tous les appareils électroniques sophistiqués pendant un orage, car ses éclairs peuvent entraîner une surtension secteur importante capable de dépasser les limites d’un simple interrupteur général secteur. Une telle surtension (qui peut atteindre plusieurs centaines de volts) peut endommager n’importe quel appareil électronique, quelles que soient sa robustesse et sa qualité...
-
Página 35: Face Arrière
������� ��� ��� ������� ���� ���� ���� ���� ��� ������ ���� �� ��� ����� �� ��� �� ��� �� �� Face arrière Les descriptions qui suivent sont conçues pour vous servir de guide instantané en réponse aux questions que vous pourriez vous poser concernant votre nouvel appareil. - Página 36 Pour cette raison, nous vous recommandons vivement d’utiliser les liaisons symétriques entre tous vos maillons Classé, à chaque fois que cela est possible. Le brochage des prises femelles XLR d’entrée est le suivant : Broche 1 : masse du signal Broche 2 : Signal + (non inversé) Broche 3 : Signal –...
- Página 37 (La majorité des enceintes acoustiques haut de gamme propose désormais deux paires de connecteurs correspondant chacune à une section du filtre intégré, l’une destinée à alimenter uniquement le haut-parleur de grave, et l’autre la section médium-aigu, composé d’un ou plusieurs haut-parleurs pour la reproduction du médium et de l’aigu.) Bien que les bornes vissantes de votre amplificateur Classé...
- Página 38 Prise d’alimentation secteur AC Mains Le CA-M400 utilise un câble d’alimentation secteur normalisé IEC. Branchez ce câble IEC dans la prise correspondante à l’arrière de l’amplificateur, puis ensuite son autre extrémité dans une prise d’alimentation secteur murale.
- Página 39 Danger ! Il y a à l’intérieur de l’amplificateur des tensions et courants électriques potentiellement dangereux, même lorsque celui- ci est débranché de son alimentation secteur. Ne jamais essayer d’ouvrir tout ou partie du coffret de l’appareil. Il n’y a à l’intérieur de l’amplificateur aucun élément susceptible d’être changé...
-
Página 40: Réglage Initial
Réglage initial Votre nouvel amplificateur Classé est d’utilisation très simple. Veuillez simplement suivre les étapes suivantes pour garantir le réglage et l’utilisation sûrs et efficaces de votre nouvel amplificateur. Important : Le branchement de l’alimentation secteur doit toujours être le dernier effectué... -
Página 41: Configuration De L'allumage De L'amplificateur
Configuration de l’allumage Dans les systèmes utilisant plusieurs amplificateurs de puissance Classé, de l’amplificateur vous pouvez classer par ordre numérique tous les amplificateurs, qui porteront alors les numéros #1, #2, #3 et ainsi de suite. Lorsqu’ils sont reliés à un préamplificateur Classé via la prise CAN Bus ou par commutation Trigger, ils s’allumeront successivement dans l’ordre de leur numéro, et non tous en même temps. -
Página 42: Entretien & Maintenance
Vérifiez que tous les branchements soient solides et ne puissent se défaire d’eux-mêmes, mais ne serrez tout de même pas trop fort. Si vous pouvez tirer raisonnablement sur chaque câble sans qu’il ne présente le moindre mouvement aux extrémités, la qualité de la liaison est suffisante. Un serrage trop prononcé... -
Página 43: Dysfonctionnements
Dysfonctionnements En règle générale, consultez toujours votre revendeur agréé Classé en cas de problème. Avant cela, toutefois, vérifiez si le problème rencontré n’est pas évoqué ci-après. Essayez alors la ou les solutions proposées. Si rien ne résout votre problème, consultez votre revendeur agréé Classé. Pas de son, et les diodes LED des canaux ne s’allument pas. - Página 44 Le fusible d’alimentation secteur a fondu La procédure de résolution du problème “ fusible secteur fondu ” est particulière, d’autant que cet événement – très rare – indique généralement la présence d’un problème sérieux. Veuillez donc suivre les étapes suivantes, en respectant bien leur ordre : a.
-
Página 45: Spécifications
Spécifications ■ Puissance de sortie nominale : 400 W/canal RMS en continu @ 8 Ω 800 W/canal RMS en continu @ 4 Ω ■ Réponse en fréquence : 10 Hz à 22 kHz (+0/-0,1 dB) 10 Hz à 155 kHz (+0/-3 dB) ■... - Página 46 WARNUNG: UM DIE GEFAHR VON FEUER ODER EINES ELEKTRISCHEN SCHLAGS ZU REDUZIEREN, DAS GERÄT NIEMALS REGEN ODER FEUCHTIGKEIT AUSSETZEN. ACHTUNG GEFAHR EINES ELEKTRISCHEN SCHLAGS NICHT ÖFFNEN UM DIE GEFAHR EINES ELEKTRISCHEN SCHLAGS ZU REDUZIEREN, NICHT DIE GEHÄUSEABDECKUNG ENTFERNEN. IM INNERN BEFINDEN SICH KEINE VOM BEDIENER ZU WARTENDEN TEILE.
-
Página 47: Wichtige Sicherheitshinweise
Wichtige Sicherheitshinweise Achtung: Bitte lesen Sie sich alle Warn- und sonstigen Hinweise in dieser Bedienungsanleitung und auf dem Gerät genau durch und befolgen Sie diese. Bewahren Sie die Bedienungsanleitung so auf, dass sie jederzeit zugänglich ist. Versuchen Sie nicht, dieses Gerät selber zu reparieren. Öffnen Sie auf keinen Fall das Gehäuse. Im Gehäuse befinden sich keine vom Bediener zu wartenden Teile. - Página 48 Inhaltsverzeichnis Willkommen in der Classé-Familie ..............49 Ein Wort zur Installation ..................49 Auspacken und Aufstellen des Gerätes............50 Auspacken Ihrer Endstufe..................50 Aufstellen des Gerätes ..................50 Belüftung ......................50 Custom Installation ....................51 Seriennummer .....................51 Lassen Sie sich registrieren! .................51 Betriebsspannung ....................51 Warmlauf-/Einlaufphase..................52 Bitte lesen Sie diese Bedienungsanleitung............52 Besondere Merkmale Ihrer Endstufe...............53 Ausgeklügelter Schaltungsaufbau .................53 Intensive Hörtests ....................53...
-
Página 49: Willkommen In Der Classé-Familie
Booklets. Ein Wort zur Installation Es sind viele Anstrengungen unternommen worden, um eine einfache Installation und Bedienung der CA-M400 von Classé zu gewährleisten. Andererseits wissen wir nichts über andere Variablen wie die Größe des Raumes, seine Akustik und das mit der Endstufe verbundene Equipment. All diese Faktoren haben letztendlich einen Einfluss auf die Klangqualität Ihres Systems. -
Página 50: Auspacken Und Aufstellen Des Gerätes
Auspacken und Aufstellen des Gerätes Auspacken Ihrer Endstufe Packen Sie Ihre Endstufe den beigefügten Hinweisen entsprechend aus. Nehmen Sie das gesamte Zubehör aus dem Karton. Seien Sie beim Anheben der Endstufe vorsichtig, da sie sehr schwer ist. Wichtig! Heben Sie das gesamte Verpackungsmaterial für einen eventuellen späteren Transport Ihres Classé-Gerätes auf. -
Página 51: Custom Installation
Es kostet Sie nur wenige Minuten. Bitte füllen Sie die Karte jetzt aus, bevor Sie es vergessen. Betriebsspannung Die Endstufe CA-M400 wird ab Werk (im Gehäuse) abhängig vom Land, in dem sie verkauft wird, auf eine Netzspannung von 100 V, 120 V, 230 V bzw. 240 V eingestellt. -
Página 52: Warmlauf-/Einlaufphase
Die CA-M400 besitzt eine Schutzschaltung, die die Endstufe vor extrem hohen bzw. niedrigen Spannungen bewahrt. • Beim Einschalten: Die Netzspannung muss beim Einschalten in einem Bereich von ungefähr -15 % bis +10 % des Nominalwertes liegen, oder die Endstufe lässt sich nicht einschalten. -
Página 53: Besondere Merkmale Ihrer Endstufe
Besondere Merkmale Ihrer Endstufe Ausgeklügelter Alle analogen Classé-Verstärkerstufen basieren auf Schaltungen, die im Laufe Schaltungsaufbau vieler Jahre stetig immer weiter optimiert worden sind. So waren, ausgehend von einem bereits hervorragenden Schaltungsaufbau und jahrelanger Erfahrung, viele kleine Verfeinerungen möglich, die letztendlich zu hervorragenden Leistungsparametern geführt haben. -
Página 54: Extrem Hohe Lebensdauer
Extrem hohe Lebensdauer Ein weiterer Vorteil der langjährigen Arbeit mit ausgeklügelten und weiterentwickelten Schaltungslayouts besteht darin, dass wir genau wissen, was langfristig gut funktioniert. Zunächst einmal verwenden wir nur hochwertigste Teile und setzen diese einerseits Belastungstests aus und nutzen andererseits unsere langjährige Erfahrung. -
Página 55: Frontansicht
�������� ������ ���� ������ ����� ������� ������� Frontansicht Standby-Taste & LED-Anzeige Mit der Standby-Taste an der Gerätefront schalten Sie die Endstufe vom Betriebs- in den Standby-Modus und umgekehrt. Im Standby-Betrieb ist die Endstufe ausgeschaltet, sie reagiert jedoch auf Systembefehle jeder beliebigen der unterstützen Steuerfunktionen (z.B. - Página 56 Nutzen Sie Ihre Endstufe über einen längeren Zeitraum nicht (beispielsweise während einer Urlaubsreise), empfehlen wir, den Netzstecker zu ziehen. Vergewissern Sie sich, dass sich die Endstufe im Standby-Modus befindet, bevor Sie dies tun. Ferner ist es in der Praxis von Vorteil, in dieser Zeit möglichst alle Elektronikgeräte vom Netz zu trennen, da ein in der Nähe Ihres Hauses einschlagender Blitz zu einer erheblichen Überspannung im Netz führen kann.
-
Página 57: Rückansicht
������� ��� ��� ������� ���� ���� ���� ���� ��� ������ ���� �� ��� ����� �� ��� �� ��� �� �� Rückansicht Im Folgenden erhalten Sie eine kurze Beschreibung, falls Sie Fragen zu Ihrem neuen Gerät haben. Im nächsten Kapitel dieser Bedienungsanleitung (siehe Setup) erhalten Sie detaillierte Hinweise darüber, wie Sie Ihre neue Endstufe in das System integrieren können. - Página 58 Dashalb empfehlen wir, die analogen symmetrischen Verbindungen zwischen Ihren Classé-Komponenten möglichst oft zu nutzen. Die Pin-Belegungen dieser XLR-Anschlüsse sind: Pin 1: Signal Masse Pin 2: Positives Signal (non-inverted) Pin 3: Negatives Signal (inverted) Steckergehäuse kontaktiert mit Gerätegehäuse-Masse Diese Pin-Belegungen entsprechen den Standards der Audio Engineering Society.
- Página 59 Obwohl die Verbindung mit den Schraubklemmen Ihrer Classé-Endstufe über blanke Drähte möglich ist, empfehlen wir Ihnen die Verwendung hochwertiger Kabelschuhe, die gekrimpt oder gelötet mit den Enden Ihrer Lautsprecherkabel verbunden werden. Die Verwendung hochwertiger Anschlüsse verhindert das Oxidieren von blanken Drähten. Ferner sind Kurzschlüsse aufgrund von schlecht isolierten Verbindungen so nicht möglich.
- Página 60 Crestron™ Weitere Informationen zu Home Automation Systemen erhalten Sie bei Ihrem Fachhändler. Netzeingang Für die CA-M400 wird ein Standard-IEC-Netzkabel verwendet. Verbinden Sie das Kabel mit dem Netzeingang an Ihrer Endstufe und anschließend mit einer Netzsteckdose. Netzsicherung Ihre Classé-Endstufe besitzt an der Geräterückseite eine Netzsicherung.
- Página 61 Vorsicht! Auch bei gezogenem Netzstecker existieren im Endstufengehäuse lebensgefährlich hohe Spannungen und Ströme. Versuchen Sie auf keinen Fall, das Gehäuse zu öffnen. Im Gehäuse befinden sich keine vom Bediener zu wartenden Teile. Die Wartung dieses Gerätes ist ausschließlich von einem qualifizierten Classé-Fachhändler oder -Distributor durchzuführen.
-
Página 62: Setup
Setup Das Setup Ihrer neuen Classé-Endstufe ist einfach durchzuführen, so dass Sie schnell die erstklassige Klangqualität Ihrer Endstufe genießen können. Befolgen Sie die unten genannten Schritte, um ein ordnungsgemäßes Setup zu gewährleisten und Ihre neue Endstufe in Betrieb nehmen zu können. Wichtig: Als Letzte ist Ihre neue Endstufe mit dem Netz zu verbinden. -
Página 63: So Konfigurieren Sie Die Verzögerungszeit Und Die Einschaltreihenfolge Der Endstufen
So konfigurieren Sie die Verfügt ein System über mehrere Classé-Endstufen, können Sie für jede Verzögerungszeit und die Endstufe die Anzahl der Sekunden für die Einschaltverzögerung festlegen, Einschaltreihenfolge der so dass die Endstufen in der von Ihnen vorgegebenen Reihenfolge und Endstufen nicht alle zugleich eingeschaltet werden. -
Página 64: Pflege & Wartung
Stellen Sie sicher, dass alle Verbindungen gut zusammengepasst sind und nicht klappern, vermeiden Sie es aber, die Anschlüsse zu überdrehen. Können Sie an den Lautsprecherkabeln leicht ziehen, ohne dass diese sich bewegen, sind die Verbindungen gut zusammengepasst. Durch weiteres Festziehen wird die Verbindung nicht besser, und es kann (im Extremfall) zu einer Beschädigung der Anschlüsse kommen. -
Página 65: Störungssuche
Störungssuche Im Allgemeinen wenden Sie sich bei Service-Problemen an Ihren Classé- Händler. Bevor Sie dies tun, gehen Sie bitte die folgende Liste durch, ob das aufgetretene Problem hierin angesprochen wird. Falls ja, versuchen Sie bitte zunächst die hier vorgeschlagenen Lösungen. Können diese das Problem nicht lösen, setzen Sie sich mit Ihrem Classé-Händler in Verbindung. - Página 66 Die Netzsicherung ist durchgebrannt. Wenn Sie nach der Ursache für das Durchbrennen der Netzsicherung suchen, folgen Sie bitte den angegebenen Schritten in der aufgeführten Reihenfolge, da dieser selten auftretende Fehler manchmal auf ein schwerwiegendes Problem hinweist: a. Ziehen Sie den Netzstecker. Lösen Sie darüber hinaus alle Eingangs- und Lautsprecherverbindungen, und entfernen Sie den Sicherungshalter an der Geräterückseite.
-
Página 67: Technische Daten
Technische Daten ■ Dauerausgangsleistung 400 Watt/Kanal RMS an 8 Ohm 800 Watt/Kanal RMS an 4 Ohm ■ Frequenzgang 10 Hz bis 22 kHz (+ 0/- 0,1 dB) 10 Hz – 155 kHz (+ 0/- 3,0 dB) ■ Phase Unter - 10° (22 kHz) ■... - Página 68 Questo dispositivo è stato esaminato e definito conforme ai limiti previsti per i dispositivi digitali di Classe B in accordo al regolamento FCC, parte 15. Questi limiti sono concepiti per fornire ragionevole protezione contro interferenze pericolose in un ambiente residenziale.
-
Página 69: Importanti Informazioni Di Sicurezza
Importanti informazioni di Sicurezza ATTENZIONE: Leggete attentamente tutte le istruzioni ed osservate le dovute precauzioni, quando trovate indicazioni di pericolo o avvertenze, sia sul manuale che sul prodotto. Conservate questo manuale per ogni riferimento futuro alle istruzioni di sicurezza. Non provate a riparare questo prodotto da soli. Non aprite il coperchio per nessuna ragione. L’apparecchio non contiene parti utili per l’utente. - Página 70 Indice Benvenuti nella famiglia Classè ..............71 Informazioni sull’installazione ................71 Sballaggio e posizionamento .................72 Sballaggio del vostro amplificatore ..............72 Posizionamento ....................72 Ventilazione ......................72 Installazioni particolari ..................73 Numero di serie....................73 Registrazione della vostra garanzia ..............73 Tensione di alimentazione ..................73 Periodo di rodaggio .....................74 Leggete questo manuale ..................74 Caratteristiche speciali...................75 Design raffinato dei circuiti...
-
Página 71: Benvenuti Nella Famiglia Classè
Informazioni Pur essendo un apparecchio di alta qualità e dalle notevoli prestazioni, ci siamo sull’installazione impegnati per rendere il collegamento e l’utilizzo del Classè CA-M400 il più semplice possibile. Le prestazioni del vostro sistema non dipendono solo dall’amplificatore finale, ma da diversi altre fattori, come ad esempio: la grandezza e la forma della stanza in cui è... -
Página 72: Sballaggio E Posizionamento
Assicuratevi di lasciare almeno 15 cm circa di spazio libero da ogni lato per permettere la dissipazione del calore con la normale circolazione dell’aria. Le aperture di ventilazione sulla parte superiore ed inferiore del CA-M400 devono essere lasciate libere da qualsiasi impedimento possa ridurre il flusso d’aria attraverso l’unità. -
Página 73: Installazioni Particolari
Tensione di alimentazione La tensione di alimentazione dell’amplificatore CA-M400 è impostata dalla fabbrica (internamente) a 100V, 120V, 230V o 240 V AC, in base al paese in cui viene venduto. -
Página 74: Periodo Di Rodaggio
Il CA-M400 è dotato di circuiti di protezione atti a prevenire il pericoloso funzionamento dell’amplificatore in condizioni di alimentazione con una tensione troppo alta o troppo bassa. • All’accensione: All’accensione dell’unità, la tensione AC di rete deve essere compresa fra -15% e +10% del valore nominale di alimentazione, altrimenti l’amplificatore non si accenderà. -
Página 75: Caratteristiche Speciali
Test di ascolto Da un prodotto di classe e fama mondiale ci si aspettano prestazioni eccellenti, ed i prodotti Classè non tradiscono le aspettative. Comunque, l’esperienza ci insegna che, l’eccellenza tecnica da sola non sempre è... -
Página 76: Straordinaria Longevità
Straordinaria longevità Un altro beneficio derivato dalla continua ricerca del migliore design circuitale negli anni è la garanzia della durata nel tempo dei nostri prodotti. Utilizziamo solo componenti della più alta qualità disponibili sul mercato, scelti anche in base alla loro durata nel tempo, verificata dalla nostra esperienza personale e mediante test di invecchiamento dei componenti;... -
Página 77: Pannello Frontale
�������� ������ ���� ������ ����� ������� ������� Pannello frontale Tasto Standby e LED indicatore Premendo il tasto standby del pannello frontale commuterete lo stato dell’amplificatore da pienamente operativo alla modalità standby, in cui l’amplificatore è disattivato ma comunque attivabile da un qualsiasi comando del sistema di controllo esterno ( per esempio, dall’ingresso IR, un segnale Trigger DC, via CAN Bus, o dalla interfaccia RS-232). - Página 78 E’ sempre consigliabile scollegare tutti gli apparecchi elettronici dall’alimentazione AC durante temporali, poiché se un fulmine dovesse cadere vicino alla vostra abitazione potrebbe provocare un tremendo sbalzo di tensione sulla rete di alimentazione AC. La scarica che ne risulterebbe ( che potrebbe essere di molte migliaia di Volt) danneggerebbe tutti gli apparecchi ad essa collegati, anche se di alta qualità...
-
Página 79: Pannello Posteriore
������� ��� ��� ������� ���� ���� ���� ���� ��� ������ ���� �� ��� ����� �� ��� �� ��� �� �� Pannello posteriore Le seguenti informazioni sono rapida descrizione delle funzioni e delle caratteristiche del prodotto. Andate alla sezione seguente (Impostazioni iniziali) per maggiori dettagli sull’installazione del vostro nuovo amplificatore nel vostro sistema. - Página 80 Per questa ragione, vi consigliamo di utilizzare le connessioni bilanciate, quando possibile, tra i vostri componenti Classè. La piedinatura dei connettori di ingresso femmina XLR è: Pin 1: Massa Pin 2: Positivo + (non invertito) Pin 3: Negativo - (invertito) Corpo del connettore: Massa dello chassis Questo tipo di piedinatura corrisponde agli standards adottati dalla Audio engineering society.
- Página 81 Anche se i connettori sul vostro amplificatore Classè accettano cavi spellati, vi raccomandiamo di utilizzare terminali ad anello o spinotti di alta qualità, inseriti e saldati ai capi dei cavi dei diffusori. Utilizzando connettori di alta qualità sarete sicuri che i collegamenti dei diffusori non si deterioreranno nel tempo, poiché...
- Página 82 Per maggiori dettagli sui sistemi di controllo, contattate il vostro rivenditore di fiducia. Ingresso alimentazione AC Il CA-M400 utilizza un cavo di alimentazione IEC standard. Inserite il cavo nella presa IEC dell’amplificatore, e quindi in una presa di corrente di rete adeguata.
- Página 83 Pericolo! Anche se l’amplificatore è scollegato dalla presa di alimentazione, potrebbero essere comunque presenti residui di tensioni e correnti pericolose. Non cercate di aprire il vostro amplificatore, non contiene parti utili. Per l’assistenza fate riferimento al vostro rivenditore o all’assistenza tecnica autorizzata Classè.
-
Página 84: Impostazioni Iniziali
Impostazioni iniziali Il vostro nuovo amplificatore Classè è molto semplice da configurare e da utilizzare. Seguite accuratamente le seguenti indicazioni per impostare ed utilizzare il vostro nuovo amplificatore. Importante: Il collegamento del cavo di alimentazione del vostro nuovo amplificatore dovrebbe essere collegato per ultimo. Inoltre, è sempre meglio accendere l’amplificatore (o gli amplificatori) per ultimo, dopo che tutti gli altri componenti sono stati accesi e si sono stabilizzati. -
Página 85: Configurazione Della Sequenza Di Attivazione Degli Amplificatori
Configurazione della In un sistema in cui vengono impiegati più amplificatori Classè, sequenza di attivazione potere indicare gli amplificatori come #1, #2 , #3 e così via. Quando degli amplificatori gli amplificatori sono collegati ad un preamplificatore Classè attraverso il sistema CAN Bus o il sistema Trigger, si attiveranno secondo l’ordine che andrete a specificare, o tutti insieme. -
Página 86: Cura E Manutenzione
Ricontrollate i collegamenti Sappiamo che questo passo possa risultarvi superfluo, ma è meglio perdere uno o due minuti per ricontrollare che tutti i collegamenti siano corretti e ben eseguiti. Accendete tutti gli altri componenti del sistema, e quindi accendete il vostro amplificatore. E’... -
Página 87: Risoluzione Dei Problemi
Risoluzione dei problemi Normalmente, per ogni problema è meglio fare riferimento al proprio rivenditore Classè. Prima di contattarlo, comunque, controllate questa sezione per verificare se il problema che riscontrate è compreso in questa lista; se così fosse, provate a seguire la relativa soluzione. Se nessuna di queste soluzioni risolve il problema, contattate il vostro rivenditore Classè. - Página 88 Il fusibile principale è bruciato. Esiste una procedura specifica di risoluzione dei problemi, nel caso in cui il fusibile principale sia bruciato; anche se raro, questo tipo di inconveniente a volte indica un problema abbastanza grave. Seguite le seguenti indicazioni come indicato: a.
-
Página 89: Caratteristiche Tecniche
Caratteristiche tecniche ■ Potenza di uscita: 400W/ch continui RMS @ 8Ω 800W/ch continui RMS @ 4Ω ■ Risposta in frequenza: da 10 Hz a 22kHz (+0/-0.1dB) da 10 Hz a 155kHz (+0/-3.0dB) ■ Fase: meno di -10° (22kHz) ■ Rapporto Segnale/Rumore: migliore di -112dB (a piena potenza, 10Hz-80kHz) ■... - Página 90 ADVERTENCIA: PARA REDUCIR EL RIESGO DE INCENDIO O DESCARGA ELÉCTRICA, NO EXPONGA ESTE APARATO A LA LLUVIA O LA HUMEDAD. PRECAUCION RIESGO DE DESCARGA ELÉCTRICA – NO ABRIR PRECAUCION: PARA REDUCIR EL RIESGO DE QUE SE PRODUZCA UNA DESCARGA ELÉCTRICA, NO QUITE LA CUBIERTA. EN EL INTERIOR DEL APARATO NO HAY COMPONENTES QUE PUEDAN SER MANIPULADOS POR EL USUARIO.
-
Página 91: Instrucciones De Seguridad Importantes
Instrucciones de Seguridad Importantes Precaución: le rogamos que lea y observe todas las advertencias e instrucciones que figuran en este manual de instrucciones, así como las marcadas en el aparato. Guarde este manual de instrucciones por si tuviera que necesitarlo en el futuro. No intente reparar este aparato usted mismo. - Página 92 Contenido Bienvenido a la familia Classé ...............93 Unas Palabras Acerca de la Instalación ..............93 Desembalaje y Ubicación................94 desembalaje de su amplificador................94 ubicación ......................94 ventilación......................94 instalaciones personalizadas................95 número de serie....................95 ¡registre su compra! .....................95 Tensión de Funcionamiento .................95 período de calentamiento/rodaje .................96 lea este manual, por favor…..................96 Detalles de Diseño Relevantes...............97 diseño circuital extremadamente refinado ............97...
-
Página 93: Bienvenido A La Familia Classé
Se ha hecho todo lo posible para hacer que tanto la instalación como el uso de la de la Instalación Classé CA-M400 sean excepcionalmente simples y rápidos. Aún así, no tenemos ningún modo de evaluar muchas otras variables, como por ejemplo el tamaño y la forma de su sala de escucha, su acústica y los componentes que usted haya elegido para combinar con su amplificador. -
Página 94: Desembalaje Y Ubicación
8 centímetros en sus dos lados para garantizar una ventilación adecuada del mismo. Las ranuras situadas en las partes superior e inferior de la CA-M400 deben mantenerse libres de cualquier obstrucción potencialmente capaz de reducir la libre circulación del flujo de aire a través del aparato. -
Página 95: Instalaciones Personalizadas
En este manual se incluyen (ver Dimensiones) dibujos para facilitar la inserción personalizadas de la CA-M400 en instalaciones especiales o en recintos -para el caso de que fueran necesarios- hechos a medida. Asimismo, se dispone opcionalmente de un kit diseñado a medida para el montaje en rack de este producto. Para más información, contacte con su detallista Classé. -
Página 96: Período De Calentamiento/Rodaje
La CA-M400 incluye circuitos de protección que evitarán que el amplificador trabaje con tensiones de alimentación peligrosamente altas o bajas. • En el momento del arranque: La tensión de alimentación alterna debe estar comprendida entre un -15% y un +10% de su valor nominal ya que en caso contrario el amplificador no se pondrá... -
Página 97: Detalles De Diseño Relevantes
Detalles de Diseño Relevantes diseño circuital Todas las etapas analógicas de amplificación utilizadas por Classé están basadas extremadamente refinado en circuitos que han sido optimizados de manera intensiva a través de muchos años de desarrollo continuado. Partiendo de diseños circuitales exclusivos y trabajando con ellos a lo largo de los años somos capaces de descubrir esos múltiples pequeños refinamientos que se suman para proporcionar unas prestaciones superlativas en un amplio abanico de aplicaciones. -
Página 98: Longevidad Extraordinaria
longevidad extraordinaria Otra ventaja derivada del empleo, durante tantos años y de modo intensivo, de diseños circuitales altamente refinados es que tenemos una vasta experiencia sobre lo que funciona bien a largo plazo. Al utilizar únicamente los mejores componentes disponibles como punto de partida y a continuación emplearlos de la manera correcta como consecuencia de experimentos de envejecimiento acelerados y experiencia real a largo plazo, somos capaces de diseñar y construir productos que con toda seguridad... -
Página 99: Panel Frontal
�������� ������ ���� ������ ����� ������� ������� Panel Frontal Botón e indicador luminoso correspondiente a la Posición de Espera (“Standby”) El botón Standby del panel frontal hará que el amplificador conmute entre su modo de funcionamiento plenamente operativo y un modo “de espera”... - Página 100 Si no piensa utilizar el amplificador durante un largo período de tiempo (quizá porque está de vacaciones), le sugerimos que lo desconecte de la red eléctrica. Antes de desconectar el aparato de la red eléctrica, asegúrese de que esté situado en el modo de espera. Asimismo, es una buena costumbre que desconecte físicamente sus valiosos componente audiovisuales durante las tormentas con fuerte aparato eléctrico, ya que un relámpago que caiga en cualquier lugar cerca de su casa...
-
Página 101: Panel Posterior
������� ��� ��� ������� ���� ���� ���� ���� ��� ������ ���� �� ��� ����� �� ��� �� ��� �� �� Panel Posterior Las descripciones que siguen pretenden ser una referencia rápida para el caso de que se le planteen dudas sobre el producto que acaba de adquirir. En el caso de que necesite una orientación específica relacionada con la incorporación de su nuevo amplificador a su equipo, le rogamos que consulte la siguiente sección (titulada Puesta a Punto Inicial). - Página 102 Por esta razón, le recomendamos fervientemente que utilice interconexiones analógicas balanceadas entre sus componentes Classé por poco que le sea posible. Las asignaciones correspondientes a las patillas de estos conectores XLR hembra son las siguientes: Patilla 1: Masa de la señal Patilla 2: Señal + (no invertida) Patilla 3: Señal - (invertida) Carcasa del conector: Masa del conjunto...
- Página 103 (La mayoría de fabricantes cajas acústicas de alta calidad incorporan dos juegos de conectores en sus modelos. Por regla general, uno de dichos juegos alimenta la parte del filtro divisor de frecuencias de la caja que alimenta al woofer mientras que el otro alimenta la sección del filtro encargada de tratar las frecuencias medias y bajas.) Aunque los terminales de conexión de su amplificador Classé...
- Página 104 Entrada de Corriente Alterna En la CA-M400 se utiliza un cable de alimentación IEC estándar. Insértelo en la toma IEC de alta corriente del panel posterior y a continuación conéctelo a una toma de corriente eléctrica adecuada.
- Página 105 ¡Peligro! En el interior de su amplificador hay, incluso cuando el aparato está desconectado de la red eléctrica, tensiones y corrientes eléctricas potencialmente peligrosas. No intente abrir ninguna parte de la carcasa del amplificador. En el interior de su etapa de potencia no hay partes que puedan ser manipuladas por el usuario.
-
Página 106: Puesta A Punto Inicial
Puesta a Punto Inicial Su nuevo amplificador Classé no presenta ningún problema a la hora de ponerlo a punto y disfrutar con su sonido. Le rogamos que siga los pasos que se indican a continuación con el fin de poner a punto y utilizar sin problemas su nuevo amplificador. -
Página 107: Configuración De Las Secuencias De Puesta En Marcha Del Amplificador
Para finalizar, continúe pulsando el botón Select hasta que todos los indicadores luminosos se apaguen. Asegúrese de configurar el amplificador para que sea compatible con el tipo de conexión de entrada que decida utilizar. configuración de las En un equipo que contenga varios amplificadores Classé, usted puede secuencias de puesta en designar cada uno de ellos por #1, #2, #3 y así... -
Página 108: Cuidado Y Mantenimiento
Realice las conexiones correspondientes a la caja acústica. Efectúe las conexiones entre los terminales de salida del amplificador y sus correspondiente cajas acústicas con ayuda de cables de conexión a cajas de alta calidad. Conecte los terminales de color negro (–) del amplificador a los terminales de color negro (–) de sus cajas acústicas y los terminales de color rojo (+) a los terminales de color rojo (+) de una de sus cajas acústicas. -
Página 109: Problemas Y Posibles Soluciones
Problemas y Posibles Soluciones Por regla general, contacte con su detallista Classé para cualquier problema relacionado con el mantenimiento de su producto. No obstante, antes de hacerlo le recomendamos que compruebe si el problema detectado coincide con alguno de los que se enumeran a continuación. En caso de que así sea, pruebe las soluciones sugeridas. - Página 110 4 El fusible de protección principal está fundido. Hay un procedimiento específico para la comprobación y sustitución de un fusible principal fundido, ya que es muy raro que tal situación indique la presencia de un problema significativo. a. Desconecte su amplificador de la red eléctrica, así como las conexiones correspondientes a su entrada y salida (caja acústica), y retire la cubierta del compartimento portafusibles que figura en el panel posterior del aparato.
-
Página 111: Características Técnicas
Características Técnicas ■ Potencia de salida nominal: 400 vatios continuos por canal sobre 8 ohmios 800 vatios continuos por canal sobre 4 ohmios ■ Respuesta en frecuencia: 10-22.000 Hz (+0 dB, -0’1 dB) 10-155.000 Hz (+0 dB, -3 dB) ■ Linealidad de la fase: inferior a –10º... - Página 112 WAARSCHUWING: OM HET RISICO VAN BRAND OF ELEKTRISCHE SCHOKKEN TE VOORKOMEN, ADVISEREN WIJ U HET APPARAAT NIET BLOOT TE STELLEN AAN REGEN OF ANDERE VOCHTIGE EN NATTE OMSTANDIGHEDEN. PAS OP! RISICO OP ELEKTRISCHE SCHOKKEN - NIET OPENEN PAS OP: OM HET RISICO VAN ELEKTRISCHE SCHOKKEN TE VOORKOMEN, LAAT DE KAP A.U.B.
-
Página 113: Belangrijke Veiligheidsinstructies
Belangrijke Veiligheids Instructies Opgelet: Lees en bekijk alle waarschuwingen en instructies vermeld in deze handleiding en op het apparaat goed en bewaar deze gebruiksaanwijzing voor je kan niet weten. Probeer het apparaat nooit zelf te repareren. Laat de kap a.u.b. dicht. In het apparaat bevinden zich geen onderdelen die geacht worden door de gebruiker onderhouden te worden. - Página 114 Inhoud Welkom bij de Classé familie ..............115 Wat Opmerkingen over het Installeren...............115 Uitpakken en Neerzetten ................116 Het uitpakken van de versterker.................116 De plaatsing ......................116 Ventilatie ......................116 Het installeren ....................117 Het serienummer ....................117 Registreer uw aankoop! ..................117 Het werkvoltage ....................117 De opwarm en “inbreek” periode ..............118 Lees a.u.b.
-
Página 115: Welkom Bij De Classé Familie
U vindt het garantiebewijs achterin het apart bijgeleverde boekje dat handelt over de garantievoorwaarden. Wat Opmerkingen over We hebben alles in het werk gesteld om de CA-M400 zo eenvoudig mogelijk te het Installeren kunnen installeren en te laten functioneren. De vele andere variabelen, zoals de vorm en afmetingen van uw kamer, zijn akoestische eigenschappen en de bijkomende apparatuur, hebben wij niet in de hand. -
Página 116: Uitpakken En Neerzetten
Zorg voor een goede ventilatie: zo’n 15cm. vrije ruimte boven en ongeveer 3cm. aan de zijkanten van de versterker. De ventilatoren boven- en onderin de CA-M400 moeten vrijelijk hun werk kunnen doen, zorg ervoor dat niets hun taak in de weg staat. Vermijd plaatsing op zachte oppervlakken (zoals... -
Página 117: Het Installeren
Het kost u slechts een minuutje van uw tijd. Invullen en op de post doen, voordat u het vergeet. Het werkvoltage De CA-M400 is op de fabriek ingesteld op één van de lichtnetvoltages: 100V, 120V, 230V of 240V wisselspanning, al naar gelang het land waar deze versterker moet worden verkocht. -
Página 118: De Opwarm En "Inbreek" Periode
De CA-M400 is uitgerust met een beveiligingscircuit om te voorkomen dat hij moet werken op een gevaarlijk veel te hoog of veel te laag voltage. • Bij het aanzetten: Het aangeboden voltage bij het aanzetten van de versterker moet ongeveer tussen de -15% en +10% van het nominale voltage zijn, anders gaat hij niet aan. -
Página 119: Speciale Ontwerp Kenmerken
Speciale Ontwerp Kenmerken hoogst verfijnde technische Alle analoge versterkingstrappen van Classé zijn gebaseerd op circuits die door ontwerpen vele jaren continue ontwikkeling tot in de puntjes zijn geperfectioneerd. Door al te beginnen met uitstekend ontworpen circuits en daar nog jaren aan te werken, weten wij ondertussen wat hele kleine verfijningen kunnen bijdragen aan al buitengewoon presterende apparaten in een grote variëteit van toepassingen. -
Página 120: Buitengewone Duurzaamheid
buitengewone Nog een voordeel van het over vele jaren op grote schaal werken aan de duurzaamheid ontwikkeling van hoogst verfijnde schakelingen is, dat we een enorme ervaring hebben op het gebied van wat wel en niet werkt op de lange termijn. Door, om te beginnen, alleen maar te werken met de beste onderdelen en ze dan, door de opgedane kennis van versnelde verouderingsexperimenten en onze lange termijn expertise, op de juiste wijze in te zetten, zijn we in staat een product te... -
Página 121: De Voorkant
Als u van plan bent de versterker een tijdje niet te gebruiken, u gaat b.v. op vakantie, dan raden wij u aan hem van het lichtnet te halen. Doet u dat niet eerder dan dat u de CA-M400 eerst uit (standby) heeft gezet. - Página 122 Omdat bliksem in de buurt van uw huis een enorme energiepuls kan geven aan het lichtnet en daar geen lichtnetschakelaar tegen opgewassen is, is het een goede gewoonte om tijdens onweer al uw apparatuur van het lichtnet te ontkoppelen. Zo’n enorme energiepuls (en dat kan oplopen tot duizenden volts) laat ieder stuk elektronica in rook opgaan, hoe goed ook beveiligd of ontworpen.
-
Página 123: De Achterkant
������� ��� ��� ������� ���� ���� ���� ���� ��� ������ ���� �� ��� ����� �� ��� �� ��� �� �� De achterkant De volgende beschrijvingen zijn bedoeld als een snel overzicht, zou u enige vragen hebben over uw nieuwe versterker. Lees voor het inpassen van uw nieuwe versterker in het totale systeem het hoofdstuk “Het aansluiten”. - Página 124 Om deze reden raden wij u aan waar mogelijk de gebalanceerde verbindingen tussen de diverse Classé componenten te gebruiken. De penbezetting van de (vrouwtjes) XLR plug is als volgt: Pen 1: Signaal aarde Pen 2: Signaal + (niet gekeerd) Pen 3: Signaal –...
- Página 125 Alhoewel op de klemschroefaansluitingen van uw Classé versterker de gestripte kabel direct zonder verdere voorzieningen aangesloten kan worden, raden wij u sterk het gebruik van aangesoldeerde en gekrompen kwaliteits vorkjes of haakse kabelschoenen aan. Juist het gebruik van goed verbindingsmateriaal garandeert u dat de kwaliteit van de verbindingen niet langzaam terugloopt door slijtage en oxydatie van kale draden.
- Página 126 De lichtnetaansluiting De bekende Euro netkabel wordt voor de CA-M400 gebruikt om hem te kunnen activeren. Doe de kabel in de netingang en de andere steker in een wandcontactdoos.
- Página 127 Gevaarlijk! Potentieel gevaarlijke spannings- en stroompunten bevinden zich in uw versterker zelfs wanneer hij uit staat en van het lichtnet ontkoppeld is. Doe dus ook geen pogingen de versterker te openen. Nogmaals: in het apparaat bevinden zich geen onderdelen die geacht worden door de gebruiker onderhouden te worden.
-
Página 128: Het Installeren
Het installeren Uw nieuwe versterker is vrij makkelijke te installeren en dus snel van te genieten. Volg de onderstaande stappen om uw nieuwe versterker op een veilige manier te installeren. Belangrijk! De verbinding met het lichtnet is de laatste verbinding die u moet maken. -
Página 129: Het Configureren Van Het Op Volgorde Aanzetten Van Versterkers
Het aansluiten op de voorversterker Wanneer de versterker uit staat en/of niet op het lichtnet is aangesloten kan u uw CA-M400 op de gekozen aansluitwijze (in stap 3: gebalanceerd of ongebalanceerd) met uw voorversterker verbinden. Gebruik daar wel topkwaliteits kabels voor. -
Página 130: Verzorging En Onderhoud
Verzorging en Onderhoud. Gebruik een pluisvrije stofdoek om de CA-M400 af te stoffen. Om vuil en vingerafdrukken te verwijderen adviseren wij spiritus en een stofdoek te gebruiken. Maak de stofdoek eerst vochtig met spiritus en wrijf dan lichtjes het oppervlak van de versterker schoon. -
Página 131: Problemen Oplossen
Problemen oplossen Normaal gesproken moet u, als er zich problemen voordoen met uw versterker, zich wenden tot uw Classé leverancier. Voordat u dat echter doet is het wellicht verstandig om de onderstaande lijst met problemen eerst even door te nemen en, als dat het geval is, de voorgestelde oplossingen te proberen. - Página 132 flinke puls uit het lichtnet. Als de zekering weer ter ziele gaat, raadpleeg dan uw Classe dealer. Het blauwe standby-lampje knippert snel en/of het kanaallampje knippert rood.
-
Página 133: Technische Gegevens
Technische gegevens ■ Uitgangsvermogen: 400 Watts continu rms aan 8Ω 800 Watts continu rms aan 4Ω ■ Frequentiebereik: 10 Hz-22 kHz (+0 / –0.1dB) 10 Hz-155 kHz (+0 / –3 dB) ■ Faseverschuiving: < 10º (22 kHz) ■ Signaal/ruisverhouding: < -122 dB (ref. -
Página 134: Dimensions
Dimensions • Abmessungen Dimensioni • Dimensiones Afmetingen ������ ������� �������� ����� ����� ������ ���� ������ ����� ����� ����� ������� ������� ����� ������ ���� ����� ����� ���� ����� ���� ������ ����� ������ ����� ������ ����� ����� ����� ���� ���� ����� ���� �����... - Página 136 Classé Audio 5070 François Cusson Lachine, Quebec Canada H8T 1B3 +1 (514) 636-6384 +1 (514) 636-1428 (fax) http://www.classeaudio.com email: cservice@classeaudio.com Copyright © 2006 Classé Audio Inc. Printed in Canada. v2.3 041106...