Tabla de contenido
Publicidad
Idiomas disponibles
Idiomas disponibles
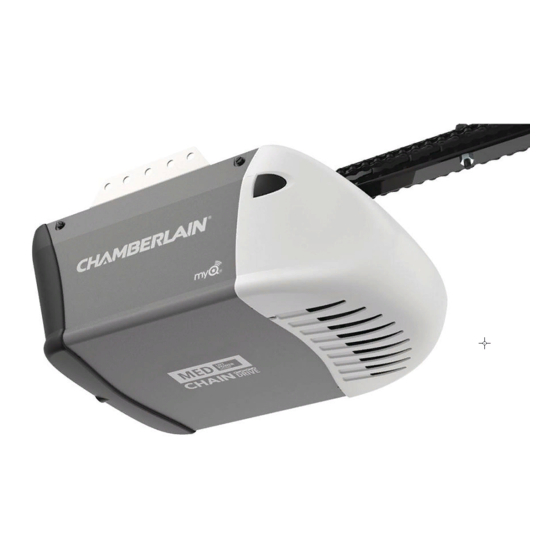
Garage Opener
• Please read this manual and the enclosed safety materials carefully!
• Fasten the manual near the garage door after installation.
• The door WILL NOT CLOSE unless the Protector System
and properly aligned.
• Periodic checks of the garage door opener are required to ensure
safe operation.
• The model number label is located on the front panel of your garage
door opener.
• This garage door opener is compatible with MyQ® and
is connected
®
Security+ 2.0® accessories.
• DO NOT install on a one-piece door if using devices or features
providing unattended close. Unattended devices and features are
to be used ONLY with sectional doors.
Owner's Manual
C205
Chain Drive
Garage Door Opener
FOR RESIDENTIAL USE ONLY
PRE-PROGRAMMED REMOTE CONTROL
INCLUDED
TO WATCH VIDEOS GO TO:
tinyurl.com/lgh5x3h
Contents
Preparation ......................................2-5
Assembly .......................................6-10
Installation .................................. 11-28
Install the Door Control ............ 21-22
Install the Protector System® .... 23-26
Connect Power ......................... 27-28
Adjustments ................................. 29-31
Operation ..................................... 32-35
Features .......................................33
Using your Garage Door Opener .....34
Push Button Door Control ..............34
Keyless Entry ................................35
Homelink® ...................................35
To Erase the Memory .....................35
To Open the Door Manually ...........36
Maintenance .....................................37
Troubleshooting ........................... 38-39
Accessories ........................................40
Warranty ...........................................41
Repair Parts ................................. 42-43
www.chamberlain.com
www.mychamberlain.com
Publicidad
Capítulos
Tabla de contenido
Solución de problemas

Manuales relacionados para Chamberlain C205


Resumen de contenidos para Chamberlain C205
- Página 45 Manual del propietario Contenido C205 Preparación ........2-5 Abre-puertas de garaje Ensamblado ........6-10 de cadena Instalación ........11-28 Instale el control de la puerta ... 21-22 Instale la Protector System®..23-26 SÓLO PARA USO RESIDENCIAL Conecte la alimentación eléctrica ........27-28 INCLUYE UN CONTROL REMOTO Ajustes .........
-
Página 46: Preparación
Preparación Revisión de los símbolos y términos de seguridad Compruebe la puerta Este abre-puertas de garaje ha sido diseñado y probado para un funcionamiento seguro, siempre y cuando se instale, se opere, se mantenga y se pruebe cumpliendo al pie de la letra con todas las advertencias y las instrucciones incluidas en este manual. -
Página 47: Elementos Adicionales Que Posiblemente Necesite
Preparación Elementos adicionales que posiblemente necesite: Herramientas necesarias Inspeccione el área de su garaje para ver si necesitará alguno de los siguientes elementos: (2) PEDAZOS DE MADERA DE 5 X 10 CM (2 X 4 PULG.) Se puede usar para ajustar la ménsula del cabezal a los soportes estructurales. También se usa para colocar el abre-puertas del garaje durante la instalación y para probar los sensores de reversa de seguridad. -
Página 48: Contenido De La Caja
El producto comprado podría tener un aspecto diferente. Modelo Alimentación Control de la puerta Control remoto Teclado inalámbrico C205 Med Lift Power System™ Pulsador de comando de puerta 1 botón (1) Ménsula del cabezal... - Página 49 Preparación Ferretería CONTROL DE EL MONTAJE LA INSTALACIÓN LA PUERTA Tuerca de mariposa Perno Perno de1/4 de pulg.- Tornillo de cabeza cuadrada de 1/4 de pulg.-20 (2) 20 x 1-3/4 de pulg. 5/16 de pulg.-9 x 1-5/8 de pulg. (4) Taquete para muro falso (2) Tornillo autorroscante...
-
Página 50: Ensamblado
Ensamblado PASO 1 Ensamblado del riel y instale el carro Insertar el riel hasta los topes superior y Para prevenir LESIONES por presión, mantenga las manos y los dedos alejados de las uniones mientras se ensambla laterales de la el riel. ménsula en ‘U’... -
Página 51: Paso 2 Fijar Riel Al Abre-Puertas De Garaje
Ensamblado PERENÍA PASO 2 Fijar riel al abre-puertas de garaje Tuerca de seguridad de 1/4 de pulg.-20 Perno de 1/4 de pulg.- Para evitar daños GRAVES en el abre-puertas, utilice SOLAMENTE los pernos/sujetadores que vienen montados en 20 x 1-3/4 de pulg. la parte superior del abre-puertas. -
Página 52: Paso 3 Instalación De La Polea
Ensamblado PERENÍA PASO 3 Instalación de la polea Tuerca de 3/8 de pulg. Arandela de Perno Ponga la cadena a un lado del riel como se muestra en la ilustración. Sujete el extremo la cadena y pase 3/8 de pulg. aproximadamente 30 cm (12 pulgadas) la cadena por la ventana. -
Página 53: Paso 4 Instale La Cadena
Ensamblado PASO 4 Instale la cadena PERENÍA Enlace maestro Eje roscado Para evitar posibles LESIONES GRAVES en los dedos causadas por las partes móviles del abre-puertas de garaje: SIEMPRE tenga las manos lejos de la rueda dentada mientras el abre-puertas esté en funcionamiento. Ponga la separador de cadena ANTES de hacer funcionar el abre-puertas. -
Página 54: Paso 5 Apretar La Cadena
Ensamblado PASO 5 Apretar la cadena Para apretar Tuerca Eje roscado la tuerca externa externa Arandela del trole Girar la tuerca interna y la arandela de presión en el eje roscado del trolley, en sentido opuesto al trolley. Para aligerar la cadena, girar la tuerca externa en la dirección mostrada. Cuando la cadena esté... -
Página 55: Instalación
Instalación INSTRUCCIONES DE INSTALACIÓN IMPORTANTES Para reducir el riesgo de LESIONES GRAVES o la MUERTE: LEA Y RESPETE TODAS LAS ADVERTENCIAS Y LAS INSTRUCCIONES DE INSTALACIÓN. Instale el control de la puerta del garaje montado en pared: Instale el abre-puertas de garaje SÓLO en puertas de garaje que estén bien equilibradas y lubricadas. Si la de manera que quede a la vista desde la puerta de la garaje. -
Página 56: Paso 1 Determinar Dónde Va A Instalar La Ménsula Del Cabezal
Instalación PASO 1 Determinar dónde va a instalar la ménsula del cabezal MONTAJE OPCIONAL DE Pared de Linea vertical del centro de la puerta MÉNSULA DE CABEZAL EL TECHO cabecera 5 x 10 cm (2x4 pulg.) Soportes de la Cielo raso sin estructurales Para evitar una LESIÓN GRAVE O INCLUSO LA MUERTE: terminación... -
Página 57: Paso 2 Instale La Ménsula Del Cabezal
Instalación INSTALACIÓN EN LA PARED PASO 2 Instale la ménsula del cabezal Pared frontal Línea vertical La ménsula del cabezal se puede sujetar a la pared sobre la puerta del garaje o en el cielo raso. Siga las instrucciones Soporte estructural de del centro que sean las más adecuadas para las necesidades de su garaje. -
Página 58: Paso 3 Coloque El Riel En La Ménsula Del Cabezal
Instalación PASO 3 Coloque el riel en la ménsula del cabezal PASO 4 Colocación del abre-puertas del garaje Coloque el abridor sobre el piso de la cochera debajo de la ménsula del cabezal. Use el material del empaque como base para protegerlo. NOTA: Si el resorte de la puerta está... -
Página 59: Paso 5 Cuelgue El Abre-Puertas De Garaje
Instalación PERENÍA PASO 5 Cuelgue el abre-puertas de garaje Tornillo tirafondo 5/16 de pulg.-9 x 1-5/8 de pulg. Tuerca de Para evitar la posibilidad de una LESIÓN GRAVE si se cae el abre-puertas de garaje, sujételo 5/16 de pulg.-18 FIRMEMENTE a los soportes estructurales del garaje. Se DEBEN usar anclajes de hormigón si se Perno hexagonal de 5/16 de pulg. -
Página 60: Paso 6 Instalación De La Bombilla
Instalación PASO 6 Instalación de la bombilla PASO 7 Instale la manija y la cuerda de emergencia Para evitar la posibilidad de una LESIÓN GRAVE O INCLUSO LA MUERTE si la puerta del garaje se cae: Para evitar un posible SOBRECALENTAMIENTO del portabombillas: De ser posible, use el desenganche de emergencia para soltar el carro SÓLO cuando la puerta del garaje esté... -
Página 61: Paso 8 Sujete La Ménsula De La Puerta
Instalación PASO 8 Sujete la ménsula de la puerta PERENÍA Tornillo autorroscante de 1/4 de pulg.-14 x 5/8 de pulg. Para puertas de garaje de fibra de vidrio, acero fino o aluminio, es NECESARIO un refuerzo ANTES de instalar la ménsula de puerta. -
Página 62: Opción Bpuertas De Una Sola Pieza
Instalación Pared de cabecera Soporte de 5 x 10 cm PASO 8 Sujete la ménsula de la puerta (continua) (2 x 4 pulg.) OPCIÓN B PUERTAS DE UNA SOLA PIEZA (Techo terminado) Ménsula de cabezal Coloque la ménsula de la puerta al centro de la parte superior de la misma, alineada con la ménsula del cabezal, según se indica en la ilustración. -
Página 63: Paso 9 Conexión Del Brazo De La Puerta Al Carro
Instalación PERENÍA PASO 9 Conexión del brazo de la puerta al carro Los procedimientos de instalación varían según el tipo de puerta de garaje. Siga las instrucciones que correspondan a su puerta. OPCIÓN A PUERTAS SECCIONALES Pasador chaveta de 5/16 Pasador chaveta de Perno hexagonal de 5/16 IMPORTANTE: El ranura en el brazo recto de la puerta DEBE voltéese del brazo curvado de la puerta. - Página 64 Instalación PASO 9 Conexión del brazo de la puerta al carro (continua) OPCIÓN B PUERTAS DE UNA SOLA PIEZA IMPORTANTE: El ranura en el brazo recto de la puerta DEBE voltéese del brazo curvado de la puerta. Brazo recto (Ranura voltéese a fuera) Cerrar la puerta.
-
Página 65: Instale El Control De La Puerta
Instalación PASO 10 Instale el control de la puerta Pele 6 mm (1/4 de pulg.) del extremo del cable y separe los cables. Conectar un cable a cada uno de los dos tornillos en la parte de atrás del control de la puerta. Los cables pueden conectarse indistintamente a cualquiera de los terminales de tornillo. -
Página 66: Paso 11 Tender Los Cables Desde El Control Hasta El Abre-Puerta De Garaje
Instalación PASO 11 Tender los cables desde el control hasta el abre-puerta de PASO 12 Colocar las etiquetas de advertencia garaje Con tachuelas o grapas, coloque en la pared cerca del control de la puerta una etiqueta de advertencia sobre el riesgo de quedar atrapado. -
Página 67: Instale La Protector System
Instalación ® PERENÍA PASO 13 Instale la Protector System Perno de coche de Tuerca mariposa 1/4 de pulg.- de 1/4 de pulg.-20 20 x 1/2 de pulg. Asegúrese de que la energía eléctrica NO esté conectada al abre-puertas de garaje ANTES de instalar los sensores de reversa de seguridad. -
Página 68: Opción Cinstalación En El Piso
Instalación ® PASO 13 Instale la Protector System (continua) OPCIÓN C INSTALACIÓN EN EL PISO Use una ménsula de extensión (no provista) o un bloque de madera para elevar la ménsula del sensor si es necesario. OPCIÓN B INSTALACIÓN EN LA PARED Mida cuidadosamente la posición de ambas ménsulas del sensor para que haya la misma distancia desde la Si fuera necesario más espacio puede utilizarse una ménsula prolongadora (no suministrada) o bloques de madera. -
Página 69: Paso 14 Cableado De Los Sensores De Reversa De Seguridad
Instalación PASO 14 Cableado de los sensores de reversa de seguridad PERENÍA Si el garaje ya tiene cables instalados para los sensores de reversa de seguridad, pase a la página 26. Grapas con aislamiento (No se muestra) INSTALACIÓN SIN CABLEADO PREVIO OPCIÓN A Grapa Instale los cables desde ambos sensores hasta el abre-puertas de garaje. -
Página 70: Opción Binstalación Con Cableado Previo
Instalación PASO 14 Cableado de los sensores de reversa de seguridad 11 mm Cables de sensor Cables (continua) (7/16 de pulg.) de seguridad preinstalados de reversa INSTALACIÓN CON CABLEADO PREVIO OPCIÓN B Corte el extremo del cable del sensor de reversa de seguridad dejando cable suficiente para que llegue a los cables preinstalados en la pared. -
Página 71: Conecte La Alimentación Eléctrica
Instalación PASO 15 Conecte la alimentación eléctrica HAY DOS OPCIONES PARA CONECTAR LA ALIMENTACIÓN ELÉCTRICA: OPCIÓN A CONEXIÓN TÍPICA Enchufe el abre-puertas a un tomacorriente con puesta a tierra. Por el momento, NO ponga en funcionamiento el abre-puertas. Para evitar la posibilidad de una LESIÓN GRAVE O INCLUSO LA MUERTE por electrocución o incendio: Asegúrese de que el abre-puertas NO esté... -
Página 72: Paso 16 Alineación De Los Sensores De Reversa De Seguridad
Instalación PASO 16 Alineación de los sensores de reversa de seguridad SI EL DEL ÁMBAR DEL SENSOR EMISOR NO SE ENCIENDE: Verificar que llegue energía eléctrica al abre-puerta. La puerta no se cerrará si los sensores de inversión no están instalados y alineados. Verificar que no haya un cortocircuito ni el sensor esté... -
Página 73: Ajustes
Ajustes Introducción Solamente para las puertas de una sola pieza Al configurar el recorrido hacia ARRIBA de una puerta de una sola pieza, verifique que la puerta no quede inclinada hacia atrás al abrirse completamente (ARRIBA). Si la puerta queda inclinada hacia atrás se deformará, hará movimientos irregulares y/o se sacudirá... -
Página 74: Paso 1 Programación Del Recorrido
Ajustes PASO 1 Programación del recorrido Botón de SUBIDA Botón de regulación Si el sistema de auto-reversa de seguridad no se ha instalado debidamente, las personas (y los niños pequeños en particular) podrían sufrir LESIONES GRAVES O INCLUSO LA MUERTE cuando se cierre la puerta del garaje. Botón de El ajuste incorrecto de los límites del recorrido de la puerta del garaje habrá... -
Página 75: Paso 2 Prueba Del Sistema De Reversa De Seguridad
Ajustes ® PASO 2 Prueba del sistema de reversa de seguridad PASO 3 Pruebe el Protector System Si el sistema de auto-reversa de seguridad no se ha instalado debidamente, las personas (y los niños pequeños en Si un sensor de reversa de seguridad no se ha instalado adecuadamente, las personas (y los niños pequeños en particular) podrían sufrir LESIONES GRAVES O INCLUSO LA MUERTE cuando se cierre la puerta del garaje. -
Página 76: Operación
Operación INSTRUCCIONES IMPORTANTES DE SEGURIDAD Para reducir el riesgo de LESIONES GRAVES o la MUERTE: LEA Y RESPETE TODAS LAS ADVERTENCIAS Y LAS INSTRUCCIONES. Después de llevar a cabo CUALQUIER ajuste, SE DEBE probar el sistema de reversa de seguridad. SIEMPRE guarde los controles remotos lejos del alcance de los niños. -
Página 77: Funciones
Internet CONSERVACIÓN DE ENERGÍA Gateway (modelo CIGBU) de Chamberlain es requerido. Para ahorrar energía, el abridor de puerta de cochera pasará a modo pasivo cuando la puerta esté totalmente cerrada. TEMPORIZADOR DE CIERRE (NO activar el temporizador de cierre con puertas de una sola pieza) En modo pasivo, el abre-puertas de garaje permanece apagado hasta que vuelva a activarse. -
Página 78: Cómo Usar Su Abre-Puertas De Garaje
Operación Cómo usar su abre-puertas de garaje Pulsador de comando de puerta El abre-puerta puede activarse con un control fijo montado en la pared, un control remoto, una entrada sin llave o un SINCRONIZACIÓN DEL CONTROL DE LA PUERTA: Para sincronizar el control con el abre-puertas de garaje, ®... -
Página 79: Control Remoto Y Teclado Digital
Mantenga presionado el botón de aprendizaje (LEARN) en el abre-puertas de garaje hasta que se apague el Chamberlain más antiguos NO son compatibles, consulte la página 40 para conocer los accesorios compatibles. DEL (aproximadamente 6 segundos). Se borrarán todos los códigos de los controles y entradas digitales. -
Página 80: Para Abrir La Puerta Manualmente
Operación Para abrir la puerta manualmente Para evitar la posibilidad de una LESIÓN GRAVE o INCLUSO LA MUERTE si la puerta del garaje se cae: De ser posible, use el desenganche de emergencia para soltar el carro SÓLO cuando la puerta del garaje esté CERRADA. -
Página 81: Mantenimiento
Mantenimiento Calendario de mantenimiento La batería del control remoto UNA VEZ AL MES Haga funcionar la puerta manualmente. Si esta desbalanceada o se pandea, llame a un técnico especializado en sistemas de puertas. Para evitar una LESIÓN GRAVE O INCLUSO LA MUERTE: Verifique que la puerta se abra y se cierre completamente. -
Página 82: Resolución De Problemas
Resolución de problemas Tabla de diagnóstico El abre-puerta de garaje viene programado con funciones de autodiagnóstico. Las flechas hacia ARRIBA y ABAJO se encienden para mostrar los códigos de diagnóstico. CÓDIGO DE DIAGNÓSTICO SÍNTOMA SOLUCIÓN La flecha hacia La flecha hacia arriba parpadea abajo parpadea El abre-puertas de garaje no cierra la puerta y las bombillas se encienden... - Página 83 Para ciertos vehículos podría ser necesario usar Compatibility Bridge™ (no incluido). Para confirmar si es necesario puertas de garaje esté funcionando correctamente. usar el puente consultar el sitio bridge.chamberlain.com. La puerta no cierra y la luz parpadea en la unidad del motor: El sensor de reversa de seguridad debe estar bien conectado y alineado antes de que el abre-puertas de garaje se mueva hacia abajo.
-
Página 84: Accessorios
Compatible con TODOS los (Opcionales). Para la instalación Para permitir que una puerta facilitar el ingreso al garaje con modelos Chamberlain desde 1993 del sensor de reversa de de 2.4 m (8 pies) se abra un código de cuatro dígitos. -
Página 85: Garantía
Garantía GARANTÍA LIMITADA DE CHAMBERLAIN Chamberlain Group, Inc. ® (“Vendedor”) garantiza al primer comprador minorista de este producto, para la residencia en la que se instaló originalmente este producto, que está libre de defectos de materiales y mano de obra durante un período específi co según se defi ne abajo (el “Período de garantía”). El período de garantía ¡PARE! -
Página 86: Piezas De Repuesto
Piezas de repuesto Piezas de la unidad del motor Piezas de instalación Descripción Numero de Descripción Numero de Parte Parte Cadena 041B1986-07 Brazo de la puerta curvo 041B0035B Juego de polea 041A8910 Ménsula de la puerta con 041A5047-1 pasador chaveta y anillo de Enlace maestro 004A1008 seguro... -
Página 87: Abre-Puertas De Garaje
Piezas de repuesto Descripción Numero de Parte Abre-puertas de garaje Separador de cadena 041A5615 Conjunto de engranaje y piñón 041C4220A Panel de extremo con etiquetes y 041D8129 casquillo de la luz Receptáculo de foco 041C0279 Lente K108D0079M Capacitor 030B0532-1 Retén del capacitor K012A0373 Módulo de recorrido 041D7742-7... - Página 88 The Chamberlain Group, Inc. © 2017, The Chamberlain Group, Inc. 300 Windsor Drive 114A5034BSP Todos los derechos reservados Oak Brook, IL 60523...