Tabla de contenido
Publicidad
Idiomas disponibles
Idiomas disponibles
Enlaces rápidos
Publicidad
Capítulos
Tabla de contenido

Manuales relacionados para Nuova Simonelli AURELIA II Digit


Resumen de contenidos para Nuova Simonelli AURELIA II Digit
- Página 1 DIGIT - T3 LIBRETTO ISTRUZIONI USER HANDBOOK MANUEL D’INSTRUCTIONS...
-
Página 3: Ec Declaration Of Conformity
DICHIARAZIONE DI CONFORMITÀ CE EC DECLARATION OF CONFORMITY DECLARATION DE CONFORMITE Lauro Fioretti Lauro Fioretti Lauro Fioretti Direttiva macchine Machinery Directive Directive machines Direttiva bassa tensione Low Voltage Directive Directive basse tension Direttiva compatibilità elettromagnetica Electromagnetic Compatibility Directive Directive compatibilité électromagnétique Direttiva materiali per alimenti Directive for Materials and Articles intended to come into contact with foodstuffs Directive matériaux pour contact alimentaire... - Página 4 DICHIARAZIONE DI CONFORMITÀ CE ATTREZZATURA A PRESSIONE EC DECLARATION OF CONFORMITY PRESSURE EQUIPMENT DECLARATION DE CONFORMITE MACHINE SOUS PRESSION Caldaia * Boiler in zona di applicazione articolo 3, comma 3 97/23/CE * Boiler in application area, article 3, section 3 97/23/EC * Chauffe-eau en zone d’application article 3, alinéa 3 97/23/CE Norme applicate: Raccolte M,S, VSR edizione '78 e '95 conservate presso la sede legale.
- Página 5 Per noi, ha scelto il meglio e potrà verificarlo, caffè dopo caffè, cappuccino dopo cappuccino. Vedrà quanto sarà comodo, pratico ed efficiente lavorare con Se è la prima volta che acquista una macchina Nuova Simonelli, benvenuto nell’alta caffetteria; se è già nostro Cliente, siamo molto lusingati della Sua fedeltà.
-
Página 6: Caratteristiche Tecniche
CARATTERISTICHE TECNICHE Versione Digit 2 Gruppi 3 Gruppi 4 Gruppi PESO NETTO 74 kg 164 lb 88 kg 194 lb 102 kg 225 lb PESO LORDO 80 kg 176 lb 100 kg 220 lb 115 kg 254 lb POTENZA TERMICA 4500 W 4500 W 5000 W... -
Página 7: Tabla De Contenido
REGOLAZIONI DEL TECNICO QUALIFICATO ....17 IMPIANTO ELETTRICO AURELIA II DIGIT T3 V . .101 RIEMPIMENTO MANUALE CALDAIA ... 17... -
Página 9: Descrizione Macchina
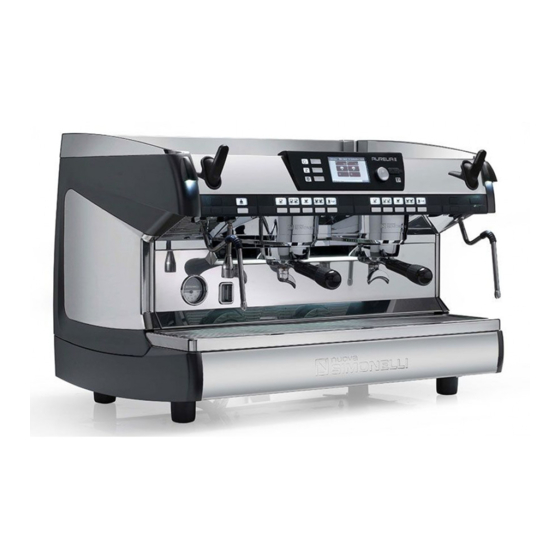
DESCRIZIONE MACCHINA Fig. 1 LEGENDA 1 Manopola vapore 17 Scaldatazze elettrico (optional) 9 Interruttore generale 2 Pulsanti erogazione acqua calda / vapore 10 Becco 2 caffè 3 Pannello di comando 11 Livello acqua in caldaia 4 Pulsanti erogazione caffè 12 Manometro 5 Manopola vapore 13 Piede regolabile 6 Portafiltro... -
Página 10: Descrizione Pannello Di Comando
DESCRIZIONE PANNELLO DI COMANDO Domenica 21 Marzo 14:45 °C °C °C °C 1.2 bar Menu Fig. 2 LEGENDA 1 Spia stato macchina accesa/spenta 8 Pulsante accensione/spegnimento 2 Pulsante accensione/spegnimento macchina scaldatazze 3 Display TFT 9 Pulsante lavaggio 4 Logo Aurelia II 10 Spia lavaggio 5 Porta USB 11 Spia stato scaldatazze acceso/spento... -
Página 11: Lista Accessori
LISTA ACCESSORI Fig. 3 4 GRUPPI CODICE DESCRIZIONE 2 GRUPPI 3 GRUPPI (Solo Digit) Tubo carico 3/8" Tubo scarico vaschetta gruppi Ø 20 mm - l. 150 cm Tubo scarico piano lavoro Ø 25 mm - l. 150 cm Portafiltro Filtro doppio Filtro singolo Filtro cieco... -
Página 12: Prescrizioni Di Sicurezza
Qualora il loro buzione elettrica. La targa è situata La Nuova Simonelli si riserva la facol- uso si rendesse indispensabile è sul frontale della macchina a sinistra. tà di apportare variazioni alla produ- necessario chiamare un elettricista L’installazione deve essere effettuata... -
Página 13: Pericolo Di Scossa Elettrica
☞ tuali impurità iniziali. ☞ L'installatore deve eseguire i collega- In fase di installazione la rete elettri- In seguito il dispositivo viene nuova- menti idraulici rispettando le norme ca dovrà essere predisposta con un mente caricato e portato fino alle di igiene e sicurezza idraulica di tute- sezionatore che sezioni ogni fase. -
Página 14: Informazione Agli Utenti
☞ Per evitare surriscaldamenti perico- ATTENZIONE losi si raccomanda di svolgere per tutta la sua lunghezza il cavo di ali- INFORMAZIONE AGLI UTENTI mentazione. Ai sensi dell’ art. 13 del ☞ Decreto Legislativo 25 luglio Non ostruire le griglie di aspirazione 2005, n. -
Página 15: Trasporto Emovimentazione
MACCHINA Per qualsiasi comunicazione con il costruttore Una volta rimosso l’imballo e aver verificato ATTENZIONE Nuova Simonelli, citare sempre il numero di l’integrità della macchina e degli accessori, PERICOLO DI URTO O matricola della macchina. procedere come descritto di seguito: SCHIACCIAMENTO L’operatore durante tutta la movimentazio-... -
Página 16: Specifiche Acqua
8 ore bisogna proce- ra dei contatti uguale o superiore a 3 mm. dere ad effettuare il ricambio del 100% La Nuova Simonelli non risponde di alcun dell'acqua contenuta nei circuiti utiliz- danno a cose o persone derivante dalla zando gli erogatori preposti. -
Página 17: Regolazioni Del Tecnico Qualificato
La sostituzione della batteria al litio deve Fig. 15 essere eseguita SOLO dal Tecnico Specializzato. La Nuova Simonelli non risponde di alcun danno a cose o persone, derivanti da una mancata osservanza delle prescrizioni di sicurezza, descritte in questo manuale. -
Página 18: Utilizzo
UTILIZZO ACCENSIONE/ L’operatore deve prima di iniziare la lavorazio- ne, accertarsi di aver letto e ben compreso le SPEGNIMENTO prescrizioni di sicurezza di questo manuale. DELLA MACCHINA PROCEDURA DI PRIMA INSTALLA- ® ACCENSIONE: collegare la macchina alla ZIONE O DOPO presa elettrica e premere l’in- MANUTENZIONE terruttore “A”... -
Página 19: Preparazione Del Caffè
PREPARAZIONE DEL Terminata la diagnosi, sul On - Off Automatico PROGRAMMATO CAFFE’ Page": NOTA: assicurarsi che l’interruttore generale sia sempre in posizione “I”. Sganciare il portafiltro e riempire di una o due dosi di caffè macinato a seconda del filtro utiliz- Domenica 21 Marzo 14:45... -
Página 20: Utilizzo Del Vapore (Lancia Vapore Manuale)
UTILIZZO DEL PREPARAZIONE DEL Dalla lancia acqua calda verrà erogata acqua per un tempo equivalente al valore programma- VAPORE (Lancia CAPPUCCINO vapore manuale) Per ottenere la tipica schiuma immergere il il pulsante per interrompere l'erogazione. ATTENZIONE beccuccio del vapore in fondo al recipiente PERICOLO DI USTIONE pieno per 1/3 (preferibilmente a forma tronco- NOTA: L’erogazione dell’acqua calda può... -
Página 21: Programmazione
PROGRAMMAZIONE PROGRAMMAZIONE Icona Descrizione Procedere all'acensione della macchina come LEGENDA Lingua. descritto nel capitolo "Utilizzo" - paragrafo "Accensione/spegnimento della macchina". Il display visualizza la "Home Page". Programmazione dosi. Temperature gruppi (solo Domenica 21 Marzo 14:45 versione T3 e se attivate in °C °C °C... -
Página 22: Lingua
Vengono visualizzate 3 opzioni: Tutti i tasti programmabili cominciano a lampeggiare: 7.2.1 LINGUA Programmazione dosi Programmaz Con il rotary switch spostarsi sull'icona "Lingua" e premerlo per accedere: Program. Program. Trasfer. Trasfer. Dosi Dosi Menu Principale dosi dosi standard standard Lingua Program. -
Página 23: Autosteam (Optional)
Per proseguire nella programmazione dei vari TRASFERIMENTO DOSI tasti selezionare di nuovo l'icona con il rotary fermare la dose programmata. switch e premerlo. valore delle dosi programmate ad altri gruppi. spegne una volta confermato premendo il Selezionare il gruppo da utilizzare come "sor- rotary switch. -
Página 24: Set Point Temperatura
7.2.3 SET POINT REGOLAZIONE OFFSET GRUPPI: Dalla schermata: SETPOINT GRUPPI TEMPERATURA (solo versione T3): Con il rotary switch spostarsi sull'icona "Set Sul display è visualizzato: Setpoint gruppi point temperatura" e premerlo per accedere: Setpoint gruppi Menu Principale Menu Setpoint gruppi 94.0 93.8 93.8... - Página 25 REGOLAZIONE OFFSET CALDAIE: Dalla schermata: SETPOINT CALDAIE SETPOINT CALDAIA VAPORE (solo versione T3): Sul display è visualizzato: Sul display è visualizzato: Setpoint caldaie Setpoint caldaia vapore Setpoint caldaie Setpoint caldaie Setpoint caldai Setpoint caldaia vapore Setpoint caldaia v 93.4 93 4 93.4 93 4 93.4...
-
Página 26: Impostazione Tasti E Display
7.2.4 IMPOSTAZIONE TABELLA PRESSIONE - TEMPERATURA SCALDATAZZE °C °F TASTI E DISPLAY Sul display è visualizzato: 0,50 110,5 230,9 Con il rotary switch spostarsi sull'icona Scaldatazze "Impostazione tasti e display" e premere per 0,55 111,5 232,7 accedere: 0,60 112,5 234,5 Menu Principale Menu Principale 0,65... - Página 27 LUMINOSITÀ TASTI TEMPERATURA EROGAZIONE UNITÀ DI MISURA (solo versione T3): luminosità dei tasti: re l'unità di misura della temperatura per la disattivare la visualizzazione della temperatura gestione dell'intera interfaccia: di erogazione gruppi nella "Home Page": Luminosità tasti Unità di misura Temperatura erogazione Unità...
-
Página 28: Risparmio Energia
Esempio giorno programmabile: Icona Descrizione Tempo erogazione Programma settimanale Programma settimanale. Lunedì Gruppi attivi. Persistente Tempo ON Tempo OF Standby attivo. 00:00 00:00 Dopo aver selezionato l'opzione con il rotary Esempio giorno OFF: switch confermarla premendolo. PROGRAMMA SETTIMANALE Questa pagina consente di impostare i giorni di Programma settimanale riposo e i giorni in cui viene programmato l'accen- sione e spegnimento automatico della macchina. - Página 29 è possibile visualizzare le configurazioni dei vari Per riabilitare il gruppo basterà eseguire la stes- giorni della settimana, home e menù. Domenica 21 Marzo 14:45 spegnere e riaccendere la macchina dall'interrut- °C °C °C tore principale posto in basso a destra. GRUPPI ATTIVI NOTA: ad ogni accensione dell'interruttore prin-...
-
Página 30: Standby Attivo
7.2.6 CONTEGGIO ON 0.50 bar: durante lo stato di OFF la EROGAZIONI macchina mantiene una pressione pari a STANDBY ATTIVO 0.50 bar e a display (impostato a luminosità Con il rotary switch spostarsi sull'icona Questa funzione consente alla macchina di minima) è... -
Página 31: Allarmi
Nella seconda tabella sono presenti i totali grup- Ruotando il rotary switch è possibile navigare 7.2.7 ALLARMI pi, i lavaggi, i servizi e il totale assoluto: attraverso le due pagine con l'elenco degli erro- ri memorizzati dalla centralina. Con il rotary switch spostarsi sull'icona "Allarmi" Per cancellare lo storico allarmi è... -
Página 32: Impostazioni Tecniche
Terminata l’impostazione dei minuti si ritorna al menù principale. DATA E ORA MANUTENZIONE 7.2.8 IMPOSTAZIONI la data e l'ora impostata in macchina e che la manutenzione programmata. viene visualizzata sulla "Home Page". È possibile programmare il numero di erogazio- TECNICHE Con il rotary switch spostarsi sull'icona Data e ora manutenzione. - Página 33 NOTA: Durante il ciclo di lavaggio dei gruppi solo gruppo 1): selezionati è possibile effettuare eroga- CICLO AUTOMATICO DI LAVAGGIO zioni di caffè sui gruppi non selezionati. Domenica 21 Marzo 14:45 ciclo di lavaggio automatico dei gruppi. °C °C °C NOTA: anche premendo il tasto lavaggio Inserire il filtro cieco nel portafiltro, aggiungere...
-
Página 34: Pulizia
PULIZIA PULIZIA DEL GRUPPO PULIZIA DELLE CON L’AUSILIO DEL DOCCETTE INOX ARRESTO FILTRO CIECO Le doccette inox sono situate sotto i gruppi Arrestare la macchina tramite i tre interruttori La macchina è predisposta per il lavaggio del erogazione. generali portandoli in posizione 0. gruppo erogazione tramite ciclo automatico di pulizia e detergente specifico in polvere. -
Página 35: Manutenzione
MANUTENZIONE Le procedure di rigenerazione sono le seguenti: 2) Rimettere il tappo e riposizionare la leva C 1) Spegnere la macchina e mettere un reci- piente della capacità di almeno 5 litri sotto salata dal tubo F finché non ritorni dolce NOTA: Durante la manutenzione / riparazione i il tubo E. - Página 37 You will see how practical, convenient and efficient working with con If this is the first time you have bought a Nuova Simonelli coffee machine, welcome to high quality coffee-making; if you are already a customer of ours, we feel flattered by the trust you have shown us.
-
Página 38: Technical Characteristics
TECHNICAL CHARACTERISTICS Digit Version 2 Groups 3 Groups 4 Groups NET WEIGHT 74 kg 164 lb 88 kg 194 lb 102 kg 225 lb GROS WEIGHT 80 kg 176 lb 100 kg 220 lb 115 kg 254 lb POWER 4500 W 4500 W 5000 W 5000 W... - Página 39 BY A QUALIFIED TECHNICIAN ONLY ..49 ADJUSTMENTS TO BE MADE AURELIA II DIGIT T3 V ELECTRIC SYSTEM ..101 BY A QUALIFIED TECHNICIAN ONLY ... 49 AURELIA II DIGIT T3 S ELECTRIC SYSTEM .
- Página 41 DESCRIPTION Fig. 1 1 Steam knob 17 Electric cup warmer (optional) 9 Main switch 2 Hot water / steam delivery button 10 2 coffees spout 3 Control panel 11 Water level inside boiler 4 Coffee delivery buttons 12 Pressure Gauge 5 Steam knob 13 Adjustable foot 6 Filter-holder...
-
Página 42: Control Panel Description
CONTROL PANEL DESCRIPTION Sunday 21 March 14:45 °C °C °C °C 1.2 bar Menu Fig. 2 1 Machine On/Off light 8 Cup warmer On/Off button 2 Machine On/Off button 9 Cup warmer On/Off button 3 TFT display 10 Wash light 4 Aurelia II Logo 11 Cup warmer On/Off light 5 USB port... -
Página 43: Accessories List
ACCESSORIES LIST Fig. 3 4 GROUPS CODE DESCRIPTION 2 GROUPS 3 GROUPS (Digit only) Filling tube 3/8 Unit tub draining tube Ø 20 mm - l. 150 cm Worktop draining tube Ø 25 mm - l. 150 cm Filter-holder Double filte Single filter Blind filter Spring... -
Página 44: Safety Prescription
Before connecting the appliance the one shown here. The use of adapters, multiple sockets make sure the rating plate data cor- Nuova Simonelli reserves the right to or extensions is strictly forbidden. If respond with the mains. make any changes to products and... -
Página 45: Risk Of Electric Shock
☞ The device is then refilled and taken ☞ The machine must be installed in During installation, the mains power to rated operating conditions. compliance with the local health system needs to be equipped with a After reaching the “ready for operation” standards in force for plumbing sys- disconnector switch to cut off each condition, the following dispensing... - Página 46 ☞ To avoid dangerous overheating, CAUTION make sure the supply cord is fully uncoiled. INFORMATION TO THE USERS Under the senses of art. 13 of ☞ Law Decree 25th July 2005, n. Do not obstruct the extraction and/or 151 “Implementation of the dissipator grids, especially of the Directives/ Guidelines 2002/95/ cup warmer.
-
Página 47: Transport And Handling
TRANSPORT AND HANDLING INSTALLATION MACHINE HANDLING PRELIMINARY IDENTIFICATION OPERATIONS CAUTION RISK OF IMPACT Always quote the machine serial number in all OR CRASHING communications to the manufacturer, Nuova After unpacking, assess that the machine and Simonelli. its accessories unit are complete, then proceed During all handling operations, the operator as follows: must ensure that there are no persons,... - Página 48 3mm. more than 8 hours, then it is necessary Nuova Simonelli is not liable for any dam- to change 100% of the water in the cir- age to people or objects due to not observ- cuits, using the relevant dispensers.
-
Página 49: Adjustments To Be Made By A Qualified Technician Only
Replacement of the lithium battery must be Fig. 15 carried out EXCLUSIVELY by Qualified Technician. Nuova Simonelli cannot be held liable for any damage to people or things due to non observance of the safety prescriptions Fig. 14 described in this booklet. -
Página 50: Turning The Machine On
TURNING THE Before starting to use the appliance, the operator MACHINE ON must be sure to have read and understood the safety prescriptions contained in this booklet. SWITCH ON: plug the machine into the ® power socket and press the COMMISSIONING switch “A”... -
Página 51: Making Coffee
MAKING COFFEE After the diagnostics stage, the Automatic On/Off PROGRAMMED "Home Page" will open on the screen: NOTE: make sure that the general switch is always on the position "I". Unhitch the filter-holder and fill it with one or two doses of ground coffee depending on the Sunday 21 March 14:45... -
Página 52: Using Steam
USING STEAM MAKING The hot water wand will deliver water for the amount of time equivalent to the set value (see (Manual steam CAPPUCCINO PROGRAMMING section and the DOSE wand) PROGRAMMING section) or press the button To obtain the typical cappuccino foam, immerse again to stop pouring. - Página 53 AURELIA T3 PROGRAMMING Icon Description (user mode) and DIGIT Language. PROGRAMMING Switch on the machine as described in the “Use” chapter – the “Switching the machine On/ Off” section. The display shows the "Home Dose programming. Page". Setpoint temperature and Group temperatures group/boiler offset.
-
Página 54: Dose Programming
3 options will be displayed: All programmable keys will start to flash: 7.2.1 LANGUAGE Dose programming Dose prog Use the rotary switch to move to the "Language" icon. Press the icon to open: Dose Dose Dose Dose Standard Standard Main Menu programming transfer doses... -
Página 55: Hot Water
To continue programming the different keys, DOSE TRANSFER select the icon with the rotary switch and press firm the programmed dose. This function serves to transfer the value of the on it. programmed dose settings to other groups. grammed is then switched off by pressing Select the group to be used as a “source”... - Página 56 7.2.3 SET POINT GROUP OFFSET ADJUSTMENT: TEMPERATURE From the screen: GROUP SETPOINT (T3 version only) Use the rotary switch to move to the "Set point The display will show: temperature" and press to enter: Group setpoint Group setpoint Main Menu Group setpoint Dose Dose...
- Página 57 BOILER OFFSET ADJUSTMENT: From the screen: BOILER SETPOINT (T3 version only): STEAM BOILER SETPOINT The display shows: The display shows: Boiler setpoint Steam boiler setpoint Boiler setpoint Boiler setpoint Boiler setpoint Steam boiler setpoint Steam boiler setpo 93.4 93 4 93.4 93 4 93.4...
-
Página 58: Cup Warmer
7.2.4 KEY AND DISPLAY PRESSURE-TEMPERATURE TABLE CUP WARMER °C °F SETTINGS The display will read: 0,50 110,5 230,9 Use the rotary switch to move to the "Button and display setting” and press to open: Cup warmer 0,55 111,5 232,7 0,60 112,5 234,5 Main Menu... - Página 59 DELIVERY TEMPERATURE (T3 version only): BUTTON BRIGHTNESS UNIT OF MEASURE This function serves to activate/deactivate the Use this function to set the brightness of the This screen serves to change the unit of meas- display for the group delivery temperature on keys: ure for the temperature used to control the the "Home Page":...
-
Página 60: Energy Saving
Programmable day example: Icon Description Pour time Weekly program Weekly schedule. Monday Active groups. Persistent Times ON Times OFF 00:00 00:00 Standby active. After selecting the option with the rotary switch, OFF day example: confirm by pressing. WEEKLY PROGRAMMING This page serves to set the days off for the Weekly program machine and the days in which its automatic switch on and off functions are programmed. - Página 61 time, the machine returns to the initial condition The change is not permanent in that every time where, by turning the rotary switch, it is possible it is switched on from the main switch, all of the Sunday 21 March 14:45 to view the settings for the different days of the groups will be active.
- Página 62 Active standby ACTIVE STANDBY Main Menu This function allows the machine to enter stand- by mode or not, which makes it possible to Language Language Dose Dose Dose Temperature emperature Key and display Key and display y and disp and disp choose whether or not to switch off the machine programming prog...
-
Página 63: Alarm History
The second table shows the total for groups, Turn the rotary switch to navigate through the 7.2.7 ALARMS washing, services and absolute total: two pages with the list of errors stored in the control unit. Use the rotary switch to select "Alarms" and To delete the alarm history, press the wash but- press to open: . -
Página 64: Date And Time
7.2.8 TECHNICAL SETTINGS DATE AND TIME MAINTENANCE Use the rotary switch to highlight the “Technical This function serves to change the date and This function serves to set scheduled mainte- settings” icon and press to open: time setting for the machine and it is viewed nance. - Página 65 In this case, the screen will display (E.g. Wash NOTE: During the selected group wash cycle, it group 1 only): is possible to deliver coffee from the AUTOMATIC WASH CYCLE groups that have not been selected. This function serves to carry out an automatic Sunday 21 March 14:45...
-
Página 66: Switching Off The Machine
CLEANING CLEANING THE UNIT Cleaning the work area: remove the worktop, WITH THE AID OF lifting it up from the front and sliding it out. Remove the water collection dish underneath THE BLIND FILTER and clean everything with hot water and cleans- SWITCHING OFF ers. -
Página 67: Resin And Softener Regeneration
MAINTENANCE Regeneration procedures are as follows: 2) Put the cap back on and reposition lever C 1) Turn the machine off and place a container moving it towards the left and allowing tube large enough to contain at least 5 litres F to discharge the salty water until it has NOTE: During maintenance/repairs, the parts under tube E. - Página 69 Et vous apprécierez la facilité et la rapidité d’emploi du modèle Si cet achat est le premier achat d’une machine Nuova Simonelli, vous êtes le bienvenu dans le monde de la haute cafétéria; si, par contre, vous faites déjà partie de notre Clientèle, nous sommes flattés par votre fidélité, et nous vous remercions de préférer nos produits.
-
Página 70: Caractéristiques Techniques
CARACTÉRISTIQUES TECHNIQUES Version Digit 2 Groupes 3 Groupes 4 Groupes POIDS NET 74 kg 164 lb 88 kg 194 lb 102 kg 225 lb POIDS BRUT 80 kg 176 lb 100 kg 220 lb 115 kg 254 lb PUISS. THERMIQUE 4500 W 4500 W 5000 W... - Página 71 L'HORLOGE......81 AURELIA II DIGIT T3 V ..... .101 INSTALLATION ÉLECTRIQUE...
-
Página 73: Description Machine
DESCRIPTION MACHINE Fig. 1 LÉGENDE 1 Poignée vapeur 9 Interrupteur général 17 Chauffe-tasses électrique (en option) 2 Poussoirs distribution eau chaude / vapeur 10 Bec 2 cafés 3 Panneau de commande 11 Niveau de l’eau dans la chaudière 4 Poussoirs distribution café 12 Manomètre 5 Poignée vapeur 13 Pied réglable... -
Página 74: Description Panneau De Commande
DESCRIPTION PANNEAU DE COMMANDE Dimanche 21 Mars 14:45 °C °C °C °C 1.2 bar Menu Fig. 2 LÉGENDE 8 Poussoir marche/arrêt chauffe-tasses 1 Témoin état marche/arrêt machine 9 Poussoir lavage 2 Poussoir marche/arrêt machine 10 Témoin lavage 3 Afficheur TFT 11 Témoin état marche/arrêt chauffe-tasses 4 Logo Aurelia II 5 Port USB... -
Página 75: Liste Accessoires
LISTE ACCESSOIRES Fig. 3 4 GROUPES CODE DESCRIPTION 2 GROUPES 3 GROUPES (Seulement version Digit) Tube arrivée 3/8” Tube évacuation bac groupes Ø 20 mm - l. 150 cm Tube évacuation plan de travail Ø 25 mm - l. 150 cm Support à... -
Página 76: Prescriptions De Sécurité
Avant de brancher l’appareil, veillez à celle représentée. est interdit. Si leur usage s’avère ce que les données indiquées sur la Nuova Simonelli se réserve le droit indispensable, il faut absolument plaquette correspondent à celles du d’apporter des variations à la produc- s’adresser à... -
Página 77: Attention Risque De Decharge Electrique
lation hydraulique, veuillez vous Le dispositif doit être ensuite à nou- ☞ En phase d’installation, le réseau adresser à un technicien dûment veau chargé et actionné jusqu’aux électrique devra être prédisposé autorisé à cet effet. conditions nominales de fonctionne- avec un sectionneur qui sectionne ☞... - Página 78 ☞ Afin d’éviter des surchauffes dange- ATTENTION reuses, il est conseillé de bien dérou- ler sur toute la longueur le câble RENSEIGNEMENT d’alimentation. UTILISATEURS ☞ Aux sens de l’art. 13 du Ne pas obstruer les grilles d’aspira- Décret Législatif du 25 juillet tion et/ou de dissipation et plus parti- 2005, n.
-
Página 79: Transport Et Déplacement
Pour toute communication avec le fabricant Après avoir retiré l’emballage et avoir vérifié ATTENTION Nuova Simonelli, indiquer toujours le numéro l’intégrité de la machine et de ses accessoires, RISQUE D’IMPACT OU de série qui est celui figurant dans ce manuel. -
Página 80: Caractéristiques Eau
à la vidange d’ouverture des contacts égale ou supé- complète de l’eau (100%) contenue rieure à 3 mm. Nuova Simonelli ne répond dans les circuits, à travers les distribu- d’aucun dommage aux personnes ou aux teurs respectifs. -
Página 81: Réglages Du Technicien Qualifie
Le remplacement de la batterie au lithium doit être effectuée UNIQUEMENT par un Fig. 15 Technicien Spécialisé. Nuova Simonelli ne répond pas des dom- mages aux personne sou aux choses déri- vant du non respect des prescriptions de Fig. 14 sécurité... -
Página 82: Utilisation
UTILISATION MISE EN MARCHE Avant de commencer à travailler, l’opérateur DE LA MACHINE doit avoir lu et compris toutes les prescriptions de sécurité indiquées dans ce manuel. MISE EN PROCÉDURE DE MARCHE: brancher la machine à la prise PREMIERE de courant et pousser l’inter- ®... -
Página 83: Préparation Du Café
PRÉPARATION DU A la fin du diagnostic, l’afficheur On - Off Automatique PROGRAMME visualise la page d’accueil CAFÉ NOTE: vérifier que l’interrupteur général soit toujours sur “I”. Dégager le support à filtre et remplir l’une ou les deux doses de café moulu selon le filtre Dimanche 21 Mars 14:45... -
Página 84: Utilisation De La Vapeur (Lance Vapeur Manuelle)
UTILISATION DE LA PRÉPARATION DU de l’eau chaude, le voyant lumineux VAPEUR (Lance CAPPUCCINO s’allume. La lance eau chaude distribue de l’eau vapeur manuelle) pendant un temps équivalent à la valeur pro- Pour obtenir la mousse typique du cappuccino, plonger le bec de la vapeur au fond du récipient qui doit être rempli d’un tiers (il est préférable ATTENTION appuyer de nouveau sur le poussoir pour inter-... -
Página 85: Programmation
PROGRAMMATION PROGRAMMATION Menu Principal Allumer la machine comme décrit au chapitre LÉGENDE "Utilisation" - paragraphe "Marche/Arrêt de la machine". Langue Langue Programmation ogrammatio Setpoint Setpoint n Program. touches Program. touches ogram touc gram tou doses doses température températ et afficheur et afficheur L’afficheur visualise la page d’accueil "Home Page". -
Página 86: Langue
Trois options s’affichent: Toutes les touches programmables se mettent à cli- gnoter: 7.2.1 LANGUE Programmation doses Programmat Se déplacer, avec le rotary switch, sur l’icône "Langue" et cliquer pour accéder: Transfert Transfe Doses standard Doses standard Programmation ogrammatio Menu Principal doses doses Langue... -
Página 87: Autosteam (Optional)
Pour continuer la programmation des diffé- Sélectionner le groupe à utiliser comme "source" rentes touches, sélectionner de nouveau l’icône pour confirmer la dose programmée. et confirmer: avec le rotary switch et cliquer dessus. après avoir confirmé en cliquant sur le rotary switch. -
Página 88: Set Point Température
7.2.3 SET POINT RÉGLAGE OFFSET GROUPES: Depuis la page vidéo: SETPOINT GROUPES TEMPÉRATURE (seulement pour version T3): Se déplacer avec le rotary switch sur l’icône L’afficheur visualise: Setpoint groupes "Set point température" et cliquer pour accéder: Setpoint groupes Menu principal Menu Setpoint groupes 94.0... - Página 89 RÉGLAGE OFFSET CHAUDIÈRES: Depuis la page vidéo: SETPOINT CHAUDIÈRES SETPOINT CHAUDIÈRE VAPEUR (seulement pour version T3): L’afficheur visualise: L’afficheur visualise: Setpoint chaudières Setpoint chaudière vapeur Setpoint chaudières Setpoint chaudières Setpoint chaud Setpoint chaudière vapeur Setpoint chaudièr 93.4 93 4 93.4 93 4 93.4 1.17...
-
Página 90: Programmation Touches Et Afficheur
7.2.4 PROGRAMMATION TOUCHES Si on désire travailler en mode "manuel", sélec- TABLEAU PRESSION - TEMPERATURE °C °F ET AFFICHEUR tionner avec le rotary switch l'icône Manuel 0,50 110,5 230,9 Se déplacer, à l’aide du rotary switch, sur l’icône appuyer sur: "Programmation touches et afficheur"... - Página 91 LUMINOSITE TOUCHES TEMPERATURE DISTRIBUTION UNITE DE MESURE Cette fonction permet de régler la luminosité (seulement pour version T3): Cette page vidéo permet de modifier l’unité de des touches: Cette fonction permet d’actionner/exclure l’affi- mesure de la température pour la gestion de chage de la température de distribution des l’ensemble de l’interface: groupes sur la page d’accueil "Home Page":...
-
Página 92: Économie D'énergie
Exemple jour programmable: Icône Descriptiom Temps extraction Programme hebdomadaire Programme hebdomadaire. Lundi Groupes actifs. Persistant Temps ON Temps OFF Standby actif. 00:00 00:00 Après avoir sélectionné l’option avec le rotary Exemple jour OFF: switch, cliquer pour confirmer. PROGRAMME HEBDOMADAIRE Cette page permet de programmer les jours de Programme hebdomadaire repos et les jours de mise en marche et d’arrêt 7.2.5... - Página 93 OFF, on retourne aux conditions initiales où il est Pour rétablir le groupe, il suffit d’effectuer la possible, en tournant le rotary switch d’afficher même procédure sur ce groupe ou d’éteindre et Dimanche 21 Mars 14:45 les configurations des différents jours de la de rallumer la machine avec son interrupteur °C °C...
-
Página 94: Comptage Distributions
7.2.6 COMPTAGE DISTRIBUTIONS STANDBY ACTIF Standby actif Se déplacer, avec le rotary switch, sur l’icône Cette fonction permet à la machine d’entrer ou "Comptage distributions" et cliquer pour accéder: de quitter un état de standby actif, qui permet de choisir si on veut éteindre entièrement la machine ou la maintenir à... -
Página 95: Alarmes
Le deuxième tableau contient le total des En tournant le rotary switch, il est possible de groupes, des lavages, des services et le total naviguer à travers les deux pages contenant la 7.2.7 ALARMES absolu: liste des erreurs enregistrées par la centrale. Se déplacer, avec le rotary switch, sur l’icône Pour effacer l’historique des alarmes, il suffit "Alarmes"... -
Página 96: Programmations Techniques
A la fin de la programmation des minutes, on revient sur le menu principal. DATE ET HEURE ENTRETIEN Cette fonction permet de modifier la date et Cette fonction permet de définir l’entretien pro- 7.2.8 PROGRAMMATIONS l’heure programmées sur la machine et qui est grammé... -
Página 97: Cycle Automatique De Lavage
Dans ce cas, la page vidéo sera (Ex. Lavage NOTE: Pendant le cycle de lavage des groupes seulement groupe 1): sélectionnés, il est possible d’effectuer CYCLE AUTOMATIQUE DE LAVAGE des distributions de café à partir des Cette fonction permet d’effectuer le cycle de Dimanche 21 Mars 14:45... -
Página 98: Nettoyage
NETTOYAGE NETTOYAGE DU NETTOYAGE DES GROUPE AVEC L’AIDE DOUCHES INOX ARRÊT DE LA DU FILTRE BORGNE MACHINE Les lances en inox sont situées sous les La machine est prédisposée pour le lavage du groupes de distribution. groupe de distribution à travers un cycle auto- Arrêter la machine avec les trois interrupteurs matique de nettoyage et avec un produit spé- généraux en les positionnant sur 0. -
Página 99: Entretien
ENTRETIEN Les procédures de revivification sont les sui- 2) Remettre le bouchon et repositionner le vantes: levier C vers la gauche, en faisant évacuer 1) Éteindre la machine et placer un récipient l’eau salée du tube F jusqu’à ce qu’elle soit NOTE: Durant l’entretien/réparation, les com- d’une capacité... -
Página 101: Aurelia Ii Digit T3 V
IMPIANTO ELETTRICO / ELECTRIC SYSTEM / INSTALLATION ÉLECTRIQUE Aurelia II Digit T3 V LEGENDA / KEY / LÉGENDE 9 TE Termostato / Thermostat / Thermostat. 15 SPC Sensore pressione caldaia / Sensor 1 MS Interruttore / Main Switch / Interrupteur. -
Página 102: Aurelia Ii Digit T3 S
IMPIANTO ELETTRICO / ELECTRIC SYSTEM / INSTALLATION ÉLECTRIQUE Aurelia II Digit T3 S 9 TE Termostato / Thermostat / Thermostat. 15 SPC Sensore pressione caldaia / Sensor LEGENDA / KEY / LÉGENDE 10 EV3 Elettrovalvola gruppo 3 / Solenoid pressure boiler / Capteur pression chaudière. -
Página 103: Aurelia Ii Digit V
IMPIANTO ELETTRICO / ELECTRIC SYSTEM / INSTALLATION ÉLECTRIQUE Aurelia II Digit V LEGENDA / KEY / LÉGENDE 9 TE Termostato / Thermostat / Thermostat. 15 EVS Elettrovalvola sfiato / vacuum electroval- 1 MS Interruttore / Main Switch / Interrupteur. 10 EV3 Elettrovalvola gruppo 3 / Solenoid Valve ve / Electrovanne évent... -
Página 104: Aurelia Ii Digit
SCHEMA CALDAIA / BOILER DIAGRAM / SCHÉMA DE CHAUDIERE Aurelia II DIGIT Donnees de projet generateur de vapeur Type Type Design pressure MPa Pression MPa Working pressure MPa Pression de service MPa Design temperature (C°) Températures de projet (C°) Working temperature (C°) Températures de service (C°) - Página 105 SCHEMA CALDAIA / BOILER DIAGRAM / SCHÉMA DE CHAUDIERE Aurelia II T3 (3 Gr.) List of Parts Liste des composants MATERIAL ELEMENT PART NO. DESCRIPTION STANDARD ELEMENT NUMERO COMPOSANT DESCRIPTION MATERIAU NORMES Boiler body Aurelia 0.180 2 Gr II T3 Copper CIJ-DHP 99.9 Corps chaudière Aurelia 0.180 2 Gr II T3 Cuivre CIJ-DHP 99.9...
- Página 106 SCHEMA CALDAIA / BOILER DIAGRAM / SCHÉMA DE CHAUDIERE Aurelia II T3 (2 Gr.) List of Parts Liste des composants MATERIAL ELEMENT PART NO. DESCRIPTION STANDARD ELEMENT NUM. COMPOSANT DESCRIPTION MATERIAU NORMES Boiler body Aurelia 0.180 2 Gr II T3 Copper CIJ-DHP 99.9 Corps chaudière Aurelia 0.180 2 Gr II T3 Cuivre CIJ-DHP 99.9...
- Página 107 SCHEMA CALDAIA / BOILER DIAGRAM / SCHÉMA DE CHAUDIERE Aurelia II T3 (2 - 3 Gr.) List of Parts Liste des composants MATERIAL DESCRIPTION ELEMENT PART NO. ELEMENT DESCRIPTION MATERIAU NUM. COMPOSANT STAINLESS STEEL Flange Pr machined, stainless steel +1 Microbar AISI316L Flasque Pr finition inox +1 Microbar STAINLESS STEEL...
- Página 112 LLC 6940Salashan PKWY BLDG A 98248 Macerata Italy Ferdale, WA Tel. +39.0733.9501 Tel. +1.360.3662226 Fax +39.0733-950242 Fax +1.3603664015 www.nuovasimonelli.it videoconf.+1.360.3188595 E-mail: n.simonelli@nuovasimonelli.it www.nuovasimonelli.it info@nuovasimonelli.com La Nuova Simonelli si riserva di apportare tutte le modifiche ritenute necessarie. Graphics and printing by: X TYPE ENGINEERING S.r.l.
- Página 113 DIGIT - T3 GEBRAUCHANWEISUNGEN INSTRUCCIONES DE MANEJO...
- Página 115 EU-KONFORMITATSERKLARUNG UNTER DRUCK BETRIEBENES GERAT DECLARACION DE CONFORMIDAD MÁQUINAS A PRESIÓN Die technischen Unterlagen sind bei dem auf der Rückseite angegebenen rechtlichen Geschäftssitz hinterlegt. Verantwortlich für die Erstellung und Verwahrung der technischen Unterlagen ist Herr Ing. Lauro Fioretti. El archivo técnico se encuentra en la sede legal con la dirección indicada en la parte trasera, el responsable encargado de la constitución y gestión del archivo técnico es el Ing.
- Página 116 EU-KONFORMITATSERKLARUNG UNTER DRUCK BETRIEBENES GERAT DECLARACION DE CONFORMIDAD MÁQUINAS A PRESIÓN Herstell Caldera Angewendeten Normen: Sammlungen M,S, VSR '78 und '95 die beim Rechtsitz erhältlich sind. Normas aplicadas: Recogidas M,S, VSR edicción '78 y '95 conservades en la sede legal. Zeichnungs Nr.
- Página 117 Sie haben sich für das - unserer Meinung nach - beste Produkt entschieden, dessen Güte Sie mit jedem Espresso und Cappuccino testen können. Falls Sie zum ersten Mal eine Maschine Nuova Simonelli kaufen, möchten wir Sie im Segment der Alta Caffetteria willkommen heißen. Wenn Sie schon zu unseren Kunden gehören, danken wir Ihnen für das Vertrauen, das Sie uns schenken!
-
Página 118: Technische Eigenschaften
TECHNISCHE EIGENSCHAFTEN Ausführung Digit 2 Gruppen 3 Gruppen 4 Gruppen NETTOGEWICHT 74 kg 164 lb 88 kg 194 lb 102 kg 225 lb BRUTTOGEWICHT 80 kg 176 lb 100 kg 220 lb 115 kg 254 lb HEIZLEISTUNG 4500 W 4500 W 5000 W 5000 W 5000 W... - Página 119 EINSTELLUNGEN DURCH DEN FACHMANN .....17 ELEKTROANLAGE AURELIA II DIGIT T3 V ..69 MANUELLES AUFFÜLLEN DES BOILERS .
-
Página 121: Beschreibung
BESCHREIBUNG Abb. 1 LEGENDE 1 Beschreibung der maschine 17 Elektrischer Tassenwärmer (Option) 9 Hauptschalter 2 Wasser-/Dampfausgabetasten 10 Tülle für 2 Espresso 3 Bedienfeld 11 Füllstandsonde im Boiler 4 Kaffee-Ausgabetasten 12 Manometer 5 Drehgriff Dampf 13 Regelbarer Fuß 6 Siebträger 14 Manuelle Dampfdüse 7 Manuelle Dampfdüse 15 Datenschild 8 Brühgruppe... -
Página 122: Beschreibung Des Bedienfelds
BESCHREIBUNG DES BEDIENFELDS Sonntag 21 März 14:45 °C °C °C °C 1.2 bar menü Abb. 2 LEGENDE 1 Kontrolllampe Maschine ein/aus 8 Ein-/Ausschalttaste Tassenwärmer 2 Ein-/Ausschalttaste Maschine 9 Taste Reinigung 3 Display TFT 10 Kontrolllampe Reinigung 4 Logo Aurelia II 11 Kontrolllampe Zustand 5 Porta USB Tassenwärmer ein/aus... -
Página 123: Zubehörliste
ZUBEHÖRLISTE Abb. 3 4 Gruppen CODE BESCHREIBUNG 2 Gruppen 3 Gruppen (Nur Digit) Rohr 3/8” voll Rohr leer Gruppenschale Ø 20 mm - l. 150 cm Rohr leer Arbeitsfläche Ø 25 mm - l. 150 cm Siebträger Doppelsieb Einzelsieb Blindsieb Feder Doppelbrühdüse Einfachbrühdüse... -
Página 124: Sicherheitsvorschriften
Rückseite des Gerätes. Das Schild abgebildeten ab. geeignet ist. Zwischenstecker, befindet sich links auf der Frontseite Nuova Simonelli behält sich das Vielfachdosen und Verlängerungen der Maschine Die Installation ist in Recht vor, jederzeit Änderungen an Übereinstimmung mit den geltenden dürfen nicht verwendet werden. - Página 125 gefüllt normalen Die Espressomaschine muß unter Bei Installation muss das Stromnetz Betriebszustand gebracht. Nach Beachtung der jeweils geltenden mit einem Trennschalter für jede ein- Erreichen der Betriebsbereitschaft ist Vorschriften für die Wasserversorgung zelne Phase ausgestattet werden. wie folgt vorzugehen: installiert werden. Wenden Sie sich - 100% iges Leeren der Kaffee-Kreisläufe bezüglich des Anschlusses an die Der zugelassene Techniker muss vor...
- Página 126 Zur Vermeidung von gefährlichen ACHTUNG Erhitzungen wird geraten, das Versorgungskabel über seine gesam- INFORMATION AN BENUTZER Im te Länge abzurollen. Sinne von Art. 13 der gesetzes- vertretenden Rechtverordnung Einlass- und/oder Nr. 151 vom 25. Juli 2005, Dissipationsgitter, vor allem beim „Durchführung der Richtlinien Tassenwärmer, nicht verstopfen.
-
Página 127: Gerätetyp Und Transportbestimmungen
GERÄTETYP UND TRANSPORTBESTIMMUNGEN INSTALLATION IDENTIFIZIERUNG HANDLING INBETRIEBNAHME DER MASCHINE Bei jeder Mitteilung an den Hersteller Nuova Nach der Verpackungsabnahme und der ACHTUNG Simonelli muss die Seriennummer angegeben Überprüfung der Unversehrtheit der Maschine STOß- ODER werden. und des Zubehörs ist wie folgt beschrieben QUETSCHUNGSGEFAHR vorzugehen: Der Bediener muss während des Verstellens... -
Página 128: Wassereigenschaften
Druck des Wassernetzes 2 bis 4 bar; Auf diese Weise wird eine Beschädigung der bei V 230 / einphasig Kaltwasser empfindlichen Graphitflächen durch Unreinheiten Mindestdurchsatz: 200 l/Std wie Sand, schwebende Kalkteilchen, Rost, usw. Filterung unter 1.0 micron verhindert und eine lange Lebensdauer der Feststoffgehalt (tds total dissolved solids) Maschine gewährleistet. -
Página 129: Einstellungen Durch Den Fachmann
Wasserstandsanzeige erreicht wurde; ACHTUNG Die Auswechslung der Lithiumbatterie darf NUR von einem Fachmann ausgeführt wer- Abb. 15 den. Nuova Simonelli trägt keine Haftung für Sach- oder Personenschäden, die auf die Nichtbeachtung der in dieser Anleitung beschriebenen Sicherheitsvorschriften Abb. 14 rückführbar sind. -
Página 130: Gebrauch Der Maschine
GEBRAUCH DER MASCHINE MASCHINENEIN- Der Bediener hat vor dem Gebrauch der Am nicht beleuchteten Display erscheint die Maschine die Sicherheitsvorschriften dieser SCHALTUNG Meldung. Anleitung zu lesen und zu verstehen. EINSCHALTEN: Die Maschine an die Steckdose VORGEHENSWEISE BEI anschließen und den Schalter ERSTINSTALLATION “A”... -
Página 131: Espresso-Zubereitung
ESPRESSO- Bis die Taste aufleuchtet und On – Off Automatisch PROGRAMMIERT ein kurzes Tonsignal gegeben ZUBEREITUNG wird. Display die "Home Page": HINWEIS:Alle Auswahltasten sind am Ende des Diagnosevorgangs aktiviert”. Siebträger abnehmen und mit einer oder zwei Sonntag 21 März 14:45 Dosen gemahlenem Kaffee (vom verwendetem Die Maschine SCHALTET sich zur ersten °C... -
Página 132: Dampfgebrauch (Manuelles Dampfrohr)
DAMPFGEBRAUCH CAPPUCCINO- Am Heißwasserrohr wird Wasser für die Dauer der programmierten Zeit abgegeben (siehe (Manuelles Dampfrohr) ZUBEREITUNG Kapitel PROGRAMMIERUNG und Abschnitt PROGRAMMIERUNG DOSEN). Andernfalls Zur Erzielung der typischen Crema ist die nochmals die gleiche Taste betätigen, um die ACHTUNG Dampftülle bis zum Boden des zu 1/3 gefüllten Ausgabe zu unterbrechen. -
Página 133: Programmierung
PROGRAMMIERUNG PROGRAMMIERUNG Ikone Beschreibung LEGENDE Die Maschine einschalten, wie im Kapitel Sprache „Betrieb“, Abschnitt „Ein-/Ausschalten der Maschine“ beschrieben. Das Display zeigt die "Home Page" an. Programmierung Dosis-Mengen Temperatur der Brühgruppen Sonntag 21 März 14:45 (nur bei Ausführung T3 und nach Aktivierung °C °C °C... -
Página 134: Programmierung
Es werden 3 Optionen angezeigt: Alle programmierbaren Tasten beginnen zu blinken: 7.2.1 SPRACHE Programmierung Dosen Programmierun Mithilfe des Rotary Switches die Ikone „Sprache“ anwählen und den Switch drücken zum Aufruf von: Program. Program. Übergabe Übergab Dosis Dosis Hauptmenü dosen dosen wählen wählen Sprache... -
Página 135: Autosteam (Option)
Die programmierte Kaffee-Auswahltaste Um die Programmierung der verschiedenen Brühgruppen zu übernehmen. erlischt nach Bestätigung durch Drücken des Tasten fortzusetzen, nochmals anhand des Die als „Quelle“ dienende Brühgruppe anwäh- Rotary Switches. Rotary Switches die Ikone anwählen und durch len und bestätigen: Um die Programmierung der verschiedenen Drücken desselben bestätigen rotary switch. -
Página 136: Setpoint Temperatur
7.2.3 SETPOINT EINSTELLUNG OFFSET BRÜHGRUPPEN: TEMPERATUR In der Bildschirmseite: SETPOINT BRÜHGRUPPEN Mit dem Rotary Switch die Ikone "Setpoint (nur Ausführung T3): Setpoint Brühgruppen Temperatur" anwählen und zum Aufruf drücken: Das Display zeigt an: Setpoint Brühgruppen Hauptmenü Haupt Setpoint Brühgruppen 94.0 93.8 93.8 Sprache... - Página 137 EINSTELLUNG OFFSET-WERT BOILER: In der Bildschirmseite: SETPOINT BOILER SETPOINT DAMPFKESSEL (nur Ausführung T3): Das Display zeigt an: Setpoint Boiler Das Display zeigt an: Setpoint Dampfkessel Setpoint Boiler Setpoint Boiler 94.0 94 0 93.8 93.8 Setpoint Dampfkessel Setpoint Dampfke Temperature Boiler 1.17 1 17 Setpoint Boiler...
-
Página 138: Einstellung Tasten Und Display
7.2.4 EINSTELLUNG TASTEN TABELLE DRUCK/TEMPERATUR TASSENWÄRMER °C °F UND DISPLAY Das Display zeigt an: 0,50 110,5 230,9 Mit dem Rotary Switch die Ikone "Einstellung Tassenwärmer Tasten und Display“ anwählen und zum Aufruf 0,55 111,5 232,7 den Switch drücken: 0,60 112,5 234,5 Manuell Manuell... - Página 139 AUSGABE-TEMPERATUR (nur bei Ausführung T3) MASSEINHEIT HELLIGKEIT TASTEN Anhand dieser Funktion kann die Anzeige der Diese Bildschirmseite gestattet die Änderung Anhand dieser Funktion kann die Helligkeit der Ausgabe-Temperatur der Brühgruppen in der der Maßeinheit für die Temperatur innerhalb der Tasten geregelt werden: "Home-Page"...
-
Página 140: Energieeinsparung
Beispiel für programmierbaren Tag: Ikone Beschreibung Ausgabezeit Wochenprogramm Wochen-Programm Montag Aktive Brühgruppen Anhaltend Zeit ON Zeit OFF 00:00 00:00 Aktives Standby Nach Anwahl der gewünschten Option muss Beispiel für Ruhetag (OFF): diese durch Drücken des Rotary Switches WOCHENPROGRAMM bestätigt werden. Diese Seite gestattet die Eingabe der Ruhetage Wochenprogramm und der Tage, für die das automatische Ein- und... - Página 141 chert wurden, erfolgt der Rücksprung zum Um die Brühgruppe wieder zu aktivieren, ist der ursprünglichen Menü, wo durch Drehen des gleiche Ablauf auszuführen oder die Maschine Sonntag 21 März 14:45 Rotary Switches die Konfigurationen der ver- am Hauptschalter unten rechts aus- und wieder °C °C °C...
-
Página 142: Ausgabe-Zähler
ON 0.50 bar: im Zustand OFF behält die 7.2.6 AUSGABE-ZÄHLER Maschine einen Druck von 0.50 bar auf- AKTIVES STANDBY recht und am Display (auf minimale Diese Funktion gestattet es der Maschine, in Anhand des Rotary Switches die Ikone Helligkeit eingestellt) erscheint die Meldung einen aktiven Standby-Zustand zu gehen oder "Ausgabe-Zähler"... -
Página 143: Alarme
In der zweiten Tabelle sind die Gesamtwerte der Durch Drehen des Rotary Switches können die 7.2.7 ALARME Brühgruppen, die Reinigungszyklen, die Service- beiden Seiten mit der Liste der von der Steuerung Zyklen und die Gesamtsumme aufgeführt: gespeicherten Fehler durchgeblättert werden. Mithilfe des Rotary Switches die Ikone „Alarme“... -
Página 144: Technische Einstellungen
Nach Beendigung der Einstellung der Minuten erfolgt der Rücksprung ins Hauptmenü. WARTUNG DATUM UND UHRZEIT Anhand dieser Funktion kann ein Wartungsplan Mithilfe dieser Funktion kann das Datum und eingegeben werden.Es besteht die Möglichkeit, die Uhrzeit geändert werden, das an der 7.2.8 TECHNISCHE die Anzahl der Ausgaben und das Datum einzuge-... - Página 145 AUTOMATISCHER HINWEIS: Während des Reinigungszyklus der Sonntag 21 März 14:45 REINIGUNGSZYKLUS angewählten Brühgruppen kann an Anhand dieser Funktion kann ein automatischer °C °C °C den nicht angewählten Gruppen Reinigungszyklus der Brühgruppen vorgenom- Kaffee ausgegeben werden. men werden. HINWEIS: Die Reinigungsfunktion kann auch durch Betätigen der entsprechen- den Taste aktiviert werden.
-
Página 146: Reinigung
REINIGUNG REINIGUNG DER REINIGUNG DER FILTER UND EDELSTAHLBRAUSEN AUSSCHALTEN SIEBTRÄGER Die Inox-Brausen befinden sich unter den Die Maschine abschalten, indem die drei Die Maschine ist für die Reinigung der Ausgabegruppen. Hauptschalter auf 0 gestellt werden. Brühgruppe anhand eines automatischen Reinigungszyklus spezifischem Reinigungsmittel in Pulverform ausgelegt. -
Página 147: Wartung
WARTUNG Die Erneuerung sieht folgende Schritte vor: 2) Den Verschluss wieder einsetzen und den 1) Maschine ausschalten und einen Behälter Hebel C wieder nach links führen. HINWEIS: Im Fall von Instandhaltungs-/ mit einem Fassungsvermögen von mindes- Dabei hat das Salzwasser durch das Rohr Reparaturarbeiten müssen die jeweils tens 5 Litern unter das Rohr E stellen. - Página 149 Verá la comodidad, lo práctico y eficiente que es trabajar con Si es la primera vez que compra una máquina de café “Nuova Simonelli”, bienvenido a la alta cafetería; si ya es un cliente nuestro, nos sentimos halagados por su fidelidad Gracias por su selección.
-
Página 150: Características Técnicas
CARACTERÍSTICAS TÉCNICAS Versión Digit 2 Grupos 3 Grupos 4 Grupos PESO NETO 74 kg 164 lb 88 kg 194 lb 102 kg 225 lb PESO BRUTO 80 kg 176 lb 100 kg 220 lb 115 kg 254 lb POT. TÉRMICA 4500 W 4500 W 5000 W... - Página 151 SUSTITUCIÓN DE LA BATERÍA DEL RELOJ ..49 AURELIA II DIGIT T3 S ..... . .70 INSTALACIÓN ELÉCTRICA...
-
Página 153: Descripción De La Máquina
DESCRIPCIÓN DE LA MÁQUINA Fig. 1 LEYENDA 1 Pomo vapor 16 Lanza agua caliente 8 Grupo erogación 2 Pulsadores para dispensar agua caliente / 17 Calienta tazas eléctrico (optional) 9 Interruptor general vapor 10 Pico 2 café 3 Panel de mando 11 Nivel de agua en la caldera 4 Pulsadores para dispensar café... -
Página 154: Descripción Panel De Mando
DESCRIPCIÓN PANEL DE MANDO Domingo 21 Marzo 14:45 °C °C °C °C 1.2 bar Menu Fig. 2 LEYENDA 1 Estado de la máquina Piloto 7 Rotary switch del encendida /apagada 8 Pulsador encendido /apagado 2 Pulsador encendido /apagado calienta-tazas de la máquina 9 Pulsador de lavado 3 Pantalla TFT 10 Piloto de lavado... -
Página 155: Lista De Accesorios
LISTA DE ACCESORIOS Fig. 3 4 GRUPOS CÓDIGO DESCRIPCIÓN 2 GRUPOS 3 GRUPOS (Sólo Digit) Tubo carga 3/8" Tubo descarga recipiente grupos Ø 20 mm - l. 150 cm Tubo descarga superficie de trabajo Ø 25 mm - l. 150 cm Portafiltro Filtro doble Filtro individual... -
Página 156: Prescripciones De Seguridad
La placa está La Nuova Simonelli se reserva la facul- res. En caso de que su uso sea situada en la parte frontal de la tad de aportar variaciones a la fabrica- indispensable es necesario llamar a máquina a la izquierda. -
Página 157: Atención Peligro De Descarga Eléctrica
A continuación el dispositivo es de El instalador debe realizar las líneas IEn fase de instalación la red eléctrica nuevo cargado y llevado hasta las condi- hidráulicas respetando las normas de tendrá que ser preinstalada con un ciones nominales de funcionamiento. higiene y seguridad hidráulica a la pro- seccionador que seccione cada fase. -
Página 158: Atención Peligro De Contaminación
Para evitar sobrecalentamientos peli- ATENCIÓN grosos se aconseja desenrollar en toda su longitud el cable de alimenta- INFORMACIÓN PARA LOS ción. USUARIOS Bajo los sentidos del art. 13 No obstruir las rejillas de aspiración del Decreto Ley del 25 de julio y/o de disipación en particular del de 2005, n. -
Página 159: Transporte Y Gestión Identificación Máquina
Para cualquier comunicación con el constructor Luego de haber quitado el embalaje y haber ATENCIÓN Nuova Simonelli, citar siempre el número de controlado el buen estado de la máquina y de PELIGRO DE CHOQUE placa de características de la máquina. -
Página 160: Características Del Agua
8 horas hay que superior a 3 mm. proceder a efectuar el recambio del Nuova Simonelli no se responsabiliza por 100% del agua contenida en los circui- ningún daño a objetos o personas provoca- tos utilizando los erogadores adjudica- dos por el incumplimiento de las normas de dos. -
Página 161: Regulación Del Técnico Cualificado
Fig. 15 La sustitución de la batería de litio la debe realizar SÓLO el Técnico Especializado. Nuova Simonelli no se responsabiliza por ningún daño a objetos o personas provoca- dos por el incumplimiento de las prescrip- ciones de seguridad, descriptas en el pre- sente manual. -
Página 162: Utilización
UTILIZACIÓN ENCENDIDO DE LA El operador, antes de comenzar la elaboración, En la pantalla electrónica, no iluminada, apa- debe asegurarse de haber leído y comprendido MÁQUINA rece el rótulo: bien las prescripciones de seguridad de este manual. ENCENDIDO: conectar la máquina a la toma PROCEDIMIENTO eléctrica y apretar el interruptor DE PRIMERA... -
Página 163: Preparación Del Café
PREPARACIÓN DEL Acabado el diagnóstico, en la On - Off Automático NO PROGRAMADO pantalla aparece la "Home CAFÉ Page" (página de inicio)": NOTA: asegurarse de que el interruptor general esté siempre en la posición “I”. Desenganchar el portafiltro y llenar con una o Domingo 21 Marzo 14:45... -
Página 164: Utilización Del Vapor (Boquilla De Vapor Manual)
UTILIZACIÓN DEL PREPARACIÓN DEL apartado PROGRAMACIÓN DOSIS) o volver a apretar el pulsador para interrumpir la dispen- VAPOR (Boquilla de CAPPUCCINO sación. vapor manual) Para obtener la típica espuma sumergir el pico NOTA: La erogación del agua caliente se ATENCIÓN del vapor en el fondo del recipiente lleno por puede producir al mismo tiempo que la PELIGRO DE QUEMADURAS... -
Página 165: Programación
PROGRAMACIÓN PROGRAMACIÓN Símbolo Descripción Encender la máquina como se ha descrito en el LEYENDA Descripción. capítulo "Uso" – apartado "Encendido /apagado de la máquina". La pantalla muestra la "Home Page". Programación dosis. Temperaturas de los grupos Domingo 21 Marzo 14:45 (sólo versión T3 y si se activan °C °C... -
Página 166: Idioma
Se muestran 3 opciones: Todas las teclas programables empiezan a parpadear: 7.2.1 IDIOMA Programación dosis Programació Con el rotary switch colocarse en el símbolo "Idioma" y presionarlo para acceder: Program. Program. Trasfer. Trasfer. dosis dosis Menú Principal dosis dosis standard standard Idioma Program... -
Página 167: Transferencia Dosis
El pulsador de café programado se apaga nuevo valor y todavía se podrá modificar TRANSFERENCIA DOSIS una vez confirmado presionando el rotary mediante el rotary switch. Trámite esta función se puede transferir el valor switch. Presionar de todas formas el rotary switch de las dosis programadas a otros grupos. -
Página 168: Setpoint Temperatura
7.2.3 SETPOINT SETPOINT GRUPOS REGULACIÓN OFFSET GRUPOS: TEMPERATURA (sólo versión T3): Por la pantalla: Con el rotary switch colocarse en el símbolo En la pantalla electrónica se muestra: "Setpoint de temperatura" y presionarlo para Setpoint grupos acceder: Setpoint grupos Menú Principal Menú... -
Página 169: Setpoint Calderas
REGULACIÓN OFFSET CALDERAS: Por la pantalla electrónica: SETPOINT CALDERAS SETPOINT CALDERA VAPOR (Sólo versión T3): En la pantalla electrónica se muestra: Setpoint calderas En la pantalla se muestra: Setpoint caldera vapor Setpoint calderas Setpoint calderas Setpoint calder Setpoint caldera vapor Setpoint caldera v 93.4 93 4... -
Página 170: Tabla De Presión - Temperatura
7.2.4 AJUSTE DE LAS TECLAS TABLA DE PRESIÓN - TEMPERATURA CALIENTA-TAZAS °C °F Y DE LA PANTALLA En la pantalla electrónica se muestra: 0,50 110,5 230,9 Con el rotary switch colocarse en el símbolo Calienta-tazas "Ajuste de las teclas y de la pantalla electróni- 0,55 111,5 232,7... -
Página 171: Luminosidad Pantalla Electrónica
TEMPERATURA DISPENSACIÓN (Sólo versión T3): LUMINOSIDAD DE LAS TECLAS UNIDAD DE MEDIDA Mediante esta función se puede activar/desacti- Mediante esta función se puede regular la lumi- Mediante esta pantalla se puede modificar la var la visualización de la temperatura de dis- nosidad de las teclas: unidad de medida de la temperatura para la pensaciones de grupos en la "Home Page"... -
Página 172: Ahorro De Energía
Ejemplo de día programable: Símbolo Descripción Tiempo dispensación Programa semanal Programa semanal. Lunes Grupos activos. Persistente Tiempo ON Tiempo OF 00:00 00:00 Standby activo. Después de haber seleccionado la opción con Ejemplo de día OFF: el rotary switch confirmarla presionándolo. PROGRAMA SEMANAL Esta página permite configurar los días de repo- Programa semanal... -
Página 173: Off Se Vuelve A Las Condiciones Iniciales Donde, Girando El Rotary Switch Se Pueden Ver
OFF se vuelve a las condiciones iniciales Para volver a habilitar el grupo habrá que hacer Domingo 21 Marzo 14:45 donde, girando el rotary switch se pueden ver la misma operación en ese grupo o bien apagar las configuraciones de los diferentes días de la y volver a encender la máquina con el interrup- °C °C... -
Página 174: Standby Activo
7.2.6 CUENTA DE LAS ON 0.50 bar: cuando la máquina está en DISPENSACIONES OFF la máquina mantiene una presión de STANDBY ACTIVO 0.50 bar y en la pantalla (ajustada con la Con el rotary switch colocarse en el símbolo Esta función permite a la máquina entrar o no luminosidad mínima) se muestra el rótulo "Cuenta de las dispensaciones"... -
Página 175: Alarmas
En la segunda tabla están los grupos totales, Girando el rotary switch se puede navegar a tra- 7.2.7 ALARMAS los lavados, los servicios y el total absoluto: vés de las dos páginas con la lista de los errores memorizados por la centralita. Con el rotary switch colocarse en el símbolo Para eliminar el informe de alarmas hay que pre- "Alarmas"... -
Página 176: Ajustes Técnicos
Acabado el ajuste de los minutos se vuelve al menú principal. FECHA Y HORA MANTENIMIENTO Mediante esta función se puede modificar la Mediante esta función se puede ajustar el mante- fecha y la hora ajustadas en la máquina y que nimiento programado. - Página 177 En este caso la pantalla será (Ej. lavado sólo NOTA: Durante el ciclo de lavados de los gru- grupo 1): pos seleccionados se pueden efectuar CICLO AUTOMÁTICO DE LAVADO dispensaciones de café en los grupos Mediante esta función se puede efectuar el Domingo 21 Marzo 14:45...
-
Página 178: Limpieza
LIMPIEZA LIMPIEZA DEL LIMPIEZA DE LAS GRUPO CON LA ROSETAS PARADA AYUDA DEL FILTRO INOXIDABLES CIEGO Detener la máquina mediante los tres interrup- Las duchas inoxidables están situadas debajo tores generales llevándolos a la posición 0. de los grupos de dispensación. La máquina está... -
Página 179: Mantenimiento
MANTENIMIENTO Los procedimientos de regeneración son las 2) Colocar nuevamente el tapón y llevar la siguientes: palanca C hacia la izquierda dejando des- 1) Apagar la máquina y colocar un recipiente cargar el agua salada del tubo F para que NOTA: Durante el mantenimiento/reparación de al menos 5 litros de capacidad debajo no se vuelva dulce aproximadamente 1/2... -
Página 181: Elektroanlage / Instalación Eléctrica
ELEKTROANLAGE / INSTALACIÓN ELÉCTRICA Aurelia II Digit T3 V LEGENDE / LEYENDA 1 MS Schalter / Interruptor. 9 TE Thermostat / Termostato. 14 STS1-2 Temperatursonde Tassenwärmer 1-2 / 2 R Relais / Relé. 10 EV3 Magnetventil Brühgruppe 3 / Sonda temperatura calienta-tazas 1-2. -
Página 182: Aurelia Ii Digit T3 S
ELEKTROANLAGE / INSTALACIÓN ELÉCTRICA Aurelia II Digit T3 S LEGENDE / LEYENDA 9 TE Thermostat / Termostato. 1 MS Schalter / Interruptor. 14 STS1-2 Temperatursonde Tassenwärmer 1-2 / 10 EV3 Magnetventil Brühgruppe 3 / Sonda temperatura calienta-tazas 1-2. 2 R Relais / Relé. -
Página 183: Aurelia Ii Digit
ELEKTROANLAGE / INSTALACIÓN ELÉCTRICA Aurelia II Digit V 9 TE Thermostat / Termostato. 15 EVS Magnetventil Entlüftung / LEGENDE / LEYENDA 10 EV3 Magnetventil Brühgruppe 3 / Electroválvula resuello. 1 MS Schalter / Interruptor. Electroválvula del grupo 3. 16 RS1 Widerstand Tassenwärmer 1 / 2 R Relais / Relé. - Página 184 BOILERANLAGE / ESQUEMA CALDERA Aurelia II DIGIT PROJEKTDATEN DAMPFERZEUGER DATOS DE PROYECTO GENERADOR DE VAPOR Tipo Max. Nennbetriebsdruck MPa Presión de sello MPa Betriebsdruck MPa Presión de funcionamiento MPa Nenntemperatur (C°) Temperaturas de proyecto (C°) Betriebstemperatur (C°) Temperaturas de funcionamiento (C°) Medium Gesättigter Wasserdampf...
- Página 185 BOILERANLAGE / ESQUEMA CALDERA Aurelia II T3 (3 Gr.) Teileliste Lista de las partes ELEMENT ANZ TEILE-NR. BESCHREIBUNG MATERIAL NORMEN ELEMENTO N.ro NÚMERO PARTE DESCRIPCIÓN MATERIAL NORMAS Gehäuse Boiler Aurelia 0.180 2 Gr II T3 Kupfer CIJ-DHP 99.9 Cobre CIJ-DHP 99.9 Cuerpo caldera Aurelia 0.180 2 Gr II T3 Schale D.180 2 Bohrungen Kupfer CIJ-DHP 99.9...
- Página 186 BOILERANLAGE / ESQUEMA CALDERA Aurelia II T3 (2 Gr.) Teileliste Lista de las partes ELEMENT TEILE-NR. BESCHREIBUNG MATERIAL NORMEN ELEMENTO N.ro NÚMERO PARTE DESCRIPCIÓN MATERIAL NORMAS Gehäuse Boiler Aurelia 0.180 2 Gr II T3 Kupfer CIJ-DHP 99.9 Cobre CIJ-DHP 99.9 Cuerpo caldera Aurelia 0.180 2 Gr II T3 Kupfer CIJ-DHP 99.9 Schale D.180 2 Bohrungen...
- Página 187 BOILERANLAGE / ESQUEMA CALDERA Aurelia II T3 (2 - 3 Gr.) Teileliste Lista de las partes ELEMENT TEILE-NR. BESCHREIBUNG MATERIAL DESCRIPCIÓN MATERIAL ELEMENTO N.ro NÚMERO PARTE Flansch Pr bearbeitet Inox +1 Microbar Brida Pr elaborada Inoxidable +1 Microbar Flansch 4 Bohrungen, bearbeitet Inox Microbar Brida 4 orificios elaborada InoxidableMicrobar Rohr Inox D.76.1 sp1.5 Aisi 316L Tubo inoxidable D.76.1 sp1.5 Aisi 316L...
- Página 192 LLC 6940Salashan PKWY BLDG A 98248 Macerata Italy Ferdale, WA Tel. +39.0733.9501 Tel. +1.360.3662226 Fax +39.0733-950242 Fax +1.3603664015 www.nuovasimonelli.it videoconf.+1.360.3188595 E-mail: n.simonelli@nuovasimonelli.it www.nuovasimonelli.it info@nuovasimonelli.com La Nuova Simonelli si riserva di apportare tutte le modifiche ritenute necessarie. Graphics and printing by: X TYPE ENGINEERING S.r.l.