HEIDENHAIN LC 2x1 Instrucciones De Montaje
Ocultar thumbs
Ver también para LC 2x1:
- Instrucciones de montaje (40 páginas) ,
- Instrucciones para la sustitución (32 páginas) ,
- Manual de instrucciones (28 páginas)
Tabla de contenido
Publicidad
Enlaces rápidos
Publicidad
Tabla de contenido

Manuales relacionados para HEIDENHAIN LC 2x1


Resumen de contenidos para HEIDENHAIN LC 2x1
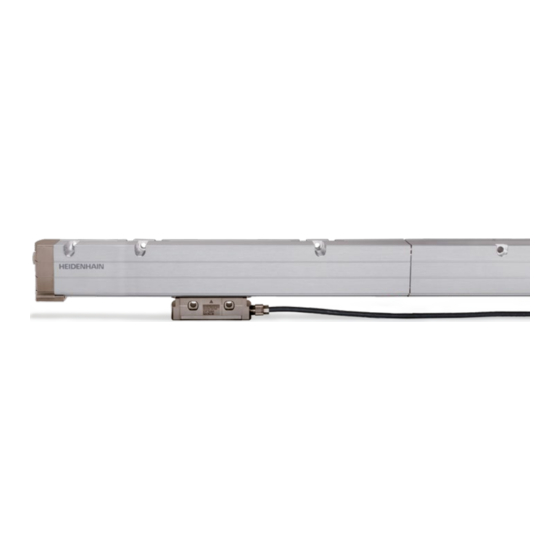
- Página 1 Mounting Instructions Instrucciones de Montaje LC 2x1 04/2019...
-
Página 2: Tabla De Contenido
Contents Standard version Índice Versión estándar Dimensions in mm Mirror-image version Medida en mm Versión espejo Página Page 3 Advertencias 3 Warnings 4 Items supplied 4 Elementos suministrados 7 Mounting information 7 Indicaciones para el montaje 12 Posibilidades de montaje y tolerancias de construcción 12 Mounting options and mounting tolerances 14 Fijación de las piezas de la carcasa 14 Fastening the housing sections... -
Página 3: Warnings
Warnings Advertencias Note: Mounting and commissioning is to be conducted by a qualified specialist under compliance with local safety regulations. Do not engage or disengage any connections while under power. The system must be disconnected from power. Scanning unit must first be installed before it is put into operation. Atención: El montaje y la puesta en marcha deben realizarse por un especialista cualificado bajo estricto cumplimiento de las disposiciones de seguridad locales. - Página 4 Items supplied/Parts kit Volumen de suministro kit de piezas Mounting Instructions Instrucciones de montaje Small parts set Kit de piezas pequeñas Scale tape (measuring length ML) Cinta graduada (longitud de medición ML) ID label Etiqueta del modelo Seal (replacement) Junta (recambio) Sealing lip Labios Housing end section with clamping device...
-
Página 5: Items Supplied
Items supplied/Small parts set (K) Volumen de suministro piezas pequeñas (K) Sealing lip clamp Fijación labios de estanqueidad Puller Herramienta de inserción Plug Tapón Label for compensation values Placa para valores de corrección Slider Herramienta deslizadora Grease for sealing lips and housing-section seal Grasa para labios de estanqueidad y junta para piezas de carcasa Scale-tape puller Herramienta para la inserción de la cinta graduada... - Página 6 Items supplied/Scale-tape housing, scanning unit Volumen de suministro carcasa de cinta graduada, unidad de captación Scale-tape housing Carcasa de cinta graduada Insertion aid Ayuda para la inserción Scanning unit Cabezal Shipping brace Bloqueo de transporte To be ordered separately: Mounting gauge, lubrication device 1 mm 2 mm Pedir por separado:...
-
Página 7: Mounting Information
Documentation/Infobase. Pour tendre le ruban de mesure, HEIDENHAIN propose le PWM 20/PWM 21 avec le logiciel de réglage et de contrôle ATS. La documentation du logiciel ATS (instructions de montage LC 2x1, n° ID 1165845) peut être téléchargée... - Página 8 Caution: Be sure that no contamination enters the encoder while you are mounting the device. Mount with sealing lips facing away from possible sources of contamination. When mounting vertically, remove the screw at the bottom d if compressed air is not used. ¡Atención! Durante el montaje, es preciso tener en cuenta que no entren impurezas en el aparato de medición.
- Página 9 If there is significant danger of contamination, fit a protective cover over the encoder with a seal between it and the mounting surface. En caso de que exista un riesgo elevado de suciedad, se recomienda la instalación de una escuadra adicional con obturación entre la superficie de montaje y la tapa.
- Página 10 Minimum distance from sources of interference Distancia mínima de las fuentes de interferencias...
- Página 11 Connection of compressed air. (DA 400 compressed air unit as accessory). Conexión de aire comprimido. (Equipo de aire comprimido DA 400 en forma de accesorio). Compressed-air connection possible at either end Posibilidad de conexión de aire comprimido en ambos lados Preferred for use À...
-
Página 12: Mounting Options And Mounting Tolerances
Mounting options and mounting tolerances ‰ 0.3 F Posibilidades de montaje y tolerancias de construcción Ÿ 0.05 ISO 7092 – 6 (ISO 7092 – 5) ISO 4762 – M6 (ISO 4762 – M5) Machine guideway Guía de la máquina Required mating dimensions Cotas de las conexiones específicas del cliente ISO 4762 –... -
Página 14: Fastening The Housing Sections
Fastening the housing sections Fijación de las piezas de la carcasa Ensure that the mounting surfaces is free of paint, dust or grease! Tener en cuenta que las superficies de montaje se encuentren limpias y no tengan pintura, polvo o grasa. >... - Página 15 0 . 3 M6 (M5) Attach the threaded mounting holes to the machine. F = Machine guideway Alinear los agujeros roscados en la máquina. F = Guía de la máquina Screw on housing end section and align it to the machine guideway F . Atornillar la pieza final de la carcasa y alinearla con la guía de máquina F .
- Página 16 Maintain correct gap between housing sections. Recommendation: Use a mounting gauge (to be ordered separately). Mantener la distancia entre las piezas de la carcasa. Recomendación: utilizar la galga de montaje (pedir por separado). 0 . 3 2 ± Within the specified hole tolerances, a tolerance of ±1 mm is also permissible.
- Página 17 Slide the scale-tape housing MG onto the housing end section. Mind the gap! Align the housing middle section to the machine direction and screw it on. Proceed accordingly with the other housing sections. 0 . 3 Deslizar las carcasas MG sobre la carcasa final. ¡Tener en cuenta la distancia de separación! Alinear la pieza intermedia de la carcasa con la dirección de la máquina y atornillarla.
- Página 18 Remove the housing end cap from E2. Remove cover plate Q. Slide out stop plate KA. Remove protective film and protective cap. Quitar la tapa de carcasa de E2. Desatornillar la placa Q. Deslizar hacia fuera la placa de tope KA. Quitar el film de protección y la tapa de protección.
- Página 19 Slide housing end section E2 onto the housing middle section, align and fasten. Deslizar la pieza final de carcasa E2 sobre la pieza central de la carcasa, alinearla y fijarla.
-
Página 20: Inserting The Bearing Strips
Inserting the bearing strips Insertar las cintas de rodadura The bearing strips can be pulled in using the puller EW. Place the hooks of the puller in the required position. Las cintas se pueden insertar con la herramienta EW. Enganchar el gancho de la herramienta en la posición requerida. Insert the puller EW into the scale housing. - Página 21 Pull the end of the bearing strip out of the cassette. Estirar del casete el comienzo del fleje de rodadura.
- Página 22 Hook the bearing strip onto the catch such that beveled corners point upwards. Ensure that the bearing strip is seated properly in the groove. Insertar las cintas de tal modo que las esquinas oblícuas apunten hacia arriba. Tener en cuenta que las cintas se encuentren correctamente dentro de la ranura prevista.
- Página 23 If the encoder is removed from the machine, the bearing strips can be repacked in the cassettes. En un desmontaje del sistema de medida, los flejes de rodadura pueden ser embalados de nuevo en sus respectivos casetes. Video on packing the bearing strip: https://www.heidenhain.com/en_US/products/linear-encoders/sealed-linear-encoders/for-numerically-controlled-machine-tools/lc-200-series-multi- section/bearingstrip/ Video sobre el embalaje del fleje de rodadura: https://www.heidenhain.es/es_ES/productos/sistemas-lineales-de-medida/sistemas-lineales-de-medida-blindados/for-numerically-controlled-machine-...
-
Página 24: Mounting The Scale Tape
Write down the shortening factor V and the scale-tape serial number on LC 201 the supplied label. HEIDENHAIN Anotar el factor de reducción V y el número de serie de la cinta D-83301 Traunreut-Germany graduada en la placa de aluminio suministrada. - Página 25 Turn the tape tensioning screw SM until the screw S is visible, flush with the left end of the oblong hole. Tighten the screw S. Girar el tornillo de corrección SM hasta el punto que el tornillo S esté visible alineado a la izquierda en el agujero ranurado. Atornillar el tornillo S. Insert the scale tape at the housing end section E1 and slide it in about 200 mm.
- Página 26 Insert the scale tape puller MW at the mark. The scale tape puller MW automatically snaps into the scale tape during insertion. Pull the scale tape in as far as it will go; remove the scale tape puller. Colocar la herramienta para la inserción de la cinta de medición MW en la marca.
- Página 27 Slide the rest of the scale tape in until it snaps into the scale-tape tensioning device. Enganchar el resto de la cinta hasta que ésta encaje en el dispositivo tensor de la cinta. Loosen the screw S. Turn the tape tensioning screw SM until the scale tape snaps into KM by itself.
-
Página 28: Pulling In The Sealing Lips
Pulling in the sealing lips Insertar los labios de estanqueidad Sealing lips are mounted preloaded. Mark the length L on the sealing lip! Los labios de estanqueidad se suminstran con pretensado. Marcar la distancia L en el labio de L = (ML + 226) x 0.99 estanqueidad. - Página 29 Pull in both sealing lips and let them protrude 1 mm on one side. Insertar los dos labios de estanqueidad y en un lado del perfil dejar 1 mm de superposición. If necessary, loosen the sealing lips with your fingers while pulling them in. En caso de dificultad de movimiento, soltar los labios de estanqueidad con los dedos durante el montaje.
- Página 30 At the second end section, pull out the sealing lips so that the marking protrudes 1 mm and also orient them outward over ~500 mm. Cut off the sealing lips along the marking. Tirar de los labios de estanqueidad en la segunda pieza final hasta obtener la superposición de 1 mm, y también elevarlos a ~500 mm.
-
Página 31: Fastening The Sealing Lips (End Section E2)
Fastening the sealing lips (end section E2) Fijar los labios de estanqueidad (pieza final E2) Slide stop plate KA into housing end section E2. Fasten the housing end cap with 3 screws. Caution: Pay attention to the seal. The sealing lips should fit closely. Deslizar a placa de tope KA dentro de la pieza final de carcasa E2. -
Página 32: Mounting The Scanning Unit
Mounting the scanning unit Montaje del cabezal captador Caution: To avoid damage to the encoder, use the included shipping brace to secure the scanning unit during mounting and moving. Atención: Para no dañar el sistema de medida, debería asegurarse el cabezal lector con el bloqueo de transporte durante el desmontaje, montaje y desplazamiento. - Página 33 Slide the scanning unit from the insertion aid EH into the scale housing E1 and, together with the first shipping brace, slide it into the housing until the second shipping brace can be clicked in. Introducir el cabezal con ayuda de EH en el perfil de la regla E1 e introducirla en la carcasa con el primer bloqueo de transporte hasta el punto que el segundo bloqueo de transporte pueda ser enganchado.
- Página 34 If possible, connect both shipping braces with the clip. Clips can be attached on either side. Slide the scanning unit on the mounting surface and lightly tighten the screws. Remove the shipping brace. Unir ambos bloqueos de transporte, si es posible, con una abrazadera. Pueden utilizarse abrazaderas en ambos lados.
- Página 35 Check the mounting tolerances over the entire measuring length. Comprobar las tolerancias de montaje en toda la longitud de medición. 0 . 3 Cable connection usable at either end. Caution: The scanning unit may only be connected when properly installed and when the scale tape has been pulled in correctly. Posibilidad de conexión de cables en ambos lados.
-
Página 36: Fastening The Sealing Lips (End Section E1)
Fastening the sealing lips (end section E1) Fijar los labios de estanqueidad (pieza final E1) Fasten the housing end cap with 3 screws. Caution: Pay attention to the seal. The sealing lips should fit closely. Loosen the clamping screw S. Fijar la tapa de la carcasa con 3 tornillos. -
Página 37: Trabajos Finales
Utilizar el tronillo cilíndrico ID 689924-xx para la toma de ID 689924-02 tierra de los tramos de las carcasas. Connect the encoder to a HEIDENHAIN PWM 20 phase meter or other suitable subsequent electronics and check for proper function over the entire range of traverse. -
Página 38: Tensar La Cinta Graduada
Tensioning the scale tape Tensar la cinta graduada Move the scanning unit as far as possible toward the end section. x.xxx 0.000 Desplazar el cabezal captador lo máximo posible hacia la pieza final. Carefully remove plug PF. Tighten the tape tensioning screw SM enough to pre-tension the scale tape (¹... - Página 39 Option Ô: Calculate the tension value V: V is the shortening factor that was written down before, measure the distance X Enter the value V and distance a. Posibilidad Ô: Calcular el valor de tensado V: V es el factor de V [µm] = X [m] ·...
- Página 40 Affix the label. Reset display to zero. Pegar la placa. Poner a cero el visualizador. Tension the scale tape with the tape tensioning screw SM by the calculated value. 2.125 0.000 After tensioning, tighten the clamping screw S. Tensar la cinta graduada mediante el tornillo de corrección SM con el valor anteriormente calculado.
-
Página 41: Corrección Lineal De Errores
Linear error compensation Corrección lineal de errores 100 µm A linear error compensation of up to ±100 µm/m can be applied -100 µm to the entire measuring length with the scale-tape tensioning device (see pages 32 to 35). 100 µm La corrección lineal de errores en toda la longitud de medición se puede realizar hasta ±100 µm/m mediante el dispositivo tensor de la cinta (véanse las páginas 32 a 35). - Página 42 Remove cover Q and loosen screw S. Retirar la tapa Q y soltar tornillo S. Calculate the compensation value K: Measure distance X and multiply with length compensation value L (from measurement of machine). Calcular el valor de correccin K: Medir la distancia X , Valor de corrección de longitud L (determinada durante la medición de la máquina).
- Página 43 Carefully remove plug PF. Tension the scale tape with the tape tensioning screw SM until X Insert the stop plug PF again. Extraer cuidadosamente el tapón PF . Tensar la cinta de medición con el tornillo de corrección SM hasta XK = XL. Insertar de nuevo el tapón de cierre PF .
- Página 44 The following section describes how to mount the scale tape and adjust its tension on the mirror- image version of the LC 2x1. For a description of how to fasten the housing sections, insert the bearing strips and sealing lips, mount the scanning unit and perform the final steps, as well as for linear error compensation and general information, please refer to the corresponding sections of the standard version.
- Página 45 Remove housing end cap from end section E2. Slide out stop plate KA. Remove protective film and protective cap. Quitar la tapa de carcasa de E2. Deslizar hacia fuera la placa de tope KA. Quitar el film de protección y la tapa de protección.
-
Página 46: Montaje De La Cinta - Versión Espejo
Mounting the scale tape – Mirror-image version Montaje de la cinta – Versión espejo Insert the scale tape at the housing end section E2 and slide it in about 300 mm. The graduation must be facing downward. Pay attention to the orientation of the punched-out part. - Página 47 Unscrew the tape tensioning screw SM of the scale-tape tensioning device as far as possible and hook the scale tape in. Desenroscar lo máximo posible el tornillo de corrección SM del dispositivo tensor de la cinta y enganchar la cinta graduada. Slide the scale tape in with the scale-tape tensioning device until the scale tape snaps into KM.
- Página 48 Tighten the tape tensioning screw SM just enough to remove any play from the scale-tape tensioning device. Enroscar el tornillo de corrección SM hasta que el dispositivo tensor de la cinta todavía tenga cierta holgura. Then loosen the scale tape by turning the tape tensioning screw SM back 90°. Luego, soltar la cinta graduada en 90º...
-
Página 49: Tensar La Cinta Graduada - Versión Espejo
Tensioning the scale tape – Mirror-image version Tensar la cinta graduada – Versión espejo Move the scanning unit as far as possible toward the end section E2. Desplazar el cabezal lector lo máximo posible hacia la pieza final E2. x.xxx 0.000 Carefully remove plug PF. - Página 50 Option Ô: Calculate the tension value V: V is the shortening factor that was written down before, measure the distance X Enter the value V and distance a. V [µm] = X [m] · V [µm/m] Posibilidad Ô: Calcular el valor de tensado V: V es el factor Example = 14.456 m...
- Página 51 0.000 0.000 Affix the label. Reset display to zero. Pegar la placa. Poner a cero el visualizador. Tension the scale tape with the tape tensioning screw SM by the calculated value. After tensioning, tighten the clamping screw S. Tensar la cinta graduada mediante el tornillo 2.125 0.000 de corrección SM con el valor anteriormente...
- Página 52 DR. JOHANNES HEIDENHAIN GmbH Dr.-Johannes-Heidenhain-Straße 5 83301 Traunreut, Germany { +49 8669 31-0 | +49 8669 32-5061 E-mail: info@heidenhain.de Technical support | +49 8669 32-1000 Measuring systems { +49 8669 31-3104 E-mail: service.ms-support@heidenhain.de NC support { +49 8669 31-3101 E-mail: service.nc-support@heidenhain.de...