Publicidad
sauder.com
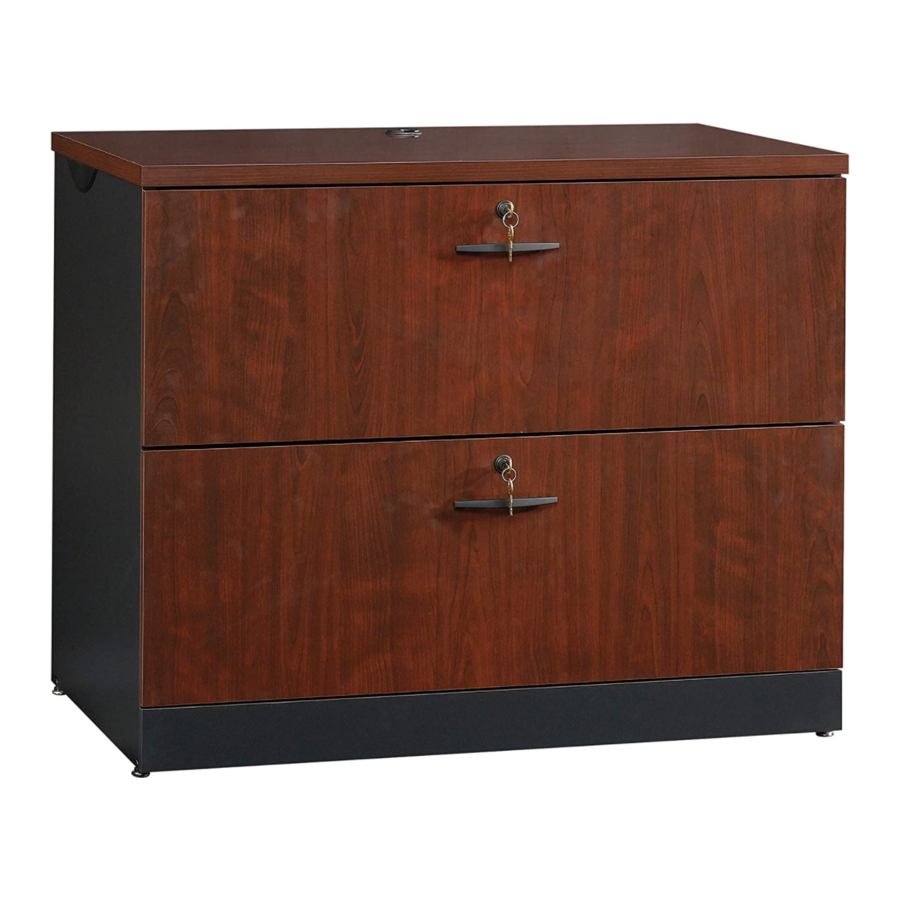
Lateral File
Via Collection | 419606
Need help? Visit Sauder.com to view video assembly tips or chat with a live rep.
Prefer the phone? Call 1-800-523-3987.
Share your journey!
Get all organized
and stuff .
NOTE: THIS INSTRUCTION
BOOKLET CONTAINS IMPORTANT
SAFETY INFORMATION.
PLEASE READ AND KEEP FOR
FUTURE REFERENCE.
English pg 1-24
Français pg 25-28
Español pg 29-32
Lot # 376736
11/03/15
Purchased: __________________
Be sure to give us a ring before
making any returns. 1-800-523-3987
Publicidad
Tabla de contenido

Manuales relacionados para Sauder Via 419606


Resumen de contenidos para Sauder Via 419606
- Página 1 Via Collection | 419606 NOTE: THIS INSTRUCTION BOOKLET CONTAINS IMPORTANT SAFETY INFORMATION. Need help? Visit Sauder.com to view video assembly tips or chat with a live rep. PLEASE READ AND KEEP FOR FUTURE REFERENCE. Prefer the phone? Call 1-800-523-3987. English pg 1-24 Français pg 25-28...
- Página 2 Assembly Tools Required Part Identifi cation No. 2 Phillips Screwdriver Tip Shown Actual Size Hardware Identifi cation Assembly Steps 6-24 Hammer Not actual size Français 25-28 Español 29-32 Skip the power trip. Safety 33-34 This time. Warranty Page 2 419606 www.sauder.com/services...
-
Página 3: Part Identifi Cation
D205 LEFT DRAWER SIDE (2) LEFT END (1) BASE (1) D498 RIGHT DRAWER SIDE (2) TOP (1) DRAWER FRONT (2) D499 DRAWER BACK (2) BOTTOM (1) DRAWER BOTTOM (2) DRAWER BRACE (2) SHELF (1) D498 D499 D205 www.sauder.com/services 419606 Page 3... - Página 4 METAL BRACKET - 5 INTERLOCK DRAWER LOCK LOCK LOCK - 2 MECHANISM - 1 ACTUATOR - 2 BRACKET - 2 COVER - 2 PROPEL NUT - GROMMET CAP - 1 PULL - 2 CORD CLIP - 2 Page 4 419606 www.sauder.com/services...
- Página 5 BLACK 9/16" LARGE HEAD SCREW - 12 BROWN 7/16" LARGE HEAD SCREW - 16 BLACK 1/2" FLAT HEAD SCREW - 10 30S BLACK 1-9/16" FLAT HEAD SCREW - 10 BLACK 9/16" PAN HEAD SCREW - 11 BLACK 7/8" MACHINE SCREW - 4 www.sauder.com/services 419606 Page 5...
- Página 6 Assemble your unit on a carpeted fl oor or on the empty å carton to avoid scratching your unit or the fl oor. Some assembly To begin assembly, push a SAUDER TWIST-LOCK® (and snacks) required. å FASTENER (7F) into the large holes in the BACK (F).
- Página 7 Turn two CAM SCREWS (8F) into the DRAWER FRONTS (H). å Push two HIDDEN CAMS (1F) into the DRAWER BRACES (M63). å Arrow Arrow Hole The arrow in the HIDDEN CAM must point toward the hole in the edge of the board. www.sauder.com/services 419606 Page 7...
- Página 8 NOTE: Be sure to use the correct screw in this step. Use this hole. Open end BLACK 9/16" PAN HEAD SCREW (8 used in this step) This small hole must be here. Open end This small hole must be here. Page 8 419606 www.sauder.com/services...
- Página 9 B) and BOTTOM (D). Use fi ve BLACK 9/16" LARGE HEAD SCREWS (1S). NOTE: Be sure the BRACKETS are even with the edges of å the ENDS and BOTTOM. BLACK 9/16" LARGE HEAD SCREW (5 used for the METAL BRACKETS) www.sauder.com/services 419606 Page 9...
- Página 10 BRACKET and into the holes in the ENDS. Now, turn an ADJUSTABLE GLIDE (16E) into each PROPEL NUT. NOTE: To raise a corner of the unit, turn the ADJUSTABLE å GLIDE counter-clockwise. To lower a corner, turn the ADJUSTABLE GLIDE clockwise. Page 10 419606 www.sauder.com/services...
- Página 11 Step Step 6 Fasten the BOTTOM (D) to the LEFT END (B). Tighten two å TWIST-LOCK® FASTENERS. How to use the SAUDER TWIST-LOCK ® FASTENER 1. Insert the dowel end of the FASTENER into the hole of the adjoining part.
- Página 12 Fasten the BACK (F) to the LEFT END (B). Tighten two å TWIST-LOCK® FASTENERS. Edge without TWIST-LOCK® FASTENERS i t h K ® f a c L O C S u r I S T - E R S T E N F A S Page 12 419606 www.sauder.com/services...
- Página 13 Fasten the SHELF (E) to the LEFT END (B). Tighten two å TWIST-LOCK® FASTENERS. Notch S u r f a c I S T - i t h o F A S L O C T E N K ® E R S www.sauder.com/services 419606 Page 13...
- Página 14 Step Step 9 Fasten the RIGHT END (A) to the BOTTOM (D), SHELF (E), å and BACK (F). Tighten six TWIST-LOCK® FASTENERS. Edge with METAL Notch BRACKET Page 14 419606 www.sauder.com/services...
- Página 15 Use fi ve BLACK 9/16" LARGE HEAD SCREWS (1S). your arms. Fasten the LOCK BRACKET (5J) to the SHELF (E). Use a å BLACK 9/16" LARGE HEAD SCREW (1S). BLACK 9/16" LARGE HEAD SCREW (6 used in this step) Long fi nished edge www.sauder.com/services 419606 Page 15...
- Página 16 Push two CORD CLIPS (9P) into the exact holes shown in å the TOP (C). Fasten a LOCK BRACKET (5J) to the TOP (C). Use a å BLACK 9/16" LARGE HEAD SCREW (1S). BLACK 9/16" LARGE HEAD SCREW (1 used in this step) Page 16 419606 www.sauder.com/services...
- Página 17 Then, fasten the TOP (C) to the ENDS (A and B) and BACK (F). å Tighten six TWIST-LOCK® FASTENERS. If you purchased the 419708 Hutch, follow step 14 in the Hutch instructions Large hole at this time. www.sauder.com/services 419606 Page 17...
- Página 18 Fasten the DRAWER BRACE (M63) to the DRAWER å å SIDES (D205 and D498) and DRAWER BRACE (M63). FRONT (H). Tighten one HIDDEN CAM. Use five BLACK 1-9/16" FLAT HEAD SCREWS (30S). Repeat this step for the other DRAWER. Page 18 419606 www.sauder.com/services...
- Página 19 SIDES (D205 and D498). Use four BROWN 7/16" LARGE HEAD SCREWS (6S). Repeat this step for the other drawer. å Open end D205 Use this hole. Open end D498 (4 screws per drawer) BROWN 7/16" LARGE HEAD SCREW (8 used in this step) www.sauder.com/services 419606 Page 19...
- Página 20 Fasten the PULLS (12K) to the DRAWER FRONTS (H). Use four å BLACK 7/8" MACHINE SCREWS (37S). BLACK 7/8" MACHINE SCREW (4 used for the PULLS) D498 D498 BLACK 1/2" FLAT HEAD SCREW (6 used for the ACTUATORS) Page 20 419606 www.sauder.com/services...
- Página 21 FRONT (H) and DRAWER BACK (D499). Use four Almost time to BROWN 7/16" LARGE HEAD SCREWS (6S). celebrate! With a nap. Repeat this step for the other drawer. å BROWN 7/16" LARGE HEAD SCREW (8 used for the FILE BRACKETS) D499 www.sauder.com/services 419606 Page 21...
- Página 22 Push a LOCK COVER (10J) over the key extension on the LOCK. å Repeat this step for the other drawer. å Be sure the METAL Key extension BAR bends away from the KEY EXTENSION. BLACK 1/2" FLAT HEAD SCREW (4 used in this step) Metal bar Page 22 419606 www.sauder.com/services...
- Página 23 Slide another FILE GLIDE (19B) onto the other end of the å FILE RODS (18B), then press this FILE GLIDE over the LEFT DRAWER SIDE (D205). Repeat this step for the other drawer. å D205 D498 www.sauder.com/services 419606 Page 23...
- Página 24 This completes assembly. To clean your unit, dampen a cloth with tap water and wipe. å And to celebrate, why not share your success story? The drawer with the DRAWER ACTUATOR fastened to the lower set of holes should be here. 40 lbs. 45 lbs. each drawer Page 24 419606 www.sauder.com/services...
-
Página 25: Liste De Pièces
QUANTITÉ d’ a chat de cet élément et conserver le livret EXTRÉMITÉ DROITE ..........1 EXCENTRIQUE ESCAMOTABLE .....2 pour future référence. Pour contacter Sauder EXTRÉMITÉ GAUCHE ..........1 FIXATION TWIST-LOCK® ........18 en ce qui concerne cet DESSUS ................1 VIS D'EXCENTRIQUE ..........2 élément, faire référence... - Página 26 Pour commencer l'assemblage, enfoncer une FIXATION faire tourner un PATIN RÉGLABLE (16E) dans chaque TOURILLON. TWIST-LOCK® SAUDER (7F) dans les gros trous de l'ARRIÈRE (F). Répéter cette étape pour les EXTRÉMITÉS (A et B), le REMARQUE : Pour soulever un coin de l'élément, faire tourner DESSOUS (D) et la TABLETTE (E).
- Página 27 Enfoncer un COUVERCLE DE VERROU (10J) sur la extension de TIROIR (D205 et D498) et à l’ENTRETOISE DE TIROIR (M63). clé sur le VERROU. Utiliser cinq VIS TÊTE PLATE 40 mm NOIRES (30S). Répéter cette étape pour l'autre TIROIR. Répéter cette étape pour l'autre tiroir. www.sauder.com/services 419606 Page 27...
- Página 28 REMARQUE : Prière de lire les informations importantes sur la sécurité fi gurant sur les pages arrière du manuel d’instructions. Ceci complète l'assemblage. Pour nettoyer l’unité, humidifi er un chiff on avec de l’eau du robinet et essuyer. Page 28 419606 www.sauder.com/services...
-
Página 29: Lista De Partes
EXTREMO DERECHO ..........1 EXCÉNTRICO ESCONDIDO .......2 et conserver le livret EXTREMO IZQUIERDO ..........1 SUJETADOR TWIST-LOCK® ......18 pour future référence. Pour contacter Sauder PANEL SUPERIOR ............1 BIELA DE EXCÉNTRICO ........2 en ce qui concerne cet FONDO .................1 SOPORTE DE METAL ..........5 élément, faire référence... - Página 30 Para comenzar el ensamblaje, empuje un SUJETADOR TWIST-LOCK® Ahora, gire un DESLIZAMIENTO AJUSTABLE (16E) dentro de cada SAUDER (7F) dentro de los agujeros grandes del DORSO (F). Repita TUERCA DE HÉLICE. este paso para los EXTREMOS (A y B), el FONDO (D) y el ESTANTE (E).
- Página 31 CAJÓN (D205 y D498) y a la RIOSTRA DE CAJÓN (M63). Utilice llave del SEGURO. cinco TORNILLOS NEGROS DE CABEZA PERDIDA de 40 mm (30S). Repita este paso para el otro CAJÓN. Repita este paso para el otro cajón. www.sauder.com/services 419606 Page 31...
- Página 32 NOTA: Por favor, lea las páginas de atrás del folleto de instrucciones en cuanto a importante información de seguridad. Esto completa el ensamblaje. Para limpiar la unidad, humedezca un paño con agua de llave y limpie. Page 32 419606 www.sauder.com/services...
- Página 33 Les téléviseurs peuvent être très un téléviseur. téléviseur. lourds. De plus, le poids et l’emplacement du tube image ont tendance à rendre les téléviseurs instables et enclins à tomber vers l’ a vant. www.sauder.com/services 419606 Page 33...
- Página 34 Además, el peso y la ubicación del tubo de imagen tienden a causar la inestabilidad de televisores y hacerlos propensos a volcarse hacia adelante. Page 34 419606 www.sauder.com/services...
-
Página 35: Garantie Limitée De 5 Ans
GARANTIE LIMITÉE DE 5 ANS 1. Sauder Woodworking Co. (Sauder®) off re une couverture de garantie limitée à l’ a cheteur 4. La présente garantie ne s’ a pplique qu’ a ux défauts garantis qui se produisent pour initial du présent produit pendant une période de cinq ans à... - Página 36 Dear Valued Customer: So, how did it go? Thanks so much for choosing Sauder® furniture. I hope the Set a world record for speed? purchase and assembly process was a positive experience Feeling good about yourself? and you feel good about the furniture you just built. If you Nice.