Tabla de contenido
Publicidad
Idiomas disponibles
Idiomas disponibles
Enlaces rápidos
1
DETTAGLI .........................................................pag. 2
2
ELENCO ACCESSORI E COMPONENTI.....pag. 3
3
PRIMA DELL'USO ...........................................pag. 5
3.1 Simbologia ...........................................pag. 5
4
POSSIBILITÀ D'IMPIEGO ..............................pag. 5
5
AVVERTENZE GENERALI ..............................pag. 6
6
MESSA IN SERVIZIO ......................................pag. 8
6.2 Preparazione aspiratore ...................pag. 8
7
FUNZIONAMENTO ........................................pag. 9
7.1 Utilizzo come pulitore a vapore ....pag. 9
7.2 Utilizzo come aspiratore polveri
e vapore .................................................pag. 9
liquidi ................................................... pag. 10
con filtraggio ad acqua ................. pag. 12
8
UTILIZZO ACCESSORI ................................ pag. 13
9
SUGGERIMENTI ........................................... pag. 17
9.1 Suggerimenti pulizia a vapore ... pag. 17
10 STIRATURA .................................................... pag. 19
10.1 Utilizzo per stiratura ....................... pag. 19
10.2 SUGGERIMENTI ................................ pag. 20
10.3 Stiratura in verticale ....................... pag. 21
10.4 Rinfrescare gli abiti ......................... pag. 21
ATTENZIONE! Prestare attenzione per motivi di sicurezza.
ATTENZIONE! Pericolo provocato da vapore bollente.
NOTA IMPORTANTE
07ATTENZIONE: I getti ad alta pressione possono essere pericolosi se usati
impropriamente. I getti non devono essere diretti verso le persone, gli animali, verso le
apparecchiature elettriche vive oppure verso l'apparecchio stesso.
IT
ISTRUZIONI PER L'USO
SIMBOLI
11 SVUOTAMENTO SERBATOIO (M) ........... pag. 22
12 RABBOCCO SERBATOIO CALDAIA (L) .. pag. 22
13 FINE LAVORO ............................................... pag. 23
14 MANUTENZIONE ........................................ pag. 24
15 RISOLUZIONE GUASTI............................... pag. 25
16 SMALTIMENTO ............................................ pag. 26
17 DATI TECNICI ................................................ pag. 27
17.1 Targhetta dati tecnici ..................... pag. 27
17.2 Caratteristiche tecniche ................ pag. 27
17.3 Sicurezze: ........................................... pag. 27
18 GARANZIA .................................................... pag. 27
1
Publicidad
Capítulos
Tabla de contenido

Manuales relacionados para Lavor GV EGON VAC


Resumen de contenidos para Lavor GV EGON VAC
-
Página 1: Tabla De Contenido
ISTRUZIONI PER L’USO DETTAGLI ............pag. 2 11 SVUOTAMENTO SERBATOIO (M) ... pag. 22 ELENCO ACCESSORI E COMPONENTI..pag. 3 12 RABBOCCO SERBATOIO CALDAIA (L) .. pag. 22 PRIMA DELL’USO ...........pag. 5 13 FINE LAVORO ..........pag. 23 3.1 Simbologia ...........pag. 5 14 MANUTENZIONE ........ -
Página 2: Dettagli
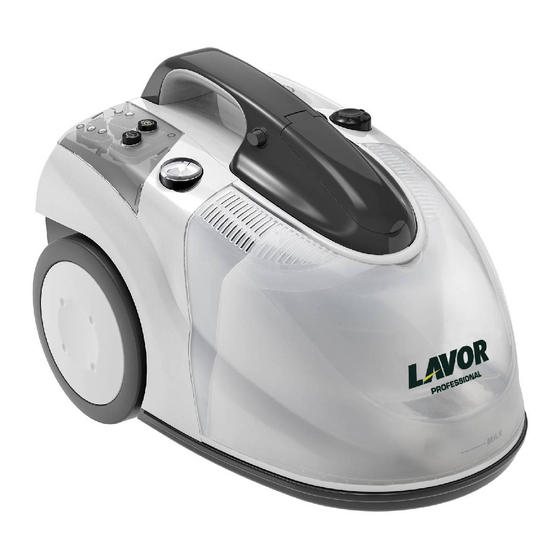
1 DETTAGLI D E F G H I A. avvolgicavo O. gruppo filtro con galleggiante (O1) B. cavo alimentazione P. filtro in microfibra (lavabile) C. tappo serbatoio caldaia Q. filtro in spugna (lavabile) D. interruttore principale R. filtro solidi (lavabile) E. -
Página 3: Elenco Accessori E Componenti
2 ELENCO ACCESSORI E COMPONENTI In base al modello si possono verificare delle differenze nella fornitura (vedi imballaggio). 28 27 26 25 OPTIONAL OPTIONAL OPTIONAL... - Página 4 In base al modello si possono verificare delle differenze nella fornitura (vedi imballaggio). * Optional 34.* Spina ferro da stiro 1. Flex/tubo flessibile 35.* Tubo vapore 2. Tubi prolunga 36.* Tasto luminoso + leva vapore ferro da 3. Spazzola grande stiro 4.
-
Página 5: Prima Dell'uso
3 PRIMA DELL’USO ATTENZIONE! Il libretto istruzioni è parte 3.1 Simbologia integrante dell’apparecchio. Leggete Nel libretto istruzioni vengono utilizzati i attentamente il libretto istruzioni prima di simboli qui di seguito indicati, per richiamare la avviare l’apparecchio. Conservate il libretto vostra attenzione su dettagli particolari. istruzioni per poterlo consultare all’occorrenza. -
Página 6: Avvertenze Generali
5 AVVERTENZE GENERALI 01. Leggere attentamente il "Manuale sostituzione tubo flessibile istruzioni" prima dell'uso. Il produttore 11. non riempire il serbatoio con l’apparecchio non potrà essere ritenuto responsabile direttamente sotto il rubinetto per danni a persone o danni a materiali 12. -
Página 7: Avvertenze Importanti
27. durante l’uso non coprire l'apparecchio, devono essere effettuate sempre da potrebbe surriscaldarsi personale specializzato; le parti che 28. l'apparecchio non deve essere utilizzato eventualmente si guastassero vanno da bambini o da persone non istruite sostituite solo con ricambi originali. all’uso 38. -
Página 8: Messa In Servizio
6 MESSA IN SERVIZIO 6.1 Messa in servizio caldaia (Vapore) Fig. 1 AVVERTENZA: Durante la preparazione spegnere l’apparecchio e sfilare la spina. AVVERTENZA: l’apparecchio deve poggiare su una superficie piana orizzontale. • Togliere il tappo serbatoio caldaia (C) (Fig. 1) • Riempire il serbatoio acqua caldaia (L) (max 1.2 litri) con acqua distillata. -
Página 9: Funzionamento
7 FUNZIONAMENTO 7.1 Utilizzo come pulitore a vapore D E F G H I Prima dell’utilizzo far riferimento al capitolo “Messa in servizio caldaia”. Premere l’interruttore principale (D) e il pulsante caldaia (E), le spie relative (H) e (I) s’illuminano. In questo modo l’acqua viene riscaldata e viene creato il vapore (Fig. 5). -
Página 10: Utilizzo Simultaneo Di Vapore E Aspirazione Polvere
È possibile variare il livello di potenza sia ad aspirazione accesa Fig. 11 che spenta. Ogni volta che si sfila l’attacco rapido (27), al successivo inserimento il livello potenza aspirazione riparte dal 1° livello. 7.3 Utilizzo simultaneo di vapore e aspirazione polvere Prima dell’utilizzo far riferimento al capitolo “Messa in servizio caldaia”. - Página 11 • Smontare i il coperchio inferiore filtro (S) (Fig. 16). Fig. 16 • Sostituire il filtro microfibra (P) e inserire il filtro spugna (Q) nell’apposita sede (Fig. 17). Nota: Filtro in spugna (Q): da utilizzarsi per aspirare liquidi. • Inserire a fondo il coperchio inferiore filtro (S) (Fig. 18). •...
-
Página 12: Funzione Aspirazione Polvere
7.5 Funzione aspirazione polvere con filtraggio ad Fig. 21 acqua IMPORTANTE: il filtro in microfibra (P) non va utilizzato con la funzione filtraggio acqua. IMPORTANTE: il filtro in HEPA (X) non va utilizzato con la funzione filtraggio acqua. Fig. 22 Il filtraggio ad acqua permette di “catturare”... -
Página 13: Utilizzo Accessori
8 UTILIZZO ACCESSORI Vedi elenco accessori e componenti. Fig. 24 Gli accessori si possono collegare direttamente all’impugnatura (26) o, a seconda delle necessità, ai tubi prolunga (2). • Innesto accessori: introdurre a fondo fino all’aggancio della leva inferiore (33) (Fig. 24). •... - Página 14 La spazzola grande (3) è dotata di attacco snodato, ruote, Fig. 28 diffusore vapore e sezione aspirante. Può montare tre diversi telai: • telaio per pavimenti (5) (Fig. 29) • telaio per tappeti (6) (Fig. 30) • telaio per liquidi (7) (Fig. 31) per inserire il telaio: •...
- Página 15 RACCORDO VAPORE/ASPIRAZIONE Fig. 35 Fig. 32 (9), ACCESSORI VAPORE, ACCESSORI ASPIRAZIONE • Innesta il raccordo vapore/aspirazione (9) all’impugnatura (26) oppure al tubo prolunga (2) . Il raccordo vapore/aspirazione (9) è dotato di Fig. 36 Fig. 33 diffusore vapore concentrato (Fig. 32), per pulire incrostazioni, fessure, ecc.
- Página 16 BOCCHETTA PER TAPPEZZERIA (20) Fig. 39 Fig. 40 Fig. 41 Fig. 42 • Innesta la bocchetta per tappezzeria (20)(Fig. 39) all’impugnatura (26) oppure al tubo prolunga (2). È dotata di diffusore vapore e bocchetta aspirante. Può montare due diversi telai: • accessorio tergi (21) per superfici dure e lisce e funzione tergivetro. •...
-
Página 17: Suggerimenti
9 SUGGERIMENTI 9.1 Suggerimenti pulizia a vapore Fig. 43 All’inizio dei lavori di pulizia, oppure dopo una lunga pausa si consiglia di indirizzare il primo getto di vapore a parte, per eliminare eventuali residui d’acqua dal tubo vapore, specialmente durante la pulizia di superfici tessili (moquette, tappeti, divani). -
Página 19: Stiratura
10 STIRATURA 10.1 Utilizzo per stiratura Fig. 44 Inserire il cavo di alimentazione (B) nella presa di corrente. Sollevare il coperchio di sicurezza (V). Infilare la spina (34) del ferro da stiro nella presa (W) (Fig. 44) (Fig. 45). Se il flex (1) è inserito, prima togliere l’attacco rapido (27) del Fig. -
Página 20: Suggerimenti
Etichetta 10.2 SUGGERIMENTI Suddividere i vari capi secondo il tipo di tessuto, • Attenzione all’etichetta. Per chi non ha controllando che non vi siano riparazioni da ancora acquisito la sicurezza che viene con la pratica, ricordate che su ogni capo c’ è fare. -
Página 21: Stiratura In Verticale
10.3 Stiratura in verticale Fig. 50 Regolare la temperatura desiderata tramite la manopola del ferro da stiro (37) (da settore vapore in poi). Regolare l’intensità del vapore mediante la manopola (J) sull’apparecchio. Erogare vapore sul vestito appeso, ad una distanza di circa 20 cm (Fig. 50). Per i tessuti delicati mettere Fig. -
Página 22: Svuotamento Serbatoio (M)
11 SVUOTAMENTO SERBATOIO (M) ATTENZIONE! Prima di togliere il serbatoio spegnere Fig. 52 l’apparecchio, sfilare la spina. • Smontare il serbatoio (M) (Fig. 52) come spiegato nel capitolo "Utilizzo vapore e aspirazione liquidi" – MAX • Ispezionare il filtro solidi (R) e togliere eventuali detriti all’interno. -
Página 23: Fine Lavoro
13 FINE LAVORO Ad ogni fine lavoro spegnere l’apparecchio, sfilare la spina . • disinserire l’interruttore per il riscaldamento (E) . • disinserire l’interruttore principale (D) . • estrarre il cavo dalla presa di corrente. Avvolgere il cavo elettrico nell’avvolgicavo (A) (Fig. 54) . Fig. -
Página 24: Manutenzione
14 MANUTENZIONE ATTENZIONE! Prima di qualsiasi intervento di manutenzione Fig. 57 o pulizia, rimuovere la spina dalla presa. Pulire l'esterno dell'apparecchio con un panno umido. Evitare l'uso di solventi o detergenti. Non utilizzare solventi, potrebbero danneggiare le parti di plastica dell’apparecchio. Non pulire l’apparecchio con il vapore. -
Página 25: Risoluzione Guasti
NOTA: il filtro in microfibra (P) non va utilizzato con la funzione Fig. 61 filtraggio acqua. • Filtro in spugna (Q): (Fig. 60) da utilizzarsi per aspirare liquidi. Lavare dall’interno verso l’esterno con acqua corrente. Da sostituire preferibilmente ogni 6 mesi . •... -
Página 26: Smaltimento
INCONVENIENTE CAUSA SOLUZIONE - Durante il funzionamento cala - L'accessorio è ostruito - Controllate e pulite l'accessorio il potere di aspirazione - Il potere di aspirazione è troppo - Uno dei filtri è ostruito - Controllate e pulite i filtri dei basso solidi (R), il filtro in microfibra (P) o il filtro in spugna (Q), il... -
Página 27: Dati Tecnici
17 DATI TECNICI 17.1 Targhetta dati tecnici 17.3 Sicurezze: ATTENZIONE! Controllare che i dati tecnici Pressostato di servizio riportati sulla targhetta siano corrispondenti Termostato di servizio con quelli della rete elettrica a cui si vuole Termostato di sicurezza collegare l’apparecchio. Valvola sovrappressione caldaia 17.2 Caratteristiche tecniche Comandi elettrici in bassa tensione... - Página 28 INSTRUCTIONS FOR USE DETAILS ............pag. 29 11 EMPTYING THE TANK (M)......pag. 49 LIST OF ATTACHMENTS AND 12 TOPPING UP THE BOILER WATER COMPONENTS ..........pag. 30 TANK (L) ............pag. 49 BEFORE USE ..........pag. 32 13 AFTER USE ............ pag. 50 3.1 Symbols ..........
-
Página 29: Details
1 DETAILS D E F G H I A. cable rewinder O. filter assembly with float (O1) B. power cable P. microfibre filter (washable) C. boiler water tank cap Q. sponge filter (washable) D. main switch R. solids filter (washable) E. -
Página 30: List Of Attachments And Components
2 LIST OF ATTACHMENTS AND COMPONENTS Depending on the model, differences in the supply may occur (see packaging). 28 27 26 25 OPTIONAL OPTIONAL OPTIONAL... - Página 31 Depending on the model, differences in the supply may occur (see packaging). * Optional 34.* Iron plug 1. Flex/flexible tube 35.* Steam hose 2. Extension tubes 36.* Luminous button + iron steam lever 3. Big brush 37.* Temperature regulator knob 4.
-
Página 32: Before Use
3 BEFORE USE CAUTION! The user’s manual is an integral 3.1 Symbols part of the appliance. Read the user’s manual The manual uses symbols, shown below, to carefully before using the appliance. Keep draw your attention to specific details. the manual for future reference. CAUTION! For safety reasons, be cautious. -
Página 33: General Warnings
5 GENERAL WARNINGS 01. Carefully read the “User Guide” before use. 13. Do not use the appliance for steam- The manufacturer will not be held cleaning electrical appliances or electric responsible for injuries to persons or sockets. damage to property due to non- 14. -
Página 34: Important Warnings
SAFETY 40. CAUTION: Inadequate extension cords can be dangerous. 41. CAUTION: If an extension cord is used, it IMPORTANT WARNINGS shall be suitable for outdoor use, and the 30. CAUTION: This appliance has been connection has to be kept dry and off the designed for use with the detergent ground. -
Página 35: Starting Up
6 STARTING UP 6.1 Starting up the boiler (steam) Fig. 1 WARNING: When preparing the appliance for use, switch it off and unplug it. WARNING: the appliance must be placed on a horizontal flat surface. • Remove the boiler water tank cap (C) (Fig. 1) •... -
Página 36: Operation
7 OPERATION 7.1 Using the appliance as a steam cleaner D E F G H I Please refer to the chapter “Starting up the boiler” before use. Press the main switch (D) and the boiler switch (E), the respective pilot lights (H) and (I) will come on. Water will start heating up and steam will then be produced (Fig. 5). -
Página 37: Using Steam And Suction Simultaneously
It is possible to change the power level with suction both on Fig. 11 and off. Every time the quick connector (27) is removed, at the next insertion the suction power level restarts from 1st level. 7.3 Using steam and suction simultaneously Please refer to the chapter “Starting up the boiler”... -
Página 38: Fig. 16
• Disassemble the lower filter cover (S) (Fig. 16). Fig. 16 • Replace the microfibre filter (P) and insert the sponge filter (Q) in the proper seat (Fig. 17). Note: Sponge filter (Q): to be used for liquid suction. • Fully insert the lower filter cover (S) (Fig. 18). •... -
Página 39: Dust Vacuum Function With
7.5 Dust vacuum function with water filtering Fig. 21 IMPORTANT: the microfibre filter (P) must not be used with water filtering function. IMPORTANT: the HEPA filter (X) must not be used with water filtering function. Water filtering allows to “capture” dirt while keeping the Fig. -
Página 40: Using The Attachments
8 USING THE ATTACHMENTS See list of attachments and components. Fig. 24 The attachments can be directly connected to the handgrip (26) or, depending on your needs, to the extension tubes (2). • Fitting the attachments: fit completely until the lower hooking lever (33) is hooked (Fig. 24). - Página 41 The big brush (3) is provided with an articulated connection, Fig. 28 wheels, steam diffuser and a suction unit. Three different fittings can be attached to it: • floor fitting (5) (Fig. 29) • carpet fitting (6) (Fig. 30) • liquid fitting (7) (Fig. 31) To assemble the fitting: •...
- Página 42 STEAM/SUCTION CONNECTOR (9), STEAM Fig. 35 Fig. 32 ATTACHMENTS, SUCTION ATTACHMENTS • Fit the steam/suction connector (9) into the handgrip (26) or extension tube (2). The steam/suction connector (9) is equipped with concentrated steam diffuser (Fig. 32), to clean limescale, splits, etc., and is equipped Fig.
-
Página 43: Upholstery Nozzle
UPHOLSTERY NOZZLE (20) Fig. 39 Fig. 40 Fig. 41 Fig. 42 • Fit the upholstery nozzle (20) (Fig. 39) into the handgrip (26) or extension tube (2). It has a steam diffuser and a suction nozzle. Two different fittings can be attached to it: •... -
Página 44: Suggestions
9 SUGGESTIONS 9.1 Steam cleaning suggestions Fig. 43 When starting to clean, or after having a long break, you should direct the first steam jet to one side in order to eliminate possible water residues from the steam hose; especially when cleaning the textile surfaces (carpets, rugs, sofas). -
Página 46: Ironing
10 IRONING 10.1 Using the appliance for ironing Fig. 44 Plug the power cable (B) into the socket. Lift the safety cover (V). Plug the iron plug (34) into the socket (W) (Fig. 44)(Fig. 45). If the flex (1) is inserted, first remove the quick connector (27) of the flex by pressing the front button (28). -
Página 47: Suggestions
Label 10.2 SUGGESTIONS Divide the garments according to the type of • Check the label. For those who still have not fabric. Check that they do not need to be gained confidence through practice, remember that all garments have a label repaired. -
Página 48: Upright Ironing
10.3 Upright ironing Fig. 50 Adjust the required temperature with the knob located on the iron (37) (from the steam section onward). Adjust the amount of steam with the knob (J) located on the appliance. Direct steam onto the hanging garment from a distance of approximately 20 cm (Fig. 50). -
Página 49: Emptying The Tank (M)
11 EMPTYING THE TANK (M) CAUTION! Before removing the tank, switch off the Fig. 52 appliance and unplug it. • Disassemble the tank (M) (Fig. 52) as described in section “Using steam and liquid suction simultaneously” – MAX • Check the solids filter (R) and remove any deposits. If steam or liquids have been vacuumed or if filtration water has been used, rinse the internal part of the tank as well as the filter assembly components with running... -
Página 50: After Use
13 AFTER USE Every time you finish working, switch off the appliance and unplug it. • switch off the boiler switch (E) • turn off the main switch (D) • remove the cable from the socket. Wind the electric cable on the cable rewinder (A) (Fig. 54). -
Página 51: Maintenance
14 MAINTENANCE CAUTION! Before any maintenance or cleaning operation, Fig. 57 remove the plug from the socket. Clean the outside of the appliance with a damp cloth. Do not use solvents or detergents. Don not use solvents, which could damage the plastic parts of the appliance. -
Página 52: Troubleshooting
NOTE: the microfibre filter (P) must not be used with water Fig. 61 filtering function. • Sponge filter (Q): (Fig. 60) to be used for liquid suction. Wash from inside to outside with running water. Best to replace every 6 months. •... -
Página 53: Disposal
TROUBLE CAUSE SOLUTION - The suction power is too low - One of the filters is clogged - Check and clean solids filter (R), microfibre filter (P) or sponge filter (Q), air filter (X) and carbon filter (Y) - Wrong filter assembly - Make sure that the filter assembly (O) is properly assembled with lower filter... -
Página 54: Technical Data
17 TECHNICAL DATA 17.1 Technical data nameplate 17.3 Safety features: CAUTION! Make sure that the technical data Process pressure switch shown on the nameplate correspond to the Process thermostat electric mains to which you want to connect Safety thermostat the appliance. Boiler overpressure valve 17.2 Technical specifications Low-voltage electric controls... -
Página 55: Remarque Importante
INSTRUCTIONS D’UTILISATION DÉTAILS ............pag. 56 10 REPASSAGE ........... pag. 73 10.1 Utilisation de l'appareil pour le LISTE DES ACCESSOIRES ET DES repassage ........... pag. 73 COMPOSANTS ..........pag. 57 10.2 SUGGESTIONS ........pag. 74 10.3 Repassage vertical ......pag. 75 AVANT L’UTILISATION ....... -
Página 56: Détails
1 DÉTAILS D E F G H I A. axe de rembobinage du cordon O. bloc du filtre avec flotteur (O1) B. cordon d’alimentation P. filtre microfibres (lavable) C. bouchon du réservoir de la chaudière Q. filtre éponge (lavable) D. commutateur principal R. -
Página 57: Liste Des Accessoires Et Des Composants
2 LISTE DES ACCESSOIRES ET DES COMPOSANTS 28 27 26 25 EN OPTION EN OPTION EN OPTION... - Página 58 Les produits fournis peuvent différer en fonction du modèle (voir emballage). * En option 34.* Prise du fer à repasser 1. Flex/tuyau flexible 35.* Tuyau à vapeur 2. Tuyau d’ e xtension 36.* Bouton lumineux + levier à vapeur du fer 3.
-
Página 59: Avant L'utilisation
3 AVANT L’UTILISATION ATTENTION ! Le manuel d'utilisation est une 3.1 Symboles partie intégrante de l'appareil. Lisez-le Le manuel utilise les symboles ci-dessous pour attentivement avant d'utiliser l'appareil. attirer votre attention sur des détails particuliers. Conservez le manuel pour toute consultation ATTENTION ! Faire très attention pour des future. -
Página 60: Avertissements Généraux
5 AVERTISSEMENTS GÉNÉRAUX 01. Lire attentivement les « Instructions nettoyage réservoir d’utilisation » avant l’utilisation. Le remplacement du tuyau tube flexible. fabricant n’est pas responsable des 11. Ne remplissez pas le réservoir en plaçant dommages aux personnes ou à la l'appareil directement sous le robinet. - Página 61 vapeur. enfants ou à du personnel non formé 26. Ne dirigez pas le jet de vapeur vers les d’utiliser l’appareil. personnes ou les animaux. 36. ATTENTION : Afin d'assurer la sécurité de 27. Pendant l'utilisation l'appareil peut l'appareil, utilisez uniquement des pièces surchauffer s’il est couvert.
-
Página 62: Mise En Marche
6 MISE EN MARCHE 6.1 Mise en marche de la chaudière (Vapeur) Fig. 1 AVERTISSEMENT : Avant de préparer l'appareil pour l’utiliser, éteignez-le et débranchez la fiche. AVERTISSEMENT : l'appareil doit être placé sur une surface plate horizontale. • Enlevez le couvercle du réservoir de la chaudière (C) (Fig. 1) •... -
Página 63: Fonctionnement
7 FONCTIONNEMENT 7.1 Utilisation de l'appareil comme appareil de nettoyage D E F G H I à la vapeur Avant l'utilisation référez-vous au chapitre « Mise en marche de la chaudière ». Appuyez sur le commutateur principal (D) et sur le bouton de la chaudière (E), les voyants respectifs (H) et (I) s'allument. -
Página 64: Utilisation De La Vapeur Et De L'aspiration Simultanément
Pour sélectionner la puissance d'aspiration (du niveau 1 au niveau Fig. 11 4), appuyez brièvement sur le bouton d'aspiration (30) de la poignée (26) ; la LED (31) correspondant au niveau de puissance sélectionné s'allume (Fig. 9) Il est possible de varier le niveau de puissance à la fois avec l'aspiration en marche et à... - Página 65 • Déposez le couvercle inférieur filtre (S) (Fig. 16). Fig. 16 • Remplacez le filtre microfibres (P) et introduisez le filtre éponge (Q) dans le logement spécialement prévu (Fig. 17). Note : Filtre éponge (Q) : à utiliser pour l’aspiration de liquides. • Introduisez jusqu’au bout le couvercle inférieur filtre (S) (Fig. 18).
-
Página 66: Fonction D'aspiration Poussières Avec Filtration À L'eau Pag
7.5 Fonction d'aspiration poussières avec filtration à Fig. 21 l'eau IMPORTANT : Le filtre en microfibres (P) ne doit pas être utilisé avec la fonction de filtration à l’ e au. IMPORTANT : Le filtre HEPA (X) ne doit pas être utilisé avec la fonction de filtration à... -
Página 67: Utilisation Des Accessoires
8 UTILISATION DES ACCESSOIRES Voir la liste des accessoires et des composants. Fig. 24 Les accessoires peuvent être directement connectés à la poignée (26) ou, selon vos besoins, aux tuyaux d'extension (2). • Adaptation des accessoires : introduisez à fond jusqu’à ce que le levier (33) ne soit accroché... - Página 68 La grande brosse (3) est fournie avec une connexion articulée, Fig. 28 des roues, un diffuseur de vapeur et un élément d’aspiration. Trois adaptateurs différents peuvent y être installés : • adaptateur pour plancher (5) (Fig. 29) • adaptateur pour tapis (6) (Fig. 30) •...
- Página 69 RACCORD EXTENSION + PULVÉRISATEUR Fig. 35 Fig. 32 (9), ACCESSOIRES VAPEUR, ACCESSOIRES ASPIRATION • Branchez l’ e xtension vapeur + pulvérisateur (9) dans la poignée (26) ou au tuyau de rallonge (2). Le raccord vapeur/aspiration (9) est doté d’un Fig. 36 Fig.
-
Página 70: Avertissements
SUCEUR POUR CAPITONNAGES (20) Fig. 39 Fig. 40 Fig. 41 Fig. 42 • Branchez le bec d’aspiration pour capitonnages (20) (Fig. 39) à la poignée (26) ou au tuyau rallonge (2). Il est doté d’un diffuseur de vapeur et d’un bec d’aspiration. Deux adaptateurs différents peuvent y être installés : •... -
Página 71: Suggestions
9 SUGGESTIONS 9.1 Suggestions de nettoyage à la vapeur Fig. 43 Au moment de commencer le nettoyage, ou après une longue pause, il est conseillé de diriger le premier jet de vapeur sur le côté pour éliminer les résidus d'eau restant dans le tuyau à... -
Página 73: Repassage
10 REPASSAGE 10.1 Utilisation de l'appareil pour le repassage Fig. 44 Branchez le cordon d'alimentation (B) dans la prise. Soulevez le couvercle de sécurité (V). Branchez la fiche (34) du fer dans la prise (W) (Fig. 44)(Fig. 45). Si le tuyau flexible (1) est inséré, enlevez d’abord le connecteur à... -
Página 74: Suggestions
Étiquette 10.2 SUGGESTIONS Triez les vêtements selon le type du tissu. • Prêtez attention à l'étiquette. Pour ceux qui Vérifiez qu’ils n’ o nt pas besoin d’ ê tre réparés. n'ont pas suffisamment d’expérience, rappelez-vous que tous les vêtements ont Vérifiez aussi que les différents vêtements ont une étiquette qui indique : été... -
Página 75: Repassage Vertical
10.3 Repassage vertical Fig. 50 Ajustez la température souhaitée avec le bouton placé sur le fer (37), à partir de la section vapeur. Ajustez l’intensité de la vapeur avec le bouton (J) placé sur l’appareil. Dirigez la vapeur sur le vêtement suspendu à une distance approximative de 20 cm (Fig. ... -
Página 76: Vidange Du Réservoir D'eau (M)
11 VIDANGE DU RÉSERVOIR D’EAU (M) ATTENTION ! Avant de sortir le réservoir éteignez l’appareil, Fig. 52 débranchez la fiche. • Déposez le réservoir (M) (Fig. 52) comme expliqué dans le chapitre « Utilisation de la vapeur et de l’aspiration de –... -
Página 77: Après L'utilisation
13 APRÈS L’UTILISATION Chaque fois que vous finissez de travailler avec l'appareil débranchez la fiche. • Désactivez le bouton du chauffage (E) . • Désactivez le commutateur principal (D) . • Extrayez le cordon d'alimentation de la prise de courant. Enroulez le cordon électrique sur l’axe de rembobinage Fig. -
Página 78: Maintenance
14 MAINTENANCE ATTENTION ! Avant tout entretien ou nettoyage, débranchez Fig. 57 la fiche de la prise de courant. Nettoyez l'extérieur de l'appareil avec un tissu humide. N'employez pas de solvants ou de détergents. Les solvants pourraient endommager les parties en plastique de l'appareil. -
Página 79: Localisation D'une Panne
NOTE : Le filtre en microfibres (P) ne doit pas être utilisé avec la Fig. 61 fonction de filtration à l’ e au. • Filtre éponge (Q) : (Fig. 60) à utiliser pour l’aspiration de liquides. Lavez de l'intérieur vers l'extérieur avec de l'eau courante. -
Página 80: Enlèvement
PROBLÈME CAUSE SOLUTION - La puissance d'aspiration est - Un des filtres est bouché - Vérifiez et nettoyez le filtre trop faible d'éléments solides (R), le filtre en microfibres (P) ou le filtre éponge (Q), le filtre à air (X) et le filtre carbonique (Y) - Mauvais assemblage des filtres - Assurez-vous que le bloc des filtres (O) est correctement... -
Página 81: Données Techniques
17 DONNÉES TECHNIQUES 17.1 Enseigne des données techniques 17.3 Caractéristiques de sécurité : ATTENTION ! Assurez-vous que les Commutateur pressurisé de service spécifications techniques indiquées sur la Thermostat de service plaque signalétique correspondent au Thermostat de sécurité réseau électrique auquel vous souhaitez Valve de surpression de la chaudière connecter l'appareil. - Página 82 BEDIENUNGSANLEITUNG DETAILS ............pag. 83 10.4 Auffrischen von Kleidungsstücken......pag. 102 ZUBEHÖRTEILE UND KOMPONENTEN pag. 84 11 AUSLEEREN DES BEHÄLTERS (M) ..pag. 103 VOR DEM GEBRAUCH ....... pag. 86 3.1 Symbole ..........pag. 86 12 NACHFÜLLEN DES KESSELS (L) ...pag. 103 EINSATZMÖGLICHKEITEN .......
-
Página 83: Details
1 DETAILS D E F G H I A. Kabelfach O. Filtereinheit mit Schwimmer (O1) B. Stromkabel P. Mikrofaserfilter (waschbar) C. Kesselstopfen Q. Schwammfilter (waschbar) D. Hauptschalter R. Feststofffilter (waschbar) E. Kesselschalter S. Unterer Filterdeckel F. Dampf-Anzeigelampe T. Griff G. Wasser-Anzeigelampe U. -
Página 84: Zubehörteile Und Komponenten Pag
2 ZUBEHÖRTEILE UND KOMPONENTEN Je nach Modell kann es Unterschiede im Lieferumfang geben (siehe Verpackung). 28 27 26 25 OPTIONAL OPTIONAL OPTIONAL... - Página 85 Je nach Modell kann es Unterschiede im Lieferumfang geben (siehe Verpackung). * Optional 34.* Stecker für Bügeleisen 1. Schlauch 35.* Dampfrohr 2. Verlängerungsrohre 36.* Leuchttaste + Dampfhebel Bügeleisen 3. Große Bürste 37.* Temperaturregler 4. Haken für Bürstenhalterung 38.* Waschmittelzerstäuber mit 5.
-
Página 86: Vor Dem Gebrauch
3 VOR DEM GEBRAUCH ACHTUNG! Die Betriebsanleitung ist 3.1 Symbole Bestandteil des Geräts. Lesen Sie die In dieser Betriebsanleitung werden die unten Betriebsanleitung sorgfältig durch, bevor angegebenen Symbole verwendet, um Sie auf Sie das Gerät einschalten. Heben Sie die bestimmte Details speziell hinzuweisen. Betriebsanleitung auf, um auch später bei ACHTUNG! Aus Sicherheitsgründen ist an Bedarf nachschlagen zu können. -
Página 87: Allgemeine Hinweise
5 ALLGEMEINE HINWEISE 01. Lesen Gebrauch Auffüllen, vor dem Reinigen des Behälters „Bedienungsanleitung” aufmerksam und vor dem Auswechseln des Schlauchs durch. Der Hersteller haftet nicht für den Stecker herausziehen. Personen- oder Sachschäden, die durch 11. Beim Auffüllen des Behälters das Gerät die Nichtbeachtung der vorgenannten niemals direkt unter den Wasserhahn „Bedienungsanleitung“... - Página 88 24. Halten Sie die Saugöffnung nicht gegen oder Kleider zu reinigen. empfindliche Körperteile, wie Augen, 34. ACHTUNG: Explosionsgefahr. Sprühen Sie Mund, Ohren. keine brennbaren Flüssigkeiten. 25. Hände nicht in den Dampfstrahl halten. 35. ACHTUNG: Nicht zulassen, dass das Gerät 26. Den Dampfstrahl nicht auf Personen oder von Kindern oder ungeschultem Personal Tiere richten.
-
Página 89: Inbetriebnahme
6 INBETRIEBNAHME Fig. 1 6.1 Inbetriebnahme des Kessels (Dampf) HINWEIS: Bei der Vorbereitung das Gerät ausschalten und den Stecker herausziehen. HINWEIS: Das Gerät muss auf einer waagerechten, ebenen Fläche aufstehen. • Den Behälterstopfen (C) am Kessel abnehmen (Abb. 1) • Den Kesselbehälter (L) (max. 1.2 Liter) ausschließlich Fig. -
Página 90: Betrieb
7 BETRIEB 7.1 Dampfreinigungsbetrieb D E F G H I Bevor Sie anfangen, lesen Sie sich den Abschnitt „Inbetriebnahme des Kessels” durch. Hauptschalter (D) und Kesseltaste (E) drücken; daraufhin leuchten die entsprechenden Anzeigelampen (H) und (I) auf. Nun wird das Wasser erhitzt und Dampf aufgebaut (Abb. 5). -
Página 91: Gleichzeitiger Einsatz Von Dampfreinigung Und Absaugung
Die Saugleistung kann sowohl bei ein- , als auch bei Fig. 11 abgeschaltetem Saugbetrieb reguliert werden. Jedes Mal, wenn der Schnellverbinder (27) heraus gezogen wird, beginnt der Sauger beim erneuten Einschalten wieder bei der Stufe 1. 7.3 Gleichzeitiger Einsatz von Dampfreinigung und Absaugung Bevor Sie anfangen, lesen Sie sich den Abschnitt „Inbetriebnahme des Kessels”... - Página 92 • Entfernen Sie die untere Filterabdeckung (S) (Abb. 16). Fig. 16 • Tauschen Sie den Mikrofaserfilter (P) aus und setzen Sie den Schwammfilter (Q) in den entsprechenden Sitz ein (Abb. 17). Anmerkung: Schwammfilter (Q): wird zum Aufsaugen von Flüssigkeiten verwendet. • Setzen Sie die untere Filterabdeckung (S) vollständig ein (Abb. 18).
-
Página 93: Staubabsaugfunktion Mit
7.5 Staubabsaugfunktion mit Wasserfiltration Fig. 21 WICHTIG: Der Mikrofaserfilter (P) sollte nicht mit der Wasserfilterfunktion verwendet werden. WICHTIG: Der HEPA-Filter (X) sollte nicht mit der Wasserfiltrationsfunktion verwendet werden. Dadurch wird der Schmutz im Wasser „gefangen”, die Luft, die Fig. 22 das Gerät abgibt, ist sauberer und die Reinigung wird noch gründlicher. -
Página 94: Zubehörteile
8 ZUBEHÖRTEILE Siehe Zubehör- und Komponentenliste. Fig. 24 Die Zubehörteile können direkt am Griff (26) oder bei Bedarf an Verlängerungsrohren (2) befestigt werden. • Anbau der Zubehörteile: Vollständig einstecken, bis der untere Hebel (33) einrastet (Abb. 24). • Ausbau der Zubehörteile: Unteren Hebel (33) eindrücken und das Zubehörteil herausziehen (Abb. 24). - Página 95 Die große Bürste (3) hat einen Gelenkanschluss, Rollen, Fig. 28 Dampföffnungen und einen Saugbereich. Es können drei unterschiedliche Düsen montiert werden: • Bodendüse (5) (Abb. 29) • Teppichdüse (6) (Abb. 30) • Wasserdüse (7) (Abb. 31) Einsatz der Düsen: • Die beiden oberen Schlitten nach außen schieben (Abb. 28). •...
- Página 96 DAMPF-/SAUGARMATUR (9), Fig. 35 Fig. 32 DAMPFZUBEHÖR, SAUGZUBEHÖR • Schließen Sie die Dampf-/Saugarmatur (9) an den Handgriff (26) oder das Verlängerungsrohr (2) an. Die Dampf-/Saugarmatur (9) gibt einen konzentrierten Dampfstrahl ab (Abb. 32) zum Fig. 36 Fig. 33 Reinigen von Verkrustungen, Rissen usw. und ist mit einem Anschluss für Absaugzubehör ausgestattet (Abb. 35).
- Página 97 POLSTERDÜSE (20) Fig. 39 Fig. 40 Fig. 41 Fig. 42 • Die Polsterdüse (20) (Abb. 39) auf den Handgriff (26) oder das Verlängerungsrohr (2). Mit Dampföffnungen und Saugöffnung. Kann mit zwei Düsen ausgerüstet werden: • Wischerzubehör (21) für harte und glatte Oberflächen und Wischerfunktion. •...
-
Página 98: Empfehlungen
9 EMPFEHLUNGEN 9.1 Empfehlungen zur Dampfreinigung Fig. 43 Zu Beginn der Arbeit oder nach längeren Unterbrechungen sollten Sie den ersten Dampfstrahl zur Seite richten, um eventuelles Restwasser aus dem Dampfrohr abzulassen, insbesondere, wenn Sie textile Oberflächen reinigen möchten (Teppichböden, Teppich, Sofa). Führen Sie immer erst einen Test an einer versteckten Stelle aus, lassen Sie die Stelle trocknen und prüfen Sie, ob die behandelte Oberfläche hitzefest ist. -
Página 100: Bügeln
10 BÜGELN 10.1 Verwendung zum Bügeln Fig. 44 Das Stromkabel (B) in die Steckdose stecken. Sicherheitsdeckel (V) anheben. Den Stecker (34) des Bügeleisens in die Steckdose (W) stecken (Abb. 44)(Abb. 45). Wenn der Schlauch (1) steckt, die vordere Taste (27) drücken Fig. 45 und dann erst den Schnellverbinder (28) des Schlauchs herausziehen. -
Página 101: Empfehlungen
Etikett 10.2 EMPFEHLUNGEN Sortieren Sie die Kleidungsstücke nach • Beachten Sie das Etikett. Wenn Sie noch Stoffsorten und kontrollieren Sie, ob Stellen keine allzu große Erfahrung haben, beachten Sie, dass an jedem Kleidungsstück repariert werden müssen. Kontrollieren Sie ein Etikett mit den folgenden Angaben ebenso, dass der Stoff wirklich sauber und nicht angebracht ist: beschädigt ist. -
Página 102: Senkrechtes Bügeln
10.3 Senkrechtes Bügeln Fig. 50 Die gewünschte Temperatur am entsprechenden Knauf am Bügeleisen (37) einstellen (ab dem Symbol Dampf). Die Dampfstärke am Knauf (J) am Gerät einstellen. Den Dampfstrahl in etwa 20 cm Entfernung auf das aufgehängte Kleidungsstück richten (Abb. 50). Bei empfindlicher Kleidung Fig. -
Página 103: Ausleeren Des Behälters (M)
11 AUSLEEREN DES BEHÄLTERS (M) ACHTUNG! Bevor Sie den Behälter herausnehmen, schalten Fig. 52 Sie das Gerät ab und ziehen Sie den Stecker heraus. • Den Behälter (M) nach jedem Gebrauch ausleeren (Abb. 52) wie im Kapitel „Dampf- und Flüssigkeitsabsaugung – MAX verwenden“... -
Página 104: Am Ende Der Arbeit
13 AM ENDE DER ARBEIT Wenn Sie mit der Arbeit fertig sind, schalten Sie das Gerät ab und ziehen Sie den Stecker heraus. • Schalten Sie den Heizungsschalter (E) aus • Schalten Sie den Hauptschalter (D) aus • Ziehen Sie das Kabel aus der Steckdose. Wickeln Sie das elektrische Kabel in das Kabelfach (A) (Abb. 54) . -
Página 105: Pflege
14 PFLEGE ACHTUNG! Ziehen Sie vor jeder Wartung oder Reinigung Fig. 57 den Stecker aus der Steckdose. Die Außenseiten des Geräts mit einem feuchten Tuch reinigen. Keine Lösungs- oder Reinigungsmittel verwenden. Lösungsmittel können die Kunststoffteile des Geräts angreifen. Das Gerät nicht mit Dampf reinigen. Leeren Sie den Behälter (M) nach abgeschlossener Arbeit aus Fig. -
Página 106: Problemlösung
ANMERKUNG: Der Mikrofaserfilter (P) sollte nicht mit der Fig. 61 Wasserfiltrationsfunktion verwendet werden. • Schwammfilter (Q): (Abb. 60) Für das Absaugen von Flüssigkeiten zu verwenden. Waschen Sie von innen nach außen unter fließendem Wasser. Vorzugsweise halbjährlich zu wechseln. • HEPA-Luftfilter (X): (Abb. 61) Prüfen Sie regelmäßig, indem Fig. -
Página 107: Entsorgung
STÖRUNG URSACHE ABHILFE - Die Saugleistung ist zu schwach. - Einer der Filter ist verstopft. - Kontrollieren und reinigen Sie den Feststofffilter (R), den Mikrofaserfilter (P) oder den Schwammfilter (Q), den Luftfilter (X) und den Kohlefilter (Y). - Falsche Filterzusammensetzung. - Stellen Sie sicher, dass die Filtereinheit (O) mit der unteren Filterabdeckung (S) und dem Feststofffilter (R) richtig montiert... -
Página 108: Technische Daten
17 TECHNISCHE DATEN 17.1 Schilddaten 17.3 Sicherheitseinrichtungen: ACHTUNG! Kontrollieren Sie, dass die Betriebs-Druckwächter technischen Daten auf dem Schild mit den Betriebs-Thermostat Daten des Stromnetzes übereinstimmen, an Sicherheits-Thermostat das das Gerät angeschlossen werden soll. Kessel-Überdruckventil 17.2 Technische Merkmale Elektrische Steuerung mit Niederspannung •... -
Página 109: Instrucciones Para El Uso
INSTRUCCIONES PARA EL USO DETALLES ............pag. 110 10.3 Planchado en posición vertical pag. 129 10.4 Refrescar la ropa ......pag. 129 LISTA DE ACCESORIOS Y COMPONENTES ........pag. 111 11 VACIADO DEL DEPÓSITO (M) ....pag. 130 ANTES DEL USO ........pag. 113 12 RESTABLECIMIENTO DEL NIVEL DE 3.1 Simbología ........pag. -
Página 110: Detalles
1 DETALLES D E F G H I A. carrete de cable O. grupo filtro con flotador (O1) B. cable de alimentación P. filtro de microfibra (lavable) C. tapón del depósito de la caldera Q. filtro de esponja (lavable) D. interruptor principal R. -
Página 111: Lista De Accesorios Ycomponentes
2 LISTA DE ACCESORIOS Y COMPONENTES Es posible que el suministro sea diferente en función del modelo (véase el embalaje). 28 27 26 25 OPCIONAL OPCIONAL OPCIONAL... - Página 112 Es posible que el suministro sea diferente en función del modelo (véase el embalaje). * Opcional 34.* Clavija de la plancha 1. Flex/tubo flexible 35.* Tubo de vapor 2. Tubos de prolongación 36.* Botón luminoso + palanca del vapor de la 3.
-
Página 113: Antes Del Uso
3 ANTES DEL USO ¡ATENCIÓN! El manual de instrucciones es 3.1 Simbología parte integrante del aparato. Lea En el manual de instrucciones se utilizan los atentamente el manual de instrucciones símbolos indicados a continuación para llamar antes de encender el aparato. Conserve el la atención sobre detalles particulares. -
Página 114: Advertencias Generales
5 ADVERTENCIAS GENERALES 01. Lea el «manual de instrucciones» antes de 11. No llene el depósito colocando el aparato su uso. El fabricante no se hace responsable directamente debajo del grifo. por daños a personas o daños a materiales 12. Antes de utilizar el aparato, verifique que causados por el incumplimiento del el cable, la clavija y el tubo flexible estén «manual de instrucciones»... -
Página 115: Seguridad
29. Si el aparato es prestado a otras personas, 39. ATENCIÓN: No use el aparato si el cable es necesario entregar también el manual eléctrico o partes importantes del mismo de instrucciones. están dañados, como por ejemplo, los dispositivos de seguridad, el tubo de alta presión de la pistola, etc. -
Página 116: Puesta En Servicio
6 PUESTA EN SERVICIO 6.1 Puesta en servicio de la caldera (Vapor) Fig. 1 ADVERTENCIA: Durante la preparación, apague el aparato y extraiga la clavija. ADVERTENCIA: El aparato debe estar apoyado sobre una superficie plana horizontal. • Quite el tapón del depósito de la caldera (C) (Fig. 1) •... -
Página 117: Funcionamiento
7 FUNCIONAMIENTO 7.1 Uso como limpiador a vapor D E F G H I Antes del uso, consulte el capítulo «Puesta en servicio de la caldera». Apriete el interruptor principal (D) y el botón de la caldera (E) y los indicadores luminosos correspondientes (H) y (I) se encenderán. -
Página 118: Uso Simultáneo De Vapor Y Aspiración
Para seleccionar la potencia de aspiración (del primer al cuarto Fig. 11 nivel), ejerza breves presiones en el botón de aspiración (30) situado en la empuñadura (26); el led (31) correspondiente al nivel seleccionado se encenderá(Fig. 9). Es posible variar el nivel de potencia con la aspiración encendida o apagada. - Página 119 • Desmonte la tapa inferior del filtro (S) (Fig. 16). Fig. 16 • Sustituya el filtro de microfibra (P) e introduzca el filtro de esponja (Q) en el alojamiento correspondiente (Fig. 17). Nota: Filtro de esponja (Q): utilícelo para aspirar los líquidos. •...
-
Página 120: Función Aspiración De Polvo Con Filtración Con Agua
7.5 Función aspiración de polvo con filtración con agua Fig. 21 IMPORTANTE: el filtro de microfibra (P) no debe ser utilizado con la función de filtración con agua. IMPORTANTE: el filtro HEPA (P) no debe ser utilizado con la función de filtración con agua. La filtración con agua permite «capturar»... -
Página 121: Uso De Los Accesorios
8 USO DE LOS ACCESORIOS Véase la lista de accesorios y componentes. Fig. 24 Los accesorios se pueden conectar directamente a la empuñadura (26) o, según se requiera, a los tubos de prolongación (2). • Conexión de los accesorios: insértelos a fondo, hasta el enganche de la palanca inferior (33) (Fig. 24). - Página 122 El cepillo grande (3) está dotado de conexión articulada, ruedas, Fig. 28 difusor de vapor y sección de aspiración. Puede tener tres bastidores diferentes: • bastidor para pavimentos (5) (Fig. 29) • bastidor para alfombras (6) (Fig. 30) • bastidor para líquidos (7) (Fig. 31) para colocar el bastidor: •...
-
Página 123: Accesorios Vapor, Accesorios
EMPALME VAPOR/ASPIRACIÓN (9), Fig. 35 Fig. 32 ACCESORIOS VAPOR, ACCESORIOS ASPIRACIÓN • Inserte el empalme vapor/aspiración (9) en la empuñadura (26) o en el tubo de prolongación (2). El empalme vapor/aspiración (9) está dotado de Fig. 36 Fig. 33 difusor de vapor concentrado (Fig. 32) para limpiar incrustaciones, ranuras, etc. -
Página 124: Tobera De Tapicería
TOBERA DE TAPICERÍA (20) Fig. 39 Fig. 40 Fig. 41 Fig. 42 • Inserte la tobera para tapicería (20)(Fig. 39) en la empuñadura (26) o en el tubo de prolongación (2). Está dotada de difusor de vapor y boca de aspiración. Puede tener dos bastidores diferentes: •... -
Página 125: Sugerencias
9 SUGERENCIAS 9.1 Sugerencias para la limpieza con vapor Fig. 43 Al inicio de las operaciones de limpieza, o después de una pausa prolongada, se recomienda dirigir el primer chorro de vapor hacia un lado para eliminar cualquier residuo de agua del tubo de vapor, especialmente durante la limpieza de superficies textiles (moquetas, alfombras, sillones, etc.). -
Página 127: Planchado
10 PLANCHADO 10.1 Uso para planchado Fig. 44 Inserte el cable de alimentación (B) en la toma de corriente. Levante la tapa de seguridad (V). Inserte la clavija (34) de la plancha en la toma (W) (Fig. 44) (Fig. 45). Si el tubo flexible (1) está conectado, quite primero la conexión Fig. -
Página 128: Sugerencias
Etiqueta 10.2 SUGERENCIAS Separe las diferentes prendas según el tipo de • Preste atención a la etiqueta. A quienes aún tejido, controlando que no deban repararse. no tienen suficiente práctica, deseamos recordar que cada prenda posee una Controle también que las diferentes prendas etiqueta que indica: estén realmente limpias, sin manchas ni roturas. -
Página 129: Planchado En Posición Vertical Pag
10.3 Planchado en posición vertical Fig. 50 Regule la temperatura deseada con el mando de la plancha (37) (a partir del sector correspondiente al vapor). Regule la intensidad del vapor con el mando (J) situado en el aparato. Aplique vapor sobre la ropa colgada, a una distancia de aproximadamente 20 cm (Fig. 50). -
Página 130: Vaciado Del Depósito (M)
11 VACIADO DEL DEPÓSITO (M) ¡ATENCIÓN! Antes de quitar el depósito, apague el aparato Fig. 52 y extraiga la clavija. • Desmonte el depósito (M) (Fig. 52) como se indica en el capítulo «Uso de vapor y aspiración de líquidos». –... -
Página 131: Fin Del Trabajo
13 FIN DEL TRABAJO Cada vez que finalice el trabajo, apague el aparato y extraiga la clavija. • Desconecte el interruptor de calentamiento (E) • desconecte el interruptor principal (D) • extraiga el cable de la toma de corriente. Enrolle el cable eléctrico en el carrete de cable (A) (Fig. 54). -
Página 132: Mantenimiento
14 MANTENIMIENTO ¡ATENCIÓN! Antes de cualquier intervención de Fig. 57 mantenimiento o limpieza, quite la clavija de la toma. Limpie el exterior del aparato con un paño húmedo. Evite el uso de solventes o detergentes. No utilice solventes, puesto que podrían dañar las partes de plástico del aparato. -
Página 133: Reparación De Averías
NOTA: el filtro de microfibra (P) no debe ser utilizado con la Fig. 61 función de filtración con agua. • Filtro de esponja (Q): (Fig. 60) utilícelo para aspirar los líquidos. Lave de dentro hacia fuera con agua corriente. Cámbielo preferiblemente cada 6 meses. •... -
Página 134: Eliminación
PROBLEMA CAUSA SOLUCIÓN - Se reduce la potencia de - El accesorio está obstruido. - Controle y limpie el accesorio. aspiración durante funcionamiento. - La potencia de aspiración es - Uno de los filtros está obstruido. - Verifique y limpie el filtro de demasiado baja. -
Página 135: Datos Técnicos
17 DATOS TÉCNICOS 17.1 Placa de datos técnicos 17.3 Dispositivos de seguridad: ¡ATENCIÓN! Verifique que los datos técnicos Presostato de servicio indicados en la placa correspondan a los de Termostato de servicio la red eléctrica a la que se conectará el Termostato de seguridad aparato. -
Página 136: Важное Примечание
ИНСТРУКЦИЯ ПО ЭКСПЛУАТАЦИИ ПОДРОБНАЯ ИНФОРМАЦИЯ .....pag. 137 парогенератора ......pag. 152 ПЕРЕЧЕНЬ ПРИНАДЛЕЖНОСТЕЙ И 10 ГЛАЖКА ............pag. 154 КОМПОНЕНТОВ ........pag. 138 10.1 Использования для глажки ..pag. 154 10.2 РЕКОМЕНДАЦИИ ......pag. 155 ПЕРЕД ИСПОЛЬЗОВАНИЕМ ....pag. 140 10.3 Вертикальная утюжка ....pag. 156 3.1 Символы ..........pag. 140 10.4 Освежить... -
Página 137: Подробная Информация
1 ПОДРОБНАЯ ИНФОРМАЦИЯ D E F G H I A. механизм сматывания шнура O. фильтр с поплавком (O1) B. кабель питания P. фильтр из микрофибры (моющийся) C. заглушка бака бойлера Q. поролоновый фильтр (моющийся) D. главный выключатель R. фильтр для твердых частиц (моющийся) E. -
Página 138: Перечень Принадлежностей И Компонентов
2 ПЕРЕЧЕНЬ ПРИНАДЛЕЖНОСТЕЙ И КОМПОНЕНТОВ В зависимости от модели, поставленный аппарат может отличаться от представленного (см. упаковку). 28 27 26 25 ДОПОЛНИТЕЛЬНЫЕ КОМПЛЕКТУЮЩИЕ ДОПОЛНИТЕЛЬНЫЕ КОМПЛЕКТУЮЩИЕ ДОПОЛНИТЕЛЬНЫЕ КОМПЛЕКТУЮЩИЕ... - Página 139 В зависимости от модели, поставленный аппарат может отличаться от представленного (см. упаковку). * Дополнительные комплектующие 34.* Вилка утюга 1. Flex/шланг 35.* Шланг для пара 2. Удлинительные трубки 36.* Световая кнопка + рычаг пара утюга 3. Большая насадка 37.* Круглая ручка регулировки пара 4.
-
Página 140: Перед Использованием
3 ПЕРЕД ИСПОЛЬЗОВАНИЕМ ВНИМАНИЕ! Инструкция является 3.1 Символы неотъемлемой частью аппарата. Перед В инструкции используются следующие знаки тем как запустить аппарат, внимательно для привлечения внимания к определенному ознакомьтесь с инструкцией. Бережно типу информации. храните инструкцию, чтобы использовать ВНИМАНИЕ! По соображениям безопасности ее... -
Página 141: Общие Предупреждения
5 ОБЩИЕ ПРЕДУПРЕЖДЕНИЯ 01. Прежде чем приступать к каждого использования и перед использованию аппарата, внимательно заполнением бака, его очистки или ознакомьтесь с инструкцией по замены шланга. эксплуатации. Изготовитель не несет 11. Не заполняйте бак вместе с аппаратом ответственности за травмы людей или непосредственном... - Página 142 24. Не прикладывайте всасывающее 35. ВНИМАНИЕ! Не позволять детям или отверстие к таким чувствительным необученным людям пользоваться частям тела, как глаза, рот, уши. аппаратом. 25. Не приближайте руки к струе пара. 36. ВНИМАНИЕ! Для обеспечения 26. Не направляйте струю пара на людей безопасности...
-
Página 143: Ввод В Эксплуатацию
6 ВВОД В ЭКСПЛУАТАЦИЮ 6.1 Ввод в эксплуатацию котла (парового) Fig. 1 ПРЕДУПРЕЖДЕНИЕ: во время подготовки выключите аппарат и выньте вилку из розетки. ПРЕДУПРЕЖДЕНИЕ: аппарат необходимо ставить на плоскую горизонтальную поверхность. • Выньте заглушку (С) (Рис. 1) бака бойлера. • Заполните бак котла (L) дистиллированной водой... -
Página 144: Пыли И Пара ....................................Pag. 144 17.2 Технические Характеристики Pag
7 ИСПОЛЬЗОВАНИЕ 7.1 Функция парогенератора D E F G H I Перед началом использования аппарата ознакомьтесь с главой «Ввод в эксплуатацию бойлера». Нажмите на главный выключатель (D) и кнопку бойлера (E). Соответствующие индикаторы (H) и (I) загорятся. Таким образом вода будет нагрета до образования пара (Рис. 5). Выберите... -
Página 145: Пылесоса .........................................Pag. 145 Устройства
Для выбора мощности всасывания (от 1 до 4 уровня) быстро Fig. 11 нажмите на кнопку всасывания (30), расположенную на рукоятке (26). Загорится индикатор (31), соответствующий выбранному уровню мощности (Рис. 9) Уровень мощности изменяется как при включенном, так и выключенном всасывании. Всякий раз как после вынимания... - Página 146 • Снимите нижнюю крышку фильтра (S) (Рис. 16). Fig. 16 • Замените фильтр из микрофибры (P) и вставьте поролоновый фильтр (Q) в соответствующее гнездо (Рис. 17). Примечание: Поролоновый фильтр (Q): используется для всасывания жидкостей. • Установите нижнюю крышку (S) фильтра до упора (Рис. 18). Fig.
-
Página 147: Функция Пылеудаления С Фильтрацией Воды
7.5 Функция пылеудаления с фильтрацией воды Fig. 21 ВАЖНАЯ ИНФОРМАЦИЯ! Фильтр из микрофибры (Р) не используется для функции фильтрации посредством аквафильтра. ВАЖНО: фильтр HEPA (X) нельзя использовать с функцией фильтрации воды. Fig. 22 Аквафильтрация позволяет «улавливать» пыль, всегда поддерживая чистым воздух на выходе и обеспечивая бóльшую... -
Página 148: Применение Принадлежностей
8 ПРИМЕНЕНИЕ ПРИНАДЛЕЖНОСТЕЙ Перечень принадлежностей и компонентов. Fig. 24 Принадлежности можно напрямую соединять с рукояткой (26) или с удлинительными трубками (2)в зависимости от необходимости. • Защелкивание принадлежностей: вставьте до упора, чтобы зацепился нижний рычажок (33) (Рис. 24). • Отсоединение принадлежностей: нажмите на нижний... - Página 149 Большая насадка (3) оснащена шарнирным соединением, Fig. 28 колесиками, соплом пара и всасывающим отверстием. В насадку можно установить одну из трех вставок: • вставка для сухого мусора (5) (Рис. 29) • вставка для ковров (6) (Рис. 30) • вставка для сбора жидкости (7) (Рис. 31) Для...
- Página 150 СОЕДИНЕНИЕ ПАРА/ВСАСЫВАНИЯ Fig. 35 Fig. 32 (9), ПРИНАДЛЕЖНОСТИ ДЛЯ ПАРА, ПРИНАДЛЕЖНОСТИ ДЛЯ ВСАСЫВАНИЯ • Прикрепите соединение пара/всасывания (9) к рукоятке (26) или к удлинительной трубке (2). Соединение пара/всасывания Fig. 36 Fig. 33 оборудовано сужающимся диффузором пара (Рис. 32) для очистки налетов, щелей и др.
- Página 151 ТУРБОЩЕТКА (20) Fig. 39 Fig. 40 Fig. 41 Fig. 42 • Прикрепите турбощетку (20)(Рис. 39) к рукоятке (26) или к удлинительной трубке (2). Насадка оснащена соплом для пара и всасывающим отверстием. В насадку можно установить одну из двух вставок: • резиновая полоска (21) для твердых и гладких поверхностей и для функции чистки стекол.
-
Página 152: Парогенератора
9 РЕКОМЕНДАЦИИ 9.1 Рекомендации по использованию функции Fig. 43 парогенератора В начале уборки и после длительного простоя рекомендуется направлять первую струю пара в сторону, чтобы удалить из шланга остатки воды. Это особенно важно при очистке ковровых покрытий, диванов и других текстильных поверхностей. Всегда... -
Página 154: Использования Для Глажки
10 ГЛАЖКА 10.1 Использования для глажки Fig. 44 Вставьте шнур питания (В) в розетку. Поднимите защитную крышку (V). Вставьте штепсель (34) утюга в гнездо (W) (Рис. 44) (Рис. 45). Если шланг (1) вставлен, то перед снятием быстросъемного Fig. 45 соединения (27) шланга нажмите на переднюю кнопку (28). Перед... -
Página 155: Рекомендации
Этикетка 10.2 РЕКОМЕНДАЦИИ Отсортируйте одежду по типу ткани и • Внимательно изучите этикетку. Для тех, у проверьте, чтобы она не нуждалась в кого еще нет уверенности, которая приходит с опытом, должен помнить о починке. Кроме того, проконтролируйте, том, что на этикетке каждого предмета чтобы... -
Página 156: Вертикальная Утюжка
10.3 Вертикальная утюжка Fig. 50 При помощи круглой ручки (37) утюга отрегулируйте требуемую температуру (должна быть за знаком пара). Посредством ручки (J) на аппарате настройте силу подачи пара. Подавайте пар на одежду, висящую на вешалке, на расстоянии примерно 20 см от нее (Рис. 5 0). Для деликатных Fig. -
Página 157: Опорожнение Бака (M)
11 ОПОРОЖНЕНИЕ БАКА (M) ВНИМАНИЕ! Прежде чем снять бак, выключите аппарат Fig. 52 и выньте вилку. • Демонтируйте бак (M) (Рис. 52), как описано в разделе «Использование пара и всасывание жидкостей». – МАКС. • Проверьте фильтр для твердых частиц (R) и уберите из него... -
Página 158: Завершение Работы
13 ЗАВЕРШЕНИЕ РАБОТЫ Каждый раз после завершения работы выключите аппарат и выньте вилку из розетки. • отожмите выключатель нагрева (E) . • отожмите главный выключатель (D) . • выньте шнур из сетевой розетки. Намотайте электрический кабель на механизме сматывания (A) (Рис. 54). Fig. -
Página 159: Техобслуживание
14 ТЕХОБСЛУЖИВАНИЕ ВНИМАНИЕ! Перед выполнением каких-либо операций Fig. 57 по техобслуживанию или чистке, выньте вилку сетевого шнура из розетки. Протрите аппарат снаружи влажной салфеткой. Не используйте растворов или моющих средств. Не используйте растворов, так как они могут повредить пластмассовые части аппарата. Не... -
Página 160: Устранение Неисправностей
ПРИМЕЧАНИЕ: фильтр из микрофибры (Р) нельзя Fig. 61 использовать для функции фильтрации воды. • Поролоновый фильтр (Q): (Рис. 60) используется для всасывания жидкостей. Промойте изнутри наружу проточной водой. Рекомендуется заменять каждые 6 месяцев. • Воздушный фильтр HEPA (X): (Рис. 61) Регулярно Fig. -
Página 161: Утилизация
НЕИСПРАВНОСТЬ ПРИЧИНА СПОСОБ УСТРАНЕНИЯ - Во время работы снижается - Принадлежность закупорена Проверьте и очистите мощность всасывания принадлежность. - Слишком низкая мощность - Один из фильтров засорен - Проверьте и очистите фильтр всасывания для твердых частиц (R), фильтр из микрофибры (P) или поролоновый фильтр... -
Página 162: Использование В Качестве 17 Технические Данные
17 ТЕХНИЧЕСКИЕ ДАННЫЕ 17.1 Паспортная табличка 17.3 Предохранительные устройства: ВНИМАНИЕ! Проверьте, что технические Рабочее реле давления данные на табличке соответствовали Рабочий термостат данным электрической сети, к которой Предохранительный термостат подключается аппарат. Предохранительный клапан бойлера 17.2 Технические характеристики Низковольтные электрические механизмы •...