Publicidad
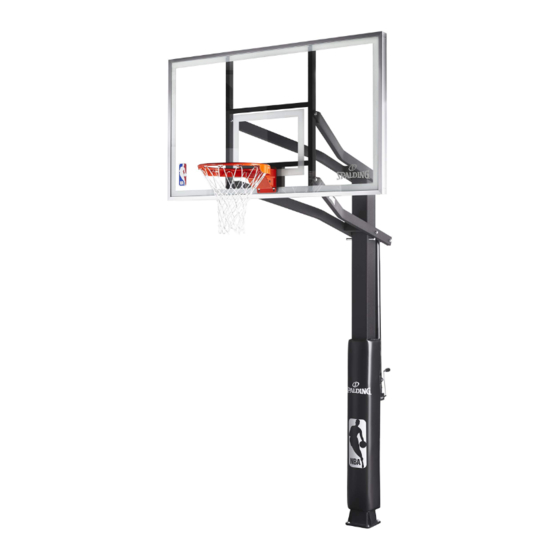
In-Ground Basketball System
ENGLISH
FRANÇAIS
Owners Manual
DEUTSCH
ESPAÑOL
Système de basket-ball à fixation dans le sol
Manuel d'utilisation
Im Boden verankertes Basketballsystem
Benutzerhandbuch
Sistema de baloncesto de piso
Manual del Propietario
1
© COPYRIGHT 2018 by Russell Brands, LLC
ID# M886649
12/18
Publicidad
Tabla de contenido

Manuales relacionados para SPALDING 888 serie


Resumen de contenidos para SPALDING 888 serie
- Página 1 In-Ground Basketball System ENGLISH FRANÇAIS Owners Manual DEUTSCH ESPAÑOL Système de basket-ball à fixation dans le sol Manuel d'utilisation Im Boden verankertes Basketballsystem Benutzerhandbuch Sistema de baloncesto de piso Manual del Propietario © COPYRIGHT 2018 by Russell Brands, LLC ID# M886649 12/18...
- Página 2 WARNING! / AVERTISSEMENT ! / WARNUNG! / ¡ADVERTENCIA! PLEASE ENSURE that (4) steel spacers are in place between board fFrame and rim prior to tightening bolts. FAILURE TO FOLLOW OPERATING INSTRUCTIONS COULD RESULT IN INjURy OR DAMAGE TO PROPERTy. (SEE PAGE 17) VEUILLEz VOUS ASSURER Que (4) entretoises en acier sont en place entre la carte du châssis et de la jante avant de serrer les boulons.
-
Página 3: Required Tools And Materials
Numéro sans frais du service clientèle (états-Unis) : 1-800-558-5234 ; Canada : 1-800-284-8339 ; Europe : 00 800 555 85234 (Suède : 009 555 85234), Pour l'Australie : 1300 367 582 - Site Internet : www.spalding.com www.spalding.com.au Gebührenfreie kundendienstnummer für Anrufer in den USA: 1-800-558-5234 Für Anrufer in kanada: 1-800-284-8339 Für Anrufer in Europa:... - Página 4 OUTILS ET MATÉRIEL BENÖTIGTE WERKZEUGE UND HERRAMIENTAS Y REQUIS: MATERIALIEN: MATERIALES REQUERIDOS: • Trois (3) adultes capables • Drei (3) zur Ausführung dieser • Tres (3) adultos capaces Arbeit fähige Erwachsene • Mètre • Maßband • Cinta de medir • Planche en bois (chute) •...
-
Página 8: Système De Basket-Ball Garantie
Para la última información de garantía del sistema de baloncesto Por favor visite el sitio web de Spalding Basketball en www.Spalding.com 1-800-558-5234 Póngase en contacto con servicio al cliente de Spalding en teléfono # Para obtener más información sobre piezas y garantía, visite www.Spalding.com 2/06... -
Página 9: Réglage De La Hauteur
RÉGLAGE DE LA HAUTEUR Retirez la goupille de sûreté pour enlever la poignée. Tournez la manivelle pour soulever et abaisser le panneau. ID# 516000 06/05 ID# FR516000 05/07 3" High 3" High 4" Wide 4" Wide HÖHENEINSTELLUNG AJUSTE DE LA ALTURA Quite el Entfernen Sie pasador de... - Página 10 bEFORE yOU START! AVANT DE COMMENCER ! VORbEREITENDE MASSNAHMEN ¡ANTES DE COMENzAR! Fragen oder fehlende Teile? HALT! HALT! Gehen Sie NICHT zum Laden zurück! Rufen Sie die GEBÜHRENFREIE Telefonnummer (in den USA und Kanada) auf der Vorderseite an! ¿Tiene preguntas o le faltan piezas? STOP! STOP! ¡...
- Página 11 IMPORTANT! Remove all contents from boxes. be sure to check inside pole sections, hardware and additional parts are packed inside. IMPORTANT! Videz entièrement les boîtes. Veillez à vérifier l'intérieur des sections de poteau. La quincaillerie et des pièces supplémentaires sont emballées à l'intérieur. WICHTIG! Die kartons vollständig auspacken.
- Página 12 Make sure ground is level with playing surface, then dig pole hole. S’assurer que le sol est au même niveau que la surface de jeu, puis commencer à creuser le trou pour le poteau. Sicherstellen, daß der Boden auf einer Ebene mit der Spielfläche ist, dann das Loch für die Stange graben. Asegure que la tierra esté...
- Página 13 Install nut (2) to J-bolt (1) as shown. Repeat procedure for other three J-bolts (1). Vissez l’écrou (2) au boulon en J (1) comme indiqué. Répétez la même procédure pour les trois autres boulons en J (1). Schrauben Sie Mutter (2) auf Hakenschraube (1), siehe Abbildung. Wiederholen Sie dieses mit den anderen drei Hakenschrauben (1).
-
Página 14: Side View
Fill hole with concrete. Tamp down concrete to release air pockets and build drainage hill. Remplissez le trou de ciment. Damez le béton pour libérer les poches d’air et construisez une butte de drainage. Füllen Sie das Loch mit Beton. Drücken Sie den Beton nach unten, um eventuelle Luftlöcher zu vermeiden, und formen Sie einen kleinen Hügel zur Dränung. - Página 15 Insert J-bolts (1) from mounting plate (3) into cement as shown. IMPORTANT! / IMPORTANT! Move assembly around to release any air pockets in cement, WICHTIG! / ¡IMPORTANTE! then rest mounting plate on cement drainage hill. Apply some pressure to level mounting plate on top of drainage hill. Level mounting plate and square with playing surface.
- Página 16 TWO people are required to upright pole (5). While the THIRD person assembles lower pole flange onto protruding J-bolts (1) as shown. The flange will then rest on the nuts (2). DEUXpersonnes sont nécessaires au poteau droit (5). Tandis que la troisième personne assemble sur la bride en saillie inférieures pôle J-vis (1), comme indiqué.
- Página 17 TWO adults, position the upper yoke (8), while the third adult secures the yoke to the pole and then the lower yoke (9) similar to upper yoke. DEUX adultes, positionner la culasse supérieure (8), tandis que le troisième adulte sécurise le joug à la perche, puis la chape inférieure (9) proche de culasse supérieure.
- Página 18 IMPORTANT! - IMPORTANT! - WICHTIG! - ¡IMPORTANTE! Instructions for GLASS bACkbOARD - ONLy! Instructions pour le verre pannenau - UNIQUEMENT ! Anweisungen für Glas RÜCkWAND - NUR! Instrucciones de VIDRIO TAbLERO - SóLO! WARNING! AVERTISSEMENT! WARNUNG! ¡ADVERTENCIA! PLEASE ENSURE that foam pad and all 4 steel spacers are in position bEFORE attaching yokes. Failure to follow these instructions could result in personal injury or damage to property.
- Página 19 Secure backboard to support arms (8 and 9) as shown. Use same hardware IMPORTANT! combination for attaching both elevator tubes to the backboard. IMPORTANT! Arrimez le panneau aux bras de support (8 et 9) comme indiqué. Utilisez la même WICHTIG! combinaison de matériel pour attacher les deux tubes d’élévation au panneau.
- Página 20 Secure jack brackets (21) to to mounting bracket as shown. Vissez les vis de calage (21) au support de montage comme indiqué. Befestigen Sie die Träger (21) an der Stütze, siehe Abbildung. Asegure los soportes del gato (21) al soporte de montaje como se muestra. 13 14 IMPORTANT! REAR VIEW...
- Página 21 A. Replace spacer in jack (20) with spacer (4). Insert through top of screw jack (20) as shown. b. Install crank jack (20) U-joint to lower support arm (9) as shown. A. Remplacez la douille du cric (20) par l’entretoise (4). Insérez-la par le dessus de la vis de calage (20) comme indiqué. Remplacez la bague d’écartement de la vis (20) par l’entretoise (4) comme indiqué.
- Página 22 Rotate jack handle until jack (20) aligns with jack brackets (21). Secure crank jack (20) to jack brackets (21) as shown. Tournez la poignée du cric jusqu’à ce qu’il soit aligné (20) à ses supports (21) comme indiqué. Drehen Sie den Griff bis das Kurbelstück (20) in einer Linie mit den Trägern (21) ist. Befestigen Sie das Kurbelstück (20) an den Trägern (21).
- Página 23 A. Apply height indicator labels (18 and 19) to height indicators (16). b. Attach height indicators (16) to lower arm in areas as shown by turning screws (17) into place with a phillips screwdriver. A. Posez les étiquettes d’indication de hauteur (18 et 19) sur les indicateurs de hauteur (16). b.
- Página 24 Install net (30) to rim as shown. Installez le panier (30) à l’anneau (voir schéma). Befestigen Sie, wie abgebildet, das Netz (30) am Ring. Instale la red (30) al aro como se muestra. WARNING! AVERTISSEMENT! WARNUNG! ¡ADVERTENCIA! PLEASE ENSURE that foam pad and all 4 steel spacers are in position bEFORE attaching yokes. Failure to follow these instructions could result in personal injury or damage to property.
- Página 25 Check leveling at this time. Pole (5) and Backboard (36) should be level in all directions. After system is leveled, completely tighten nuts (2) above pole flange. Vérifiez le niveau. Le poteau (5) et le panneau (36) doit être à niveau dans toutes les directions. Une fois l’ensemble nivelé, serrez complètement les boulons (2) au-dessus de la bride du poteau.
- Página 26 Secure pole pad (32) as shown. NOTE: REMARQUE: Verrouillez la guêtre du poteau (32) comme indiqué. HINWEIS: Befestigen Sie den Stangenschutz (32), siehe Abbildung. NOTA: Pole pad may NOT be included in Asegure la almohadilla del poste (32) como se muestra. this model.
- Página 27 Apply height adjustment label (31) to front of pole as shown. Posez l’étiquette d’ajustement de hauteur (31) devant le poteau (voir schéma). Bringen Sie das Schildchen zur Höhenverstellung (31) vorn an der Stange an, siehe Abbildung. Aplique la etiqueta de ajuste de altura (31) al frente del poste como se muestra.
-
Página 28: Parts List
205600 Pole Pad, Hydra-Rib (May Not Be 206340 Lock Nut, Hex 1/2-13 Included) 208439 Spacer, 0.53 I.D. x 0.75 O.D. x .41 Long 205600S Pole Pad, Spalding (May Not Be Included) 204735 Height Indicator 208484 Spacer, Metal 204733 Screw, #8 x 0.50” Long... -
Página 29: Lista De Piezas
205600 Almohadilla de poste, Hydra-Rib 10.25” de longitud (puede no estar incluida) 202651 Arandela plana 1/2” 205600S Almohadilla de poste, Spalding 206340 Contratuerca hexagonal, 1/2-13 (puede no estar incluida) 208439 Espaciador, 0.53 D.I. x 0.75 D.E. x 208484 Espaciador, Metal 0.41”... - Página 30 HARDWARE IDENTIFIER (BOLTS AND SCREWS) IDENTIFICATION DES PIÈCES (BOULONS ET VIS) BEFESTIGUNGSTEILESCHLÜSSEL (BOLZEN UND SCHRAUBEN) IDENTIFICADOR DE HERRAJE (PERNOS Y TORNILLOS) #11 (2) #28 (1) #24 (2) #17 (4) #12 (4) #23 (2) #10 (4) * You may have extra parts with this model. * Il est possible que vous ayez d’autres pièces avec ce modèle.
- Página 31 HARDWARE IDENTIFIER (NUTS, WASHERS & STEEL SPACERS) IDENTIFICATEUR MATERIEL (ECROUS, RONDELLES & BAGUES D’ÉCARTEMENTS ACIER) TEILEINDENTIFIZIERUNG (MUTTERN, UNTERLEGSCHEIBEN & DISTANZSTÜCKE) IDENTIFICADOR DE EQUIPO (TUERCAS, ARANDELAS Y ESPACIADORES DE ACERO) #22 (4) #14 (11) #2 (12) #7 (2) #13 (20) #25 (6) 202651 0.53”...