Tabla de contenido
Publicidad
Enlaces rápidos
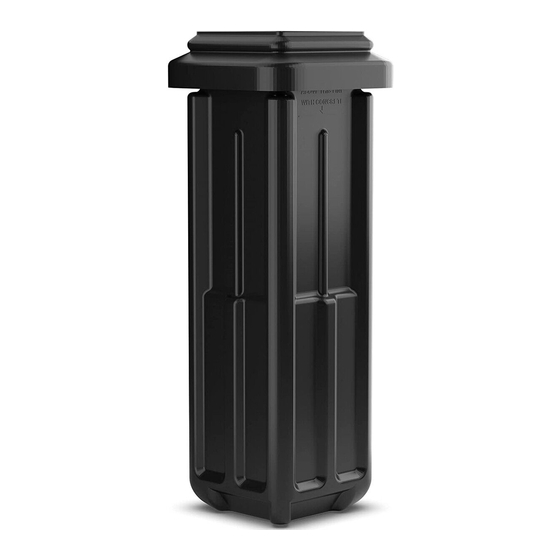
Ground Sleeve Owner's Manual
[for a 4" (10.2 cm) square pole)
This manual, accompanied by sales receipt, should be saved and kept on hand as a convenient reference, as it
WARNING!
ReAd ANd uNdeRsTANd opeRAToR's
MANuAl BeFoRe usING THIs uNIT.
FAIluRe To FolloW opeRATING
INsTRucTIoNs could ResulT IN
INjuRy oR dAMAGe To pRopeRTy.
Write Model Number From Box Here:
Toll-Free Customer Service Number for U.S: 1-800-558-5234, For Canada: 1-800-284-8339,
For Europe: 00 800 555 85234 (Sweden: 009 555 85234), For Australia: 1 300 367 582
1-800-spalding
Adult Assembly Required.
contains important information about your model.
REQUIRED TOOLS AND MATERIALS:
• Two (2) Capable
Adults
• Carpenter's Level
• 15' Tape Measure
• Shovel & Post Hole
Digger
• Wood Board (scrap)
• Tape
• Sawhorse or
Support Table
Internet Address: www.spalding.com
• Stepladder 8 ft. (2.4 m)
• Safety Goggles
• (2 each) Wrenches and/or Socket Wrenches and
Sockets (Deep-Well Sockets are Recommended).
1/2"
9/16"
3/4"
1/2"
9/16"
3/4"
www.spalding.com.au
1
•
• Container to Mix
• 36" Section of
Re-Bar Material
• Optional: Large &
Small Adjustable
• Drill
Wrenches
05/12
ID# M8600042
Publicidad
Tabla de contenido

Resumen de contenidos para SPALDING AC.8672SP.0.0.0.0
- Página 1 • Sawhorse or 1/2" 9/16" 3/4" Support Table Toll-Free Customer Service Number for U.S: 1-800-558-5234, For Canada: 1-800-284-8339, For Europe: 00 800 555 85234 (Sweden: 009 555 85234), For Australia: 1 300 367 582 Internet Address: www.spalding.com www.spalding.com.au 05/12 ID# M8600042...
- Página 2 Numéro sans frais du service clientèle (États-Unis) : 1-800-558-5234 ; Canada : 1-800-284-8339 ; Europe : 00 800 555 85234 (Suède : 009 555 85234), Pour l'Australie : 1 300 367 582 Site Internet : www.spalding.com www.spalding.com.au Gebührenfreie Kundendienstnummer für Anrufer in den USA: 1-800-558-5234 Für Anrufer in Kanada: 1-800-284-8339 Für Anrufer in Europa: 00 800 555 85234 (Schweden: 009 555 85234) Für Australien: 1 300 367 582...
-
Página 3: Outils Et Matériel Requis
OUTILS ET MATÉRIEL BENÖTIGTE WERKZEUGE HERRAMIENTAS Y REQUIS: UND MATERIALIEN: MATERIALES REQUERIDOS: • dos (2) adultos • zwei (2) zur Ausführung dieser • deux (2) adultes capables capaces Arbeit fähige erwachsene • Mètre • cinta de medir • Maßband • planche en bois (chute) •... -
Página 7: Vorbereitende Massnahmen
BeFoRe you sTART! AvANT de coMMeNceR ! voRBeReITeNde MAssNAHMeN ¡ANTes de coMeNzAR! NoTIce To AsseMBleRs Adult Assembly Required. Dispose of ALL packaging materials promptly. As with all products, periodically inspect for loose small parts. ALL basketball systems, including those used for DISPLAYS, MUST be assembled and installed according to instructions. Failure to follow instructions could result in SERIOUS INJURY. -
Página 8: Parts List
PARTS LIST - See Hardware Identifier HARDWARE IDENTIFIER LISTE DES PIÈCES - Voir légende TEILELISTE - Siehe Teileschlüssel IDENTIFICATION DES PIÈCES LISTA DE PIEZAS - Vea el identificador de herraje BEFESTIGUNGSTEILESCHLÜSSEL Item Qty. Part No. Description 206500 Ground Sleeve, Square IDENTIFICADOR DE HERRAJE 203232 Washer, Flat, 3/8 x 3/4 O.D. - Página 9 secTIoN A: ASSEMBLE THE POLES (not included) secTIoN A: ASSEMBLAGE DES SECTIONS DE POTEAU ( non fournie) BAuABscHNITT A: ZUSAMMENBAU DER STANGENTEILE (nicht inbegriffen) seccIóN A: MONTAJE DE LAS SECCIONES DEL POSTE ( no se incluye) This is what your system will look like when you’ve finished this section. Voici à...
- Página 10 Make sure ground is level with playing surface, then dig NoTe: pole hole. ReMARQue: HINWeIs: S’assurer que le sol est au même niveau que la surface de NoTA: jeu, puis commencer à creuser le trou pour le poteau. Maximum distance from edge of hole to edge of playing surface 6”...
-
Página 11: Importante
Assemble clamps (3) around bottom pole and ground IMpoRTANT! sleeve (1) as shown. IMpoRTANT! Montez les colliers de serrage (3) autour de la section WIcHTIG! de poteau inférieure et du manchon de fixation en terre ¡IMpoRTANTe! (1), comme indiqué. clamp MusT be positioned as shown below. Die Klammern (3) wie gezeigt um das untere le collier de serrage doIT être positionné... - Página 12 FIG. A / FIG. A Fill hole completely with concrete. Insert ground sleeve assembly ABB. A / FIG. A and center in hole Remplissez complètement le trou de béton. (FIG. A). 1" (2.54 cm) Front of pole must be Das Loch vollständig mit Beton füllen. parallel with playing surface.
- Página 13 Tamp down concrete to release air pockets and build drainage hill up to line on groundsleeve. (see NoTe BeloW). Level pole section in all directions several times while concrete is curing. Tassez le béton pour éliminer les poches d'air et formez une butte de drainage L'haut pour revêtir sur groundsleeve.
- Página 14 Assemble poles. Montez les sections de poteau. Die Stangenteile zusammenbauen. Monte las secciones del poste NoTe: / ReMARQue: HINWeIs: / NoTA: pole(s) NoT INcluded. FolloW MANuFAcTuReRs INsTRucTIoNs AccoRdINGly. suIvez les INsTRucTIoNs du FABRIcANT. secTIoN(s) de poTeAu NoN FouRNIe(s). jeWeIls dIe ANleITuNG des sTANGe(N) NIcHT IM lIeFeRuMFANG eNTHAlTeN.
- Página 15 Insert clamp cover (5) onto bottom section. Bend back exposed top flange sections of secured ground sleeve (1). Then insert pole into ground sleeve (1). Insérez le cache de pince (5) sur la section inférieure. Courbez vers l'arrière les sections de bride supérieures du manchon de fixation au sol (1).
- Página 16 Lower clamp cover (5) over clamps and snap into proper position. Abaissez le bouchon des colliers de serrage (5) sur ces derniers et enclenchez-le en position. Die Klemmenabdeckung (5) auf die Klemmen absenken und einschnappen lassen. Baje la cubierta de la abrazadera (5) sobre las abrazaderas y conéctela a presión en la posición correcta. GSQ08.EPS 211250 GSQ09.EPS...


