Tabla de contenido
Publicidad
Enlaces rápidos
WARRANTY
DO NOT RETURN YOUR PRODUCT TO THE STORE. PLEASE CONTACT BABY TREND
FOR REPLACEMENT PARTS, SERVICE AND REPAIR.
The Baby Trend
warranty covers workmanship defects within the first 180 days of
®
purchase. Any product which has been subjected to misuse, abuse, abnormal use,
excessive wear and tear, improper assembly, negligence, environmental exposure, alteration
or accident, or has had its serial number altered or removed invalidates all claims against
the manufacturer. Any damage to property during installation is the sole responsibility of the
end user. The Customer Service Department can be contacted at 1-800-328-7363 Monday
through Friday between 8:00am and 4:30 pm (PST). Return Authorizations are required prior
to returning product(s) to Baby Trend
GARANTIA
NO DEVUELVA SU PRODUCTO A LA TIENDA. POR FAVOR CONTACTE A BABY TREND
PARA PIEZAS DE REPUESTO, SERVICIO Y REPARACION.
La garantía de Baby Trend
cubre defectos de fábrica dentro de los primeros 180 días de
®
la compra.Cualquier producto que haya sido sometido a uso indebido, abuso, uso anormal,
desgaste excesivo, montaje incorrecto, negligencia, exposición ambiental, alteración o
accidente, o que ha tenido su número de serie alterado o removido anula todos los reclamos
contra el fabricante. Cualquier daño a la propiedad durante la instalación es de la exclusiva
responsabilidad del usuario final. El Departamento de Servicio al Cliente puede ser
contactado a 1 800 328-7363 Lunes a viernes entre 8:00 am y 4:30 pm (PST).Un numero
de autorizacion es requerido antes de la devolución de los producto(s) a Baby Trend®.
Garantia válida sólo en América del Norte.
GARANTIE
NE PAS RETOURNER VOTRE PRODUIT AU MAGASIN. VEUILLEZ CONTACTER BABY
TREND POUR DES PIÈCES DE RECHANGE, ENTRETIEN ET RÉPARATION.
La garantie Baby Trend
couvre les vices de fabrication dans les 180 jours suivant l'achat du
®
produit. Tout produit qui a été soumis à un usage abusif, une utilisation anormale, une usure
excessive, un montage incorrect, de la négligence, de l'exposition environnementale, de la
modification ou un accident, ou a eu son numéro de série modifié ou supprimé annule toutes
les réclamations contre le fabricant. Tout dommage à la propriété lors de l'installation est de
la seule responsabilité de l'utilisateur final. Le service client peut être contacté au 1-800-328-
7363 du lundi au vendredi 8 h – 16 h 30 (PST). Une autorisation sera nécessaire avant de
retourner le produit à Baby Trend
. Garantie valable uniquement en Amérique du Nord.
®
www.babytrend.com
Baby Trend, Inc.
1607 S. Campus Ave.,
Ontario, CA 91761
1
. Warranty only valid in North America.
®
1-800-328-7363
(8:00am ~ 4:30pm PST)
www.babytrend.com
Read all instructions BEFORE assembly and USE of product.
KEEP INSTRUCTIONS FOR FUTURE USE.
Lea todas las instrucciones ANTES de armar y USAR el producto.
CONSERVE LAS INSTRUCCIONES PARA USO FUTURO.
Lisez toutes les instructions du manuel AVANT l'assemblage
ou L'UTILISATION de ce produit. CONSERVEZ CES
INSTRUCTIONS POUR RÉFÉRENCE ULTÉRIEURE.
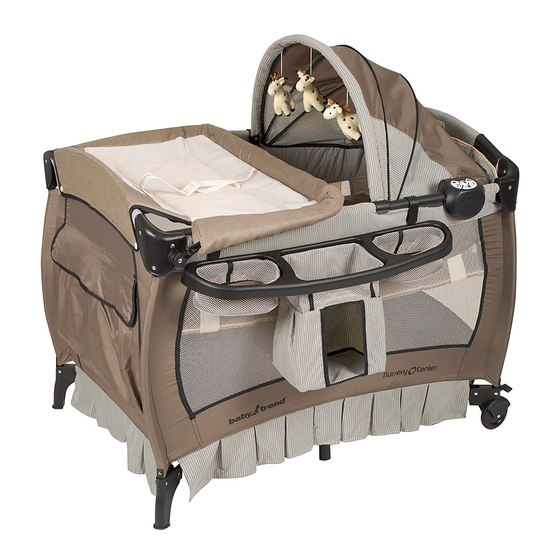
Deluxe Nursery Center
Instruction Manual
Manual de Instrucciones
Manuel d'instruction
www.babytrend.com
PY29D
PY29xxxD_3L_0416
2
Publicidad
Tabla de contenido

Manuales relacionados para BABYTREND PY29D


Resumen de contenidos para BABYTREND PY29D
- Página 1 Le service client peut être contacté au 1-800-328- 7363 du lundi au vendredi 8 h – 16 h 30 (PST). Une autorisation sera nécessaire avant de PY29D retourner le produit à Baby Trend . Garantie valable uniquement en Amérique du Nord.
- Página 2 WARNING WARNING WARNING: NEVER LEAVE • To reduce the risk of SIDS, pediatricians recommend healthy infants be placed on their back to sleep, unless otherwise advised by your INFANT IN PRODUCT WITH physician. • Child can become entrapped and die when improvised netting or covers SIDES DOWN.
- Página 3 ADVERTENCIA ADVERTENCIA ADVERTENCIA: NUNCA DEJE puedan servirle de escalones para trepar y salir. • NUNCA coloque el producto cerca de ventanas donde el niño se pueda AL NIÑO EN EL PRODUCTO estrangular con cordones de persianas o cortinas. • Proporcione siempre la supervisión necesaria para la seguridad continua CON LOS COSTADOS BAJOS.
- Página 4 AVERTISSEMENT AVERTISSEMENT AVERTISSEMENT: NE JAMAIS mesure plus de 890 mm (35 po) ou pèse plus de 14 kg (30 lb), peut importe quel arrive en premier. LAISSER LE BÉBÉ DANS LE • Quand l’enfant est capable de se tirer à une position debout, enlever les bordures de protection, les gros jouets et les divers autres PARC LORSQUE LES CÔTÉS objets qui pourraient servir comme marches au bébé...
- Página 5 MAINTENANCE MANTENIMIENTO ENTRETIEN PARTS PIEZAS PIÈCES MAINTENANCE AND CLEANING INSTRUCTIONS: This model may not include some features shown below. Check the parts list on the back cover to make sure you have all the parts for this model before Use only household mild soap and warm water. assembling the playard.
-
Página 6: Assembly Montaje Assemblage
PARTS PIEZAS PIÈCES ASSEMBLY MONTAJE ASSEMBLAGE IMPORTANT! To ensure safe operation of your playard, please follow these instructions carefully. Please keep these instructions for future reference. IMPORTANT! Before assembly and each use, inspect this product for damaged hardware, loose joints, missing parts or sharp edges. NEVER use if any parts are missing or broken. - Página 7 ASSEMBLY MONTAJE ASSEMBLAGE ASSEMBLY MONTAJE ASSEMBLAGE TO ASSEMBLE PLAYARD • Top rails must be fully erected before lowering center. Pull up one rail at a time, hold one hand ARMADO DEL CORRALITO on each side of the rail and pull up sharply. Do ASSEMBLAGE DU PARC DE BÉBÉ...
- Página 8 1-800-328-7363 or visit us online at www. rígidas y aseguradas en su lugar antes de babytrend.com usar el producto (Fig. 3b). • Introduzca las correas de gancho y bucle • Lorsque les quatre (4) barrières auront été...
- Página 9 1-800-328-7363 ou visiter notre site Internet lado. www.babytrend.com. • Todavía no destrabe las barandillas superiores. El centro del piso debe estar elevado antes de • To operate the brakes on the Wheels, press destrabar las barandillas superiores.
- Página 10 ASSEMBLY MONTAJE ASSEMBLAGE ASSEMBLY MONTAJE ASSEMBLAGE • Locate the rail latch release in the center • Ramenez les quatre (4) coins vers le and bottom side of each rail. Squeeze the centre (Fig. 9). Enroulez le matelas autour lever with two hands until the rail releases du cadre du parc, côté...
- Página 11 WARNING WARNING Accessories WARNING: • NEVER use plastic shipping bags or other plastic film as mattress covers Failure to follow these warning and not sold and intended for that purpose. They can cause suffocation. the instructions could result in serious injury or death. •...
-
Página 12: Peligro De Asfixia
ADVERTENCIA ADVERTENCIA Accesorios ADVERTENCIA: • La cuna deberá dejar de usarse cuando el niño comience a levantarse La inobservancia de las apoyándose en sus manos y rodillas o alcance una altura de 25 pulgadas advertencias e instrucciones podría causar lesiones (635 mm), un peso de 15 libras (6.8 kg) o tenga 4 meses de edad, lo que graves o la muerte. -
Página 13: Danger De Suffocation
AVERTISSEMENT AVERTISSEMENT Accessoires MISE EN GARDE : • NE PAS utiliser ce produit lorsque le bébé commence à ramper sur les Manquer de suivre mains et genoux, mesure plus de 635 mm (25 po), pèse plus de 6,8 kg ces avertissements et les instructions peut entraîner de (15 lb) ou est âgé... - Página 14 ASSEMBLY MONTAJE ASSEMBLAGE ASSEMBLY MONTAJE ASSEMBLAGE • Connect opposing Mattress Support Tubes TO ASSEMBLE BASSINET that are attached to the bottom of the CÓMO ARMAR LA CUNA Bassinet (Fig. 11a). POUR ASSEMBLER LA COUCHETTE • Before placing the Mattress into the Bassinet, make sure Mattress Support tubes are connected as seen in (Fig.
- Página 15 ASSEMBLY MONTAJE ASSEMBLAGE ASSEMBLY MONTAJE ASSEMBLAGE TO REMOVE BASSINET • Place the Mattress into the Bassinet with the padded side facing upward (Fig. 13) PARA QUITAR LA CUNA NOTE: Fasten tabs underneath the POUR RETIRER LA COUCHETTE Mattress secure it in place. •...
- Página 16 ASSEMBLY MONTAJE ASSEMBLAGE ASSEMBLY MONTAJE ASSEMBLAGE • Open Canopy as seen in Fig. 14b, make • Ubique la Cubierta en el centro del Corralito. opening adjustments at the top of the Canopy • Sujete cada lado de la Cubierta presionando by aligning the inner center strap with the two firmemente los ganchos de la Cubierta en outer straps (Fig.
-
Página 17: Peligro De Caída
ASSEMBLY MONTAJE ASSEMBLAGE ASSEMBLY MONTAJE ASSEMBLAGE WARNING FALL HAZARD: TO ASSEMBLE THE CHANGING TABLE ARMADO DEL ORGANIZADOR PARA PADRES To prevent death or serious injury, always keep child ASSEMBLAGE DE LA TABLE À LANGER within arm's reach. Always use restraint belt to prevent falls, see page 36 for details. - Página 18 ASSEMBLY MONTAJE ASSEMBLAGE ASSEMBLY MONTAJE ASSEMBLAGE ATTENTION: Playard must be fully assembled and les barres autour du bord intérieur du tissu de la securely locked before installing or using the changing table. table feature. (See To Assemble Playard section). • Attacher les deux (2) barres courtes à chaque extrémité...
- Página 19 ASSEMBLY MONTAJE ASSEMBLAGE ASSEMBLY MONTAJE ASSEMBLAGE TO SECURE THE CHANGING TABLE TO THE PLAYARD • Secure the changing table to the playard frame by fastening the hook and loop PARA ASEGURAR LA MESA CAMBIADORA A EL CORRALLITO fasteners on the underside of the changing table to the side rails of the playard frame.
- Página 20 OPERATION FUNCIONAMIENTO UTILISATION OPERATION FUNCIONAMIENTO UTILISATION del Corralito (Fig. 22b). y desconecte las Barras • Ajuste la correa hasta que esté ceñida cortas de la Barra curvada oprimiendo los alrededor de la cintura del niño. botones a presión y desmontándolas. Retire la NO AJUSTE DE MÁS (Fig.
- Página 21 ASSEMBLY MONTAJE ASSEMBLAGE ASSEMBLY MONTAJE ASSEMBLAGE • Organizador para los padres: Ponga MOBILE ASSEMBLY Parent Organizer Organizador para padres cada gancho en posición cual este alado de ARMADO DEL MÓVIL Organisateur pour parent la parte posterior del organizador. Precione ASSEMBLAGE DU MOBILE firmamente el gancho asia abajo dentro de ATTENTION: la renura asta que se encaje en su lugar...
- Página 22 ASSEMBLY MONTAJE ASSEMBLAGE ASSEMBLY MONTAJE ASSEMBLAGE deben mezclarse. Las pilas alcalinas, estándar de carbón • Attach the Mobile (a) to the Tri-shaped Arm (b), align slots on both pieces then gently y zinc, y las recargables de níquel-cadmio no deben press the two pieces together (Fig.
- Página 23 OPERATION FUNCIONAMIENTO UTILISATION OPERATION FUNCIONAMIENTO UTILISATION • El Centro musical requiere 4 pilas AA. To listen to SLEEP music, press the VOLUME CONTROL SLEEP button. Press the button to change Por favor, vea la figura 27 para instalar CONTROL DE the song.
-
Página 24: Fcc Statement
OTHER OTRO AUTRE OTHER OTRO AUTRE FCC Statement Declaración de la FCC This device complies with Part 15 of the FCC rules. Operation is subject to the following two Este dispositivo cumple con las normas de la Parte 15 de la Comisión Federal de conditions: Comunicaciones (FCC). -
Página 25: Déclaration Fcc
OTHER OTRO AUTRE OTHER OTRO AUTRE Déclaration FCC Canada ICES-003 Statement Declaración ICES-003 de Canadá Cet appareil est conforme à la Partie 15 des règles de la FCC. L’utilisation est sujette aux Déclaration NMB-003 Canada deux conditions suivantes : 1 ce dispositif ne peut causer d’interférences nuisibles, et This Class B digital apparatus complies with Industry Canada Standard ICES-003. - Página 26 Copyright © 2016, Baby Trend Inc., All Rights Reserved. Todos los derechos reservados. Tous droits réservés. Copyright © 2016, Baby Trend Inc., All Rights Reserved. Todos los derechos reservados. Tous droits réservés.