Tabla de contenido
Publicidad
Idiomas disponibles
Idiomas disponibles
Publicidad
Capítulos
Tabla de contenido

Manuales relacionados para Beta REV-3


Resumen de contenidos para Beta REV-3
- Página 2 REV-3 Grazie per la fiducia accordata e buon divertimento. Con questo libretto abbiamo voluto darLe le informazioni necessarie per un corretto uso e una buona manutenzione della Sua moto. I dati e le caratteristiche indicate sul presente manuale non impegnano la BETAMOTOR S.p.A che si riserva il diritto di apportare modifiche ai propri modelli...
- Página 3 A A A A A VVER VVER VVER VVERTENZA TENZA TENZA TENZA VVER TENZA Si raccomanda, dopo la prima ora di allenamento, di controllare tutti i serraggi, con particolare attenzione a: • Supporti pedane • Dischi freno anteriore e posteriore •...
-
Página 4: Tabla De Contenido
.1: CONOSCENZA DEL VEICOL .1: CONOSCENZA DEL VEICOL .1: CONOSCENZA DEL VEICOLO O O O O CAP .1: CONOSCENZA DEL VEICOL .1: CONOSCENZA DEL VEICOL Elementi principali ....................6 Dati identificazione veicolo ..................6 Cruscotto e comandi ....................6 Dati tecnici ......................7 Schema elettrico ....................... -
Página 6: Elementi Principali
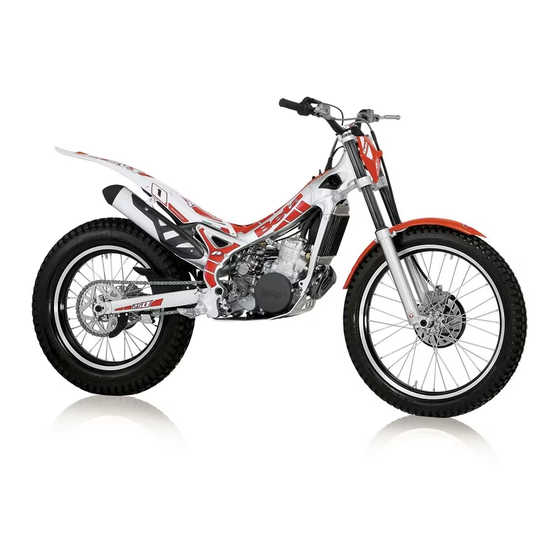
INDICE ARGOMENTI INDICE ARGOMENTI INDICE ARGOMENTI INDICE ARGOMENTI INDICE ARGOMENTI Elementi principali Dati identificazione veicolo Cruscotto e comandi Dati tecnici Schema elettrico... - Página 7 ELEMENTI PRINCIP ELEMENTI PRINCIP ELEMENTI PRINCIP ELEMENTI PRINCIP ELEMENTI PRINCIPALI 1- 1- 1- 1- 1-Scatola filtro 2 2 2 2 2-Serbatoio carburante 3- 3- 3- 3- 3-Tappo carburante 4- 4- 4- 4- 4-Silenziatore 5- 5- 5- 5- 5-Leva messa in moto 6 6 6 6 6 - Coperchio filtro D D D D D A A A A A TI IDENTIFICAZIONE VEICOL TI IDENTIFICAZIONE VEICOL TI IDENTIFICAZIONE VEICOL...
- Página 8 D D D D D A A A A A TI TECNICI TI TECNICI TI TECNICI TI TECNICI TI TECNICI P P P P P eso veicolo eso veicolo eso veicolo eso veicolo eso veicolo - - - - - in ordine di marcia (a secco) ................. 72 (kg) Dimensioni Dimensioni Dimensioni...
-
Página 9: Schema Elettrico
SCHEMA ELETTRICO SCHEMA ELETTRICO SCHEMA ELETTRICO SCHEMA ELETTRICO SCHEMA ELETTRICO... -
Página 10: Controlli E Manutenzione Prima E Dopo L'utilizzo In Fuoristrada
INDICE ARGOMENTI INDICE ARGOMENTI INDICE ARGOMENTI INDICE ARGOMENTI INDICE ARGOMENTI Controlli e manutenzione prima e dopo l’utilizzo in fuoristrada Rifornimento carburante Lubrificanti e liquidi consigliati Rodaggio Avviamento... - Página 11 CONTROLLI E MANUTENZIONE PRIMA E DOPO CONTROLLI E MANUTENZIONE PRIMA E DOPO CONTROLLI E MANUTENZIONE PRIMA E DOPO CONTROLLI E MANUTENZIONE PRIMA E DOPO CONTROLLI E MANUTENZIONE PRIMA E DOPO L L L L L ’UTILIZZO IN FUORISTRAD ’UTILIZZO IN FUORISTRAD ’UTILIZZO IN FUORISTRAD ’UTILIZZO IN FUORISTRAD ’UTILIZZO IN FUORISTRADA A A A A...
- Página 12 L L L L L UBRIFICANTI E LIQUIDI CONSIGLIA UBRIFICANTI E LIQUIDI CONSIGLIA UBRIFICANTI E LIQUIDI CONSIGLIA UBRIFICANTI E LIQUIDI CONSIGLIATI TI TI TI TI UBRIFICANTI E LIQUIDI CONSIGLIA Per un migliore funzionamento ed una più lunga durata del mezzo si raccomanda di utilizzare preferibilmente i prodotti elencati in tabella: e t l "...
- Página 13 A A A A A VVIAMENT VVIAMENT VVIAMENT VVIAMENTO O O O O VVIAMENT •Aprire il rubinetto del serbatoio carburante B B B B B OFF = chiuso ON = aperto RES = riserva •Controllare che il cambio sia in folle •Intervenire sulla leva della messa in moto affondando con il piede un colpo deciso e ruotando leggermente il comando gas...
- Página 14 INDICE ARGOMENTI INDICE ARGOMENTI INDICE ARGOMENTI INDICE ARGOMENTI INDICE ARGOMENTI Olio cambio Olio pompa freni Olio pompa frizione Olio forcelle Filtro aria Candela Freno anteriore Freno posteriore Liquido di raffreddamento Silenziatore marmitta Carburatore Lamelle Controlli dopo la pulizia Manutenzione programmata...
-
Página 15: Olio Cambio
OLIO CAMBIO OLIO CAMBIO OLIO CAMBIO OLIO CAMBIO OLIO CAMBIO Controllo Controllo Controllo Controllo Controllo Tenere il veicolo in posizione verticale rispetto al terreno. Quando il motore è freddo controllare, attraverso l’oblò A A A A A , la presenza dell’olio. Il livello dell’olio deve essere sempre visibile dall’oblò, in caso contrario procedere al rabbocco attraverso il tappo di carico B B B B B . -
Página 16: Olio Pompa Freni
OLIO POMP OLIO POMP OLIO POMPA FRENI A FRENI A FRENI A FRENI OLIO POMP OLIO POMP A FRENI F F F F F reno anteriore reno anteriore reno anteriore reno anteriore reno anteriore Controllare, attraverso l’oblò di livello A A A A A , la presenza dell’olio. - Página 17 Spurgo freno anteriore Spurgo freno anteriore Spurgo freno anteriore Spurgo freno anteriore Spurgo freno anteriore Per lo spurgo aria dal circuito del freno anteriore procedere come segue: •Togliere il cappuccio di gomma A A A A A dalla valvola B B B B B •Aprire il tappo della vaschetta olio •Inserire un’estremità...
-
Página 18: Olio Pompa Frizione
OLIO POMP OLIO POMP OLIO POMPA FRIZIONE A FRIZIONE A FRIZIONE A FRIZIONE OLIO POMP OLIO POMP A FRIZIONE Controllare, la presenza dell’olio. Il livello non deve mai essere al di sotto della metà della vaschetta. Per ripristinare il livello procedere al rabbocco svitando le due viti A A A A A , sollevando il tappo B B B B B e inserendo l’olio. -
Página 19: Olio Forcelle
OLIO FORCELLE OLIO FORCELLE OLIO FORCELLE OLIO FORCELLE OLIO FORCELLE Stelo destro Stelo destro Stelo destro Stelo destro Stelo destro Per la sostituzione procedere nel modo seguente: Togliere la ruota anteriore Togliere il manubrio ( vd. pag.29) Allentare le viti A A A A A di serraggio dello stelo e sfilare il gambale Svitare il tappo superiore Svitare il controdado di fissaggio del... - Página 20 Stelo sinistro Stelo sinistro Stelo sinistro Stelo sinistro Stelo sinistro Per la sostituzione procedere nel modo seguente: Togliere la ruota anteriore Togliere il manubrio ( vd. pag.29) Allentare le viti A A A A A di serraggio stelo Svitare il tappo gambale Togliere la molla e svuotare bene tut- to l’olio Rimettere la molla ed immettere olio...
-
Página 21: Filtro Aria
FILTRO ARIA TRO ARIA TRO ARIA TRO ARIA TRO ARIA Per accedere al filtro è sufficente svitare la vite posteriore di fissaggio del coperchio, quindi procedere nel modo seguente: •Togliere la cornice filtro ed il filtro •Lavarlo con acqua e sapone •Asciugarlo •Bagnarlo con olio per filtri, eliminandone poi l’eccedenza in modo che non... -
Página 22: Candela
CANDELA CANDELA CANDELA CANDELA CANDELA Mantenere la candela in buono stato contribuisce alla diminuzione dei consumi e all’ottimale funzionamento del motore. Per effettuare il controllo è sufficiente sfilare la pipetta della corrente e svitare la candela. Esaminare con uno spessimetro la distanza fra gli elettrodi che dovrà essere di 0,5-0,6 mm, nel caso non corrisponda a questo valore è... -
Página 23: Freno Anteriore
FRENO ANTERIORE FRENO ANTERIORE FRENO ANTERIORE FRENO ANTERIORE FRENO ANTERIORE Controllo Controllo Controllo Controllo Controllo Per verificare lo stato di usura del freno anteriore è sufficiente visionare la pinza dalla parte anteriore, dove è possibile in- travedere le estremità delle due pastiglie che dovranno presentare almeno uno strato di 2 mm di ferodo. -
Página 24: Freno Posteriore
FRENO POSTERIORE FRENO POSTERIORE FRENO POSTERIORE FRENO POSTERIORE FRENO POSTERIORE Controllo Controllo Controllo Controllo Controllo Per verificare lo stato di usura del freno posteriore è sufficiente visionare la pinza dalla parte posteriore, dove è possibile intravedere le estremità delle due pasti- glie che dovranno presentare almeno uno strato di 2 mm di ferodo. - Página 25 LIQUIDO DI RAFFREDD LIQUIDO DI RAFFREDD LIQUIDO DI RAFFREDDAMENT AMENT AMENT AMENTO O O O O LIQUIDO DI RAFFREDD LIQUIDO DI RAFFREDD AMENT Il controllo del livello deve essere effet- tuato a motore freddo nel modo seguente: •Rimuovere la griglia D •Svitare il tappo A A A A A e controllare visivamen- te il livello del liquido •Nel caso in cui il livello sia in prossimità...
-
Página 26: Carburatore
CARBURA CARBURA CARBURAT T T T T ORE CARBURA CARBURA Per un ottimale funzionamento del car- buratore è importante effettuare una accu- rata pulizia dopo ogni uscita. Dopo avere smontato la vaschetta B B B B B , ve- rificare la corretta posizione del galleg- giante accertandosi che la piastrina por- ta galleggiante A A A A A sia posizionata in modo parallelo al piano del corpo carburatore... -
Página 27: Controlli Dopo La Pulizia
CONTROLLI DOPO LA PULIZIA CONTROLLI DOPO LA PULIZIA CONTROLLI DOPO LA PULIZIA CONTROLLI DOPO LA PULIZIA CONTROLLI DOPO LA PULIZIA Dopo la pulizia del motociclo è buona norma: •Pulire il filtro dell’aria (procedere come descritto a pag. 20) •Smontare il coperchio volano per eliminare l’eventuale acqua entrata all’interno •In caso di smontaggio e rimontaggio accensione, verificare la posizione dello statore contrassegnata da un indicatore sulla piastra e da uno corrispondente su una colonnetta di fissaggio del semicarter... -
Página 28: Regolazione Freni
INDICE ARGOMENTI INDICE ARGOMENTI INDICE ARGOMENTI INDICE ARGOMENTI INDICE ARGOMENTI Regolazione freni Regolazione frizione Regolazione minimo Regolazione gioco gas Controllo e regolazione gioco sterzo Tensionamento catena Regolazione sospensione anteriore Posizionamento manubrio Regolazione ammortizzatore posteriore... -
Página 29: Regolazione Frizione
REGOLAZIONE FRENI REGOLAZIONE FRENI REGOLAZIONE FRENI REGOLAZIONE FRENI REGOLAZIONE FRENI F F F F F reno anteriore reno anteriore reno anteriore reno anteriore reno anteriore Il freno anteriore è del tipo a disco con comando idraulico per cui necessita solo di manutenzione ordinaria. -
Página 30: Regolazione Minimo
REGOLAZIONE MINIMO REGOLAZIONE MINIMO REGOLAZIONE MINIMO REGOLAZIONE MINIMO REGOLAZIONE MINIMO Per eseguire correttamente questa operazione si consiglia di effettuarla a motore caldo, collegando un contagiri elettronico al cavo candela. Intervenire poi con un giravite sulla vite di registro A A A A A tirando il minimo a 1000 rpm. -
Página 31: Tensionamento Catena
TENSIONAMENT TENSIONAMENT TENSIONAMENTO CA O CA O CATENA O CA TENA TENA TENA TENSIONAMENT TENSIONAMENT O CA TENA Per una più lunga durata della catena di trasmissione è opportuno controllare periodicamente la sua tensione. Tenerla sempre pulita dalla sporcizia depositata e lubrificarla. Se il gioco della catena supera i 20 mm procedere al suo tensionamento. -
Página 32: Regolazione Sospensione Anteriore
REGOLAZIONE SOSPENSIONE REGOLAZIONE SOSPENSIONE REGOLAZIONE SOSPENSIONE REGOLAZIONE SOSPENSIONE REGOLAZIONE SOSPENSIONE ANTERIORE ANTERIORE ANTERIORE ANTERIORE ANTERIORE F F F F F orcella orcella orcella orcella orcella •Per una guida più reattiva svitare completamente pomello registrazione B B B B B rispetto alla posizione standard •Per una guida più... - Página 33 REGOLAZIONE AMMOR REGOLAZIONE AMMOR REGOLAZIONE AMMORTIZZA TIZZA TIZZAT T T T T ORE TIZZA REGOLAZIONE AMMOR REGOLAZIONE AMMOR TIZZA POSTERIORE POSTERIORE POSTERIORE POSTERIORE POSTERIORE Informazioni sulle regolazioni Informazioni sulle regolazioni Informazioni sulle regolazioni Informazioni sulle regolazioni Informazioni sulle regolazioni •Per una guida più reattiva, aprire il pomello di regolazione in compressione A A A A A •Per una guida più...
-
Página 34: Ricerca Del Guasto
INDICE ARGOMENTI INDICE ARGOMENTI INDICE ARGOMENTI INDICE ARGOMENTI INDICE ARGOMENTI Ricerca del guasto... - Página 35 ' l l t i t i t i ' l l ò à t à t...
- Página 36 Ammortizzatore posteriore ................32 Avviamento ....................12 Candela ......................20 Carburatore ....................25 Controlli dopo la pulizia ................26 Controlli e manutenzione prima e dopo utilizzo in fuoristrada ......10 Cruscotto e comandi ..................6 Dati identificazione veicolo ................6 Dati tecnici .....................
- Página 37 NOTE ....................
- Página 38 REV-3 Thank you for choosing BETA. Wishing you a lots of good biking! This manual wiIl give you the information you need to use your motorcycle correctly and to keep it in excellent condition. BETAMOTOR S.p.A. reserves the right to change the data and features described in...
- Página 39 A A A A A TTENTION TTENTION TTENTION TTENTION TTENTION After the first training hour, check all the tightenings and in a particular manner: • Footboard supports • Front and rear brake disks • Wheel rims • Shock absorber bolt •...
- Página 40 SECTION 1: GENERAL INFORMA SECTION 1: GENERAL INFORMA TION TION SECTION 1: GENERAL INFORMA SECTION 1: GENERAL INFORMA SECTION 1: GENERAL INFORMATION TION TION Main parts ..................... 42 Vehicle identification data................42 Instrument panel and controls................42 Technical data ......................43 Electrical diagram ....................
-
Página 42: Main Parts
INDEX INDEX INDEX INDEX INDEX Main parts Vehicle identification data Instrument panel and controls Technical data Electrical diagram... - Página 43 MAIN P MAIN P MAIN PAR MAIN P MAIN P ARTS TS TS TS TS 1- 1- 1- 1- 1-Filter box 2 2 2 2 2-Fuel tank 3- 3- 3- 3- 3-Fuel cap 4- 4- 4- 4- 4-Silencer 5- 5- 5- 5- 5-Kick starter 6- 6- 6- 6- 6-Filter cover VEHICLE IDENTIFICA VEHICLE IDENTIFICA TION D...
- Página 44 TECHNICAL D TECHNICAL D TECHNICAL DA A A A A T T T T T A A A A A TECHNICAL D TECHNICAL D V V V V V ehicle weight ehicle weight ehicle weight ehicle weight ehicle weight - - - - - ready to operate (unfueled) ..................72 (kg) Dimensions Dimensions Dimensions...
- Página 45 ELECTRICAL DIA ELECTRICAL DIA GRAM GRAM ELECTRICAL DIA ELECTRICAL DIA GRAM ELECTRICAL DIA GRAM GRAM...
-
Página 46: Check And Maintenance Before And After Off-Road Use
INDEX INDEX INDEX INDEX INDEX Check and maintenance before and after off-road use Fueling Recommended lubrificants and liquids Breaking in Start up... - Página 47 CHECKS AND MAINTENANCE BEFORE AND AFTER OFF CHECKS AND MAINTENANCE BEFORE AND AFTER OFF CHECKS AND MAINTENANCE BEFORE AND AFTER OFF-RO -ROAD USE AD USE AD USE AD USE CHECKS AND MAINTENANCE BEFORE AND AFTER OFF CHECKS AND MAINTENANCE BEFORE AND AFTER OFF AD USE In order to avoid problems connected to the operation of the vehicle, it is advisable to perform a number of checks and maintenance operations before and after use.
-
Página 48: Recommended Lubricants And Liquids
RECOMMENDED LUBRICANTS AND LIQUIDS RECOMMENDED LUBRICANTS AND LIQUIDS RECOMMENDED LUBRICANTS AND LIQUIDS RECOMMENDED LUBRICANTS AND LIQUIDS RECOMMENDED LUBRICANTS AND LIQUIDS For better operation and longer vehicle life, we advise you to use the products listed in the following chart: M " "... - Página 49 ST ST STAR ARTUP •Open fuel tank valve B B B B B OFF = closed ON = open RES = reserve •Check that the gears are in neutral •Depress the kick-starter with a sharp movement of the foot and slightly turn the gas control •Always close the fuel tank valve when the engine is off.
- Página 50 INDEX INDEX INDEX INDEX INDEX Gearbox oil Brake pump oil Clutch pump all Fork oil Air filter Spark plug Front brake Rear brake Cooling liquid Silencer Carburetor Valve petals Checks after cleaning Maintenance schedule...
-
Página 51: Gearbox Oil
GEARBOX OIL GEARBOX OIL GEARBOX OIL GEARBOX OIL GEARBOX OIL Check Check Check Check Check Hold the vehicle vertical to the ground. When engine is cold check the oil level by means of porthole A A A A A . The oil level must be always visible from the porthole. -
Página 52: Brake Pump Oil
BRAKE PUMP OIL BRAKE PUMP OIL BRAKE PUMP OIL BRAKE PUMP OIL BRAKE PUMP OIL F F F F F ront brake ront brake ront brake ront brake ront brake Check the oil level by means of oiI port- hole A A A A A . The oil level must be always vis- ible from the porthole. - Página 53 Bleeding of front brake Bleeding of front brake Bleeding of front brake Bleeding of front brake Bleeding of front brake To bleed air from the front brake circuit, proceed as follows: •Remove the rubber cap A A A A A from valve B B B B B •Open the oiI sump cap •Insert one end of a tube into valve B B B B B and the other end into a container...
-
Página 54: Clutch Pump Oil
CLUTCH PUMP OIL CLUTCH PUMP OIL CLUTCH PUMP OIL CLUTCH PUMP OIL CLUTCH PUMP OIL Check the oil level. The oil level must never be below half the tank capacity. To restore the oil level, top up by unscrewing the two screws A A A A A , lifting cop B B B B B and adding oil. -
Página 55: Fork Oil
FORK OIL FORK OIL FORK OIL FORK OIL FORK OIL Right shaft Right shaft Right shaft Right shaft Right shaft To replace the oil, proceed as follows: Remove the front wheel Remove the handlebar (see pag.65) Loosen left shaft lock the screws A A A A A and take off the slider Unscrew upper plug Unscrew fixing lock nut and take off... - Página 56 Left shaft Left shaft Left shaft Left shaft Left shaft To replace the oil, proceed as follows: Remove the front wheel Remove the handlebar (see pag. 65) Unloose the shaft lock the screws A A A A A Unscrew slider plug Remove the spring and totally empty the oil Reset the...
-
Página 57: Air Filter
AIR FIL AIR FIL AIR FILTER AIR FIL AIR FIL To access the filter you must remove the filter cover by unscrewing the rear screw, and then proceed as follows: •Remove filter capping and filter •Wash the filter with water and soap •Dry the filter •Wet the filter with filter oil, removing any excess oil so that there is no dripping... -
Página 58: Spark Plug
SP SP SP SPARK PL ARK PL ARK PLUG ARK PL ARK PL Keeping the spark plug in good condition wiII reduce fuel consumption and increase engine performance. To perform the check, simply slide off the electrical connection tube and unscrew the spark plug. -
Página 59: Front Brake
FRONT BRAKE FRONT BRAKE FRONT BRAKE FRONT BRAKE FRONT BRAKE Check Check Check Check Check To check the front brake for wear, simply observe the caliper from the front, where it is possible to see the ends of the two pads. -
Página 60: Rear Brake
REAR BRAKE REAR BRAKE REAR BRAKE REAR BRAKE REAR BRAKE Check Check Check Check Check To check the rear brake for wear, simply observe the caliper from the rear, where it is possible to see the ends of the two pads. These pads should have at least a 2 mm Iayer of Iining. -
Página 61: Liquid Coolant
LIQUID COOLANT LIQUID COOLANT LIQUID COOLANT LIQUID COOLANT LIQUID COOLANT The level check must be performed with the engine cold, as follows: •Remove plastic grid D •Unscrew cap A A A A A and check the level of the liquid •lf the level is dose to the bottom of pipe proceed to add liquid Circuit capacity is indicated in the table... -
Página 62: Carburetor
CARBURET CARBURET CARBURETOR CARBURET CARBURET To ensure excellent carburetor performance, the carburetor must be cleaned thoroughly after every use of the motorcycle. After having removed tank B, B, B, B, B, check the correct position of the float, making sure that float support plate A A A A A is parallel to the plane of the carburetor, as shown in the figure. -
Página 63: Checks After Cleaning
CHECKS AFTER CLEANING CHECKS AFTER CLEANING CHECKS AFTER CLEANING CHECKS AFTER CLEANING CHECKS AFTER CLEANING After cleaning the motorcycle, it is good practice to check: •Clean the air filter (proceed as described on pag.56) •Remove the flywheel cover to eliminate any water that may have entered. •If ignition is disassembled and reassembled, check the position of the stator marked by an indicator on the plate and by a corresponding marker on a halt- casing fastening support. -
Página 64: Adjustement Of Brake
INDEX INDEX INDEX INDEX INDEX Adjustment of brakes Adjustment of clutch Adjustment of idling speed Adjustment of gas clearance Check and adjustment of steering gear Tightening the chain Adjustment of front suspension Positioning of handlebar Adjustment of rear shock absorber... - Página 65 ADJUSTMENT OF BRAKES ADJUSTMENT OF BRAKES ADJUSTMENT OF BRAKES ADJUSTMENT OF BRAKES ADJUSTMENT OF BRAKES F F F F F ront brake ront brake ront brake ront brake ront brake The front brake is disk type with hydraulic control, and therefore requires only ordi- nary maintenance.
-
Página 66: Adjustement Of Idling Speed
ADJUSTMENT OF IDLING SPEED ADJUSTMENT OF IDLING SPEED ADJUSTMENT OF IDLING SPEED ADJUSTMENT OF IDLING SPEED ADJUSTMENT OF IDLING SPEED In order to perform this operation correctly, we advise you to do it when the engine is hot, connecting an electric revolution counter to the spark plug wire. -
Página 67: Tightening The Chain
TIGHTENING THE CHAIN TIGHTENING THE CHAIN TIGHTENING THE CHAIN TIGHTENING THE CHAIN TIGHTENING THE CHAIN Checking the drive chain periodically to ensure longer chain life. Always keep it Iubricated and clean of deposited dirt. If play exceeds 20 mm, tighten the chain as follows: •Loosen nut A A A A A •Adjust lever B B B B B... -
Página 68: Adjustement Of Front Suspension
ADJUSTEMENT OF FRONT ADJUSTEMENT OF FRONT ADJUSTEMENT OF FRONT ADJUSTEMENT OF FRONT ADJUSTEMENT OF FRONT SUSPENSION SUSPENSION SUSPENSION SUSPENSION SUSPENSION F F F F F ork •For a more active “quicker” suspension setting, totally unscrew regulation knob B B B B B compared to the std. position •For a more controlled “slower ”... -
Página 69: Adjustement Of Rear Shock Absorber
ADJUSTMENT OF REAR SHOCK ADJUSTMENT OF REAR SHOCK ADJUSTMENT OF REAR SHOCK ADJUSTMENT OF REAR SHOCK ADJUSTMENT OF REAR SHOCK ABSORBER ABSORBER ABSORBER ABSORBER ABSORBER Adjustment of spring Ioad Adjustment of spring Ioad Adjustment of spring Ioad Adjustment of spring Ioad Adjustment of spring Ioad •For a more active “quicker”... -
Página 70: Troubleshooting
INDEX INDEX INDEX INDEX INDEX Troubleshooting... - Página 71 t l i l l i , t r . f f s t i i t r i t r i t r i t r i r t i r t...
- Página 72 Adjustment of brakes ..................64 Adjustment of clutch ..................64 Adjustment of front suspension ............... 67 Adjustment of gas clearance ................65 Adjustment of handlebar ................67 Adjustment of idling speed ................65 Air filter ......................56 Bleeding of brakes ..................52 Bleeding of clutch ..................
- Página 73 NOTES ....................
- Página 74 REV-3 Gracias por la confianza otorgada y felicitaciones por su óptima elección. Con este manual, pretendemos darle la información necesaria para un correcto uso y un adecuado mantenimiento de su moto. Los datos y caracteristicas indicadas en el presente manual, no comprometen a BETAMOTOR S.p.A.
- Página 75 AVISO AVISO AVISO AVISO AVISO Se recomienda , después de la primera hora de adiestramiento, controlar todas las sujeciones, y en concreto: • Soportes plataformas • Discos freno delantero y trasero • Radios ruedas • Tornillo de amortiguador • Torniller’ a motor •...
- Página 76 .1: CONOCIMlENT .1: CONOCIMlENT O DEL VEHICUL O DEL VEHICUL O DEL VEHICULO O O O O CAP.1: CONOCIMlENT .1: CONOCIMlENT .1: CONOCIMlENTO DEL VEHICUL O DEL VEHICUL Elementos principales ......................78 Datos identificación vehículo ....................78 Tablero y mandos ........................78 Datos técnicos ..........................
-
Página 78: Datos Identificación Vehículo
I I I I I NDICE ARGUMENT NDICE ARGUMENT NDICE ARGUMENT NDICE ARGUMENTAL AL AL NDICE ARGUMENT Elementos principales Datos identificación vehículo Tablier y mandos Datos técnicos Esquema eléctrico... -
Página 79: Os Identifica Os Identificacion Cion Vehlculo
ELEMENT ELEMENT OS PRINCIP OS PRINCIP ALES ALES ELEMENT ELEMENTOS PRINCIP ELEMENT OS PRINCIP OS PRINCIPALES ALES ALES 1 1 1 1 1 -Caja de filtro 2 2 2 2 2 -Depósito gasolina 3 3 3 3 3 -Tapón gasolina 4 4 4 4 4 -Silencioso 5 5 5 5 5 -Kick-starter 6 6 6 6 6-Tapa filtro D D D D D A A A A A T T T T T OS IDENTIFICA... -
Página 80: Alimentación
D D D D D A A A A A T T T T T OS TECNICOS OS TECNICOS OS TECNICOS OS TECNICOS OS TECNICOS P P P P P eso del vehículo eso del vehículo eso del vehículo eso del vehículo eso del vehículo -en orden de marcha (en vacío) ..................72 (kg) Dimensiones... -
Página 81: Esquema Eléctrico
ESQUEMA ELÉCTRICO ESQUEMA ELÉCTRICO ESQUEMA ELÉCTRICO ESQUEMA ELÉCTRICO ESQUEMA ELÉCTRICO... -
Página 82: Llenado De Carburante
INDICE ARGUMENT INDICE ARGUMENT INDICE ARGUMENTAL AL AL INDICE ARGUMENT INDICE ARGUMENT Control y mantenimiento antes y después de utilizar por caminos Llenado de carburante Lubricantes y Iíquidos aconsejados Rodaje Arranque... - Página 83 CONTROL Y MANTENIMIENT CONTROL Y MANTENIMIENT CONTROL Y MANTENIMIENTO ANTES Y DESPUES DE UTILIZAR POR O ANTES Y DESPUES DE UTILIZAR POR O ANTES Y DESPUES DE UTILIZAR POR O ANTES Y DESPUES DE UTILIZAR POR CONTROL Y MANTENIMIENT CONTROL Y MANTENIMIENT O ANTES Y DESPUES DE UTILIZAR POR CAMINOS (NO CARRETERA) CAMINOS (NO CARRETERA)
- Página 84 LUBRICANTES Y LIQUIDOS ACONSEJADOS LUBRICANTES Y LIQUIDOS ACONSEJADOS LUBRICANTES Y LIQUIDOS ACONSEJADOS LUBRICANTES Y LIQUIDOS ACONSEJADOS LUBRICANTES Y LIQUIDOS ACONSEJADOS Para un mejor funcionamiento y una más larga durada del vehícuIo, se recomienda, utilizar preferiblemente los productos indicados en la tabla: I S I "...
-
Página 85: Arranque
ARRANQUE ARRANQUE ARRANQUE ARRANQUE ARRANQUE • Abrir el grifo del depósito de gasolina B B B B B OFF = cerrado ON = abierto RES = reserva •Comprobar que el cambio esté en punto muerto •Efectuar con el pie, un golpe decidido sobre la palanca de arranque,girando ligeramenfe el mando del gas •A motor parado, cerrar siempre eI grifo... -
Página 86: Aceite Cambio
INDICE ARGUMENT INDICE ARGUMENT INDICE ARGUMENTAL AL AL INDICE ARGUMENT INDICE ARGUMENT Aceite cambio Aceite bomba freno Aceite bomba embrague Aceite horquilla Filtro aire Bujía Freno anterior Freno posterior Líquido de refrigeracíon Silenciador escape Carburador Caja láminas Control después de la limpieza Mantenimiento programado... - Página 87 ACEITE CAMBIO ACEITE CAMBIO ACEITE CAMBIO ACEITE CAMBIO ACEITE CAMBIO Control Control Control Control Control Colocar el vehículo en posición vertical respecto al suelo. Motor frio comprobar a través de la portilla A A A A A , la presencia del mismo.
-
Página 88: Aceite Bomba De Freno
Atención: Atención: Atención: Atención: Si se detecta fojedad en la leva, puede ser debido a burbujas deaire en circuito, se recomienda dirajase los antes posible al concesionario BETA. Nota: Nota: Nota: Nota: Nota: Para las sustituciones atenerse a la tabla de la pág. - Página 89 Purga freno anterior Purga freno anterior Purga freno anterior Purga freno anterior Purga freno anterior Para el purgado de aire del circuito de freno anterior, proceder como sigue: •Sacar el capuchón de goma A A A A A de la válvula B B B B B •Abrir el tapón del recipiente de aceite •Introducir la extremidad de un tubo en la...
-
Página 90: Aceite Bomba Embrague
ACEITE BOMBA EMBRAGUE ACEITE BOMBA EMBRAGUE ACEITE BOMBA EMBRAGUE ACEITE BOMBA EMBRAGUE ACEITE BOMBA EMBRAGUE Comprobar la presencia de aceite. EI nivel no debe ser nunca inferior a la mitad del recipiente. Para añadir al nivel, proceder al Ilenado desenroscando los dos tornillos A A A A A , sacar la tapa B B B B B y poner aceite. -
Página 91: Aceite Horquilla
ACEITE HORQUILLA ACEITE HORQUILLA ACEITE HORQUILLA ACEITE HORQUILLA ACEITE HORQUILLA Barra derecha Barra derecha Barra derecha Barra derecha Barra derecha Para la sustitución proceder del modo siguiente: Desmontar la rueda delantera Desmontar el manillar ( ver pág. 101) Aflojar los tornillos A A A A A que cierra el vástago y sacar la barra Desenroscar el tapón superior Desenroscar la contratuerca del... - Página 92 Barra izquierda Barra izquierda Barra izquierda Barra izquierda Barra izquierda Para la sustitución proceder del modo siguiente: Desmontar la rueda delantera Desmontar el manillar ( ver pág. 101) Aflojar los tornillos A A A A A que cierra el vástago Desenroscar el tapón de la barra Sacar el muelle y vaciar bien todo el aceite...
-
Página 93: Filtro Aire
FILTRO AIRE TRO AIRE TRO AIRE TRO AIRE TRO AIRE Para acceder al filtro es necesario desmontar la tapa, desatornillando el tornillo posterior, entonces proceder en el siguiente modo: •Quitar el marco filtro y el filtro •Lavarlo con agua y jabón •Enjuagarlo •Bañarlo con aceite para filtro, eliminado la excedencia, de modo que no gotee. -
Página 94: Bujía
BUJIA BUJIA BUJIA BUJIA BUJIA Mantener la bujía en buen estado, contribuye a la disminución de consumo y optimiza el funcionamiento del motor. Para efectuar el control en necesario sacar la pipa de corriente y desenroscar la bujía. Examinar con una galga, la distancia entre los electrodos que deberá ser 0,5-0,6 mm, en caso que no corresponda a este valor, es posible corregirla, golpeando ligeramente el electrodo de masa. -
Página 95: Freno Anterior
FRENO ANTERIOR FRENO ANTERIOR FRENO ANTERIOR FRENO ANTERIOR FRENO ANTERIOR Control Control Control Control Control Para verificar el estado de uso del freno anterior es necesario visionar la pinza de la parte anterior, luego es posible entrever la extremidad de las dos pastillas que deberán presentar por lo menos un estrato de 2 mm de ferodo. -
Página 96: Freno Posterior
FRENO POSTERIOR FRENO POSTERIOR FRENO POSTERIOR FRENO POSTERIOR FRENO POSTERIOR Control Control Control Control Control Para verificar el estado de uso del freno posterior es necesario visionar la pinza por la parte posterior, donde es posible entrever las extremidades de Ias dos pastillas, que deberán presentar al menos un estrato de 2 mm de ferodo. -
Página 97: Líquido De Refrigeración
LIQUIDO DE REFRIGERACION LIQUIDO DE REFRIGERACION LIQUIDO DE REFRIGERACION LIQUIDO DE REFRIGERACION LIQUIDO DE REFRIGERACION EI control del nivel se tiene que efectuar con el motor frío de la siguiente manera: •Sacar la rejilla D •Destornillar el tapón A A A A A y controlar visualmente eI nivel del liquído •En el caso en que el nivel esté... -
Página 98: Carburador
CARBURADOR CARBURADOR CARBURADOR CARBURADOR CARBURADOR Para un optimo fuincuanamiento del carburador, es importante efectuar una depurada limpieza después de cada salida. Después de haber desmontado la vasija B B B B B , verificar la correcta posición del flotador, asegurandose que el soporte del flotador A, A, A, A, A, este posicionado de forma paralela al plano del cuerpo carburador, tal como indica la figura. -
Página 99: Control Después De La Limpieza
CONTROL DESPUES DE LA LIMPIEZA CONTROL DESPUES DE LA LIMPIEZA CONTROL DESPUES DE LA LIMPIEZA CONTROL DESPUES DE LA LIMPIEZA CONTROL DESPUES DE LA LIMPIEZA Después de la limpieza del vehículo, es buena norma controlar: •Lavar el filtro de l’aire (proceder como lo descrito en la pág. 92) •Desmontar la tapa del volante, para eliminar la eventual agua depositada. -
Página 100: Regulación Frenos
INDICE ARGUMENT INDICE ARGUMENT INDICE ARGUMENTAL AL AL INDICE ARGUMENT INDICE ARGUMENT Regulación frenos Regulación embrague Regulación mínimo (ralentí) Regulación juego gas Control y regulación juego manillar Tensado cadena Regulación suspensíon anterior Posición manillar Regulación amortiguador posterior... -
Página 101: Regulacion Frenos
REGULACION FRENOS REGULACION FRENOS REGULACION FRENOS REGULACION FRENOS REGULACION FRENOS F F F F F reno anterior reno anterior reno anterior reno anterior reno anterior EI freno anterior es de tipo a disco, con mando hidráulico, por lo tanto exige solamente el mantenimento ordinario. -
Página 102: Regulación Juego Gas
REGULACION MINIMO (RALENTI) REGULACION MINIMO (RALENTI) REGULACION MINIMO (RALENTI) REGULACION MINIMO (RALENTI) REGULACION MINIMO (RALENTI) Para seguir correctamente esta operación, se aconseja efectuarla a motor caliente colocando un cuentavueltas electrónico al cable de la bujía. lntervenir después con un destornillador, sobre el tornillo del registro A A A A A , regulando el mínimo a 1000 rpm (ralentí). -
Página 103: Tensado Cadena
TENSADO CADENA TENSADO CADENA TENSADO CADENA TENSADO CADENA TENSADO CADENA Para una más larga durada de la cadena de transmisión, es oportuno controlar periódicamente su tensado. Tenerlo siempre limpia de la suciedad que se deposita y lubrificarla. Si el juego de la cadena, supera los 20 mm proceder a su tensado. -
Página 104: Regulación Suspensión Anterior
REGULACION SUSPENSION REGULACION SUSPENSION REGULACION SUSPENSION REGULACION SUSPENSION REGULACION SUSPENSION ANTERIOR ANTERIOR ANTERIOR ANTERIOR ANTERIOR Regulación precarga muelle Regulación precarga muelle Regulación precarga muelle Regulación precarga muelle Regulación precarga muelle •Para una conducción mas competitiva, desenroscar completamente el tornillo de registro B B B B B con respecto a la posición standard •Para una conducción mas controlada,... -
Página 105: Regulación Amortiguador Posterior
REGULACIÓN REGULACIÓN REGULACIÓN AMORTIGUADOR AMORTIGUADOR AMORTIGUADOR REGULACIÓN REGULACIÓN AMORTIGUADOR AMORTIGUADOR POSTERIOR POSTERIOR POSTERIOR POSTERIOR POSTERIOR Informaciones sobre la regulación Informaciones sobre la regulación Informaciones sobre la regulación Informaciones sobre la regulación Informaciones sobre la regulación •Para una conducción mas competitiva, abrir el tornillo de regulación en compresión A A A A A •Para una conducción mas controlada,... - Página 106 INDICE ARGUMENT INDICE ARGUMENT INDICE ARGUMENTAL AL AL INDICE ARGUMENT INDICE ARGUMENT Búqueda de la averia...
- Página 107 ó ó ó ó á ó í j ú i r i ú ì j í j í j ò ò ò ò ò ó i r i l l i í j i r i i r i i r i é...
- Página 108 Aceite bomba freno: freno anterior y posterior ..........87 Aceite bomba embrague ................89 Aceite cambio: control y sustitución ............... 86 Aceite horquilla: barra derecha ..............90 Aceite horquilla: barra izquierda ..............91 Amortiguadoer posterior ................. 104 Arranque ......................84 Bujía ......................
- Página 109 NOTAS ....................
- Página 110 REV-3 Merci de votre confiance et bon divertissement. Ce livret contient les informations nécessaires pour vous permettre d’utiliser et d’entretenir correctement votre moto. Les informations données dans ce livret sont sans engagement pour BETAMOTOR S.p.A. qui se réserve le droit de modifier ses modèles à tout moment.
- Página 111 A A A A A TTENTION TTENTION TTENTION TTENTION TTENTION Après la première heure d’entraînement, nous recommandons de contrôler tous les serrages, avec une attention particulière pour les suivants: • Supports des cale-pieds • Disques de frein avant et arrière •...
- Página 112 CHAP CHAP . I: GENÈRALITÈS . I: GENÈRALITÈS CHAP CHAP CHAP. I: GENÈRALITÈS . I: GENÈRALITÈS . I: GENÈRALITÈS Parties principales ........................114 Identification du véhicule ......................114 Planche de bord et commandes ..................... 114 Caractéristiques techniques..................... 115 Schéma électrique ........................116 CHAP CHAP CHAP.
- Página 114 T T T T T ABLE DES MA ABLE DES MA ABLE DES MATIÈRES ABLE DES MA TIÈRES TIÈRES TIÈRES ABLE DES MA TIÈRES Parties principales Identification du véhicule Planche de bord et commandes Caractéristiques techniques Schéma électrique...
-
Página 115: Numéro De Cadre
P P P P P AR TIES PRINCIP TIES PRINCIP ALES ALES ARTIES PRINCIP TIES PRINCIP TIES PRINCIPALES ALES ALES 1 1 1 1 1 -Boîtier de filtre 2 2 2 2 2 -Réservoir à carburant 3 3 3 3 3 -Bouchon du carburant 4 4 4 4 4 -Silencieux 5 5 5 5 5 -Kick starter 6 6 6 6 6 -Couvercle de filtre IDENTIFICA IDENTIFICA... -
Página 116: Caractéristiques Techniques
CARACTÉRISTIQUES TECHNIQUES CARACTÉRISTIQUES TECHNIQUES CARACTÉRISTIQUES TECHNIQUES CARACTÉRISTIQUES TECHNIQUES CARACTÉRISTIQUES TECHNIQUES P P P P P oids du véhicule oids du véhicule oids du véhicule oids du véhicule oids du véhicule -à vide en ordre de marche...................72 (kg) Dimensiones Dimensiones Dimensiones Dimensiones Dimensiones -Iongueur hors tout....................... - Página 117 SCHÉMA ÉLETRIQUE SCHÉMA ÉLETRIQUE SCHÉMA ÉLETRIQUE SCHÉMA ÉLETRIQUE SCHÉMA ÉLETRIQUE...
-
Página 118: Contróles Et Entretien Avant Et Après L'utilisation En Tout-Terrain
T T T T T ABLES DES MA ABLES DES MA ABLES DES MATIÉRES ABLES DES MA TIÉRES TIÉRES TIÉRES ABLES DES MA TIÉRES Contrôles et entretien avant et après l’utilisation en tout-terrain Ravitaillement en carburant Lubrifiants et liquides conseillés Rodage Démarrage... - Página 119 CONTRÔLES ET ENTRETIEN A CONTRÔLES ET ENTRETIEN A CONTRÔLES ET ENTRETIEN AV V V V V ANT ET APRÈS L ANT ET APRÈS L ANT ET APRÈS L ANT ET APRÈS L’UTILISA ’UTILISA ’UTILISA ’UTILISATION EN TION EN TION EN TION EN CONTRÔLES ET ENTRETIEN A CONTRÔLES ET ENTRETIEN A...
-
Página 120: Rodage
LUBRIFIANT ET LIQUIDES PRÉCONISÉS LUBRIFIANT ET LIQUIDES PRÉCONISÉS LUBRIFIANT ET LIQUIDES PRÉCONISÉS LUBRIFIANT ET LIQUIDES PRÉCONISÉS LUBRIFIANT ET LIQUIDES PRÉCONISÉS Pour un fonctionnement meilleur et une plus grande Iongévité du véhicule, il est recommandé d’utiliser de préférence Ies produits indiqués dans le tableau: É... -
Página 121: Démarrage
DÉMARRAGE DÉMARRAGE DÉMARRAGE DÉMARRAGE DÉMARRAGE •Ouvrir le robinet du réservoir à carburant B B B B B OFF = fermé ON = ouvert RES = réserve •Contrôler que les vitesses sont au point mort •Agir sur le levier de kick, en poussant à fond avec le pied d’un coup décidé... -
Página 122: T T T T T Able Des Ma
T T T T T ABLE DES MA ABLE DES MA ABLE DES MATIÈRES ABLE DES MA TIÈRES TIÈRES TIÈRES ABLE DES MA TIÈRES Huile boîte de vitesses Liquide de frein Liquide d’embrayage Huile de fourche Filtre à air Bougie Frein avant Frein arrière Liquide de refroidissement... -
Página 123: Huile Boîte De Vitesses
HUILE BOÎTE DE VITESSES HUILE BOÎTE DE VITESSES HUILE BOÎTE DE VITESSES HUILE BOÎTE DE VITESSES HUILE BOÎTE DE VITESSES Contrôle Contrôle Contrôle Contrôle Contrôle Tenir le véhicule à la verticale par rapport au sol. Quand le moteur est froid contrôler, par le hublot A A A A A , la présence d’huile. -
Página 124: Liquide De Frein
LIQUIDE DE FREIN LIQUIDE DE FREIN LIQUIDE DE FREIN LIQUIDE DE FREIN LIQUIDE DE FREIN F F F F F rein avant rein avant rein avant rein avant rein avant Contrôler la présence de liquide par le hublot A A A A A . Le niveau d’huile doit être toujours visible du hublot. - Página 125 Purge du frein avant Purge du frein avant Purge du frein avant Purge du frein avant Purge du frein avant Pour purger le circuit de frein avant de l’air éventuel, procéder ainsi:. •Enlever le capuchon A A A A A en caoutchouc de la valve B B B B B •Ouvrir le bouchon du réservoir de liquide •Enfiler l’extrémité...
- Página 126 LIQUIDE D LIQUIDE D LIQUIDE D’EMBRA ’EMBRA ’EMBRA ’EMBRAY Y Y Y Y A A A A A GE LIQUIDE D LIQUIDE D ’EMBRA Contrôler la présence de liquide. Le niveau ne doit jamais descendre en deçà de la moitié du réservoir. Pour rétablir le niveau, dévisser les deux vis A A A A A soulever le bouchon B B B B B et faire l’appoint.
-
Página 127: Huile De Fourche
HUILE DE FOURCHE HUILE DE FOURCHE HUILE DE FOURCHE HUILE DE FOURCHE HUILE DE FOURCHE T T T T T ube de droite ube de droite ube de droite ube de droite ube de droite Pour la vidange, procéder ainsi: Enlever la roue antérieure Déposer le guidon (voir page 137) Deserrer les vis A A A A A de serrage du tige... - Página 128 T T T T T ube de gauche ube de gauche ube de gauche ube de gauche ube de gauche Pour la vidange, procéder ainsi: Enlever la roue antérieure Déposer le guidon (voir page 137) Deserrer les vis A A A A A de serrage du tige Dévisser le bouchon de la jambe Retirer le ressort et enlever bien tout l’huile...
-
Página 129: Filtre À Air
FILTRE A AIR TRE A AIR TRE A AIR TRE A AIR TRE A AIR Pour avoir accès au filtre il faut démonter le couvercle, dévissent la vis arrière, puis procéder ainsi: •Enlever la couverture de protection du filtre et le filtre •Laver à... -
Página 130: Bougie
BOUGIE BOUGIE BOUGIE BOUGIE BOUGIE Le maintien d’une bougie en bon état permet de limiter la consommation et contribue à un meilleur fonctionnement du moteur. Pour effectuer le contrôle, il suffit de retirer le capuchon et de dévisser la bougie. Mesurer l’écartement des électrodes avec une cale d’épaisseur, il doit être de 0,5-0,6 mm. -
Página 131: Frein Avant
FREIN AVANT FREIN AVANT FREIN AVANT FREIN AVANT FREIN AVANT Contrôle Contrôle Contrôle Contrôle Contrôle Pour contrôler l’usure du frein avant, il suffit de regarder l’étrier par l’avant d’où l’on aperçoit les extrémités des deux plaquettes. CeIles-ci doivent avoir au moins 2 mm d’épaisseur de garniture. -
Página 132: Frein Arrière
FREIN ARRIÈRE FREIN ARRIÈRE FREIN ARRIÈRE FREIN ARRIÈRE FREIN ARRIÈRE ContrôIe ContrôIe ContrôIe ContrôIe ContrôIe Pour contrôler l’usure du frein arrière, il suffit de regarder l’étrier par le postérieur d’où l’on aperçoit les extrémités des deux plaquettes. Celles-ci doivent avoir au moins 2 mm d’épaisseur de garniture. -
Página 133: Liquide De Refroidissement
LIQUIDE DE REFROIDISSEMENT LIQUIDE DE REFROIDISSEMENT LIQUIDE DE REFROIDISSEMENT LIQUIDE DE REFROIDISSEMENT LIQUIDE DE REFROIDISSEMENT Le contrôle du niveau s’effectue á moteur froid et de la manière suivante: •Enlever la grille D •Dévisser le bauchon A A A A A et contròler le niveau du liquide à... -
Página 134: Carburateur
CARBURA CARBURA CARBURATEUR TEUR TEUR TEUR CARBURA CARBURA TEUR Pour un fonctionnement optimal du carburateur, il est important de lui faire un nettoyage méticuleux après chaque sortie. Désassembler la cuve B, B, B, B, B, vérifier la position du flotteur en veillant à ce que la pIaquette de maintien du flotteur A A A A A soit positionnée parallèlement au plan du corps de carburateur comme le montre la figure. -
Página 135: Contrôles Après Le Nettoyage
CONTRÔLES APRÈS LE NETT CONTRÔLES APRÈS LE NETT CONTRÔLES APRÈS LE NETTO O O O O Y Y Y Y Y A A A A A GE CONTRÔLES APRÈS LE NETT CONTRÔLES APRÈS LE NETT Après le nettoyage du motocycle, il faut contrôler: •Laver le filtre a air (procéder comme il est décrit à... - Página 136 T T T T T ABLE DES MA ABLE DES MA ABLE DES MATIÈRES ABLE DES MA TIÈRES TIÈRES TIÈRES ABLE DES MA TIÈRES Réglage des freins Réglage de l’ embrayage Réglage du ralenti Réglage du jeu à la poignée des gaz Contrôle et réglage du jeu à...
-
Página 137: Réglage Des Freins
RÉGLAGE DES FREINS RÉGLAGE DES FREINS RÉGLAGE DES FREINS RÉGLAGE DES FREINS RÉGLAGE DES FREINS F F F F F rein avant rein avant rein avant rein avant rein avant Le frein avant est du type à disque avec une commande hydraulique, en conséquence il exige seulement l’entretien ordinaire. -
Página 138: Contrôle Et Réglage Du Jeu À La Direction
RÉGLAGE DU RALENTI RÉGLAGE DU RALENTI RÉGLAGE DU RALENTI RÉGLAGE DU RALENTI RÉGLAGE DU RALENTI Pour exécuter correctement cette opération, il est conseillé de la réaliser à moteur chaud, en branchant un compte-tours électronique au câble de bougie. Intervenir ensuite avec un tournevis sur la vis de réglage A A A A A pour régler le ralenti à... -
Página 139: Tension Des Chaînes
TENSION DE LA CHAÎNE TENSION DE LA CHAÎNE TENSION DE LA CHAÎNE TENSION DE LA CHAÎNE TENSION DE LA CHAÎNE Pour une plus longue durée de la chaîne de transmission, il est préférable de contrôler périodiquement sa tension. Il faut la maintenir propre en permanence, la débarrasser des dépôts de saleté... -
Página 140: Réglage Suspension Avant
RÉGLAGE DE LA SUSPENSION RÉGLAGE DE LA SUSPENSION RÉGLAGE DE LA SUSPENSION RÉGLAGE DE LA SUSPENSION RÉGLAGE DE LA SUSPENSION AVANT AVANT AVANT AVANT AVANT F F F F F ourche ourche ourche ourche ourche •Pour un pilotage plus réactif, dévisser complétementle pommeau de réglage B B B B B par rapport à... -
Página 141: Réglage Amortisseur Arrière
RÉGLAGE AMORTISSEUR ARRIÈRE RÉGLAGE AMORTISSEUR ARRIÈRE RÉGLAGE AMORTISSEUR ARRIÈRE RÉGLAGE AMORTISSEUR ARRIÈRE RÉGLAGE AMORTISSEUR ARRIÈRE Informations sur les réglages Informations sur les réglages Informations sur les réglages Informations sur les réglages Informations sur les réglages •Pour un pilotage plus rèactif, ouvrir le pommeau de règlage en compression A A A A A •Pour un pilotage plus contrôlé, fermer le pommeau de réglage en compression A A A A A... - Página 142 T T T T T ABLE DES MA ABLE DES MA ABLE DES MATIERES ABLE DES MA TIERES TIERES TIERES ABLE DES MA TIERES Recherche des pannes...
- Página 143 s i l é r , r i é r é é à t l i à . é à é l t s i à é r é t s i . é s é é é s é é...
- Página 144 Amortisseur arrière ..................140 Boîte à clapets ....................133 Bougie ......................129 Caractéristiques techniques ................115 Carburateur ....................133 Contrôle et entretien avant et après l’utilisation en tout-terrain......118 Contrôle aprés le nettoyage ................134 Démarrage ....................120 Direction: contrôle et réglage ................ 137 Embrayage ..................
- Página 145 NOTES ....................
- Página 147 - - - - - - - - - - - - - - - - - - - - - - - - - - - - - - - - - - - - - - - - - - - - - - - - - - - - - - - - - - - - - - - - - - - - - - - - - - - - - - - - - - - - - - - - GARANZIA N°...