Tabla de contenido
Publicidad
Idiomas disponibles
Idiomas disponibles
Enlaces rápidos
INSTALLATION INSTRUCTIONS
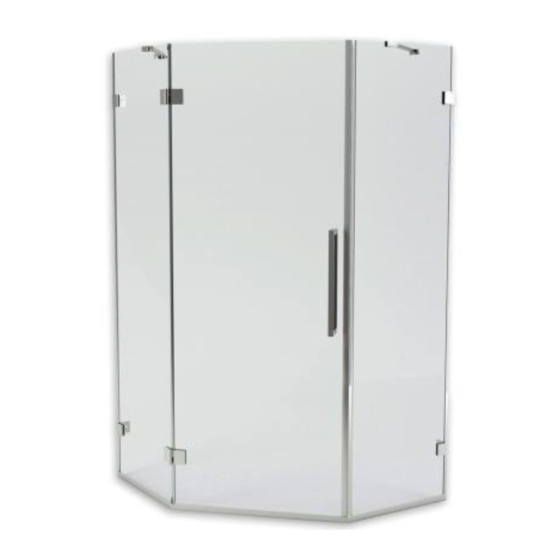
AXIS 72 x 42 NEO ANGLE SHOWER DOOR
MODEL: AM4242N3400C SERIES
Thank you for selecting American Standard – the benchmark of fine quality for over 100 years. To ensure this product is installed
properly, please read these instructions carefully before you begin. (Certain installations may require professional help.) Also be
sure your installation conforms to local codes.
GENERAL INFORMATION
Please inspect the product immediately upon receipt for transit damage, missing packs/parts or manufacturing
fault. Damage reported later cannot be accepted. Please handle the product with care avoiding knocks and
shocks, or loading to all sides and edges of the glass.
IMPORTANT: TEMPERED GLASS CANNOT BE DRILLED, CUT OR MODIFIED.
READ THE INSTRUCTIONS CAREFULLY
Familiarize yourself with all the parts as shown in the assembly drawing. The assembly drawing will also
provide a helpful reference when relating the location of the various parts and how they are mounted.
Special care should be taken when drilling walls to avoid hidden pipes or electrical cables.
Note: This product is heavy and requires two people for a portion of the installation.
For product quality or installation issues, we would like to hear from you. Please don't hesitate to call
American Standard at 800-442-1902 and follow the prompts for consumer/shower doors.
AFTER-CARE INSTRUCTIONS
After use, your shower should be cleaned with soap and water. This is particularly important in hard water
districts where insoluble lime salts may be deposited and allowed to build up. Cleaners of a gritty or abrasive
nature should not be used. Care should be taken to avoid contact with strong chemicals such as organic
solvents and strippers.
Glass cleaners can be used, but with caution; if in doubt, contact the manufacturer of the cleaner in question.
Please keep these instructions for aftercare and customer service details.
Caulking Gun & Silicone
Safety Glasses
Product names listed herein are trademarks of AS America Inc.
© AS America Inc. 2016
REQUIRED TOOLS AND MATERIALS
Drill
Regular Screwdriver
Phillips Screwdriver
1/4" & 1/8" Drill Bits
Tape Measure
#2 Square Drive Bit
Pencil
Hammer
1
10'
Painter's
Masking Tape
Utility Knife
7 10 3 54 - 10 0 Rev. A 8 /16
Level
Publicidad
Tabla de contenido

Manuales relacionados para American Standard AM4242N3400C Serie


Resumen de contenidos para American Standard AM4242N3400C Serie
- Página 1 MODEL: AM4242N3400C SERIES Thank you for selecting American Standard – the benchmark of fine quality for over 100 years. To ensure this product is installed properly, please read these instructions carefully before you begin. (Certain installations may require professional help.) Also be sure your installation conforms to local codes.
- Página 2 MODEL: AM4242N3400C SERIES Thank you for selecting American Standard – the benchmark of fine quality for over 100 years. To ensure this product is installed properly, please read these instructions carefully before you begin. (Certain installations may require professional help.) Also be sure your installation conforms to local codes.
-
Página 3: Assembly Drawing
ASSEMBLY DRAWING [19] [18] [25] [17] [16] [20] [15] [21] [22] [26] [10] [11] [14] [23] [24] [12] [13] [1] 8 Wall Anchors [14] 1 Door Bottom Gasket [2] 4 Screws M5x50 [15] 2 Hinges [3] 4 Adjust Retainer [16] 1 Door Side Gasket [4] 2 Fixed Panels [17] 4 Cushions [5] 4 Wall Bracket with Screws... -
Página 4: Installation Notes
INSTALLATION NOTES: This unit is best installed by two people. Cover drain with tape prior to installation to prevent the loss of small parts. Unpack your unit carefully and inspect for freight damage. Lay out and identify all parts using instruction sheet as a reference. - Página 5 ASSEMBLING THE WALL BRACKET AND RETAINERS TO THE FIXED PANELS Attach the Wall Brackets [5] and Adjusting Retainers [3] onto the Fixed Panels [4] as shown in 1A-1C. With a utility knife, notch the bottom of the Wall Gaskets [7] as shown. 2b/2c.
- Página 6 ASSEMBLING DOOR PANEL TO THE WALL NOTE: TWO PEOPLE REQUIRED 1. Place the Shims [23] on the Aluminum Seal as shown in 1a. Place the Fixed Panel [4] on the Aluminum Seal as shown in 1b. 2. With the Fixed Panel leveled, mark the locations of the holes in the Wall Brackets on the wall. 3.
- Página 7 ATTACHING DOOR TO FIXED PANEL 1a. Attach Hinges [15] to the outside of the Door Panel [22] and Fixed Panel using the M6x16 Screws and M4 Allen Wrench as shown. 1b. Insert Screw Covers [6] as shown. 1c. Tighten the Set Screw using the M2.5 Allen Wrench as shown, if necessary. M6x16 M4.0 Cover...
- Página 8 ATTACHING THE SUPPORT BARS 1a. Put two Cushions [17] in the open end of the Support Bar [18] and slide it onto the top of the Fixed Panel. 1b. Place the Support Bar against the wall and mark the locations of the holes. 1c.
- Página 9 AS AMERICA, INC. LIMITED LIFETIME WARRANTY FOR SHOWER DOORS AS America, Inc. (“American Standard”) warrants to the original consumer purchaser that it will, at its sole option, repair or replace this product or any part of this product, if it confirms that the product is defective in materials or workmanship under normal use and maintenance for the lifetime of this product.
- Página 10 PARTS SHOWER DOORS AXIS 72" x 42" NEO ANGLE SHOWER DOOR MODEL NUMBER: AM4242N3400C SERIES DESCRIPTION PART # FINISH QTY/UNIT Glass to Glass Hinges — 2 pieces 710373-101.2130A Chrome 1 Set Handles — 2 pieces 710355-101.2130A Chrome 1 Set Bottom Profile Gasket — 3 pieces 710356-101.0070A 1 Set Door Bottom Gasket...
-
Página 11: Información General
MODELO: SERIE AM4242N3400C Gracias por elegir American Standard, el parámetro de excelente calidad por más de 100 años. Para asegurarse de que este producto se instale de manera adecuada, lea las instrucciones atentamente antes de comenzar. (Algunas instalaciones pueden requerir ayuda profesional.) Asegúrese también de realizar la instalación de conformidad con los códigos locales. -
Página 12: Contenido De La Caja
AXIS 72 x 42 PUERTA DE DUCHA NEOANGULAR MODELO: SERIE AM4242N3400C Gracias por elegir American Standard, el parámetro de excelente calidad por más de 100 años. Para asegurarse de que este producto se instale de manera adecuada, lea las instrucciones atentamente antes de comenzar. (Algunas instalaciones pueden requerir ayuda profesional.) Asegúrese también de realizar la instalación de conformidad con los códigos locales. -
Página 13: Diagrama De Ensamblaje
DIAGRAMA DE ENSAMBLAJE [19] [18] [25] [17] [16] [20] [15] [21] [22] [26] [10] [11] [14] [23] [24] [12] [13] [1] 8 Anclajes de pared [14] 1 Junta inferior para puerta [2] 4 Tornillos M5x50 [15] 2 Bisagras [3] 4 Retenedores de ajuste [16] 1 Junta lateral para puerta [4] 2 Paneles jos [17] 4 Cojines... - Página 14 NOTAS SOBRE LA INSTALACIÓN: Se recomienda instalar la unidad de a dos personas. Cubra el desagüe con cinta antes de realizar la instalación para no perder las piezas pequeñas. Desempaque su unidad con cuidado y fíjese que no haya sido dañada durante el envío. Saque e identi que todas las piezas usando la hoja de instrucciones como referencia.
- Página 15 ENSAMBLAR LA MÉNSULA DE PARED Y LOS RETENEDORES A LOS PANELES FIJOS 1. Fije los conectores de pared [5] y retenedores de ajuste [3] a los paneles fijos [4], tal como se indica en 1A-1C. 2a. Usando un cuchillo de uso general, haga un corte preciso en la parte inferior de las juntas de pared [7], tal como se indica.
- Página 16 ENSAMBLAR EL PANEL PARA PUERTA A LA PARED NOTA: SE REQUIEREN DOS PERSONAS 1. Coloque los calces [23] en el empaque de aluminio, tal como se muestra en 1A. Coloque el panel jo [4] en el empaque de aluminio, tal como se muestra en 1B. 2.
- Página 17 FIJAR LA PUERTA AL PANEL FIJO 1a. Fije las bisagras [15] a la parte exterior del panel para puerta [22] y del panel fijo usando los tornillos M6x16 y la llave Allen M4, tal como se indica. 1b. Inserte las tapas para tornillos [6], tal como se muestra. 1c.
- Página 18 FIJAR LAS BARRAS DE SOPORTE 1a. Coloque dos cojines [17] en el extremo abierto de la barra de soporte [18] y deslícela en la parte superior del panel jo. 1b. Coloque la barra de soporte contra la pared y marque las ubicaciones de los ori cios. 1c.
-
Página 19: Mantenimiento
1. Los defectos o daños que surjan del envío, la instalación, las modificaciones, los accidentes, el abuso, el uso incorrecto o la falta de mantenimiento y el uso de refacciones que no sean American Standard auténticas, en todos los casos, ya sea causado por un plomero contratista, una empresa de servicios, el propietario o cualquier otra persona. - Página 20 PIEZAS PUERTAS DE DUCHA AXIS 72" x 42" PUERTA DE DUCHA NEOANGULAR NÚMERO DE MODELO: SERIE AM4242N3400C NRO. DESCRIPCIÓN PARTE # ACABADO CANT./UNIDAD Bisagras vidrio a vidrio — 2 piezas 710373-101.2130A Cromo 1 juego Manijas — 2 piezas 710355-101.2130A Cromo 1 juego Junta de perfil inferior —...
-
Página 21: Information Générale
PORTE DE DOUCHE NÉO-ANGULAIRE AXIS 72 x 42 MODÈLE : SÉRIE AM4242N3400C Nous vous remercions d’avoir choisi American Standard… la référence en matière de qualité depuis plus de 100 ans. Afin de garantir une installation adéquate, veuillez lire ces instructions attentivement avant de commencer. (Certaines installations peuvent requérir l’aide d’un professionnel.) De plus, assurez-vous que votre installation soit en conformité... -
Página 22: Contenu De La Boîte
MODÈLE : SÉRIE AM4242N3400C Nous vous remercions d’avoir choisi American Standard… la référence en matière de qualité depuis plus de 100 ans. Afin de garantir une installation adéquate, veuillez lire ces instructions attentivement avant de commencer. (Certaines installations peuvent requérir l’aide d’un professionnel.) De plus, assurez-vous que votre installation soit en conformité... - Página 23 IMAGE D’ASSEMBLAGE [19] [18] [25] [17] [16] [20] [15] [21] [22] [26] [10] [11] [14] [23] [24] [12] [13] [1] 8 ancrages muraux [14] 1 joint d’étanchéité inférieur de porte [2] 4 vis M5x50 [15] 2 charnières [3] 4 dispositifs de retenue [16] 1 joint d’étanchéité...
-
Página 24: Remarques D'installation
REMARQUES D’INSTALLATION : L’installation de la porte se fait plus facilement à deux. Couvrez la bonde avec du ruban avant l’installation pour éviter de perdre les petites pièces. Déballez soigneusement votre porte de douche et véri ez qu’elle n’a subi aucun dommage durant le transport. Disposez les différentes pièces et identi ez-les à... -
Página 25: Vue De L'intérieur
MONTAGE DU SUPPORT MURAL ET DES DISPOSITIFS DE RETENUE SUE LES PANNEAUX FIXES Fixez les supports muraux [5] et dispositifs de retenue [3] sur les panneaux fixes [4], comme illustré dans les figures 1A-1C. À l’aide d’un couteau universel, entaillez la partie inférieure des joints d’étanchéité muraux [7], comme illustré. 2b/2c. - Página 26 MONTAGE DU PANNEAU DE PORTE SUR LE MUR REMARQUE : DEUX PERSONNES SONT NÉCESSAIRES. 1. Posez les cales [23] sur le joint d’étanchéité en aluminium comme illustré à la gure 1a. Posez le panneau xe [4] sur le joint d’étanchéité en aluminium comme illustré à la gure 1b. 2.
- Página 27 FIXATION DE LA PORTE SUR LE PANNEAU FIXE 1a. Fixez les charnières [15] sur la partie extérieure du panneau de porte [22] et sur le panneau xe à l’aide des vis M6x16 et de la clé hexagonale M4, comme illustré. 1b.
- Página 28 FIXATION DES BARRES D’APPUI 1a. Placez deux coussins [17] dans l’extrémité ouverte de la barre d’appui [18], puis faites-la glisser sur la partie supérieure du panneau xe. 1b. Placez la barre d’appui contre le mur et marquez les emplacements des trous. 1c.
- Página 29 AS America, Inc. (American Standard) garantit au consommateur/acheteur original qu’elle réparera ou remplacera, à sa convenance, ce produit ou toute pièce du produit qui, selon American Standard et à son entière discrétion, a un défaut de matériau ou de fabrication, dans un contexte d’utilisation et d’entretien normal, pendant toute la durée de vie du produit.
-
Página 30: Porte De Douche Néo-Angulaire
PIÈCES PORTES DE DOUCHE PORTE DE DOUCHE NÉO-ANGULAIRE AXIS 72 po x 42 po NUMÉRO DE MODÈLE : SÉRIE AM4242N3400C DESCRIPTION NO DE PIÈCE FINITION QTÉ/UNITÉ Charnières pour portes en verre — 2 pièces 710373-101,2130A Chrome 1 ensemble Poignées — 2 pièces 710355-101,2130A Chrome 1 ensemble...