Tabla de contenido
Publicidad
Idiomas disponibles
Idiomas disponibles
Enlaces rápidos
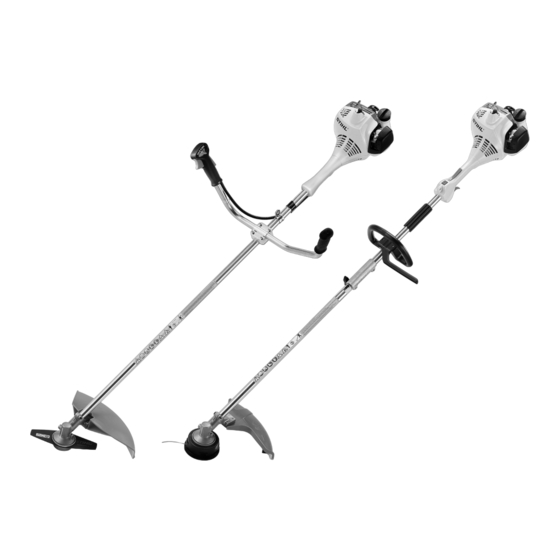
STIHL FS 55
STIH)
Instruction Manual
Manual de instrucciones
Warning!
For safe operation follow all safety
precautions in Instruction Manual - improper
use can cause serious injury.
Advertencia!
Para su seguridad durante el manejo de este
producto, siga siempre las precauciones de
seguridad dadas en el manual de
instrucciones - el uso indebido puede causar
lesiones graves.
Publicidad
Capítulos
Tabla de contenido

Manuales relacionados para Stihl FS 55 Serie


Resumen de contenidos para Stihl FS 55 Serie
- Página 1 STIH) STIHL FS 55 Instruction Manual Manual de instrucciones Warning! For safe operation follow all safety precautions in Instruction Manual - improper use can cause serious injury. Advertencia! Para su seguridad durante el manejo de este producto, siga siempre las precauciones de...
-
Página 2: Tabla De Contenido
Parts and Controls ......41 before using your trimmer/brushcutter. Mounting the Deflector ....21 Specifications ......... 43 Contact your STIHL dealer or the STIHL Mounting the Cutting Tools ..... 21 Special Accessories ....... 44 distributor for your area if you do not Fuel .......... -
Página 3: Guide To Using This Manual
Engineering improvements in different ways: individual components. STIHL’s philosophy is to continually A bullet marks a step or procedure Note or hint which is not essential improve all of its products. As a result, without direct reference to an... -
Página 4: Safety Precautions And Working Techniques
Safety Precautions and Working Techniques Warning! Most of these safety precautions and Warning! warnings apply to the use of all STIHL Because a brushcutter is brushcutters. Different models may have The use of any brushcutter may be a high-speed, fast-cutting hazardous. - Página 5 Warning! available with an anti-vibration ("AV") system designed to reduce Prolonged use of a brushcutter (or other The ignition system of the STIHL unit machines) exposing the operator to the transmission of vibrations produces an electromagnetic field of a vibrations may produce whitefinger created by the engine to the very low intensity.
- Página 6 Secure hair so it is above shoulder for the STIHL brushcutter, their use may, over your goggles or safety glasses. level. in fact, be extremely dangerous.
- Página 7 English / USA THE USE OF THE Fueling BRUSHCUTTER Your STIHL brushcutter uses an oil- gasoline mixture for fuel (see the chap- Transporting the brushcutter ter on "Fuel" of your owner's manual). Warning! Warning! Always turn off the engine and make...
- Página 8 In order Select bare ground for fueling and move To do this with this STIHL to reduce the risk of fuel at least 10 feet (3 m) from the fueling cap, raise the grip on the spillage and fire, tighten the fuel filler cap spot before starting the engine.
- Página 9 (see chapter on mounting the To reduce the risk of injury from loss of various cutting tools of your owner's control, be absolutely sure that the Some STIHL brushcutter manual). cutting tool is clear of you and all other models are equipped with...
- Página 10 STIHL Servicing Dealer only. suspect a clogged screen, have your ventilated locations. muffler maintained by a STIHL Servicing Warning! Dealer. Warning! To reduce the risk of fire or burn injury, Use of this product can generate dust keep the area around the muffler clean.
- Página 11 English / USA some other authorities, for instance, have published lists of substances known to cause cancer, reproductive toxicity, etc. Control dust and fumes at the source where possible. In this regard use good work practices and follow the recommendations of OSHA/NIOSH and occupational and trade associations.
- Página 12 STIHL the condition of the cutting tool at regular dealer. Never use a brushcutter with a STIHL recommends use of the nylon line intervals. If the behavior of the tool heads or PolyCut head for such jobs. In loose blade.
- Página 13 Use of To reduce the risk of fire and burn running cutting tool, do not use a cutting non-STIHL parts may cause serious or injuries, check fuel filler cap for leaks at tool with incorrect idle adjustment. At fatal injury.
- Página 14 Cutting Tools" in your owner's manual. Additionally, the daily maintenance schedule for your brushcutter set forth in Using the mowing heads your STIHL Owner's Manual should be strictly followed. Do not use with mowing line larger than the intended diameter. With a properly...
- Página 15 Nylon cutting cord advances auto- the head! matically when tapped against the The STIHL AutoCut, PolyCut and FixCut ground. mowing heads produce a clean and tidy finish. They may be used only on brushcutters...
- Página 16 English / USA STIHL FixCut mowing head Observe wear indicators. Do not continue using the mowing head if the raised moldings (1) on the base are missing or worn – see right illustration above. The mowing head may otherwise shatter and flying objects could result in injury to the operator or bystanders.
-
Página 17: Approved Combinations Of Mowing Tool, Deflector, Handle And Harness
Harness (bike unit only) Deflectors Warning! 9 Deflector for mowing heads Select the correct combination from Stihl brushcutters with a loop handle 10 Deflector for all mowing tools the table according to the mowing without barrier bar may be used only with tool you intend to use. - Página 18 English / USA Mowing tools Deflectors Handles Harnesses/Straps FS 55...
-
Página 19: Mounting The Bike Handle
English / USA Mounting the Bike Handle Fitting the handlebar Secure handlebar (4) on the drive Fitting the control handle tube (3) at distance (A) of approx. Place the clamp (1) and handle Release the screw (8) and remove it 15 cm (6 in) from the powerhead. -
Página 20: Mounting The Loop Handle
English / USA Mounting the Loop Handle Fitting the throttle cable Do not kink the throttle cable - make sure the throttle trigger moves freely. Push the throttle cable (13) into the retainer (14). Loop handle with barrier bar Place the clamp (3) in the loop handle (4) and position them both Insert square nuts (1) in the against the drive tube (5). -
Página 21: Fitting The Carrying Eye
English / USA Fitting the Carrying Eye Loop handle without barrier bar Securing the loop handle For position of carrying eye "Parts and Controls" Place the clamp (3) in the loop Secure the loop handle (4) Place the clamp (1) with the handle (4) and position them both approx. -
Página 22: Mounting The Deflector
English / USA Mounting the Deflector Mounting the Cutting Tools Preparations Lay your brushcutter on its back with the gearhead facing upward. Mounting Hardware for Cutting Tools The mounting hardware supplied depends on the cutting tool that comes Mounting the deflector Fitting skirt and blade as original equipment with the new 1 = Deflector approved for all cutting... - Página 23 English / USA Mounting hardware is packed with the machine Mowing heads and metal cutting tools may be mounted. Mounting hardware is loose Pull the hose (1) (protector for shipping) off the shaft (2). The nut (3), rider plate (4) and thrust washer (5) are in the parts kit supplied with the machine.
- Página 24 STIHL SuperCut 20-2, STIHL AutoCut 25-2, Push the thrust washer (3) over the STIHL AutoCut C 25-2, shaft (1) so that it locates against STIHL TrimCut 30-2, the base. STIHL PolyCut 20-3 Block the output shaft.
-
Página 25: Adjusting Nylon Line
STIHL SuperCut 20-2, fresh line is advanced. STIHL AutoCut 25-2, The blade on the deflector trims STIHL AutoCut C 25-2, overlong line to the correct length – STIHL TrimCut 30-2, avoid tapping head more than once at a STIHL PolyCut 20-3 time. - Página 26 English / USA Place the cutting tool (3) on the thrust plate (4). Collar (see arrow) must locate in cutting tool’s mounting hole. Slip thrust washer (5) and rider plate (6) over the output shaft (7). Block the output shaft. Screw the mounting nut (8) onto the output shaft counterclockwise and tighten down firmly.
-
Página 27: Fuel
English / USA Fuel This engine is certified to operate on Use only STIHL two-stroke engine oil or Fuel mix ages unleaded gasoline and the STIHL two- equivalent high-quality two-stroke Only mix sufficient fuel for a few days stroke engine oil at a mix ratio of 50:1. -
Página 28: Fueling
English / USA Fueling Fitting the Harness Before fueling, clean the filler cap and the area around it to ensure that no dirt falls into the tank. Always thoroughly shake the mixture in the canister before fueling your machine. In order to reduce the risk of burns or other personal injury from escaping gas vapor and fumes, remove the fuel filler cap carefully... -
Página 29: Balancing The Brushcutter
English / USA Balancing the Brushcutter Floating position Mowing tools Mowing heads and grass cutting blades should just touch the ground. When the correct floating position has been reached: Tighten down the screw on the carrying ring firmly. The type and style of harness and Loosen the screw (3). -
Página 30: Starting / Stopping
English / USA Starting / Stopping Starting Hold down the throttle trigger interlock and squeeze the throttle trigger. While holding both levers in this position, move the slide control to START and hold it there. Now release the throttle trigger, slide control and throttle trigger interlock in that order. - Página 31 English / USA Version with loop handle Starting All versions Controls Move stop switch to position # Set the choke lever (8): For cold start to Hold down throttle trigger interlock Stop switch (1) with positions: For warm start to e and squeeze the throttle trigger until # - normal run position (2) and –...
- Página 32 English / USA Do not let the starter grip snap back. Guide it slowly back into the housing so that the starter rope can rewind properly. If the engine is cold: (choke position Crank the engine until it begins to fire.
- Página 33 English / USA Make sure carburetor is correctly If the engine does not start Unscrew and dry off the spark plug. adjusted – cutting tool must not Open the throttle wide. Choke lever rotate when engine is idling. Crank the engine several times with If you did not set the choke lever to e Your machine is now ready for the starter to clear the combustion...
-
Página 34: Operating Instructions
English / USA Operating Instructions Cleaning the Air Filter During break-in period A factory new machine should not be run at high revs (full throttle off load) for the first three tank fillings. This avoids unnecessary high loads during the break-in period. -
Página 35: Motor Management
English / USA Motor Management Adjusting the Carburetor Exhaust emissions are controlled by the Standard Setting design of the fundamental engine Shut off the engine. parameters and components (e.g. carburation, ignition, timing and valve or Mount the cutting tool. port timing) without the addition of any Check the air filter and replace if major hardware. -
Página 36: Adjusting Idle Speed
English / USA Rule of thumb At high altitudes Cutting tool rotates when engine is idling Turn the high speed screw (H) Rotate the high speed screw (H) about clockwise (leaner) no further than Turn idle speed screw (LA) slowly turn for every 1000 meter (3300 ft) stop until there is no noticeable counterclockwise until cutting tool... -
Página 37: Checking The Spark Plug
(mostly authorized by STIHL. Always press eroded. at part throttle etc.) affect the condition of spark plug boot (2) snugly onto the spark plug. -
Página 38: Rewind Starter
Have a damaged starter rope and air filter. inside of the filler plug, screw the tube (2) of STIHL gear lubricant for replaced in good time by your Store the machine in a dry, high or servicing dealer. -
Página 39: Sharpening Metal Cutting Tools
In case of more serious wear or nicks: Resharpen with grinder or have work done by a STIHL dealer. Resharpen frequently, take away as little material as possible - two or three strokes of the file are usually enough. -
Página 40: Inspections And Maintenance By Stihl Service
English / USA Inspections and Maintenance by STIHL Service Fuel pickup body in tank Have the pickup body in the fuel tank replaced every year. Spark arresting screen in the muffler* If the engine is low on power, have the spark arresting screen in the muffler checked see “Guide to Using this Manual”... -
Página 41: Maintenance Chart
Spark arresting screen* in muffler Clean or replace All accessible screws and nuts (not adjusting Retighten screws) Visual inspection Mowing tool Replace Check tightness Metal cutting tools Sharpen Safety labels Replace 1) STIHL recommends the STIHL dealer Not in all versions, market-specific FS 55... -
Página 42: Parts And Controls
English / USA Parts and Controls 1 Fuel pump 2 Carburetor adjusting screw 3 Spark plug boot 4 Starter grip 5 Muffler (with spark arresting screen) 6 Throttle trigger 7 Slide control 8 Throttle trigger interlock 9 Bike handle 10 Handle support 11 Carrying eye* 12 Throttle cable retainer 13 Choke lever... - Página 43 English / USA Definitions 8. Throttle trigger interlock. 16. Fuel tank. Fuel pump. Must be depressed before the For fuel and oil mixture. Provides additional fuel feed for a throttle trigger can be activated. cold start. 17. Machine support. 9. Bike handle. For resting machine on the ground.
-
Página 44: Specifications
English / USA Specifications Definitions EPA / CEPA: The Emission Compliance Period Mowing head referred to on the Emissions The cutting attachment, i. e. mowing Compliance Label indicates the number head, for different purposes of operating hours for which the engine (special accessory). -
Página 45: Ignition System
English / USA Special Accessories Ignition System Weights Contact your STIHL dealer for information regarding special Type: Electronic magneto ignition without cutting tool and deflector accessories that may be available for FS 55 11.0 lb (5.0 kg) your product. Spark plug FS 55 R 10.6 lb (4.8 kg) -
Página 46: Maintenance And Repairs
Users of this unit should carry out only the maintenance operations described in this manual. Other repair work may be performed only by authorized STIHL service shops. Warranty claims following repairs can be accepted only if the repair has been... -
Página 47: Stihl Incorporated Federal Emission Control Warranty Statement
You are responsible for presenting your Obligations Coverage: small off-road equipment engine to a STIHL service center as soon as a The U.S. Environmental Protection In the U.S., 1997 and later model year problem exists. The warranty repairs will Agency (EPA) and STIHL Incorporated... -
Página 48: Maintenance Requirements
This Emission Control Systems replaced by STIHL Incorporated at no used for any warranty maintenance or Warranty shall not cover any of the cost to the owner. Any warranted part... -
Página 49: Stihl Incorporated California Exhaust And Evaporative Emissions Control Warranty Statement
English / USA For California only: STIHL Incorporated California Exhaust and Evaporative Emissions Control Warranty Statement Manufacturer’s Warranty Your Warranty Rights and You are responsible for presenting your Coverage Obligations small off-road equipment engine to a STIHL servicing dealer as soon as the... - Página 50 COVERAGE BY STIHL 6. The owner must not be charged for STIHL Incorporated at no cost to the INCORPORATED, see above. A diagnostic labor that leads to the owner. statement in such written instructions to...
-
Página 51: Trademarks
® AUTOCUT Where to make a claim for Ematic™ / Stihl-E-Matic™ Warranty Service ® EASYSTART FixCut™ Bring the STIHL product to any ® OILOMATIC HT Plus™ authorized STIHL servicing dealer and ® STIHL Cutquik present the signed STIHL product IntelliCarb™... - Página 52 STIHL RAPID™ STIHL SuperCut™ STIHL Territory™ TapAction™ TrimCut™ This listing of trademarks is subject to change. Any unauthorized use of these trademarks without the express written consent of ANDREAS STIHL AG & Co. KG, Waiblingen is strictly prohibited. FS 55...
- Página 53 English / USA FS 55...
- Página 54 Montaje del manillar de Inspecciones y mantenimiento precauciones de seguridad, que bicicleta ........... 70 por el centro de servicio STIHL ..91 empiezan en la página 55, antes de usar Montaje del mango tórico ....71 Tabla de mantenimiento ....92 la orilladora/cortadora de matorrales.
-
Página 55: Guía Para El Uso De Este Manual
Mejoramientos técnicos a una ilustración. Nota o sugerencia que no es La filosofía de STIHL es mejorar esencial para el uso de la máquina, continuamente todos su productos. Una descripción de un paso o pero puede ayudar al operador a Como resultado de ello, periódicamente... -
Página 56: Medidas De Seguridad Y Técnicas De Manejo
2. la cortadora de matorrales llen o agrieten. mente. El uso descuidado o inadecuado 3. el uso de la cortadora de matorra- STIHL no recomienda el uso de cuchi- de cualquier cortadora de matorrales les. llas rígidas en zonas pedregosas. Los puede causar lesiones graves e incluso objetos arrojados o las cuchillas daña-... - Página 57 / EE.UU – La mayor parte de las herramientas Advertencia Advertencia motorizadas de STIHL se ofrecen con un sistema antivibración ("AV") El uso prolongado de una cortadora de El sistema de encendido de la máquina matorrales (u otras máquinas) expone al cuyo propósito es reducir la transmi-...
- Página 58 Para reducir Use pantalones largos hechos de un suministrados por STIHL o expresa- el riesgo de lesionarse la cara, STIHL material grueso para protegerse las mente autorizados por STIHL para recomienda usar también una careta o piernas.
- Página 59 / EE.UU USO DE LA CORTADORA DE Llenado de combustible MATORRALES La cortadora de matorrales de STIHL utiliza una mezcla de aceite-gasolina Transporte de la cortadora de mato- como combustible (vea el capítulo rrales "Combustible" en el manual del usua- Advertencia rio).
- Página 60 Para reducir el riesgo de derra- encima de la tapa de motor está funcionando. mes e incendio, apriete la tapa de lle- llenado STIHL de modo nado de combustible a mano con la Elija una superficie despejada para lle- que quede en posición mayor fuerza posible.
- Página 61 Una vez que mienta de corte se encuentra lejos de su STIHL están equipados está funcionando, puede arrojar objetos cuerpo y de todas las obstrucciones y con un convertidor extraños a gran distancia.
- Página 62 Haga reparar el silenciador silenciador por un concesionario de lugares mal ventilados. únicamente por el concesionario de servicio STIHL. servicio STIHL. Advertencia Advertencia El uso de este producto puede generar polvo y vapores que contienen produc- Para reducir el riesgo de incendio o tos químicos considerados como cau-...
- Página 63 español / EE.UU California y algunas otras autoridades han publicado varias listas de sustan- cias carcinógenas, de toxicidad repro- ductora, etc. Siempre que sea posible, controle el polvo y los vapores en su punto de ori- gen. Al respecto, emplee buenas prácti- cas de trabajo y siga las recomendacio- nes de OSHA/NIOSH y asociaciones laborales y comerciales.
- Página 64 No utilice nunca pie- dora de matorrales o daños a la cuchilla. condición de la herramienta de corte en Para ese tipo de trabajo, STIHL reco- zas no autorizadas para sujetar la cuchi- intervalos regulares. Si nota un cambio lla.
- Página 65 Este tipo un incendio. de trabajo debe realizarse únicamente en el taller de servicio de STIHL. FS 55...
- Página 66 Los hilos excesiva- cado en el manual del usuario de la cor- mente largos pueden sobrecargar al tadora de matorrales de STIHL. motor, dañando el mecanismo del embrague y las piezas relacionadas. FS 55...
-
Página 67: Importante
árboles, etc., que si se usan cuchillas de polímero. Sin embargo, las cabezas PolyCut de STIHL con cuchilla de polímero produ- cen un mejor corte si no hay plantas a lo largo de la orilla del césped. No es nece- sario afilar y las cuchillas de corte des- Utiliza hilos de nilón o cuchillas de plás-... - Página 68 / EE.UU Cabeza segadora STIHL FixCut Observe los indicadores de des- gaste. No siga usando la cabeza segadora si le faltan los rebordes salientes (1) en la base o si los mismos están desgastados – vea la ilustración a la derecha más arriba.
-
Página 69: Combinaciones Aprobadas De Herramienta De Corte, Deflector, Mango Y Arnés
17 Se puede usar la correa para Para reducir el riesgo de daños oca- hombro sionados por objetos despedidos y 2 STIHL AutoCut C 25-2 por contacto con la cuchilla, no Se debe usar la correa para 3 STIHL AutoCut 25-2... - Página 70 español / EE.UU Herramientas de corte Deflectores Mangos Arneses/Correas FS 55...
-
Página 71: Montaje Del Manillar De Bicicleta
español / EE.UU Montaje del manillar de bicicleta Coloque la abrazadera (1) y el Sujete el manillar (4) en el eje impul- Instalación del mango de control soporte del manillar (2) en el tubo sor (3) a una distancia (A) de aprox. Afloje el tornillo 8) y retírelo con la de mando (3). -
Página 72: Montaje Del Mango Tórico
español / EE.UU Montaje del mango tórico Instalación del cable del acelera- No tuerza el cable del acelerador - asegúrese de que el gatillo se mueva libremente. Inserte el cable del acelerador (13) en los retenedores (14). Mango tórico con barra de Coloque la abrazadera (3) en el defensa mango tórico (4) y ponga los dos en... -
Página 73: Mango Tórico Sin Barra De Defensa
español / EE.UU Colocación de la argolla de transporte Mango tórico sin barra de Fijación del mango tórico Para la posición de la argolla de defensa transporte consulte la sección Fije el mango tórico (4) aprox. a "Piezas y controles" 8 pulg (20 cm) (A) delante del Coloque la abrazadera (3) en el Coloque la abrazadera (1) con el... -
Página 74: Montaje Del Deflector
español / EE.UU Montaje del deflector Montaje de las herramientas de corte Preparaciones Apoye la cortadora de matorrales en el suelo sobre su parte trasera con el mecanismo vuelto hacia arriba. Tornillería de montaje para herramientas de corte Montaje del deflector Instalación de la faldilla y cuchilla La tornillería de montaje suministrada 1 = Deflector aprobado para todas las... - Página 75 español / EE.UU La tornillería de montaje se embala con la máquina Se pueden montar cabeza segadoras y herramientas de corte metálicas. La tornillería de montaje está suelta Retire la manguera (1) (protección para el transporte) del eje (2). La tuerca (3), placa de refuerzo (4) y arandela de empuje (5) se encuentran en el juego de piezas suministrado con la máquina.
- Página 76 STIHL AutoCut 25-2, Gire la tuerca o la herramienta de STIHL AutoCut C 25-2, Empuje la arandela de empuje (3) corte en el eje (2) hasta que el STIHL TrimCut 30-2, sobre el eje (1) para que quede con- pasador de tope se deslice a su ó...
-
Página 77: Sustitución Del Hilo De Nilón O Cuchillas Segadoras
STIHL SuperCut 20-2, avanzarán aproximadamente 3 cm STIHL AutoCut 25-2, (1-1/4 pulg) de hilo nuevo. STIHL AutoCut C 25-2, La cuchilla en el deflector corta el hilo STIHL TrimCut 30-2, sobrante al largo correcto. Evite golpear STIHL PolyCut 20-3 la cabeza más de una vez. - Página 78 español / EE.UU Coloque la herramienta segadora (3) sobre la placa de empuje (4). El collar (vea la flecha) debe enca- jar en el agujero de montaje de la herramienta segadora. Deslice la arandela de empuje (5) y la placa de refuerzo (6) sobre el eje de salida (7).
-
Página 79: Combustible
Duración de la mezcla de combusti- nar con una mezcla de 50 a 1 de gaso- motores de dos tiempos o un aceite de lina sin plomo y aceite STIHL para moto- marca equivalente para motores de dos Mezcle una cantidad suficiente de com- res de dos tiempos. -
Página 80: Llenado De Combustible
español / EE.UU Llenado Colocación del arnés de combustible Antes de llenar de combustible, limpie la tapa de llenado y el área alrededor de ella para asegurarse que no caiga tierra o mugre al tanque. Agite completamente la mezcla en el recipiente antes de vaciarla al tanque de la máquina. -
Página 81: Equilibrio De La Cortadora De Matorrales
español / EE.UU Equilibrio de la cortadora de matorrales Posición de flotación Herramientas segadoras Las cabezas de segado y la cuchillas para pasto apenas deben tocar el suelo. Cuando se alcanza el punto de flotación correcto: Apriete firmemente el tornillo en la argolla de transporte. -
Página 82: Desconexión De La Unidad De La Correa Para El Hombro
español / EE.UU Arranque / parada Arranque Mantenga oprimido el bloqueo del gatillo y oprima el gatillo de acelera- ción. Mientras sujeta los dos controles en esta posición, mueva el control des- lizante a la posición START y sujé- telo allí. Ahora suelte el gatillo de acelera- ción, el control deslizante y el blo- queo del gatillo, en el orden indi-... - Página 83 español / EE.UU Versión con mango tórico Arranque Todas las versiones Controles Mueva el interruptor de parada a la Ajuste la palanca del estrangulador posición # (8): Interruptor de parada (1) con las posicio- Para arranque en frío en Mantenga oprimido el bloqueo del nes: Para arranque caliente en e gatillo y oprima el gatillo de acelera-...
- Página 84 español / EE.UU No deje que el mango de arranque salte bruscamente hacia atrás. Guíelo lentamente hacia el interior de la caja para que la cuerda de arranque se enrolle correctamente. Si el motor está frío: (posición de estrangulador Haga girar el motor hasta que empiece a encenderse.
- Página 85 español / EE.UU Asegúrese que el carburador esté Si el motor no arranca Destornille y seque la bujía. correctamente ajustado, la her- Abra el acelerador al máximo. Palanca del estrangulador ramienta de corte no debe girar Haga girar el motor varias veces Si no se movió...
-
Página 86: Instrucciones De Manejo
español / EE.UU Instrucciones de manejo Limpieza del filtro de aire Durante el período de rodaje Una máquina nueva no debe hacerse funcionar a velocidad alta (aceleración máxima sin carga) por el lapso que tome llenar el tanque tres veces. Esto evita la imposición de cargas innecesariamente altas durante el período de rodaje. -
Página 87: Manejo Del Motor
español / EE.UU Manejo del motor Ajuste del carburador con el tornillo de ajuste de ralentí LA Las emisiones de gases de escape son Ajuste normal controladas por el diseño de parámetros Apague el motor. y componentes fundamentales del Monte la herramienta de corte. motor (por ej. - Página 88 español / EE.UU Regla general A gran altitud La herramienta de corte gira cuando el motor funciona a ralentí Gire el tornillo de velocidad alta (H) Gire el tornillo de ajuste de velocidad en sentido horario (mezcla más Gire el tornillo de ralentí (LA) lenta- alta (H) aproximadamente 1/4 de vuelta pobre) hasta que no haya un mente en sentido contrahorario...
-
Página 89: Revisión De La Bujía
Coloque una bujía nueva después de de funcionamiento desfavorables (gene- STIHL. Siempre encaje un casquillo 100 horas de funcionamiento, aproxi- ralmente a media aceleración, etc.) (2) del tamaño correcto bien ajus- madamente, o más temprano si nota... -
Página 90: Arrancador De Cuerda
Si no se ve grasa en el interior del "Arranque/parada del motor". tapón, atornille el tubo (2) del lubri- Limpie la máquina a fondo - preste Pida que el concesionario STIHL atención especial a las aletas del cante para engranajes STIHL espe- sustituya la cuerda de arranque cilindro y al filtro de aire. -
Página 91: Afilado De Las Herramientas De Corte Metálicas
(B). el equilibrador 5910 850 2600 la cuchilla matriz - R1 debe medir STIHL y vuelva a ajustar el equili- 5/64 pulg (2 mm). El radio R2 mide brio según sea necesario. 7/64 pulg (2,5 mm) y se obtiene automáticamente si se utiliza la lima... -
Página 92: Inspecciones Y Mantenimiento Por El Centro De Servicio Stihl
/ EE.UU Inspecciones y manteni- miento por el centro de servicio STIHL Captador de combustible en el tanque Cada año, pida que le sustituyan el captador en el tanque. Chispero en silenciador* Si el motor pierde potencia, haga revisar el chispero del silenciador. -
Página 93: Tabla De Mantenimiento
(salvo los tornillos de ajuste) Inspección visual Cabeza segadora Reemplazar Revisar el apriete Herramientas de corte metálicas Afilar Etiquetas de seguridad Reemplazar STIHL recomienda que el concesionario STIHL efectúe este trabajo No se instala en todas las versiones, depende del mercado FS 55... -
Página 94: Piezas Y Controles
español / EE.UU Piezas y controles 1= Bomba de combustible 2= Tornillo de ajuste del carburador 3= Casquillo de bujía 4= Mango de arranque 5= Silenciador con chispero 6= Gatillo de aceleración 7= Control deslizante 8= Bloqueo del gatillo de aceleración 9= Manillar 10= Soporte del manillar 11= Argolla de transporte... -
Página 95: Definiciones
español / EE.UU Definiciones 8. Bloqueo del gatillo de acelera- 15. Tapa de llenado de combustible. Bomba de combustible. ción. Para tapar el tanque de combusti- Suministra alimentación adicional Debe ser oprimido antes de poder ble. de combustible para el arranque en activar el gatillo de aceleración. -
Página 96: Especificaciones
español / EE.UU Especificaciones Parte 2 Definiciones Motor Cabeza segadora E.P.A: El accesorio de corte, por ejemplo El período de cumplimiento de emisio- una cabeza segadora, que se usa nes indicado en la etiqueta de cumpli- para diferentes propósitos (acceso- miento de emisiones es la cantidad de rio especial). -
Página 97: Sistema De Encendido
/ EE.UU Accesorios especiales Sistema de encendido Pesos Comuníquese con su concesionario STIHL para información acerca de los Versiones estándar Tipo: Encendido por accesorios especiales que pueden estar magneto electró- disponibles para su producto. sin herramienta de corte y deflector... -
Página 98: Mantenimiento Y Reparaciones
Los usuarios de esta máquina deben efectuar únicamente los trabajos de mantenimiento descritos en este manual. Solamente los talleres autoriza- dos por STIHL deben llevar a cabo los demás trabajos de reparación. Los reclamos de garantía presentados después de realizadas las reparaciones serán aceptados únicamente si las mis-... -
Página 99: Declaración De Garantía De Stihl Incorporated Sobre Sistemas De Control De Emisiones Según Normas Federales
/ EE.UU No para California: Declaración de garantía de STIHL Incorporated sobre sistemas de control de emisiones según normas Federales Sus derechos y obligaciones de costo alguno, incluido el diagnóstico (si reducirá las obligaciones de la garantía garantía el trabajo de diagnóstico fue realizado del fabricante del motor. -
Página 100: Diagnóstico
STIHL. La prueba del sistema Lleve el producto a cualquier centro de reglamentos aplicables durante un de control de emisiones se realiza ya servicio autorizado por STIHL y pre- período de dos años. -
Página 101: Sus Derechos Y Obligaciones De Garantía
/ EE.UU Solamente para California: Declaración de garantía de STIHL Incorporated sobre el control de emisiones de gases de escape y emisiones por evaporación para el Estado de California Sus derechos y obligaciones de Cobertura de garantía del Usted es responsable de llevar el motor pequeño para equipo de uso fuera de... -
Página 102: Período De Garantía Contra Defectos
Al propietario no se le debe cobrar el defectuoso, el mismo será sustituido por POR STIHL INCORPORATED, vea más trabajo del diagnóstico que establece que STIHL Incorporated sin costo alguno para arriba. Una declaración en las el componente garantizado es de hecho el propietario. -
Página 103: Marcas Comerciales
IntelliCarb™ Lleve el producto de STIHL a cualquier ® STIHL DUROMATIC concesionario de servicio autorizado por Master Control Lever™ STIHL y presente la tarjeta de registro de ® STIHL Farm Boss Micro™ producto STIHL firmado o la copia impresa ®... - Página 104 STIHL SuperCut™ STIHL Territory™ TapAction™ TrimCut™ Esta lista de marcas comerciales está sujeta a cambios. Queda terminantemente prohibido todo uso de estas marcas comerciales sin el consentimiento expreso por escrito de ANDREAS STIHL AG & Co. KG, Waiblingen. FS 55...
- Página 105 español / EE.UU FS 55...
- Página 106 ! WARNING! ! WARNING! ! ADVERTENCIA! The engine exhaust from this product The engine exhaust from this product El gas de escape del motor de esta máquina contiene productos químicos que en el estado de contains chemicals known to the State contains chemicals known to the State California son considerados como causantes de of California to cause cancer, birth...