Epson FX-890 Manual Del Usuario
Ocultar thumbs
Ver también para FX-890:
- Manual de referencia (264 páginas) ,
- Guia de instalacion (83 páginas) ,
- Guia de instalacion (2 páginas)
Tabla de contenido
Publicidad
Idiomas disponibles
Idiomas disponibles
Publicidad
Capítulos
Tabla de contenido
Solución de problemas

Manuales relacionados para Epson FX-890


Resumen de contenidos para Epson FX-890
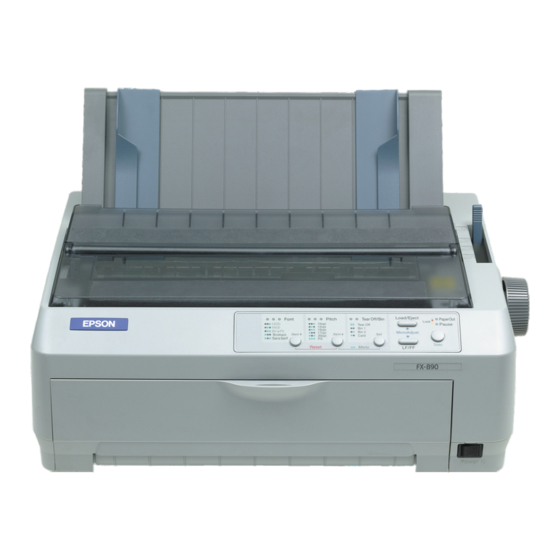
- Página 2 paper guide edge guides paper guide cover printer cover paper release lever front cover control panel power switch paper-thickness lever ribbon cartridge paper tension unit AC inlet sprockets knob optional interface cover parallel interface USB interface...
- Página 3 9-pin Dot Matrix Printer User’s Guide This manual is divided in two sections: English and Spanish. The English section begins after this page. The Spanish section begins approximately at the middle of the manual. Este manual está dividido en dos secciones: Inglés y Español. El manual en español comienza aproximadamente a la mitad del libro.
- Página 4 SEIKO EPSON CORPORATION. The information contained herein is designed only for use with this EPSON printer. EPSON is not responsible for any use of this information as applied to other printers.
-
Página 5: Tabla De Contenido
Contents Introduction Okidata Compatibility ........5 Options . - Página 6 For Canadian users ....... . . 46 EPSON AMERICA, INC., LIMITED WARRANTY ..47...
-
Página 7: Introduction
Okidata Compatibility ® ® You can make your FX-890 or FX-2190 work like the Okidata Microline 320 Turbo or 321 Turbo by turning the printer on in a different mode. For instructions, see page 40. -
Página 8: Options
(See the Reference Guide for more information.) You can purchase ribbon cartridges, paper, manuals, and accessories ® from EPSON at (800) 873-7766, or visit the EPSON Store www.epsonstore.com (U.S. sales only). In Canada, please call (800) 463-7766 for dealer referral. Introduction... -
Página 9: Setting Up The Printer
Chapter 1 Setting Up the Printer This chapter describes how to unpack and set up your printer. Unpacking the Printer Make sure you have the following items. Ribbon cartridge Paper guide Printer Power cord Printer software Follow the directions on the Notice Sheet to remove the protective materials before you turn on the printer. -
Página 10: Assembling The Printer
Avoid electrical outlets controlled by wall switches or automatic timers. An interruption in power can erase information in the memory of your printer or computer. Also avoid outlets on the same circuit as large motors or other appliances that can cause voltage fluctuations. - Página 11 Remove the new ribbon Ribbon guide cartridge from the package. The black plastic ribbon guide is held in place on top of the cartridge with a small tab. To release it, hold the sides of the ribbon guide and gently disconnect it.
- Página 12 You can use the paper guide only when the tractor is installed in the front or rear push position. For your safety and for the fastest printing, EPSON recommends keeping the printer cover closed while printing. Although you can print with the cover open, printing speed will be slower.
-
Página 13: Connecting The Printer To Your Computer
Connecting the Printer to Your Computer Your printer is equipped with both an IEEE-1284-compatible parallel interface and a USB (Universal Serial Bus) interface. It also includes a Type-B optional interface slot in case your computer requires a different type of printer interface. (See the Reference Guide if you need to install an interface card.) Note: You can connect cables to both interfaces;... - Página 14 Caution: There are several models of the printer designed for different voltages, and it is not possible to adjust the printer for use with another voltage. If the label on the back of the printer does not show the correct voltage for your country, contact your dealer.
-
Página 15: Installing The Printer Software
Installing the Printer Software After you connect the printer to your computer, you need to install the EPSON printer software on the CD-ROM shipped with your printer. The printer driver is the software that runs, or “drives,” your printer. With it, you can select printer settings such as print quality, resolution, and paper size. -
Página 16: For Dos Programs
To control the printer from DOS application programs, you need to select the printer you are using or another available printer from the printer list in your application. Choose the EPSON printer at the appropriate step in the installation or setup procedure. If the list in your application does not... -
Página 17: Installing And Using The Online Reference Guide
EPSON folder. To open the Reference Guide on your hard disk, click Start , go to Programs (or All Programs ) and select EPSON . Then, click FX890 2190 Guide . Installing the Remote Configuration Manager The EPSON Remote Configuration Manager provides an easy way to change your printer’s default settings in Windows. - Página 18 Setting Up the Printer...
-
Página 19: Paper Handling
Chapter 2 Paper Handling This chapter covers some important instructions you need to load and use paper in your printer. For complete paper handling information, see the Reference Guide. Setting the Paper Release Lever Before you start printing, be sure to set the paper release lever to indicate the paper source you want to use, as described... -
Página 20: Adjusting The Paper-Thickness Setting
Adjusting the Paper-Thickness Setting Before you start printing, make sure the paper-thickness setting is correct for the type of paper you are using. Turn the printer off and open the printer cover. The paper-thickness lever is located on the left side of the printer. -
Página 21: Loading Continuous Paper With The Front Push Tractor
Loading Continuous Paper with the Front Push Tractor Make sure the printer is turned off. Then open the front cover and the flap. Make sure the tractor is installed in the front push position. (You may need to move it from the rear push or pull position.) Set the paper release lever to the front push tractor position. - Página 22 Remove the front cover by pulling it straight down. Make sure your paper has a clean, straight edge. Then open both sprocket covers and fit the first four holes of the paper, with printable side up, over the tractor pins. Close the sprocket covers.
-
Página 23: Loading Continuous Paper With The Rear Push Tractor
If the first line on your page appears too high or low, you can change its position using the Micro Adjust function as described on page 32. Caution: Never use the knob to adjust the top-of-form position; this may damage the printer or cause it to lose the top-of-form position. -
Página 24: Loading Continuous Paper With The Pull Tractor
Make sure your paper has a clean, straight edge. Then open both sprocket covers and fit the first four holes of the paper, with the printable side down, over the tractor pins. Close the sprocket covers. Then slide the right sprocket to remove any slack in the paper and lock it in place by pushing the blue lock lever down. - Página 25 Release the sprockets by pulling the sprocket lock levers forward. Slide the left sprocket Edge guides approximately 0.5 inch (12 mm) from the far left position and push the lever back to lock it in place. Then slide the right sprocket to match the width of your paper, but do not lock it.
- Página 26 Insert the paper into the front or bottom paper slot as shown below until it emerges between the platen and the ribbon guide. Then pull up the paper until the perforation between the first and second pages is even with the top of the printer’s ribbon. Front slot Before you load paper in the front slot, remove the front...
- Página 27 Reattach the front cover. 10. Turn on the printer. 11. Remove any slack in the paper by pressing the LF/FF button. (Always remove any slack from the paper; otherwise print quality may deteriorate.) When the printer receives data, it will start printing at the current position without advancing the paper.
-
Página 28: Removing Paper From The Pull Tractor
The paper can be up to 10.1 inches (257 mm) wide on the FX-890 and 16.5 inches (420 mm) wide on the FX-2190. To load single-sheet multipart forms, use the front paper entry... - Página 29 Make sure the paper guide is in the upright position. Then set the paper-thickness lever to 0 if you are using ordinary single-sheet paper. (If you are using envelopes, see “Envelopes” on page 29 to set the lever.) Also move the paper release lever to the single-sheet position.
-
Página 30: Loading Special Papers
Loading Special Papers Follow the guidelines in this section when loading single-sheet multipart forms, labels, envelopes, and postcards. Single-sheet multipart forms To load single-sheet multipart forms, use the front paper entry slot with the optional front paper guide or front sheet guide installed. Thick paper, such as multipart forms with five or six parts, requires a straight paper path to avoid paper jams. -
Página 31: Envelopes
Do not load continuous paper with labels from the rear paper slot. Because the rear paper path is curved, labels may come off their backing sheets inside the printer and cause a paper jam. Do not load paper that is curled or has been folded. Removing continuous paper with labels To prevent labels from peeling off the backing sheet and jamming the printer, follow these steps to remove continuous paper with labels from... -
Página 32: Postcards
The print head must not print past the left or right edge of the envelope or other thick paper. Make sure your application program prints entirely within the recommended printable area of your envelope. See “Printer Specifications” in the Reference Guide for more information on the recommended printable area of envelopes. -
Página 33: Using The Micro Adjust Function
Using the Micro Adjust Function The Micro Adjust function allows you to move the paper forward or backward in 1/216-inch (0.118 mm) increments to adjust the tear-off and top-of-form positions. Adjusting the tear-off position If your paper’s perforation is not aligned with the tear-off edge, you can use the Micro Adjust function to move the perforation to the tear-off position, as described below. -
Página 34: Adjusting The Top-Of-Form Position
Open the paper guide cover, then press the LF/FF D button to feed paper backward, or press the Load/Eject U button to feed paper forward, until the paper perforation is aligned with the tear-off edge of the printer cover. Tear-off edge of the printer cover Paper perforation Note: The printer has a minimum and a maximum tear-off position. - Página 35 Make sure the printer is turned on. Load paper. (If the tractor is in a push position, press the Load/Eject button to advance continuous paper to the current top-of-form position.) If necessary, lift up the printer cover so you can see the paper position.
- Página 36 Paper Handling...
-
Página 37: Using The Control Panel
Chapter 3 Using the Control Panel This chapter describes the buttons and lights on the control panel, plus: Selecting a font and pitch Changing the printer’s default settings Emulating the Okidata Microline 320/321 Turbo printer Buttons and Lights Button/Light Function Font (Item Selects one of the fonts. - Página 38 Tear Off/Bin Feeds continuous paper forward to the tear-off position. (Set) button Feeds continuous paper backward from the tear-off position to the top-of-form position. Selects a cut-sheet feeder bin when it is installed. In default setting mode, works as the Set button to select a value.
-
Página 39: Selecting A Font And Pitch
Selecting a Font and Pitch Usually, you use your application program to select the font and pitch you want to use in a document. However, you can select one of the printer’s five fonts (in different pitches) with the buttons on the printer’s control panel, as described below. -
Página 40: Changing The Printer's Default Settings
There are two ways to do this: Using the EPSON Remote Configuration Manager on the printer software CD-ROM. (See page 15.) From the printer’s control panel using the default-setting mode. -
Página 41: Default-Setting Mode
Setting Options (default in bold) Auto CR (available in IBM Off, On PPDS emulation mode) IBM character table Table 2, Table1 Default-setting mode Follow the steps below to enter the default-setting mode. If you use single sheets, you need to load a new sheet of paper each time the printer ejects a printed page. -
Página 42: Emulating The Okidata Microline 320/321 Turbo
Off (No), On (Yes) Note: The FX-890 and FX-2190 do not support the USB interface in Okidata mode. If you want to use your printer in Okidata mode, do not install the Windows driver that came with your printer. If you have been using an Okidata driver, you can continue to use it with your printer in Okidata mode. -
Página 43: Troubleshooting
Chapter 4 Troubleshooting This chapter explains the error indicators and describes how to clear paper jams and print a self test. For more troubleshooting information, see your Reference Guide. If you cannot resolve the problem using the information in the manuals, see “Where To Get Help” on page 44. Using the Error Indicators Use the following table to diagnose printer errors. -
Página 44: Clearing Paper Jams
Turn off the printer and clear any obstruction Tear Off/Bin blocking the print head. Turn the printer back on. Font light O O O If the print head is still stuck, contact EPSON for Pitch light O O O service. •••••... -
Página 45: Printing A Self Test
See the Reference Guide for possible causes and solutions to the problem. You can print the self test using either single sheets or continuous paper of at least the following width: Paper type FX-890 FX-2190 Continuous paper (including 9.5 inches 14.8 inches... -
Página 46: Where To Get Help
Where To Get Help If your EPSON printer is not operating properly and you cannot solve the problem using the troubleshooting information, see the contact information below. EPSON provides technical assistance 24 hours a day through the electronic support services and automated telephone services listed below. -
Página 47: Product Information
Chapter 5 Product Information Safety Instructions Hot Parts Caution Symbol This symbol is placed on the print head and other parts to indicate that they may be hot. Never touch those parts just after the printer has been used. Let them cool for a few minutes before touching them. Important Safety Instructions Read all of these safety instructions before using the printer. -
Página 48: Fcc Compliance Statement For United States Users
Unplug the printer and refer servicing to qualified service personnel under the following conditions: if the power cord or plug is damaged, if liquid has entered the printer, if the printer has been dropped or the cabinet damaged, if the printer does not operate normally or exhibits a distinct change in performance. -
Página 49: Epson America, Inc., Limited Warranty
(905) 709-2170 (Canada) for warranty repair instructions and return authorization, if required. EPSON will, at its option, repair or replace on an exchange basis the defective unit, without charge for parts or labor. When warranty service involves the exchange of the product or of a part, the item replaced becomes EPSON property. - Página 50 USE OR INABILITY TO USE THE EPSON PRODUCT, WHETHER RESULTING FROM BREACH OF WARRANTY OR ANY OTHER LEGAL THEORY. IF THE REMEDY ABOVE FAILS, EPSON’S ENTIRE LIABILITY SHALL BE LIMITED TO A REFUND OF THE PRICE PAID FOR THE EPSON PRODUCT COVERED BY THIS LIMITED WARRANTY.
- Página 51 Impresora matricial de 9 agujas Manual del Usuario Este manual está dividido en dos secciones: Inglés y Español. El manual en español comienza después de esta página. El manual en inglés comienza al principio del manual. This manual is divided in two sections: English and Spanish. The English section starts at the beginning of the manual.
- Página 52 Seiko Epson Corporation. La información aquí contenida está diseñada para usarse solamente con esta impresora Epson. Epson no será responsable si esta información se usa con otras impresoras.
- Página 53 Tabla de contenido Introducción Compatibilidad con Okidata ......5 Opciones ..........6 Instalación de la impresora Desembalaje de la impresora .
- Página 54 (para Estados Unidos) ....... . . 48 Garantía limitada de productos EPSON ....49...
-
Página 55: Introducción
Resolución de problemas Información sobre la impresora Aunque las ilustraciones en este manual son de la FX-890, las instrucciones se refieren tanto a la FX-890 como a la FX-2190. Las advertencias se deben seguir al pie de la letra para evitar daños corporales. -
Página 56: Opciones
También existen tarjetas de interfaz opcionales además de las interfaces incorporadas de la impresora. Para mayor información, consulte el Manual de referencia. Puede comprar cartuchos de cinta, papel, manuales y accesorios de EPSON comunicándose con EPSON o con su distribuidor de productos ® EPSON más cercano. Introducción... -
Página 57: Instalación De La Impresora
Cápitulo 1 Instalación de la impresora Siga los pasos de este capítulo para desempacar e instalar la impresora. Desembalaje de la impresora Asegúrese de que cuenta con las siguientes partes: Cartucho de cinta Guía del papel Impresora Software de la Cable de alimentación impresora Siga las instrucciones en la hoja de desembalaje incluida para retirar el... -
Página 58: Selección De La Ubicación De La Impresora
Selección de la ubicación de la impresora Coloque la impresora sobre una superficie plana y estable. La impresora no funcionará correctamente si está inclinada o desnivelada. Evite usar o almacenar la impresora en lugares expuestos a cambios rápidos de temperatura o humedad. Manténgala alejada de la luz solar directa, de una luz intensa, de fuentes de calor o de un exceso de humedad o polvo. -
Página 59: Montaje De La Impresora
Montaje de la impresora Compruebe que la impresora esté apagada y desconectada. Luego abra la tapa de la impresora, tire de ella hacia arriba y retírela. Retire la unidad de tensión del papel levantando las lengüetas de ambos lados y tirando de la unidad hacia arriba. Deslice el cabezal de impresión hacia el centro de la impresora con la mano. - Página 60 Saque el cartucho de cinta Guía de la cinta nuevo de su envoltura. La guía negra plástica de la cinta está sujeta a la parte superior del cartucho por medio de una pequeña lengüeta. Para soltarla, sostenga ambos lados de la guía de la cinta y desconéctela con cuidado.
- Página 61 Reinstale la unidad de tensión del papel colocándola sobre las espigas de montaje de la impresora. Presione en ambos extremos hasta que calce en su lugar. Vuelva a colocar la tapa de la impresora insertando las lengüetas delanteras en las ranuras de la impresora y luego baje la tapa. Presione la tapa hasta que encaje en su lugar.
-
Página 62: Conexión De La Impresora A La Computadora
Para su seguridad y para obtener una impresión más rápida, EPSON recomienda que la cubierta de la impresora permanezca cerrada mientras la impresora imprime. Aunque es posible imprimir con la cubierta abierta, la velocidad de impresión disminuirá. - Página 63 Asegúrese de que la impresora y la computadora están apagadas, luego conecto el cable paralelo o USB a la impresora. Conexión paralela Conexión USB Conecte el otro extremo a la computadora. Precaución: Existen varios modelos de la impresora diseñados para voltajes diferentes; no es posible ajustarla para que funcione con otro voltaje.
-
Página 64: Instalación Del Software De La Impresora
Instalación del software de la impresora Después de conectar la impresora a la computadora, debe instalar el software de la impresora EPSON que se incluye en el CD-ROM que viene con la impresora. El driver de la impresora es el software que controla su impresora. -
Página 65: Instalación Y Uso Del Manual De Referencia
EPSON. de FX890 2190 Para abrir el Manual de referencia, haga clic en Inicio , vaya a Programas (o ) y seleccione EPSON . Luego haga clic en Manual Todos los programas de FX890 2190... -
Página 66: Manejo Del Papel
Capítulo 2 Manejo del papel Este capítulo contiene instrucciones importantes para cargar papel e imprimir con la impresora. Para mayor información sobre la manipulación del papel, consulte el Manual de referencia. Cómo fijar la palanca de grosor del papel Antes de imprimir, debe fijar la palanca de ajuste de grosor de papel para indicar la fuente de... -
Página 67: Cómo Seleccionar El Grosor Del Papel
Cómo seleccionar el grosor del papel Antes de empezar a imprimir, debe seleccionar el grosor de papel, dependiendo del tipo de papel que va a utilizar: Apague la impresora y abra la cubierta de la impresora. La palanca de grosor del papel está ubicada en el costado izquierdo de la impresora. -
Página 68: Cómo Cargar Papel Continuo Con El Tractor De Empuje Delantero
Cómo cargar papel continuo con el tractor de empuje delantero Compruebe que la impresora esté apagada. Abra la cubierta delantera y la solapa. Asegúrese de que el tractor está instalado en la posición de empuje delantera. (Es posible que tenga que moverlo de la posici ón de empuje o arrastre posterior.) Coloque la palanca de liberación de papel en la posición... - Página 69 Retire la cubierta frontal tirando de ella la hacia abajo. Asegúrese de que el borde de papel está recto. Luego abra ambas tapas de las ruedas de arrastre y coloque los primeros cuatro huecos del papel con el lado imprimible hacia arriba, sobre las clavijas del tractor.
-
Página 70: Cómo Cargar Papel Continuo Con El Tractor De Empuje Posterior
Si la primera línea se imprime muy arriba o muy abajo en la página, puede cambiar la posición utilizando la función de ajuste micrométrico según se describe en la página 31. Precaución: Nunca utilice la perilla para ajustar la posición de principio de página, pues podría dañar la impresora o perder la posición de principio de página. -
Página 71: Cómo Cargar Papel Continuo Con El Tractor De Arrastre
La señal de triángulo en la parte superior de la impresora indica el extremo izquierdo máximo desde donde la impresora puede imprimir. Asegúrese de que las orillas del papel están rectas. Luego abra ambas tapas de las ruedas de arrastre y coloque los primeros 4 huecos del papel con la cara imprimible hacia... - Página 72 Coloque la palanca de liberación de papel en la posición de tractor de arrastre. Libere las ruedas de arrastre moviendo las palancas de bloqueo de las ruedas de arrastre hacia adelante. Deslice la rueda de arrastre izquierda Guías laterales aproximadamente 12 mm (0,5 pulg.) desde el extremo izquierdo y tire de...
- Página 73 Introduzca el papel en la ranura de papel delantera o inferior como se indica abajo hasta que el papel aparezca entre el rodillo y la guía de la cinta. Luego tire del papel hasta que la línea perforada entre la primera y segunda hoja esté...
- Página 74 Vuelva a colocar la tapa delantera. Encienda la impresora. 10. Presione el botón LF/FF para tensar el papel. Asegúrese de que el papel está bien tensado, de lo contrario la calidad de impresión puede deteriorar.) Cuando la impresora recibe datos, empezará a imprimir en la posición en que se encuentra sin avanzar el papel.
-
Página 75: Cómo Retirar El Papel Del Tractor De Arrastre
Con la FX-890, el papel puede ser de hasta 257 mm de ancho (10,1 pulgadas) ó de hasta de ancho 420 mm (16,5 pulgadas) si se usa la FX-2190. - Página 76 Asegúrese de que la guía de papel está en posición vertical. Luego coloque la palanca de grosor del papel en 0 si va a utilizar hojas sueltas normales. (Si va a imprimir sobres, refiérase a la “Sobres” en la página 29 para las instrucciones de como ajustar la palanca de grosor del papel.) También debe mover la palanca de liberación de papel a la posición de hojas sueltas.
-
Página 77: Cómo Cargar Papeles Especiales
Cómo cargar papeles especiales Siga las indicaciones en esta sección cuando utilice los siguientes tipos de papel especiales: formularios multicopia en hojas sueltas, etiquetas, sobres y tarjetas. Formularios multicopia en hojas sueltas Utilice la ranura de entrada delantera para cargar formas multicopias de hojas sueltas utilizando la guía de papel delantera o la guía de hojas delantera opcional. -
Página 78: Cómo Retirar Papel Continuo Con Etiquetas
Debido a que las etiquetas son muy sensibles a la temperatura y la humedad, utilícelas solamente bajo condiciones de funcionamiento normal como las que se describen a continuación: Temperatura 15 a 25°C (59 a 77°F) Humedad 30 a 60% HR Retire las etiquetas de la impresora si no las va a utilizar;... -
Página 79: Tarjetas Postales
Para cargar sobres individuales, siga las instrucciones en la página “Cómo cargar hojas sueltas con la guía de papel” en la página 26. Para cargar varios sobres, refiérase al Manual de referencia. Nota: Asegúrese de colocar el sobre con el lado imprimible hacia abajo e introduzca el sobre por el borde superior. -
Página 80: Cómo Utilizar La Función De Ajuste Micrométrico
Para cargar una tarjeta individual, siga las instrucciones en la página “Cómo cargar hojas sueltas con la guía de papel” en la página 26. Para cargar varias tarjetas, refiérase al Manual de referencia. Nota: Cuando vaya a cargar tarjetas por el borde ancho, cárguelas en la ranura superior. -
Página 81: Ajuste De La Posición De Principio De Página
Sostenga el botón Pause (Pausa) durante uno tres segundos. La luz de Pause comienza a parpadear y la impresora pasa a modo de ajuste micrométrico. Abra la tapa de la guía de papel, luego presione el botón LF/FF D para hacer retroceder el papel, o presione el botón Load/Eject U (Cargar/Expulsar) para hacer avanzar el papel, hasta que la línea perforada quede alineada con el borde de corte de la tapa de la impresora. - Página 82 Precaución: Nunca utilice la perilla para ajustar la posición de principio de página, pues podría dañar la impresora o perder la posición de principio de página. Compruebe que la impresora esté encendida. Cargue papel en la impresora. (Si el tractor está en posición de empuje, presione el botón Load/Eject (Cargar/Expulsar) para avanzar el papel continuo a la posición de principio de página actual.) Si es necesario, levante la tapa de la impresora para poder...
-
Página 83: Cómo Utilizar El Panel De Control
Capítulo 3 Cómo utilizar el panel de control Este capítulo describe los botones y luces del panel de control, y también: Cómo seleccionar los ajustes de fuente y espacio entre letras Cómo modificar los ajustes predeterminados de la impresora Cómo emular la impresora Okidata Microline Turbo 320/321 Botones y luces Botón/Luz Función... - Página 84 Botón Tear Off/Bin Avanza el papel continuo hasta la posición de corte. (Corte/Bandeja) Hace retroceder el papel continuo desde la posición de corte a la posición de principio de página. Selecciona la bandeja del alimentador de hojas sueltas cuando dicho alimentador está instalado. Luces Tear Off/Bin Parpadean cuando el papel continuo está...
-
Página 85: Selección De Fuente Y Espaciamiento
Botón Pause Detiene la impresión de manera provisional y la (Pausa) reanuda cuando se presiona otra vez. Cuando se sostiene tres segundos, la impresora pasa a modo de ajuste micrométrico. Cuando se vuelve a presionar, desactiva el modo de ajuste micrométrico. Luz Paper Out Se ilumina cuando no hay papel cargado en el origen (Falta de papel) -
Página 86: Cómo Cambiar Los Valores Predeterminados
Presione el botón Pitch (espaciamiento) hasta que las tres luces de Pitch indiquen el espaciamiento que desea seleccionar. 10 cpp N N O 12 cpp N O N 15 cpp N O O 17 cpp O N N 20 cpp O N O O O O = encendida,... - Página 87 Valor Opciones (valores predeterminados en negrillas) Parallel I/F bidirectional Off (apagado),On (encendido) mode (Modo bidireccional de interfaz paralela) Packet mode Off (apagado), Auto (Modo de paquete) 0 slash (0 con barra) 0, (el caracter cero con barra) Buzzer (Indicador Off (apagado), On (encendido) acústico) Auto CR (Auto retorno de Off (apagado), On (encendido)
-
Página 88: Modo De Configuración De Valores Predeterminados
Emulación de Okidata Microline 320/321 Turbo Su impresora FX-890 ó FX-2190 puede funcionar como la Okidata Microline 320 Turbo ó 321 Turbo. En el modo Okidata, la impresora emula las funciones de la impresora Okidata y puede seleccionar los siguientes valores adicionales en el modo de configuración de valores. - Página 89 Encendido [Sí]) Nota: Las FX-890 y FX-2190 no son compatibles con la interfaz USB en modo Okidata. Si desea utilizar su impresora en modo Okidata, no instale el driver de Windows que se incluyó con su impresora. Si ha estado utilizando el driver de Okidata, puede utilizarlo con su impresora en modo Okidata.
-
Página 90: Resolución De Problemas
Capítulo 4 Resolución de problemas Este capítulo describe los indicadores de error y explica cómo despejar las obstrucciones de papel y cómo imprimir una hoja de autoverificación. Consulte el Manual de referencia para más información. Si no puede solucionar el problema con la información que se encuentra en los manuales, refiérase a “Dónde obtener ayuda”... -
Página 91: Cómo Despejar Papel Obstruido
Problema Estado de las Secuencia luces de bips Solución ••• Paper Out El papel continuo no avanza a la posición de Pause espera. (continuado) Corte la hoja impresa por la perforación, luego presione el botón Load/Eject para avanzar el papel a la posición de espera. •••... -
Página 92: Cómo Imprimir Una Hoja De Autoverificación
Refiérase al Manual de referencia para determinar las posibles causas y soluciones del problema. Puede imprimir los resultados de la autoverificación utilizando hojas sueltas o papel continuo con las siguientes medidas mínimas: Tipo de papel FX-890 FX-2190 Papel continuo (incluso papel 241 mm 376 mm... -
Página 93: Dónde Obtener Ayuda
EPSON suministra apoyo técnico a través de los servicios de apoyo electrónicos y los servicios telefónicos que se indican a continuación. - Página 94 Prueba de compra (factura del almacén que le vendió el equipo) y fecha de la compra Configuración de la computadora Descripción del problema Puede comprar cartuchos de cinta, papel, manuales y accesorios de EPSON comunicándose directamente con EPSON o con su distribuidor más cercano. Resolución de problemas...
-
Página 95: Información Sobre La Impresora
Capítulo 5 Información sobre la impresora Instrucciones de seguridad Símbolo de precaución con piezas calientes Este símbolo aparece en el cabezal de impresión y en otras piezas para indicar que podrían estar calientes. No toque estas piezas justo después de imprimir. Espere a que se enfríen antes de tocarlas. Instrucciones de seguridad importantes Lea todas las instrucciones de seguridad antes de utilizar la impresora. -
Página 96: Declaración De Cumplimiento Con La Fcc (Para Estados Unidos)
Desconecte la impresora y hágala reparar por personal calificado si se presenta una de las siguientes situaciones: el cable de alimentación o el enchufe están estropeados, la impresora se cayó o el gabinete sufrió algún daño, la impresora no funciona correctamente o el rendimiento es diferente. Declaración de cumplimiento con la FCC (para Estados Unidos) Este equipo ha sido probado, y se ha determinado que cumple con los límites establecidos... -
Página 97: Garantía Limitada De Productos Epson
La presente garantía no incluye compensación o indemnización alguna originada por las fallas de funcionamiento del producto EPSON. En cualquier caso la responsabilidad máxima de EPSON para con el cliente quedará limitada al precio de compra pagado a EPSON o al canal de venta autorizado. - Página 98 Para obtener el servicio de garantía, el cliente puede acudir a cualquiera de los Centros Autorizados de Servicio EPSON con una copia de su factura de compra o llamar a los Centros de Asistencia Técnica EPSON (vea la lista por países, más adelante).
- Página 99 Cualquier actividad relacionada con la reinstalación o reposición del software entregado con el equipo será facturada al cliente a las tarifas en vigor del Centro de Servicio EPSON. Esto mismo aplica si la falla es causada por un defecto del software propietario del cliente o “virus” informáticos.
- Página 100 Lista de subsidiarias y oficinas EPSON en Latinoamérica Epson Argentina S.A. Epson Costa Rica, S.A. Epson Venezuela, S.A. Avenida Belgrano 964/970 Embajada Americana, Calle 4 con Calle 11-1 (1092), Buenos Aires, 200 Sur y 300 Oeste La Urbina Sur Argentina San José, Costa Rica...
- Página 101 guía del papel guías laterales cubierta de la guía del papel cubierta de la impresora palanca de liber- ación del papel cubierta frontal panel de control interruptor cartucho de cinta palanca de ajuste de grosor tensor del papel entrada CA unidad de arrastre mando cubierta de la...