Tabla de contenido
Publicidad
Idiomas disponibles
Idiomas disponibles
Publicidad
Capítulos
Tabla de contenido

Manuales relacionados para Britax ONE4LIFE CLICKTIGHT


Resumen de contenidos para Britax ONE4LIFE CLICKTIGHT
- Página 1 ONE4LIFE ™ CLICKTIGHT ® User Guide Guía del Usuario...
-
Página 3: Tabla De Contenido
Warranty �������������������������������������������������������������� 47 ONE4LIFE , BRITAX , and CLICKTIGHT are trademarks owned by Britax ® ® Child Safety, Inc. All rights reserved. ©2020 Britax Child Safety, Inc. This product and its components are subject to change without notice. Printed in USA. P12779500_A:06.20. -
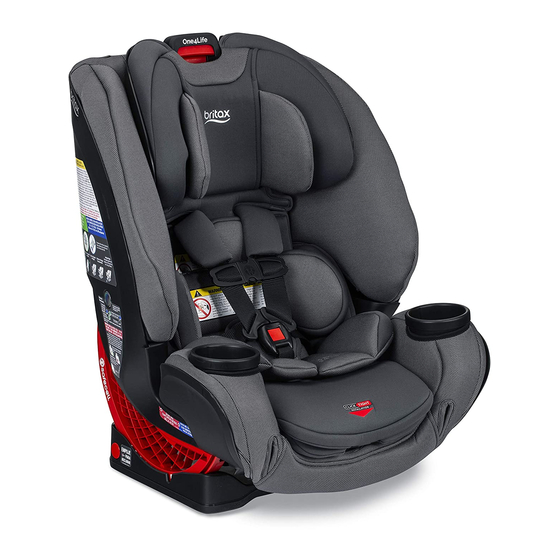
Página 4: Features Overview
Features Overview Front 1. Harness and Headrest 14. Harness Adjuster Strap Adjuster 15. Lower Connectors 2. Headrest Insert (LATCH component) 3. Harness Straps 16. Lower Connector Adjuster (LATCH component) 4. Comfort Pads 5. Chest Clip 17. Lower Connector Adjuster Release Button 6. - Página 5 Rear 21. Headrest 34. Safecell Impact Protection BOOSTER Mode 35. Top Tether Hook Shoulder Belt Guide 36. FORWARD-Facing 23. Carry Handle Belt Path 24. Top Tether Strap 25. Top Tether Adjuster 26. Shell 27. Recline Indicator 28. Cup Holder (2) 29.
-
Página 6: Safety Information
Safety Information Warnings WARNING! Failure to follow all warnings and instructions on the restraint system could result in SERIOUS INJURY or DEATH. Carefully read all the instructions in this user guide and on the child restraint before using this product. Keep this user guide in the user guide storage pocket under the seat cover for future use. -
Página 7: Notes
• Ensure the upper harness (shoulder) straps are firmly adjusted so that the child is secure. • The use of non-Britax covers, inserts, toys, accessories or tightening devices is not approved by Britax. Their use could cause this child restraint not to perform as intended in a crash. -
Página 8: Register Your Child Restraint
Send your name, address, e-mail address if available and the restraint’s model number and manufacturing date to Britax Child Safety, Inc. P.O. Box 91167 Allentown, PA 18109-9925, or call 1-888-427-4829 or 1-704-409-1699, or register online at us.britax.com/registration. - Página 9 Aircraft For aircraft installation the top tether cannot be used. For REAR-facing aircraft installation: 1. Recline this child restraint (see page 15) and place REAR-facing on the aircraft seat. 2. Slide the aircraft lap belt into the REAR-facing belt path over the cover with the CLICKTIGHT in the closed position.
-
Página 10: Child Fit Guidelines
Child Fit Guidelines Britax strongly recommends that children ride REAR-facing to the highest weight or height specified. NOTE: Infants weighing less than 22 lb (10 kg) MUST use the child restraint REAR-facing. No child restraint can guarantee protection from injury in every situation, but proper use helps reduce the risk of serious injury and death. -
Página 11: Vehicle Compatibility Guidelines
Vehicle Compatibility Guidelines Vehicle Buckle Positions WARNING! The position of the vehicle belt buckle can adversely affect the stability of the child restraint. If the vehicle buckle lies near the incorrect position ( ) when the vehicle belt is tightened, try fitting the child restraint in another seating position in the vehicle. - Página 12 Motorized, automatic top or bottom anchor vehicle seat belts. points on the vehicle door. NOTE: This Britax child restraint may not be compatible with every inflatable lap-shoulder belt. See FAQs in the support section of the Britax website (us.britax.com/faqs) for additional...
-
Página 13: Harness Mode
Using the Lower Anchors and Tethers for Children (LATCH) LATCH SYSTEM ANCHOR LOCATIONS Lower Anchors 11 in. (27.9 cm) Tether Lower Anchor Anchors The Lower Anchors and Tethers for Children or LATCH, is a system available on this child restraint that offers an alternative to vehicle seat belt installation methods. -
Página 14: Features
3 in 3 in Acceptable Acceptable Not Acceptable Rear-Facing Forward-Facing Overhang Harness Mode Harness Mode Booster Mode Features Harness and Headrest Adjuster The headrest and the harness heights adjust together. Adjusting Headrest and Harness Positions 1. Squeeze the harness and headrest adjuster at the top of the headrest and raise or lower it into desired position. - Página 15 2. Open the CLICKTIGHT. Squeeze the CLICKTIGHT release buttons underneath the front cover flap and lift to open. 3. Lift the front of the seat cover off the CLICKTIGHT. 4. Locate the metal bracket on the underside of the CLICKTIGHT. 5.
-
Página 16: Recline Button And Recline Indicator
Recline Button and Recline Indicator NOTES: • The seat has nine (9) recline positions. • Set the recline position before installing. • The vehicle MUST be on level ground. • If necessary, the proper recline angle REAR-facing ONLY can be achieved by placing a rolled towel or pool noodle under the base. - Página 17 REAR-FACING HARNESS INSTALLATION For infants with NO head and neck control: Recline indicator can NOT Recline indicator arrow be in the stripe blue-green tip must be in solid blue or black section. section. For children with head and neck control: Recline indicator arrow tip Recline indicator can NOT be in the black section.
-
Página 18: Booster Mode Installation
BOOSTER MODE INSTALLATION Recline indicator arrow Recline indicator arrow tip tip must be in black can NOT be in the blue or striped blue-green section. section. IMPORTANT: Recline MUST be in position “B” when seat is used in BOOSTER mode. Reclining the Seat in BOOSTER Mode... -
Página 19: Anti-Rebound Bar (Arb)
Anti-Rebound Bar (ARB) (For models with anti-rebound bar) In the event of a crash, the anti-rebound bar is designed to help prevent rebound rotation in rear-facing car seat installations. Installing the Anti-Rebound Bar WARNING! • The anti-rebound bar is not intended for use as a carry handle. -
Página 20: Installation
Installation REAR-Facing Installation Harness Mode Britax strongly recommends that children should ride REAR- facing until they exceed the weight or height limits specified. Use REAR-facing only: • with harness straps in closest position below the child’s shoulders, and • with children weighing 5 - 50 lb (2.3 - 22.7 kg), and... - Página 21 4. Open the CLICKTIGHT. Squeeze the CLICKTIGHT release buttons underneath the front cover flap and lift to open. 5. Route the vehicle lap- shoulder belt through the REAR-facing belt path marked by blue labels. 6. Ensure the belt is not twisted, then buckle the vehicle seat belt.
- Página 22 9 Both red CLICKTIGHT release buttons are visible after installation. 9 All connections are secure and vehicle belt is not twisted. 9 Car seat base MUST be flat on vehicle seat and MUST be parallel to vehicle seat. 9 Recline indicator is still within the correct section for REAR-facing, after child is secured.
- Página 23 6. Ensure that no more than 3 in (7.6 cm) of the base hangs over the front edge of the vehicle seat. 3 in 3 in 7. Slide the lower connector strap into the REAR-facing belt path marked by blue labels. 8.
-
Página 24: Vehicle Lap Belt Only
NOTE: Do NOT install by this method for a child weighing more than 30 lb (13.6 kg). 9 Both red CLICKTIGHT release buttons are visible after installation. 9 All connections are secure and vehicle belt is not twisted. 9 Car seat base MUST be flat on vehicle seat and MUST be parallel to vehicle seat. - Página 25 5. Route the lap vehicle seat belt through the REAR-facing belt path marked by blue labels. 6. Ensure the belt is not twisted then buckle the vehicle seat belt. 7. Lock and remove slack from vehicle seat belt. NOTE: Make sure that the vehicle seat belt is locked as directed by your vehicle owner’s manual.
-
Página 26: Forward-Facing Installation Harness Mode
FORWARD-Facing Installation Harness Mode Britax strongly recommends: • children should ride REAR-facing until they exceed the weight or height limits specified. • the top tether be used at ALL times when installing the child restraint FORWARD-facing. - Página 27 2. Unhook the top tether hook from the back of the child restraint and place it up and over the seatback. 3. Recline child restraint to the appropriate position. Refer to page 15 to determine appropriate recline position. 4. Place the child restraint FORWARD-facing on the vehicle seat so that the car seat base is flat on the...
- Página 28 11. Ensure both CLICKTIGHT release buttons are visible. NOTE: If it is difficult to close, you may have locked your vehicle seat belt or removed too much slack. 12. Connect the top tether hook to the vehicle’s top tether anchor (check the vehicle owner’s manual for location).
-
Página 29: Lower Anchor Connectors And Top Tether (Latch)
Installation with Lower Anchor Connectors and Top Tether (LATCH) Do NOT install by this method for a child weighing more than 35 lb (15.9 kg). 1. Extend the top tether strap by lifting on the top tether adjuster. 2. Unhook the top tether hook from the back of the child restraint and place it up and over the seatback. - Página 30 9. Route the lower connector strap through the FORWARD-facing belt path marked by green labels. 10. Firmly press lower connectors onto their adjacent anchors until a click is heard. 11. Ensure the connector strap is not twisted. Pull the end of the lower connector strap to remove slack.
-
Página 31: Vehicle Lap Belt Only
9 Both red CLICKTIGHT release buttons are visible after installation. 9 All connections are secure and strap is not twisted. 9 Car seat base MUST be flat on vehicle seat and MUST be parallel to vehicle seat. 9 Recline indicator is still within the correct section for FORWARD- facing, after securing the child. - Página 32 7. Route the lap vehicle belt through the FORWARD- facing belt path marked by green labels. 8. Ensure the belt is not twisted and fasten the seat belt. 9. Push down into the middle of the child restraint with moderate force (approximately 20.4 kg/45 lb), compressing the vehicle seat while tightening the...
-
Página 33: Booster Mode Installation
BOOSTER Mode Installation IMPORTANT: Britax strongly recommends that children should remain in a child seat with a 5-point harness until reaching the maximum weight or height allowed. Use in... - Página 34 1. Refer to page 37 to convert from harness to BOOSTER mode. 2. Adjust the child restraint to position “B” by pushing the red recline button on either side of the base. 3. Extend the top tether strap by lifting on the top tether adjuster.
- Página 35 8. Place child restraint on the vehicle seat so that the car seat base is flat on the vehicle seat and is parallel to vehicle seat. NOTE: If your vehicle seat back is adjustable, ensure it is in the upright position before placing the child seat on the vehicle seat.
-
Página 36: Securing Your Child
9 Child restraint is in recline position “B”. 9 Child restraint is in a vehicle seat that has a lap-shoulder belt. 9 All connections are secure and strap is not twisted. 9 Car seat base MUST be flat on vehicle seat and MUST be parallel to vehicle seat. - Página 37 3. Open the chest clip by squeezing the tabs (A) and pull apart (B). 4. Release the buckle and place the harness straps to the side. 5. Place child in the child restraint. Ensure the child is positioned upright in the child restraint and not slouching.
-
Página 38: Booster Mode
Before traveling, verify that the: 9 Recline indicator is still in acceptable range. 9 Harness straps are not twisted. 9 Harness is snug. 9 Buckle is fastened. 9 Chest clip is at the child’s armpit level. 9 Bulky coats and jackets are removed. Booster Mode NOTE: •... -
Página 39: Switching Between Harness And Booster Mode
7. Ensure the shoulder part lays across the center of the child’s chest, above the child’s shoulder and does not contact the childs neck (A). The lap part of the vehicle belt is routed low across the childs upper thighs (B). Before traveling, verify that the: 9 Vehicle belt is not twisted. - Página 40 3. (A) Open the chest clip. (B) Open the fasteners on the headrest cover and remove the harness straps. 4. Flip up the headrest cover. 5. Release the buckle. 6. Position the harness straps behind the seat pan cover. NOTE: Located under the fasteners near the bottom of the harness straps.
- Página 41 10. Locate the space in- between the back of the Back of the shell shell and the back-top part of the seat pan. Seat Pan 11. Tuck in the buckle tongues and comfort pads, pushing them with force down into the gap until the chest clip and excess webbing are no longer visible.
-
Página 42: Booster Mode To Harness Mode
16. Roll the remaining harness adjuster strap. 17. Tuck the remaining harness adjuster strap into the front of the cover. 18. Close the CLICKTIGHT. 19. Flip down the headrest cover back and reattach fasteners. Booster Mode to Harness Mode 1. Flip the headrest cover up. 2. - Página 43 5. Open the chest clip. 6. Flip the seat pan cover up. Pull the harness strap from underneath the seat pan cover and route the harness straps through the seat pan cover slots and reattach fasteners. 7. Flip the headrest cover back down.
-
Página 44: Removing And Installing Seat Cover
Removing and Installing Seat Cover Removing the Cover Removing the Headrest Cover 1. Loosen the harness. Press the harness release button (A) and pull both harness straps forward (B). 2. Release the buckle. 3. Lift the elastic strap up and away from the rear of headrest adjuster. - Página 45 3. Undo the fasteners near the bottom of the harness straps. 4. Pull the cover away from the harness and child restraint. Separate the belly pad from the rest of the cover (if needed). Removing the Side Protection Top Cover 1.
- Página 46 2. Pull the cover away from the belt path area. 3. Pull the cover up and over the cup holders. Removing the Anti-Rebound Cover (For models with anti-rebound bar) 1. Open the CLICKTIGHT. 2. Unhook elastic bands from the front of the seat. 3.
- Página 47 4. Attach elastics to the hooks on the shell. Installing the Side Protection Top Cover 1. Route the elastic up and around the carry handle. 2. Tuck cover into the remainder of the child restraint. 3. Attach the elastic loops to the hooks on the backrest.
- Página 48 6. Route the bottom of the harness through the slots and reattach fasteners. Installing the Headrest Cover 1. Raise the headrest to the highest position. Tuck both sides of the headrest cover under and around the headrest foam. 2. Route the elastic strap around headrest adjuster.
-
Página 49: Cleaning
• Bleach instructions • Iron • If care label indicates Cover machine washable, always refer to us.britax. com/faqs for important care information. • SPONGE CLEAN the DO NOT harness using warm • Disassemble water and mild soap. -
Página 50: Warranty
Proof of purchase is required. Your exclusive remedy for this warranty is that Britax will, at its option, provide repair or replacement components for this product. Britax reserves the right to discontinue or change fabrics, parts, models or products, or to make substitutions. - Página 51 ONE4LIFE , BRITAX® y CLICKTIGHT® son marcas comerciales propiedad de Britax Child Safety, Inc. Todos los derechos reservados. ©2020 Britax Child Safety, Inc. Este producto y sus componentes se encuentran sujetos a cambios sin previo aviso. Impreso en EE. UU. P12779500_A:06.20.
-
Página 52: Resumen De Características
Resumen de características Parte Frontal 1. Ajustador del arnés y del 13. Botones de liberación reposacabezas CLICKTIGHT (debajo de la solapa de la funda 2. Inserto del frontal) reposacabezas 14. Correa de ajuste del 3. Correas del arnés arnés 4. Almohadillas para 15. -
Página 53: Orientación Hacia Atrás
Parte Posterior 21. Reposacabezas 32. Botón de reclinación 22. Guía para el cinturón 33. Base del hombro modo SILLA 34. Protección contra ALTA impactos Safecell 23. Manija para el 35. Gancho de amarre transporte superior 24. Correa de fijación 36. Camino del cinturón para superior (componente ORIENTACIÓN HACIA LATCH) -
Página 54: Información De Seguridad
Información de seguridad Advertencias ADVERTENCIA! De no seguirse todas las advertencias e instrucciones, podrían provocarse LESIONES GRAVES o la MUERTE. Lea detenidamente todas las instrucciones de esta guía del usuario y del asiento de seguridad para niños antes de utilizar este producto. -
Página 55: Notas
• El uso de fundas, insertos, juguetes, accesorios o dispositivos de ajuste no fabricados por Britax no está aprobado por Britax. Su uso podría causar que este asiento de seguridad para niños no funcione según lo previsto en un choque. -
Página 56: Registre Su Asiento De Seguridad Para Niños
Envíe su nombre, dirección, dirección de correo electrónico si está disponible y el número de modelo del asiento y la fecha de fabricación a Britax Child Safety, Inc. P.O. Box 91167 Allentown, PA 18109-9925 o llame al 1-888-427-4829 o 1-704-409-1699, o regístrese en línea en us.britax.com/registration. - Página 57 Aeronaves Para la instalación en aeronaves no se puede utilizar el amarre superior. Para la instalación en aeronaves con orientación HACIA ATRÁS: 1. Recline este asiento de seguridad para niños (consulte la página 15) y colóquelo con orientación HACIA ATRÁS en el asiento de la aeronave.
-
Página 58: Pautas Para El Ajuste Del Niño
Pautas para el ajuste del niño Britax recomienda encarecidamente que los niños viajen con orientación HACIA ATRÁS hasta que alcancen el peso o la altura más altos especificados. NOTA: Los bebés que pesen menos de 10 kg (22 lb) DEBEN usar el asiento de seguridad del automóvil con orientación... -
Página 59: Pautas De Compatibilidad De Vehículos
Pautas de compatibilidad de vehículos Posiciones de la hebilla del vehiculo ADVERTENCIA! La posición de la hebilla del cinturón del vehículo puede afectar negativamente la estabilidad del asiento de seguridad para niños. Si la hebilla del vehículo está cerca de la posición incorrecta ( ) cuando el cinturón del vehículo esté... - Página 60 NOTA: Este asiento de seguridad para niños Britax puede no ser compatible con todos los cinturones inflables de cadera y hombros. Consulte las preguntas frecuentes en la sección de soporte del sitio web de Britax (us.britax.com/faqs) para obtener...
-
Página 61: Saliente Del Asiento Del Vehículo
Uso de los anclajes y amarres inferiores para niños (LATCH) UBICACIONES DE LOS ANCLAJES DEL SISTEMA LATCH Reposacabezas del asiento del vehículo Anclajes de retención con orientación delantera Sistema retráctil del cinturón de Anclajes inferiores seguridad del vehículo 27,9 cm (11 in.) Cinturón de seguridad del vehículo con... -
Página 62: Características
7,6 cm 7,6 cm Acceptable Acceptable Not Acceptable Rear-Facing Forward-Facing Overhang Harness Mode Harness Mode Booster Mode Características Adjustador del arnés y del reposacabezas La altura del reposacabezas y del arnés se ajustan juntas. Cómo ajustar las posiciones del reposacabezas y del arnés 1. - Página 63 2. Abra el CLICKTIGHT. Apriete los botones de liberación CLICKTIGHT debajo de la solapa de la funda frontal y levántelos para abrirlos. 3. Levante la parte delantera de la funda del asiento del CLICKTIGHT. 4. Localice el soporte metálico en la parte inferior del CLICKTIGHT.
-
Página 64: Botón De Reclinación E Indicador De Reclinación
Botón de reclinación e indicador de reclinación NOTAS: • El asiento tiene nueve (9) posiciones reclinables. • Ajuste la posición de reclinación antes de la instalación. • El vehículo DEBE estar en un terreno nivelado. • Si es necesario, el ángulo de reclinación adecuado se puede lograr colocando una toalla enrollada un tubo de espuma en la unión respaldo-cojín del asiento del vehículo. -
Página 65: Instalación Con Vista Hacia Atrás
INSTALACIÓN CON VISTA HACIA ATRÁS Para infantes SIN control de su cabeza y cuello: La punta de la flecha La punta de la flecha indicadora de reclinación indicadora de reclinación NO debe estar en el área debe estar dentro del área de rayas azules y verdes de color azul sólido. -
Página 66: Instalación Del Modo Silla Alta
INSTALACIÓN DEL MODO SILLA ALTA La punta de la flecha La punta de la flecha indicadora de reclinación indicadora NO debe de debe estar dentro del área estar en la sección azul. negra o rayas azules y verdes. IMPORTANTE: La reclinación DEBE estar en la posición “B” cuando se utiliza el asiento en modo SILLA ALTA. -
Página 67: Barra Anti-Rebote (Arb)
Barra Anti-Rebote (ARB) (Para modelos con la barra anti-rebote) En el caso de un accidente, la barra anti-rebote está diseñada para ayudar a prevenir la rotación del rebote en las instalaciones del asiento para niños orientadas hacia atrás. Instalación de la barra anti-rebote ¡ADVERTENCIA! •... -
Página 68: Instalación
Instalación Instalación para la orientación hacia atrás en modo arnés Britax recomienda encarecidamente que los niños viajen con orientación HACIA ATRÁS hasta que excedan los límites de peso o altura especificados. Use solo la orientación HACIA ATRÁS: • con las correas del arnés en la posición más cercana por debajo... - Página 69 4. Abra el CLICKTIGHT. Apriete los botones de liberación CLICKTIGHT debajo de la solapa de la funda frontal y levántelos para abrirlos. 5. Dirija el cinturón para cadera y hombros del vehículo a través del camino del cinturón con orientación HACIA ATRÁS marcado con etiquetas azules.
-
Página 70: Instalación Con Conectores De Anclaje Inferior (Latch)
LISTA 9 Ambos botones rojos de liberación CLICKTIGHT están visibles luego de la instalación. 9 Todas las conexiones son seguras y el cinturón del vehículo no está retorcido. 9 La base del asiento de vehículo DEBE quedar fija en el asiento y paralela al asiento del automóvil. - Página 71 6. Asegúrese de que no más de 7,6 cm (3 pulgadas) de la base sobresalgan del borde delantero del asiento del vehículo. 7,6 cm 7,6 cm 7. Deslice la correa del conector inferior a través del camino del cinturón con orientación HACIA ATRÁS marcado con etiquetas azules.
-
Página 72: Instalación Con Cinturón De Cadera Solamente
NOTA: NO utilice este método de instalación para niños que pesen más de 13,6 kg (30 lb). LISTA 9 Ambos botones rojos de liberación CLICKTIGHT están visibles luego de la instalación. 9 Todas las conexiones son seguras y la correa no está torcida. 9 La base del asiento de vehículo DEBE quedar fija en el asiento y paralela al asiento del automóvil. - Página 73 5. Dirija el cinturón de cadera del vehículo a través del camino del cinturón con orientación HACIA ATRÁS marcado con etiquetas azules. 6. Asegúrese de que el cinturón no esté retorcido y luego abroche el cinturón de seguridad del vehículo. 7.
-
Página 74: Instalación Para La Oritentación Hacia Adelante En Modo De Arnés
Instalación para la orientación hacia adelante en modo arnés Britax recomienda encarecidamente: • que los niños viajen con orientación HACIA ATRÁS hasta que excedan los límites de peso o altura especificados, y •... -
Página 75: Hacia Delante
2. Desenganche el gancho de amarre superior de la parte trasera del asiento de seguridad para niños y colóquelo hacia arriba y sobre el respaldo del asiento. 3. Recline el asiento de seguridad para niños en la posición adecuada. Consulte la página 15 para determinar la posición de reclinación adecuada. - Página 76 11. Asegúrese de que ambos botones de liberación CLICKTIGHT estén visibles. NOTA: Si es difícil de cerrar, es posible que se haya bloqueado el cinturón de seguridad del vehículo o que haya retirado demasiado sobrante. 12. Conecte el gancho de amarre superior al ancla de amarre superior del vehículo (consulte el...
-
Página 77: Instalación Con Conectores De Anclaje Inferior Y Amarre Superior (Latch)
Instalación con conectores de anclaje inferior y amarre superior (LATCH) NO utilice este método de instalación para niños que pesen más de 15,9 kg (35 lb). 1. Extienda la correa de amarre superior levantando el ajustador del amarre superior. 2. Desenganche el gancho de amarre superior de la parte trasera del asiento de seguridad para niños y colóquelo hacia... - Página 78 9. Dirija la correa del conector inferior a través del camino del cinturón con orientación HACIA ADELANTE marcado con etiquetas verdes. 10. Presione firmemente los conectores inferiores sobre los anclajes adyacentes hasta que se oiga un clic. 11. Asegúrese de que la correa del conector no esté...
-
Página 79: Solamente Cinturón De Cadera Del Vehículo
LISTA 9 Ambos botones rojos de liberación CLICKTIGHT están visibles luego de la instalación. 9 Todas las conexiones son seguras y el cinturón del vehículo no está retorcido. 9 La base del asiento de vehículo DEBE quedar fija en el asiento y paralela al asiento del automóvil. - Página 80 7. Dirija el cinturón de cadera del vehículo a través del camino del cinturón con orientación HACIA ADELANTE marcado con etiquetas verdes. 8. Asegúrese de que el cinturón no esté retorcido y abroche el cinturón de seguridad. 9. Empuje hacia el centro del asiento de seguridad para niños con una fuerza moderada (aproximadamente...
-
Página 81: Instalación Del Modo Silla Alta
Instalación del modo SILLA ALTA IMPORTANTE: Britax recomienda encarecidamente que los niños permanezcan en un asiento para niños con un arnés de 5 puntos hasta alcanzar la altura o el peso máximo permitido. - Página 82 1. Consulte la página 37 para convertirlo del modo arnés al modo SILLA ALTA. 2. Ajuste el asiento se seguridad para niños a la posición “B” presionando el botón rojo de reclinación a ambos lados de la base. 3. Extienda la correa de amarre superior levantando el ajustador del amarre superior.
- Página 83 8. Coloque el asiento de seguridad para niños en en el asiento del automóvil, de modo que la base del asiento de vehículo quede fija en el asiento del automóvil y paralela a este. NOTA: Si es posible regular la posición del respaldo del asiento en su vehículo, asegúrese de que esté...
-
Página 84: Cómo Sujetar Al Niño
LISTA 9 El asiento de seguridad para niños está en la posición de reclinación “B”. 9 El asiento de seguridad para niños está en un asiento del vehículo que tiene un cinturón de seguridad para cadera y hombro. 9 Todas las conexiones son seguras y la correa no está torcida. 9 La base del asiento de vehículo DEBE quedar fija en el asiento y paralela al asiento del automóvil. - Página 85 3. Abra el broche de pecho apretando las lengüetas (A) y separándolo (B). 4. Libere la hebilla y coloque las correas del arnés a un lado. 5. Coloque al niño en el asiento de seguridad para niños. Asegúrese de que el niño esté...
-
Página 86: Modo Silla Alta
LISTA Antes de viajar, verifique que: 9 El indicador de reclinación sigue en un rango aceptable. 9 Las correas del arnés no estén torcidas. 9 El arnés sea cómodo. 9 La hebilla esté abrochada. 9 El broche de pecho esté al nivel de la axila del niño. 9 Los abrigos y chaquetas voluminosos sean retirados. -
Página 87: Cambio Entre Los Modos Arnés Y Silla Alta
7. Asegúrese de que la parte del hombro se encuentre en el centro del pecho del niño, sobre o por encima del hombro del niño y que no entre en contacto con el cuello del niño (A). La parte de la cadera del cinturón del vehículo se dirige por debajo, en la parte baja de los muslos superiores... - Página 88 3. (A) Abra el clip de pecho. (B) Abra los cierres de la cubierta del reposacabezas y retire las correas del arnés. 4. Levante la cubierta del reposacabezas. 5. Suelte la hebilla. 6. Coloque las correas del arnés detrás de la cubierta de la bandeja del asiento.
- Página 89 10. Ubique el espacio entre la Parte parte trasera de la carcasa posterior de la carcasa y la parte trasera superior de la bandeja del asiento. Bandeja del asiento 11. Introduzca las lengüetas de la hebilla y las almohadillas de confort, empujándolas con fuerza hacia abajo en el hueco hasta que el clip de pecho y...
-
Página 90: Modo Silla Alta Al Modo Arnés
16. Enrolle el resto de la correa de ajuste del arnés. 17. Inserte el resto de la correa de ajuste del arnés en la parte delantera de la cubierta. 18. Cierre el CLICKTIGHT. 19. Voltee hacia abajo la cubierta del reposacabezas y vuelva a colocar los sujetadores. - Página 91 5. Abra el clip de pecho. 6. Voltee la cubierta de la bandeja del asiento hacia arriba. Tire de la correa del arnés desde debajo de la cubierta de la bandeja del asiento y pase las correas del arnés a través de las ranuras de la cubierta de la bandeja del asiento y vuelva a colocar los sujetadores.
-
Página 92: Cómo Quitar E Instalar La Cubierta Del Asiento
Cómo quitar e instalar la cubierta del asiento Cómo retirar la cubierta Cómo retirar la tapa del reposacabezas Afloje el arnés. Presione el botón de liberación del arnés (A) y tire de ambas correas del arnés hacia adelante (B). Suelte la hebilla. Levante la correa elástica hacia arriba y aléjela de la parte posterior del ajustador... - Página 93 3. Deshaga los sujetadores cerca de la parte inferior de las correas del arnés. 4. Tire de la cubierta hacia afuera del arnés y del asiento de seguridad para niños. Separe la almohadilla para el vientre del resto de la funda de ser necesario.
- Página 94 2. Tire de la cubierta para alejarla del área del camino del cinturón. 3. Tire de la cubierta hacia arriba y colóquela sobre los portavasos. Cómo remover la cubierta de la barra anti-rebote (Para modelos con la barra anti-rebote) 1. Abra el CLICKTIGHT. 2.
- Página 95 4. Fije los elásticos a los ganchos de la carcasa. Cómo instalar la cubierta superior de la protección lateral 1. Dirija el elástico hacia arriba y alrededor de la manija para el transporte. 2. Inserte la cubierta en el resto del asiento de seguridad para niños.
- Página 96 6. Dirija la parte inferior del arnés a través de las ranuras y vuelva a colocar los sujetadores. Cómo instalar la tapa del reposacabezas 1. Levante el reposacabezas a la posición más alta. Inserte ambos lados de la cubierta del reposacabezas debajo y alrededor de la espuma del reposacabezas.
-
Página 97: Limpieza
• Plancha instrucciones de lavado. • Si la etiqueta de cuidado indica que Cubierta se puede lavar a máquina, siempre consulte us.britax. com/faqs para obtener información importante sobre el cuidado. • LIMPIE CON ESPONJA el arnés • Desarmar el usando agua tibia y arnés... -
Página 98: Garantía Limitada De Un Año
Esta garantía le otorga derechos legales específicos y usted puede tener otros derechos, que varían de un estado a otro. Ni Britax, ni el minorista que vende este producto, autoriza a ninguna persona a crear para él cualquier otra garantía, obligación o... - Página 100 Britax Child Safety, Inc. Tel.: 1-888-427-4829 4140 Pleasant Road Tel.: 1-704-409-1699 Fort Mill, SC 29708 USA A Britax Childcare company www.Britax.com...