Publicidad
Enlaces rápidos
sauder.com
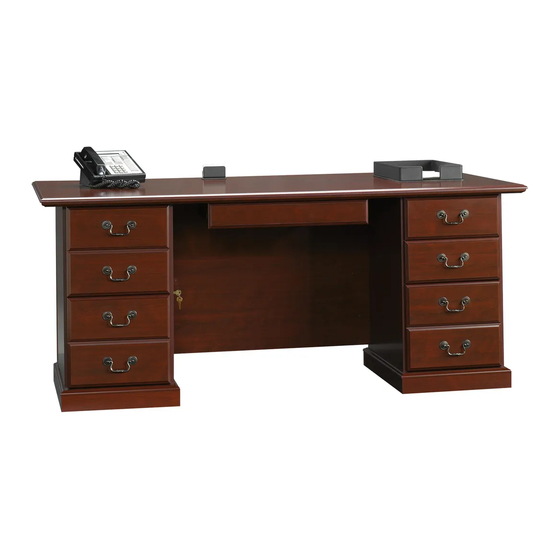
Executive Desk
Heritage Hill Collection | Model 109843
Need help? Visit Sauder.com to view video assembly tips or chat with a live rep.
Prefer the phone? Call 1-800-523-3987.
Share your journey!
Business or pleasure.
Works both ways.
NOTE: THIS INSTRUCTION
BOOKLET CONTAINS IMPORTANT
SAFETY INFORMATION.
PLEASE READ AND KEEP FOR
FUTURE REFERENCE.
English pg 1-26
Français pg 27-31
Español pg 32-36
Lot # 507393
07/28/17
Purchased: __________________
Be sure to give us a ring before
making any returns. 1-800-523-3987
Publicidad

Manuales relacionados para Sauder Heritage Hill Serie


Resumen de contenidos para Sauder Heritage Hill Serie
- Página 1 Heritage Hill Collection | Model 109843 NOTE: THIS INSTRUCTION BOOKLET CONTAINS IMPORTANT SAFETY INFORMATION. Need help? Visit Sauder.com to view video assembly tips or chat with a live rep. PLEASE READ AND KEEP FOR FUTURE REFERENCE. Prefer the phone? Call 1-800-523-3987.
- Página 2 LONG SKIRT (4) FRONT MOLDING (1) D421 SMALL DRAWER SIDE (4) SHORT SKIRT (4) BACK MOLDING (1) D460 SMALL DRAWER BOX FRONT (4) EXTENSION BLOCK (2) SHORT MOLDING (2) D717 SMALL DRAWER BOTTOM (2) LARGE DRAWER FRONT (3) Page 2 109843 www.sauder.com/services...
- Página 3 While not all parts are labeled, some of the parts will have a label or an inked letter on the edge to help distinguish similar parts from each other. Use this part identifi cation to help identify similar parts. D460 D421 D717 D460 D421 D332 D360 D856 D360 D332 www.sauder.com/services 109843 Page 3...
- Página 4 STRIKE FOOT - 8 V - CATCH - 1 HINGE - 2 CATCH - 1 FASTENER - 18 PULL LOCK RING - 1 PULL - 8 LOCK BRACKET - 2 LOCK - 1 MOUNT - 16 Page 4 109843 www.sauder.com/services...
- Página 5 BLACK 1-1/4" FLAT HEAD SCREW - 48 SILVER 1-1/8" FLAT HEAD SCREW - 22 BLACK 7/8" LARGE HEAD SCREW - 8 BLACK 1-1/8" MACHINE SCREW - 16 BLACK 9/16" WAFER HEAD SCREW - 8 BLACK 9/16" PAN HEAD SCREW - 2 www.sauder.com/services 109843 Page 5...
- Página 6 fl oor. Scan this QR code or go to this address: http://qr.sauder.com/?ID=1862 To begin assembly, push a SAUDER TWIST-LOCK® å to watch a video on how to assemble your unit. FASTENER (7F) into the large holes in the RIGHT END (A2), LEFT END (B), RIGHT UPRIGHT (C2), LEFT UPRIGHT (D), and MODESTY PANEL (H).
- Página 7 NOTE: The EXTENSION SLIDES will be used later for the LARGE DRAWERS. å 45MC 45MA Push the black lever in and pull the SLIDE from the RAIL. Open end GOLD 5/16" FLAT HEAD SCREW (8 used in this step) Long edge with TWIST-LOCK® FASTENERS Open end www.sauder.com/services 109843 Page 7...
- Página 8 RIGHT END or RIGHT UPRIGHT. Turn a SCREW into this hole. GOLD 5/16" FLAT HEAD SCREW (12 used in this step) Roller end Finished edge Short edge with TWIST-LOCK® FASTENERS Roller end Finished edge Page 8 109843 www.sauder.com/services...
- Página 9 Fasten the RIGHT END (A2) and RIGHT UPRIGHT (C2) to the å other BACK (F3). Tighten four TWIST-LOCK® FASTENERS. ® How to use the SAUDER TWIST-LOCK FASTENER 1. Insert the dowel end of the FASTENER into the hole of the adjoining part.
- Página 10 This hole must be here. U n fi n i s h s u r f a c BLACK 1-7/8" FLAT HEAD SCREW (8 used in this step) Page 10 109843 www.sauder.com/services...
- Página 11 NOTE: Start each SCREW a few turns before tightening å any of them. Be sure a SHORT SKIRT is positioned toward the fl oor as shown. BLACK 9/16" WAFER HEAD SCREW (8 used in this step) www.sauder.com/services 109843 Page 11...
- Página 12 Tighten the SCREWS in the SHORT MOLDINGS. NOTE: Do not overtighten the SCREWS. å Finished surface The large holes should be closer to the BACK MOLDING (Y). Finished surface SILVER 1-1/8" FLAT HEAD SCREW (18 used in this step) Page 12 109843 www.sauder.com/services...
- Página 13 NOTE: The KEYBOARD SLIDES will be used later for the KEYBOARD DRAWER. å Push the metal release in and pull the SLIDE from the RAIL. Open end BLACK 9/16" LARGE HEAD SCREW (4 used in this step) www.sauder.com/services 109843 Page 13...
- Página 14 Below are various ways you can attach your 109848 Return Kit and 109872 Connector Kit to the 109843 Executive Desk. If you purchased the 109843 Desk only, continue with å step 10 of this instruction book. Page 14 109843 www.sauder.com/services...
- Página 15 EXTENSION BLOCK is facing up. S u r f a c i t h I S T - L O ® F A S T E N E R SILVER 1-1/8" FLAT HEAD SCREW (4 used in this step) www.sauder.com/services 109843 Page 15...
- Página 16 Now, fasten the UPRIGHTS (C2 and D) to the MODESTY PANEL (H). å Use four BLACK 1-7/8" FLAT HEAD SCREWS (2S). Now, carefully stand your unit upright. å BLACK 1-7/8" FLAT HEAD SCREW (4 used in this step) Page 16 109843 www.sauder.com/services...
- Página 17 Use the SMALL DRAWER BOX FRONTS (D460), Slide a LARGE DRAWER BOTTOM (D856) into the SMALL DRAWER SIDES (D421), and SMALL å grooves in the LARGE DRAWER SIDES and LARGE DRAWER BOTTOMS (D717). DRAWER BOX FRONT. www.sauder.com/services 109843 Page 17...
- Página 18 NOTE: The LARGE DRAWER FRONT should overhang the bottom edge of the drawer about 1/2". If it does not overhang å the bottom edge, the DRAWER FRONT is on upside down. Repeat this step for the other two large drawers. å BLACK 1-1/8" MACHINE SCREW (12 used in this step) D332 D360 D332 D360 D332 Page 18 109843 www.sauder.com/services...
- Página 19 1-1/8" MACHINE SCREW (21S) for each PULL MOUNT. Repeat this step for the other small drawer. å BLACK 7/8" LARGE HEAD SCREW (4 used in this step) D460 BLACK 1-1/8" MACHINE SCREW (4 used for the PULL MOUNTS) www.sauder.com/services 109843 Page 19...
- Página 20 Repeat this step for the other small drawer. å Roller end D421 Roller end D421 (4 screws per drawer) GOLD 5/16" FLAT HEAD SCREW (8 used in this step) Page 20 109843 www.sauder.com/services...
- Página 21 LOCK BRACKET toward the top will be used as the bottom drawer. Open end TOP DRAWER D360 Open end Use the oblong hole. D360 BOTTOM DRAWER Use the oblong hole. D360 Open end D360 BROWN 7/16" LARGE HEAD SCREW (20 used in this step) www.sauder.com/services 109843 Page 21...
- Página 22 Fasten the KEYBOARD FRONT (U) to the HINGES (16H). Use å four BROWN 7/16" LARGE HEAD SCREWS (6S). These holes should be closer to this edge. BROWN 7/16" LARGE HEAD SCREW (8 used for the HINGES) Page 22 109843 www.sauder.com/services...
- Página 23 NOTE: Be sure to position the STRIKE CATCH and V-CATCH as shown. å Finished edge BLACK 1-1/4" FLAT HEAD SCREW (8 used in this step) Finished edge BROWN 7/16" LARGE HEAD SCREW (4 used for the CATCHES) www.sauder.com/services 109843 Page 23...
- Página 24 Step 19 Fasten the KEYBOARD SLIDES (DD) to the KEYBOARD å SHELF (T) as shown. Use four BLACK 7/8" LARGE HEAD SCREWS (17S). Open end Open end BLACK 7/8" LARGE HEAD SCREW (4 used in this step) Page 24 109843 www.sauder.com/services...
- Página 25 BRACKETS and adjust the BRACKETS in or out. Insert the GROMMETS (10P) into the large holes in the TOP (G). A å GROMMET CAP (1P) will insert into the top of each GROMMET. BLACK 9/16" PAN HEAD SCREW (2 used in this step) www.sauder.com/services 109843 Page 25...
- Página 26 å And to celebrate, why not share your success story? Caution THIS SAUDER UNIT HAS BEEN DESIGNED FOR THE WEIGHTS SHOWN IN THIS STEP. EXCEEDING THESE RECOMMENDED WEIGHTS COULD RESULT IN EXCESSIVE "SAGGING" OF THE SHELF. EXTREME OVERLOADING COULD CAUSE FAILURE OF THE SHELF AND POSSIBLE INJURY.
- Página 27 EXTRÉMITÉ DROITE .................1 CC GLISSIÈRE DE CLAVIER ..............2 pour future référence. EXTRÉMITÉ GAUCHE ..............1 DD COULISSE DE CLAVIER ..............2 Pour contacter Sauder ARMATURE DROITE POUR DOSSIERS .........3 MONTANT DROIT ................1 en ce qui concerne cet 13B CLIP POUR DOSSIERS .................6 MONTANT GAUCHE ................1...
- Página 28 Fixer l'EXTRÉMITÉ DROITE (A2) et le MONTANT DROIT (C2) sur l'autre ARRIÈRE (F3). Serrer quatre FIXATIONS TWIST-LOCK®. Pour commencer l’ a ssemblage, enfoncer une FIXATION TWIST-LOCK® SAUDER (7F) dans les gros trous dans l’EXTRÉMITÉ Utilisation de la FIXATION TWIST-LOCK® SAUDER DROITE (A2), l’EXTRÉMITÉ GAUCHE (B), le MONTANT DROIT (C2), 1.
- Página 29 TIROIR DE CLAVIER. EXTRÉMITÉS et les MONTANTS. Maintenant, fi xer les MONTANTS (C2 et D) au VOILE DE FOND (H). Utiliser quatre VIS TÊTE PLATE 48 mm NOIRES (2S). Relever, avec précaution, l’élément dans sa position verticale. www.sauder.com/services 109843 Page 29...
- Página 30 DE SERRURE vers la partie supériere sera le tiroir inférieur. chant inférieur du tiroir d’environ 13 mm. Si celui-ci ne dépasse du chant inférieur, c’est que le DEVANT DE TIROIR est monté à l’envers. Répéter cette étape pour les autres deux grands tiroirs. Page 30 109843 www.sauder.com/services...
- Página 31 Ceci complète l'assemblage. Nettoyer à l’ a ide d’une encaustique pour meubles ou d’un chiff on humide. Essuyer. Attention: CETTE UNITÉ SAUDER A ÉTÉ CONÇUE POUR LES POIDS INDIQUÉS À CETTE ÉTAPE. EXCÉDER CES POIDS RECOMMANDÉS POURRAIT ENTRAÎNER UN « AFFAISSEMENT »...
- Página 32 EXTREMO IZQUIERDO ..........1 CORRIMIENTO CON MUESCA pour future référence. PARAL DERECHO ............1 DE ARCHIVERO...............6 PARAL IZQUIERDO ............1 Pour contacter Sauder PATA ....................8 D332 FRENTE DE CAJÓN GRANDE ......6 en ce qui concerne cet SUJETADOR TWIST–LOCK® ........18 D360 LADO DE CAJÓN GRANDE ........6 FIADOR EN V ................
- Página 33 Fije el EXTREMO DERECHO (A2) y el PARAL DERECHO (C2) al otro DORSO (F3). Apriete cuatro SUJETADORES TWIST-LOCK®. Para comenzar el ensamblaje, empuje un SUJETADOR TWIST-LOCK® (7F) de SAUDER dentro de los agujeros grandes Cómo utilizar el SUJETADOR TWIST-LOCK® SAUDER del EXTREMO DERECHO (A2), el EXTREMO IZQUIERDO (B), el 1.
- Página 34 Ahora, cuidadosamente ponga la unidad en posición vertical. abiertos estén mirando hacia el exterior. Siga el diagrama atentamente. Centre los TORNILLOS en los agujeros alargados. NOTA: Las CORREDERAS DE EXTENSIÓN se utilizarán más tarde para los LADOS DE TECLADO. Page 34 109843 www.sauder.com/services...
- Página 35 DE CERRADURA hacia la parte superior será el cajón inferior. unos 13 mm sobre el borde inferior del cajón. Si no extiende sobre el borde inferior, la CARA DE CAJÓN está sujetada al revés. Repita este paso para los dos otros cajones grandes. www.sauder.com/services 109843 Page 35...
- Página 36 Esto completa el ensamblaje. Limpie con su pulimento para muebles preferido o un paño húmedo. Seque con un paño. Precaución: ESTA UNIDAD SAUDER HA SIDO DISEÑADA PARA LOS PESOS QUE SE MUESTRAN EN ESTE PASO. SOBREPASAR ESTOS PESOS RECOMENDADOS PODRÍA DAR COMO RESULTADO QUE EL ESTANTE SE PUEDA “TORCER”...
- Página 37 à Les téléviseurs peuvent être particulièrement un téléviseur. cet eff et. lourds. De plus, le poids et l’emplacement du tube image ont tendance à rendre les téléviseurs instables et enclins à tomber vers l’ a vant. www.sauder.com/services 109843 Page 37...
- Página 38 Además, el peso y la ubicación del tubo de imagen tienden a causar la inestabilidad de televisores y propensa a volcarse hacia adelante. Page 38 109843 www.sauder.com/services...
- Página 39 à compter de la date d'achat la première fois et qui sont signalés à Sauder dans les limites de couverture de la contre tout défaut de matériaux ou de fabrication des composantes de mobilier Sauder.
- Página 40 Dear Valued Customer: So, how did it go? Thanks so much for choosing Sauder® furniture. I hope the Set a world record for speed? purchase and assembly process was a positive experience Feeling good about yourself? and you feel good about the furniture you just built. If you Nice.