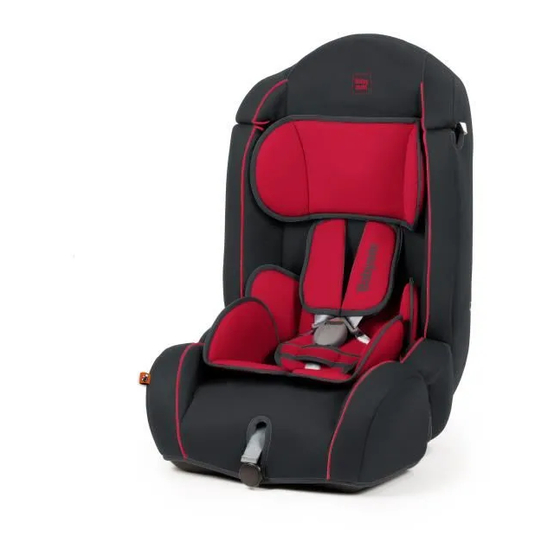
Resumen de contenidos para Babyauto Kulixka SAVILE V7
- Página 1 Kulixka SAVILEV7 Apto para Suitable for 9 - 36 kg. Manual de uso Instruction for use...
- Página 2 Si vous souhaitez consulter le manuel dans une autre langue, veuillez visiter notre site internet: IMPORTANTE Se você quiser o manual em outro idioma, por favor visite nosso website: IMPORTANTE Se desidera il manuale in un’altra lingua, si colleghi al nostro sito Internet: http://manuales.babyauto.com KULIXKA...
- Página 3 Instrucciones de uso - Sistema de retención infantil Grupo 1/2/3 de 9 a 36 kg. (de 9 meses a 12 años aprox.) Instruction for use - Child safety seat Group 1/2/3 from 9 kgs to 36 kgs (from 9 months to 12 Years aprox) Grupo 1/2/3 www.babyauto.com...
- Página 4 KULIXKA...
- Página 5 Grupo 1/2/3 www.babyauto.com...
- Página 6 KULIXKA...
- Página 7 Grupo 1/2/3 www.babyauto.com...
- Página 8 5.10 5.11 KULIXKA...
- Página 9 6.3 6.5 6.10 Grupo 1/2/3 www.babyauto.com...
- Página 10 6.11 6.12 6.13 KULIXKA...
-
Página 11: Lea Cuidadosamente Antes De Instalar La Silla Infantil En El Vehículo
9. La silla o accesorios del arnés que estén dañados o hayan sido utilizados incorrectamente deberán ser reemplazados. 10.No deje objetos pesados en el interior del coche, porque en caso de accidente podrían lesionar al niño. Grupo 1/2/3 www.babyauto.com... -
Página 12: Las Ilustraciones De Las Instrucciones Son Meramente
11.Compruebe que la hebilla está correctamente cerrada, porque en caso de emergencia el niño podrá ser liberado rápidamente. 12.Verifique que ninguna parte de la silla infantil está atrapada en la puerta del vehículo o en un asiento reclinable. Además revise que la silla de seguridad está... - Página 13 “Clic” para que el asiento infantil esté correctamente instalado (3.2, 3.3 y 3.4). 3. Termine de tensar el cinturón de seguridad del vehículo tirando del cinturón diagonal hacia arriba hasta que no haya ninguna holgura y el asiento infantil esté instalado firmemente (3.5). Grupo 1/2/3 www.babyauto.com...
- Página 14 4. Asegúrese que el cinturón de seguridad del vehículo no esta torcido, también verifique que la funda no impide el movimiento del cinturón de seguridad del vehículo, ni impide la instalación de la silla de ninguna manera. Para liberar a su niño desabroche el cinturón del vehículo tal y como se describe en las instrucciones.
- Página 15 Tensar el arnés 1. Tire las cintas del arnés hacia arriba para quitar la holgura de la sección abdominal de arnés, luego tire de la cinta reguladora del arnés hasta que el arnés esté completamente tensado (5.10). Grupo 1/2/3 www.babyauto.com...
- Página 16 2. El arnés debe de estar tensado lo máximo posible sin causar incomodidad a su niño. 3. Asegúrese que la cinta del arnés de la sección abdominal está posicionada lo más bajo posible, rodeando las caderas de su niño y no su estómago.
-
Página 17: Instrucciones De Lavado
· No usar secadora. · No planchar. Si tiene alguna duda sobre el uso o colocación de este producto o necesita cualquier pieza de repuesto, por favor póngase en contacto con nuestro servicio de atención al cliente. Grupo 1/2/3 www.babyauto.com... -
Página 18: Garantia
8. GARANTIA BABYAUTO garantiza sus productos contra todo defecto de fabricación durante un período de 2 años a partir de la fecha de compra según la Ley 23/2003, de 10 de Julio, de Garantías de venta de bienes de consumo. - Página 19 9. When damaged or improperly used, replace the seat or the harness components. 10. Do not leave heavy objects within the vehicle since these may injure the child in the event of an accident. Group 1/2/3 www.babyauto.com...
- Página 20 11. Check that the buckle is properly fastened. It is important that in the event of an emergency the child can be released quickly. 12. Make sure the seat does not become caught by the vehicle´s door or reclining seat. Likewise, check that the seat is properly and sufficiently fitted.
- Página 21 “clicks”, making sure the child seat is properly installed (3.2, 3.3 & 3.4). 3. Finish tightening the vehicle seat belt by pulling the diagonal shoulder belt upwards until there is no slack and the child seat is securely installed (3.5). Group 1/2/3 www.babyauto.com...
- Página 22 4. Make sure the vehicle’s safety belt is not twisted, also check that the seat cover does not impede the movement of the vehicle’s safety belt or prevent the installation of the seat in any way. To release your child unbuckle the vehicle safety belt as described in the instructions.
- Página 23 4. To unfasten the harness press the red button on the buckle downwards (5.9). Tightening the harness 1. Pull the harness straps up to remove the slack from the lap section of the harness, then pull the harness regulating strap until the Group 1/2/3 www.babyauto.com...
- Página 24 harness is fully stretched (5.10). 2.The harness should be as tight as possible without causing discomfort to your child. 3. Make sure the lap section of the harness is positioned as low as possible, surrounding your child’s hips and not his stomach. 4.
-
Página 25: Cleaning And Maintenance
· Dry clean, with any solvent except trichloroethylene. · Do not use dryer. · Do not iron. If you have any question about using or installing this product, or if you need a spare part contact our Customer Service. Group 1/2/3 www.babyauto.com... - Página 26 8. GUARANTEE BABYAUTO guarantees its products against all manufacturing faults for a period of 2 years as of the date of purchas, in accordance with Law 23/2003, of 10 July 2003, relating to Consumer Goods Sale Guarantees. 1.The guarantee does not include defects or disorders produced by...
- Página 27 www.babyauto.com...
- Página 28 BABYAUTO GROUP Parque Empresarial Zuatzu Edificio Donosti, 2ª planta Oficina 3 20018 San Sebastián (Gipuzkoa) Spain t. (00 34) 943 833 013 f. (00 34) 943 833 004 e. info@babyauto.com www.babyauto.com...


