Tabla de contenido
Publicidad
Idiomas disponibles
Idiomas disponibles
Enlaces rápidos
Publicidad
Capítulos
Tabla de contenido

Manuales relacionados para Pioneer MEH-P9100R


Resumen de contenidos para Pioneer MEH-P9100R
- Página 1 All manuals and user guides at all-guides.com Multi-CD/MD/DAB control DSP High power MD player with RDS tuner Reproductor de MD de alta potencia DSP con control de múltiples CD/MD/DAB con sintonizador RDS Operation Manual MEH-P9100R Manual de Operación...
-
Página 2: Tabla De Contenido
All manuals and user guides at all-guides.com Contents Key Finder ............ 3 Tuner Operation ........24 Head Unit Local Seek Tuning (LOCAL) Steering Remote Controller Best Stations Memory (Best Stations Memory) Before Using This Product ...... 5 Using the RDS Functions ......25 About This Product .......... - Página 3 All manuals and user guides at all-guides.com Audio Adjustment ........44 Initial Setting ..........63 Selecting the Equalizer Curve ......44 Entering the Initial Setting Menu ....63 Entering the Audio Menu 1 ......44 Initial Setting Menu Functions ......64 Audio Menu 1 Functions ........
-
Página 4: Key Finder
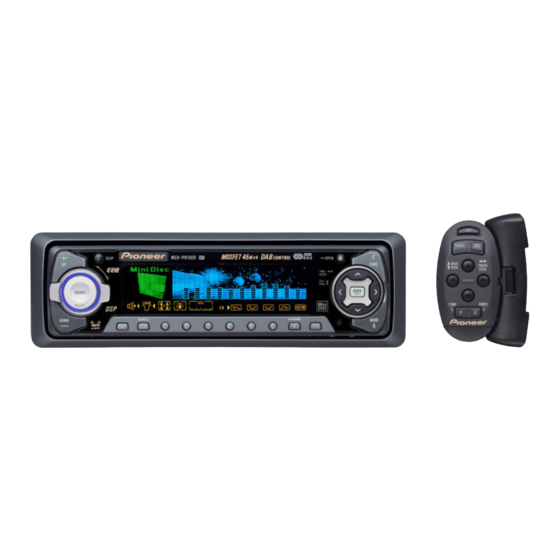
All manuals and user guides at all-guides.com Key Finder Head Unit RESET button DISPLAY button FUNCTION button EJECT button 5/∞/2/3 buttons ENTERTAINMENT button EQ selector Buttons 1–6 BAND button +/– button SCR button PTY button SOURCE/OFF button TA button AUDIO button... -
Página 5: Steering Remote Controller
All manuals and user guides at all-guides.com Steering Remote Controller A steering remote controller that enables remote operation of the head unit is supplied. Operation is the same as when using buttons on the head unit. ATT button This lets you quickly lower volume level (by about 90%). -
Página 6: Before Using This Product
All manuals and user guides at all-guides.com Before Using This Product About This Product • This product complies with the EMC Directives (89/336/EEC, 92/31/EEC) and CE Marking Directive (93/68/EEC). The tuner frequencies on this product are allocated for use in Western Europe, Asia, the Middle East, Africa and Oceania. -
Página 7: About The Demo Mode
All manuals and user guides at all-guides.com About the Demo Mode This product features two demonstration modes. One is the Reverse Demo mode, the other is the Feature Demo mode. Reverse Demo If you do not perform an operation within about 30 seconds, screen indications start to reverse, and then continue reversing every 10 seconds. -
Página 8: When Using The Dab (Digital Audio Broadcasting) Tuner
All manuals and user guides at all-guides.com Before Using This Product When using the DAB (Digital Audio Broadcasting) Tuner You can use this product with a separately sold hide-away DAB tuner (GEX-P900DAB, GEX-P900DABII). For details concerning operation, refer to the DAB Tuner’s Operation Manuals. -
Página 9: Operation
All manuals and user guides at all-guides.com Operation With this product, operation of the following four functions differs. (Reference pages are in the Hide-away DAB Tuner’s Operation Manual.) • Changing the Label (Refer to page 12.) • Changing Display Indications (Refer to page 13.) •... - Página 10 All manuals and user guides at all-guides.com Before Using This Product 7 Service List Function This product is also equipped with the Service List Function in the Function Menu. It is possible to select the desired Service among the memorized Services in the Service List. Function Menu Functions appear on the display in the following order: Service List (SRVC.
-
Página 11: Precaution
CLASS 1 LASER PRODUCT • The Pioneer CarStereo-Pass is for use only in Germany. • Keep this manual handy as a reference for operating procedures and precautions. • Always keep the volume low enough for outside sounds to be audible. -
Página 12: Remote Controller And Care
All manuals and user guides at all-guides.com Remote Controller and Care Using the Steering Remote Controller Precaution: • Do not operate this unit while manipulating the steering wheel as it might result in a traffic acci- dent. • If you have to operate this unit unavoidably when driving, look ahead carefully to avoid the risk of being involved in a traffic accident. -
Página 13: Replacing The Lithium Battery
All manuals and user guides at all-guides.com 7 Replacing the Lithium Battery • Remove the lithium battery. Precaution: • Replace the battery with a CR2032 lithium battery. • Replace the battery in the unit using a non metallic tapered instrument. WARNING: •... -
Página 14: Basic Operation
= Multi-MD player = Multi-CD player = External Unit = AUX Note: • External Unit refers to a Pioneer product (such as one available in the future) that, although incom- patible as a source, enables control of basic functions by this product. Only one External Unit can be controlled by this product. -
Página 15: Basic Operation Of Tuner
All manuals and user guides at all-guides.com Basic Operation of Tuner This product’s AF function can be switched ON and OFF. AF should be switched OFF for normal tuning operations. (Refer to page 26.) Manual and Seek Tuning • You can select the tuning method by changing the length of time you press the 2/3 button. -
Página 16: Basic Operation Of Built-In Md Player
All manuals and user guides at all-guides.com Basic Operation Basic Operation of Built-in MD Player Switching the Display Each press of the DISPLAY button changes the display in the following order: Playback mode (Play Time) = Disc Title = Track Title Note: •... -
Página 17: Track Search And Fast Forward/Reverse
All manuals and user guides at all-guides.com Track Search and Fast Forward/Reverse • You can select between Track Search or Fast Forward/Reverse by pressing the 2/3 button for a different length of time. Track Search 0.5 seconds or less Fast Forward/Reverse Continue pressing Disc Loading Slot You can only load one MD at a time in the Built-in MD player. -
Página 18: Basic Operation Of Multi-Cd Player
All manuals and user guides at all-guides.com Basic Operation Basic Operation of Multi-CD Player This product can control a Multi-CD player (sold separately). Switching the Display Track Search and Fast Forward/Reverse Each press of the DISPLAY • You can select between Track Search or Fast button changes the display Forward/Reverse by pressing the 2/3 button in the following order:... -
Página 19: Disc Number Search
All manuals and user guides at all-guides.com Disc Number Search (for 6-Disc, 12-Disc types) • You can select discs directly with the 1 to 6 buttons. Just press the num- ber corresponding to the disc you want to listen to. Note: •... -
Página 20: Corresponding Display Indications And Buttons
All manuals and user guides at all-guides.com Basic Operation Corresponding Display Indications and Buttons This product’s display features Key Guidance Indicators. These light to indicate which of the 5/∞/2/3 buttons you can use. When you’re in the Function Menu (refer to next sec- tion), Detailed Setting Menu (refer to page 22), Initial Setting Menu (refer to page 63) or Audio Menu 1, 2 (refer to pages 44 and 51), they also make it easy to see which 5/∞/2/3 buttons you can use to switch functions ON/OFF, switch repeat selections and perform... - Página 21 All manuals and user guides at all-guides.com 2. Operate a mode. (e.g. Random Play) The button used and the operation it performs are indicated by the key guidance indicator. Press the 5 button to switch the key guidance indicator ON, and the ∞...
-
Página 22: Multi-Cd Player
All manuals and user guides at all-guides.com Basic Operation 7 Built-in MD Player Function name (Display) Button: Operation Page 5: ON Repeat Play (Play Mode) ∞: OFF 1 2 or 3: Select (Track Title) Selecting Tracks by Track Title List 2 5: Play (Track List) 5: ON... -
Página 23: Entering The Detailed Setting Menu
All manuals and user guides at all-guides.com Entering the Detailed Setting Menu In the Detailed Setting Menu, you can operate convenient, complex functions for each source. 1. Enter the Detailed Setting Menu. Hold for 2 seconds 2. Select the desired mode. (Refer to next section, “Detailed Setting Menu Functions”.) Each press changes the Mode ... -
Página 24: Detailed Setting Menu Functions
All manuals and user guides at all-guides.com Basic Operation Detailed Setting Menu Functions The following chart shows functions for each source in the Detailed Setting Menu. The chart also shows indications for each function, operations and buttons used to perform operations. -
Página 25: Tuner Operation
All manuals and user guides at all-guides.com Tuner Operation Local Seek Tuning (LOCAL) When Local mode is ON (“LOC” indicator lights), you can only select broadcast stations providing strong reception. 1. Press the FUNCTION button and select the Local mode (LOCAL) in the Function Menu. -
Página 26: Using The Rds Functions
All manuals and user guides at all-guides.com Using the RDS Functions What is RDS? RDS (Radio Data System) is a system for transmitting data along with FM programs. This data, which is inaudible, provides a variety of features such as: program service name, pro- gram type display, traffic announcement standby, automatic tuning and program type tun- ing, intended to aid radio listeners in tuning to a desired station. -
Página 27: Af Function (Alternativefrequency)
All manuals and user guides at all-guides.com AF Function (AlternativeFrequency) The AF (Alternative Frequencies search) function is used to search for other frequencies in the same network as the currently tuned station. It automatically retunes the receiver to another frequency in the network which is broadcasting a stronger signal when there are problems with reception of the currently tuned station or better reception is possible on a different frequency. -
Página 28: Pi Seek Function
All manuals and user guides at all-guides.com Using the RDS Functions PI Seek Function The tuner searches for another frequency broadcasting the same programming. “PI Seek” appears on the display and the radio volume is muted during a PI Seek. The muting is discon- tinued after completion of the PI Seek, whether or not the PI seek has succeeded. -
Página 29: Traffic Announcement Standby Function
All manuals and user guides at all-guides.com Traffic Announcement Standby Function (Traffic Announcement) The TA (Traffic Announcement standby) function lets you receive traffic announcements automatically, no matter what source you are listening to. The TA function can be activat- ed for a TP station (a station that broadcasts traffic information) or an EON TP station (a station carrying information which cross-references TP stations). -
Página 30: Canceling Traffic Announcements
All manuals and user guides at all-guides.com Using the RDS Functions Canceling Traffic Announcements • Press the TA button while a traffic announcement is being received to cancel the announcement and return to the original source. The announcement is canceled but the tuner remains in the TA mode until the TA button is pressed again. -
Página 31: Pty Function
All manuals and user guides at all-guides.com PTY Function With Wide and Narrow classification of program type, the PTY function provides two ways to select stations by the type of program being broadcast (PTY Search). It also pro- vides automatic tuning to emergency broadcasts (PTY Alarm). Note: •... -
Página 32: News Program Interruption Setting (News)
All manuals and user guides at all-guides.com Using the RDS Functions News Program Interruption Setting (News) You can switch automatic reception of PTY code news programs ON/OFF. When a received news program ends, reception of the previous program resumes. • Set interruption to ON or OFF. Hold for 2 seconds “NEWS”... -
Página 33: Pty Alarm
All manuals and user guides at all-guides.com PTY Alarm PTY Alarm is a special PTY code for announcements regarding emergencies such as nat- ural disasters. When the tuner receives the radio alarm code, “ALARM” appears on the display and the volume adjusts to the TA volume. When the station stops broadcasting the emergency announcement, the system returns to the previous source. -
Página 34: Pty List
All manuals and user guides at all-guides.com Using the RDS Functions PTY List Wide Narrow Details News&Inf News News. Affairs Current affairs. Info General information and advice. Sport Sports programs. Weather Weather reports/Meteorological information. Finance Stock market reports, commerce, trading, etc. Popular Pop Mus Popular music. -
Página 35: Using The Built-In Md Player
All manuals and user guides at all-guides.com Using the Built-in MD Player Repeat Play (Play Mode) Repeat Play plays the same track repeatedly. 1. Press the FUNCTION button and select the Repeat Mode (Play Mode) in the Function Menu. 2. Switch the Repeat Play ON/OFF with the 5/∞... -
Página 36: Scan Play (Scan Play)
All manuals and user guides at all-guides.com Using the Built-in MD Player Scan Play (Scan Play) Scan Play plays the first 10 seconds or so of each track on an MD in succession. 1. Press the FUNCTION button and select the Scan mode (Scan Play) in the Function Menu. -
Página 37: Selecting Tracks By Track Title List (Track List)
All manuals and user guides at all-guides.com Selecting Tracks by Track Title List (Track List) Every 6 track titles on an MD are displayed. You can scroll the display. 1. Press the FUNCTION button and select the Track List mode (Track List) in the Function Menu. -
Página 38: Using Multi-Cd Players
All manuals and user guides at all-guides.com Using Multi-CD Players Repeat Play (Play Mode) There are three repeat play ranges: One-track Repeat, Disc Repeat and Multi-CD player Repeat. Default repeat play range is Multi-CD player Repeat. 1. Press the FUNCTION button and select the Repeat selecting mode (Play Mode) in the Function Menu. -
Página 39: Scan Play (Scan Play)
All manuals and user guides at all-guides.com Scan Play (Scan Play) In the Disc Repeat, the beginning of each track on the selected disc is scanned for about 10 seconds. In the Multi-CD player Repeat, the beginning of the first track on each disc is scanned for about 10 seconds. -
Página 40: Pause (Pause)
All manuals and user guides at all-guides.com Using Multi-CD Players Pause (Pause) Pause pauses the currently playing track. 1. Press the FUNCTION button and select the Pause mode (Pause) in the Function Menu. 2. Switch the Pause ON/OFF with the 5/∞ buttons. Compression and DBE (Compression) Using the Comp. -
Página 41: Its (Instant Track Selection)
All manuals and user guides at all-guides.com ITS (Instant Track Selection) The ITS function allows you to search for the track you wish to play when a Multi-CD player is installed. You can use ITS to program automatic playback of up to 24 tracks per disc from up to 100 discs. -
Página 42: Erase A Track Program
All manuals and user guides at all-guides.com Using Multi-CD Players Erase a Track Program 1. Select the track you wish to erase, during ITS Play. 2. Select the ITS Programming mode (ITS Memory) in the Detailed Setting Menu. (Refer to page 22.) 3. - Página 43 All manuals and user guides at all-guides.com 3. Switch the desired Character type with button 1. Each press of button 1 changes the Character type in the following order: Alphabet (Upper case), Numbers and Symbols = Alphabet (Lower case) = European letters, such as those with accents (e.g.
-
Página 44: Selecting Discs By Disc Title List
All manuals and user guides at all-guides.com Using Multi-CD Players Selecting Discs by Disc Title List (Disc List) Every 6 discs are displayed. You can scroll the display. Follow the procedures below to play a disc for which you have input the title in a Multi- CD player or a CD TEXT disc on a CD TEXT compatible Multi-CD player. -
Página 45: Audio Adjustment
All manuals and user guides at all-guides.com Audio Adjustment Selecting the Equalizer Curve You can switch between Equalizer curves. • Rotate the EQ selector up or down to select the desired Equalizer curve. SUPER BASS + = POWERFUL + = NATURAL + = VOCAL + = CUSTOM + = FLAT Note: •... -
Página 46: Audio Menu 1 Functions
All manuals and user guides at all-guides.com Audio Adjustment Audio Menu 1 Functions The Audio Menu 1 features the following functions. Balance Adjustment (FAD/BAL) This function allows you to select a Fader/Balance setting that provides ideal listening con- ditions in all occupied seats. 1. -
Página 47: Graphic Equalizer
All manuals and user guides at all-guides.com Graphic Equalizer Compared to compensation for car interior acoustic characteristics provided by the Auto- equalizing function, this lets you create your own equalization curves as desired. There are two types of equalizer curves: Default equalizer curves (Factory curves) and a user-defined equalizer curve (Custom). -
Página 48: Adjusting The Equalizer Curves (Equaliz E R)
All manuals and user guides at all-guides.com Audio Adjustment 2. Select the desired Equalizer curve. (e.g. Press button 1.) Note: • When you have performed Auto-equalizing (refer to page 56), you can turn AUTO EQ ON and OFF by pressing the button for the equalizer curve that was called. 7 Sequential Recall 1. - Página 49 All manuals and user guides at all-guides.com 7 13-Band Graphic Equalizer Adjustment You can select this mode only when you select Custom. 1. Press the AUDIO button and select the Graphic Equalizer mode (Equaliz in the Audio Menu 1. 2. Recall Custom. (Refer to previous section.) 3.
-
Página 50: Sound Field Control And Octaver
All manuals and user guides at all-guides.com Audio Adjustment Sound Field Control and Octaver The sound field control function (SFC) incorporates 3 programs for reproducing typical sound fields of a studio, etc. This function makes it possible to reproduce a realistic sound field of a studio, etc. -
Página 51: Position Selector
All manuals and user guides at all-guides.com Position Selector One way to assure a more natural sound is to clearly position the stereo sound image (putting you in the center of the sound field). The Position Selector function adjusts volume level of sound from each speaker to match seat positions and the number of people in the car, and lets you recall settings at the touch of a button. -
Página 52: Entering The Audio Menu 2
All manuals and user guides at all-guides.com Audio Adjustment Entering the Audio Menu 2 In the Audio Menu 2, you can operate convenient, complex functions for each source. Note: • After entering the Audio Menu 2, if you do not perform an operation within about 30 seconds, the Audio Menu 2 is automatically canceled. -
Página 53: Subwoofer Setting Adjustment (Sub W-2)
All manuals and user guides at all-guides.com 1. Select the Subwoofer ON/OFF mode (Sub W-1) in the Audio Menu 2. (Refer to previous section.) 2. Switch the Subwoofer output ON/OFF with the 5/∞ buttons. 3. Change the phase of Subwoofer output with the 2/3 buttons. -
Página 54: Non-Fading Output (Non Fad E -1)
All manuals and user guides at all-guides.com Audio Adjustment Non-Fading Output (Non Fad When the Non-Fading Output setting is ON, the audio signal does not pass through this unit’s low pass filter (for the Subwoofer), but is output through the RCA output. Note: •... -
Página 55: High Pass Filter (High Pass)
All manuals and user guides at all-guides.com High Pass Filter (High Pass) When you do not want sound in the Subwoofer output frequency range output from the front or rear speakers, switch the High Pass Filter ON. Only higher frequencies than those in the selected range are output from the front and rear speakers. -
Página 56: Automatic Sound Levelizer (Asl) Function
All manuals and user guides at all-guides.com Audio Adjustment Automatic Sound Levelizer (ASL) Function During driving, noise in the car changes according to the driving speed and road condi- tions. The automatic sound levelizer (ASL) monitors such varying noise and automatically increases the volume level, if this noise becomes greater. -
Página 57: Auto-Equalizing Function
All manuals and user guides at all-guides.com Auto-equalizing Function This product’s Auto-equalizer automatically measures car interior acoustic characteristics, and then creates the Auto-equalizer curve based on that information. Before Operating the Auto-equalization 7 WARNING: • To prevent accidents, never perform Auto-equalizing when driving. When this function measures car interior acoustic characteristics to create an Auto-equalizer curve, a loud measurement tone (noise) may be output from the speakers. -
Página 58: Auto-Equalizing
All manuals and user guides at all-guides.com Audio Adjustment • When connected to a power amp with input level control, Auto-equalizing may not be possible if you lower power amp input level. Set the power amp’s input level to the stan- dard position. - Página 59 All manuals and user guides at all-guides.com 4. Switch the ignition switch to ON or ACC. If the car’s air conditioner or heater is switched on, switch it off. Noise from the fan in the air conditioner or heater may prevent correct Auto-equalizing. 5.
- Página 60 All manuals and user guides at all-guides.com Audio Adjustment 9. Get out of the car and close the door within 10 seconds, if a 10-second count- down starts. The measurement tone (noise) is output from the speakers, and Auto-equalizing (acoustic characteristics measurement and compensation) begins.
-
Página 61: Error Codes Of Auto-Equalizing Function
All manuals and user guides at all-guides.com Error Codes of Auto-equalizing Function When correct measurement of car interior acoustic characteristics is not possible with the Auto-equalizer, the following error messages are displayed. After checking, try again. Display Cause Remedy Error Check Mic Microphone is not connected. -
Página 62: Detaching And Replacing The Front Panel
All manuals and user guides at all-guides.com Detaching and Replacing the Front Panel Theft Protection The front panel of the head unit is detachable to discourage theft. Precaution: • Never use force or grip the display tightly when removing or replacing the front panel. •... -
Página 63: Replacing The Front Panel
All manuals and user guides at all-guides.com Replacing the Front Panel 1. Make sure the inner cover is closed. 2. Replace the front panel by clipping it into place. Warning Tone If the front panel is not detached within 5 seconds after the ignition is turned off, a warning tone will sound. -
Página 64: Initial Setting
All manuals and user guides at all-guides.com Initial Setting Entering the Initial Setting Menu With this menu, you can perform initial settings for the product. 1. Switch the sources OFF. 2. Enter the Initial Setting Menu. Hold for 2 seconds 3. -
Página 65: Initial Setting Menu Functions
All manuals and user guides at all-guides.com Initial Setting Menu Functions The Initial Setting Menu features the following functions. Changing the FM Tuning Step (FM tuning step) Normally set at 50 kHz during Seek tuning in the FM mode, the tuning step changes to 100 kHz when the AF or TA mode is activated. -
Página 66: Switching The Auto Pi Seek (Auto Pi Seek)
All manuals and user guides at all-guides.com Initial Setting Switching the Auto PI Seek (Auto PI Seek) During Preset Station PI Seek operation, you can switch the Auto PI Seek function ON/OFF. (Refer to “PI Seek Function” on page 27.) 1. -
Página 67: Switching The Rear Speaker Output
All manuals and user guides at all-guides.com Switching the Rear Speaker Output (Rear Speaker Out) This product’s rear speaker leads can be used for full-range speaker (“Full Range output”) or Subwoofer (“Sub woofer output”) connection. If you switch Rear Speaker Lead setting to the “Sub woofer output”, you can connect a rear speaker lead directly to a Subwoofer without using an auxiliary amp. -
Página 68: Setting The Dimmer (Dimmer)
All manuals and user guides at all-guides.com Initial Setting Setting the Dimmer (Dimmer) To enable this product’s display from being too bright at night, when the vehicle’s head lights are turned ON the display is dimmed. You can switch this function ON/OFF. 1. -
Página 69: Selecting The Wall Paper (Wall Paper)
All manuals and user guides at all-guides.com Selecting the Wall Paper (Wall Paper) This product is equipped with three types of wall paper. 1. Press the FUNCTION button and select the Wall Paper mode (Wall Paper) in the Initial Setting Menu. 2. -
Página 70: Rfp Alert Function
Activating the RFP Alert Feature Pioneer has developed a menu display that allows you to set-up your RFP Alert to meet your personal needs. By scrolling through this menu it is possible to select your own “Entry Delay Time”, “Speaker Output Volume”... -
Página 71: Activating Internal Speaker On/Off
All manuals and user guides at all-guides.com Activating Internal Speaker ON/OFF This feature allows you to select whether or not the speaker output is sounded when the “RFP Alert” is triggered. Initially from the factory the speaker output is activated. Toggling between 5, ∞... -
Página 72: Selecting Door Switching Systems
All manuals and user guides at all-guides.com RFP Alert Function Selecting Door Switching Systems It is necessary to select the correct “Door System Type” (Negative or Positive switching) for that of your vehicle. Initially, the system is set for vehicles with the grounding type (Negative switching). -
Página 73: Operation Of "Rfp Alert
Upon entering your vehicle, and within the “Entry Delay Time” set within the “RFP Alert Menu”, attach your Pioneer Front Panel as described on page 62. If you have forgotten your removable front panel, simply insert the ignition key in the igni-... -
Página 74: Entry Detection
All manuals and user guides at all-guides.com A Title (English) RFP Alert Function Entry Detection If the “RFP Alert” was not disarmed in accordance with “Disarming Alert”, the “RFP Alert” will be triggered. The “RFP Alert” will sound for 60 seconds and will repeat 5 times if any door is left open or reopened. -
Página 75: Other Functions
All manuals and user guides at all-guides.com A Title (English) Other Functions Switching the Entertainment Display You can change the display to the movie screens, etc. while listening to each source. (e.g. MOVIE SCREEN MODE 1) • Select the desired Entertainment Display. Each press changes the Display ... -
Página 76: Using The Pgm Button (Program Function)
All manuals and user guides at all-guides.com Other Functions Using the PGM Button (Program Function) The PGM button can memorize one of the functions in the Function Menu. It is possible to memorize a different function for each source. PGM button operations are only possible with the remote controller (sold separately) such as CD-R600. -
Página 77: Using The Pgm Button
All manuals and user guides at all-guides.com Using the PGM Button The PGM button operates in a different way depending on the function programmed (memorized). • Use the PGM button on the remote controller. (e.g. CD-R600) 7 Tuner Function Name (Display) Press Hold for 2 seconds Best Stations Memory (BSM) -
Página 78: Using The Aux Source
All manuals and user guides at all-guides.com A Title (English) Others Functions Using the AUX Source It is possible to use auxiliary (AUX) equipment with this product. To listen to auxiliary equipment, switch the AUX Mode in the Initial Setting Menu ON, and then select the desired source. -
Página 79: Md Player And Care
All manuals and user guides at all-guides.com MD Player and Care Precaution • Do not open the MD shutter by hand. Forcing it open may result in damage. Shutter • Be sure to stick labels supplied with MDs in the specified location. Failing to do this, or sticking one label on top of another may make it impossible for the MD to be removed. -
Página 80: Built-In Md Player's Error Message
When problems occur with MD playback, an error message appears on the display. Refer to the table below to identify the problem, then take the suggested corrective action. If the error persists, contact your dealer or your nearest PIONEER Service Center. Message... -
Página 81: Specifications
All manuals and user guides at all-guides.com A Title (English) Specifications General MD player Power source ..14.4 V DC (10.8 – 15.1 V allowable) System ........ Mini disc digital audio system Grounding system ........Negative type Usable discs ............Mini disc Max. - Página 82 All manuals and user guides at all-guides.com Contenido Guía de botones ........3 Operación del sintonizador ....24 Unidad principal Sintonización de búsqueda local Controlador remoto de volante (LOCAL) Memoria de las mejores emisoras Antes de usar este producto ....5 (Best Stations Memory) Sobre este producto ..........
- Página 83 All manuals and user guides at all-guides.com ITS (Selección de canción instantánea) ..40 Ajustes iniciales ........63 Programación ITS (ITS Memory) Selección del menú de ajustes iniciales ..63 Reproducción ITS (ITS Play) Funciones del menú de ajustes iniciales ..64 Borrado de una pista programada Cambio del paso de sintonía de FM Borrado de un disco programado...
-
Página 84: Guía De Botones
All manuals and user guides at all-guides.com Guía de botones Unidad principal Botón RESET Botón DISPLAY Botón FUNCTION Botón EJECT Botones 5/∞/2/3 Botón ENTERTAINMENT Selector EQ Botones 1–6 Botón BAND Botón +/– Botón SCR Botón PTY Botón SOURCE/OFF Botón TA Botón AUDIO... -
Página 85: Controlador Remoto De Volante
All manuals and user guides at all-guides.com Controlador remoto de volante Se suministra un controlador remoto de volante que permite la operación a distancia de la unidad principal. La operación es la misma que cuando se usan los botones en la unidad principal. -
Página 86: Antes De Usar Este Producto
All manuals and user guides at all-guides.com Antes de usar este producto Sobre este producto • Este producto cumple con las Directivas EMC (89/336/CEE, 92/31/CEE) y Directiva de Marcación CE (93/68/CEE). Las frecuencias del sintonizador en este producto se han dispuesto para usar en Europa Occidental, Asia, Oriente Medio, Africa y Oceanía. -
Página 87: Acerca Del Modo De Demostración
All manuals and user guides at all-guides.com Acerca del modo de demostración Este producto presenta dos modos de demostraciones. Uno es el modo de demostración de retroceso el otro es el modo de demostración de característica. Demostración de retroceso Si no realiza ninguna operación dentro de 30 segundos, las indicaciones de la pantalla comienzan a retroceder, y luego continúan retrocediendo cada 10 segundos. -
Página 88: Cuando Se Usa El Sintonizador Dab
All manuals and user guides at all-guides.com Antes de usar este producto Cuando se usa el sintonizador DAB (Emisión de audio digital) Se puede utilizar este producto con un sintonizador DAB oculto vendido separadamente (GEX-P900DAB, GEX-P900DABII). Para los detalles acerca de la operación, consulte el manual de instrucciones del sintonizador DAB. -
Página 89: Operación De Los Anuncios Con El Menú De Funciones
All manuals and user guides at all-guides.com Operación Con este producto, la operación de las siguientes cuatro funciones difiere. (Refiérase a las páginas en el manual de operación del sintonizador DAB oculto-alejado.) • Cambio de etiqueta (Vea la página 12.) •... - Página 90 All manuals and user guides at all-guides.com Antes de usar este producto 7 Función de lista de servicios Este producto también se equipa con la función de lista de servicios en el menú de fun- ciones. Es posible seleccionar el servicio deseado entre los servicios memorizados en la lista de servicios.
-
Página 91: Precaución
CLASS 1 LASER PRODUCT • El Pioneer CarStereo-Pass es para usar solamente en Alemania. • Guarde este manual a mano como referencia para los procedimientos de operación y precauciones. • Mantenga siempre el volumen bajo lo suficiente para oír los sonidos de tráfico. -
Página 92: Controlador Remoto Y Cuidado
All manuals and user guides at all-guides.com Controlador remoto y cuidado Uso del controlador remoto de volante Precaución: • No opere esta unidad mientras maneja el volante, o podría resultar en un accidente de tráfico. • En el caso de que inevitablemente opere esta unidad mientras conduce, mire hacia adelante cuida- dosamente. - Página 93 All manuals and user guides at all-guides.com 7 Para cambiar la pila de litio • Retire la pila de litio. Precaución: • Cambie la pila con una pila de litio CR2032. • Cambie la pila en la unidad utilizando una barra puntiaguda no metálica. ADVERTENCIA: •...
-
Página 94: Operación Básica
= Unidad externa = AUX Nota: • Unidad externa refiérese a un producto Pioneer (como un disponible en el futuro) que, mientras sea incompatible como una fuente, permite el control de funciones básicas por este producto. Solamente una Unidad externa se puede controlar por este producto. -
Página 95: Operación Básica Del Sintonizador
All manuals and user guides at all-guides.com Operación básica del sintonizador La función AF de este producto se puede activar y desactivar. Se debe desactivar la fun- ción AF para operaciones de sintonización normales. (Vea la página 26.) Sintonización de búsqueda y manual •... -
Página 96: Operación Básica Del Reproductor De Md Incorporado
All manuals and user guides at all-guides.com Operación básica Operación básica del reproductor de MD incorporado Cambio de la visualización A cada presión del botón DISPLAY cambia la visualización en el orden siguiente: Modo de reproducción (Tiempo de reproducción) = Título de disco = Título de pista Nota: •... -
Página 97: Búsqueda De Pista Y Avance Rápido/Retroceso
All manuals and user guides at all-guides.com Búsqueda de pista y avance rápido/retroceso • Se puede seleccionar entre la búsqueda de pista o el avance rápido/retroceso presionando el botón 2/3 durante un lapso diferente de tiempo. Búsqueda de pista 0,5 segundos o menos Avance rápido/retroceso Continúe presionando Ranura de carga de disco... -
Página 98: Operación Básica Del Reproductor De Multi-Cd
All manuals and user guides at all-guides.com Operación básica Operación básica del reproductor de Multi-CD Este producto puede controlar un reproductor de Multi-CD (en venta por separado). Cambio de la visualización Búsqueda de pista y avance rápido/retroceso A cada presión del botón •... -
Página 99: Búsqueda De Número De Disco
All manuals and user guides at all-guides.com Búsqueda de número de disco (para tipos de 6 discos, 12 discos) • Se puede seleccionar los discos directamente con los botones 1 a 6. Basta presionar el número correspondiente al disco que desea escuchar. Nota: •... -
Página 100: Visualizaciones Y Botones Correspondientes
All manuals and user guides at all-guides.com Operación básica Visualizaciones y botones correspondientes El visualizador de este producto presenta los indicadores de guía de botones. Estos indi- cadores se iluminan para indicar qué botones 5/∞/2/3 se pueden utilizar. Cuando se está en el menú... -
Página 101: Funciones Del Menú De Funciones
All manuals and user guides at all-guides.com 2. Opere un modo (tal como la reproducción aleatoria). El botón usado y la operación que realiza se indi- can por el indicador de guía de botones. Presione el botón 5 para activar el indicador de guía de botones, y el botón ∞... - Página 102 All manuals and user guides at all-guides.com Operación básica 7 Reproductor de MD incorporado Nombre de la función (Visualización) Botón: Operación Página 5: Activación Reproducción con repetición (Play Mode) ∞: Desactivación 1 2 o 3: Selección (Título de pista) Selección de las pistas mediante la lista de 2 5: Reproducción títulos de pista (Track List) 5: Activación...
-
Página 103: Selección Del Menú De Ajustes Detallados
All manuals and user guides at all-guides.com Selección del menú de ajustes detallados En el menú de ajustes detallados, se pueden ejecutar funciones convenientes y complejas para cada fuente. 1. Seleccione el menú de ajustes detallados. Sostenga durante 2 segundos. 2. -
Página 104: Funciones Del Menú De Ajustes Detallados
All manuals and user guides at all-guides.com Operación básica Funciones del menú de ajustes detallados En la siguiente tabla se muestran las funciones para cada fuente en el menú de ajustes detallados. En la tabla también se muestran las indicaciones para cada función, operaciones y botones usados para realizar las operaciones. -
Página 105: Operación Del Sintonizador
All manuals and user guides at all-guides.com Operación del sintonizador Sintonización de búsqueda local (LOCAL) Cuando el modo local está activado (indicador “LOC” se enciende), se puede seleccionar solamente emisoras de señales fuertes. 1. Presione el botón FUNCTION y seleccione el modo local (LOCAL) en el menú... -
Página 106: Uso De Las Funciones Rds
All manuals and user guides at all-guides.com Uso de las funciones RDS ¿Qué es RDS? RDS (Radio Data System) es un sistema para transmisión de dados con los programas de FM. Esos datos, que son inaudibles, proveen una variedad de funciones tales como: nombre de servicio de programa, indicación de tipo de programa, espera por anuncio de tráfico, sintonización automática y sintonización por tipo de programa, para ayudar los oyentes de radio a sintonizar una emisora deseada. -
Página 107: Función Af (Alternativefrequency)
All manuals and user guides at all-guides.com Función AF (AlternativeFrequency) La función AF (Alternative Frequencies search) se usa para buscar otras frecuencias en la misma red de la emisora sintonizada actualmente. La función sintoniza de nuevo el recep- tor automáticamente a una otra frecuencia en la red con señales más fuertes, cuando hay problemas en la recepción de la emisora sintonizada actualmente, o si es posible obtener una mejor recepción en una frecuencia diferente. -
Página 108: Función De Búsqueda Pi
All manuals and user guides at all-guides.com Uso de las funciones RDS Función de búsqueda PI El sintonizador busca por una otra frecuencia transmitiendo el mismo programa. “PI Seek” (búsqueda PI) aparece en el visualizador y el volumen de la radio se enmudece durante la búsqueda PI. -
Página 109: Función De Espera De Anuncio De Tráfico
All manuals and user guides at all-guides.com Función de espera de anuncio de tráfico (Traffic Announcement) La función TA (espera por anuncio de tráfico) le permite recibir anuncios de tráfico automáticamente, independientemente de la fuente que esté escuchando. La función TA se puede activar para una emisora TP (una emisora que transmite información de tráfico) o una emisora EON TP (una emisora que transmite informaciones interreferenciales remisivas a las emisoras TP). -
Página 110: Cancelación De Anuncios De Tráfico
All manuals and user guides at all-guides.com Uso de las funciones RDS Cancelación de anuncios de tráfico • Presione el botón TA mientras recibe un anuncio de tráfico para cancelar el anuncio y volver a la fuente original. El anuncio se cancela pero el sintonizador permanece en el modo TA hasta que se presione el botón TA nuevamente. -
Página 111: Función Pty
All manuals and user guides at all-guides.com Función PTY Con la clasificación de ancho y estrecho del tipo de programa, la función PTY proporciona dos maneras para seleccionar las emisoras por el tipo de programa que se está emitiendo (PTY Search). La función también provee la sintonización automática a radiodifusiones de emergencia (PTY Alarm). -
Página 112: Ajuste De Interrupción De Programa De Noticias (News)
All manuals and user guides at all-guides.com Uso de las funciones RDS Ajuste de interrupción de programa de noticias (News) La recepción automática de los programas de noticias con código PTY puede ser activada o desactivada. Cuando un programa de noticias recibido termina, la recepción del programa precedente continúa. -
Página 113: Alarma Pty
All manuals and user guides at all-guides.com Alarma PTY La alarma PTY es un código PTY especial para anuncios relativos a emergencias tales como desastres naturales. Cuando el sintonizador recibe el código de alarma de radio, “ALARM” (alarma) aparece en el visualizador y el volumen se ajusta al volumen TA. Cuando la emisora deja de transmitir el anuncio de emergencia, la unidad vuelve a la fuente anterior. -
Página 114: Lista De Pty
All manuals and user guides at all-guides.com Uso de las funciones RDS Lista de PTY Ancho Estrecho Detalles News&Inf News Noticias. Affairs Temas de actualidad. Info Información general y consejos. Sport Programas deportivos. Weather Informes del tiempo/Información meteorológica. Finance Informes del mercado de valores, comercio, operaciones de compraventa, etc. -
Página 115: Uso Del Reproductor De Md Incorporado
All manuals and user guides at all-guides.com Uso del reproductor de MD incorporado Reproducción con repetición (Play Mode) La reproducción con repetición reproduce la misma pista repetidamente. 1. Presione el botón FUNCTION y seleccione el modo de repetición (Play Mode) en el menú de funciones. 2. -
Página 116: Reproducción Con Exploración
All manuals and user guides at all-guides.com Uso del reproductor de MD incorporado Reproducción con exploración (Scan Play) La reproducción con exploración reproduce en sucesión los primeros 10 segundos más o menos de cada pista de un disco. 1. Presione el botón FUNCTION y seleccione el modo de exploración (Scan Play) en el menú... -
Página 117: Selección De Las Pistas Mediante La Lista De Títulos De Pista (Track List)
All manuals and user guides at all-guides.com Selección de las pistas mediante la lista de títulos de pista (Track List) En un MD se visualiza a cada 6 títulos de pista. Puede pasar a través de la visualización. 1. Presione el botón FUNCTION y seleccione el modo de lista de pistas (Track List) en el menú... -
Página 118: Uso De Reproductores De Multi-Cd
All manuals and user guides at all-guides.com Uso de reproductores de Multi-CD Reproducción con repetición (Play Mode) Existen tres gamas de reproducción con repetición: Repetición de una pista, repetición de disco y repetición de reproductor de Multi-CD. La gama de reproducción con repetición es la repetición de reproductor de Multi-CD. -
Página 119: Reproducción Con Exploración
All manuals and user guides at all-guides.com Reproducción con exploración (Scan Play) En la repetición de disco, se explora el comienzo de cada pista en un disco seleccionado durante aproximadamente 10 segundos. En la repetición de reproductor de Multi-CD, se explora el comienzo de la primera pista de cada disco durante aproximadamente 10 segundos. -
Página 120: Pausa (Pause)
All manuals and user guides at all-guides.com Uso de reproductores de Multi-CD Pausa (Pause) Pausa permite detener temporalmente la reproducción de la pista actual. 1. Presione el botón FUNCTION y seleccione el modo de pausa (Pause) en el menú de funciones. 2. -
Página 121: Its (Selección De Canción Instantánea)
All manuals and user guides at all-guides.com ITS (Selección de canción instantánea) La función ITS le permite buscar la canción que desea reproducir cuando se hay instalado un reproductor de Multi-CD. Se puede utilizar la función ITS para programar hasta 24 can- ciones en cada disco de un total de 100 disco para una reproducción automática. -
Página 122: Borrado De Una Pista Programada
All manuals and user guides at all-guides.com Uso de reproductores de Multi-CD Borrado de una pista programada 1. Durante la reproducción ITS, seleccione la pista que desea borrar. 2. Seleccione el modo de programación ITS (ITS Memory) en el menú de ajustes detallados. - Página 123 All manuals and user guides at all-guides.com 3. Cambie el tipo de caracteres deseado con el botón 1. A cada presión del botón 1 cambia el tipo de caracteres en el orden siguiente: Alfabeto (Mayúsculas), números y símbolos = Alfabeto (minúsculas) = Caracteres europeos, tal como aquéllos acentuados (ejemplo, á, à, ä, ç) Nota:...
-
Página 124: Selección De Discos Mediante La Lista De Títulos De Disco (Disc List)
All manuals and user guides at all-guides.com Uso de reproductores de Multi-CD Selección de discos mediante la lista de títulos de disco (Disc List) Se visualiza a cada 6 discos. Puede pasar visualizando la visualización. Para reproducir un disco para el cual ha ingresado el título en un reproductor Multi-CD y un disco CD TEXT en un reproductor Multi-CD compatible con CD TEXT, sigas los procedimientos siguientes. -
Página 125: Ajuste De Audio
All manuals and user guides at all-guides.com Ajuste de audio Selección de la curva del ecualizador Se puede cambiar entre las curvas del ecualizador. • Desplace el selector EQ hacia arriba o abajo para seleccionar la curva del ecualizador deseada. SUPER BASS + = POWERFUL + = NATURAL + = VOCAL + = CUSTOM + = FLAT Nota: •... -
Página 126: Funciones Del Menú De Audio 1
All manuals and user guides at all-guides.com Ajuste de audio Funciones del menú de audio 1 El menú de audio 1 presenta las funciones siguientes. Ajuste del equilibrio (FAD/BAL) Esta función le permite seleccionar un ajuste de potenciómetro/equilibrio que proporciona las condiciones de audición ideales para todos los presentes. -
Página 127: Ecualizador Gráfico
All manuals and user guides at all-guides.com Ecualizador gráfico Compara para compensar las características acústicas en el interior del automóvil provistos por la función de ecualización automática, esto le permite crear sus propias curvas de ecualización deseadas. Existen dos tipos de curva del ecualizador: Curvas del ecualizador fijadas por omisión (Curvas de fábrica) y curva del ecualizador definidas por el usuario (Curva del usuario). -
Página 128: Ajuste De Las Curvas Del Ecualizador
All manuals and user guides at all-guides.com Ajuste de audio 2. Seleccione la curva de ecualizador deseada. (Por ejemplo, presione el botón 1.) Nota: • Cuando haya realizado una ecualización automática (vea la página 56), puede activar y desactivar AUTO EQ ON/OFF presionando el botón para la curva de ecualizador que fue recuperada. 7 Recuperación secuencial 1. - Página 129 All manuals and user guides at all-guides.com 7 Ajuste del ecualizador gráfico de 13 bandas Este modo solamente puede seleccionarse cuando se selecciona la curva de usuario (Custom). 1. Presione el botón AUDIO y seleccione el modo de ecualizador gráfico (Equaliz r) en el menú...
-
Página 130: Campo De Sonido Y Octavizador
All manuals and user guides at all-guides.com Ajuste de audio Campo de sonido y octavizador La función de control de campo de sonido (SFC) incorpora 3 programas para la reproducción de campos de sonidos típicos de un estudio, etc. Esta función hace posible reproducir un campo de sonido real de un estudio, etc. -
Página 131: Selector De Posición
All manuals and user guides at all-guides.com Selector de posición Una manera de asegurar un sonido más natural es colocar claramente la imagen de sonido estéreo (colocándose en el centro del campo de sonido). La función de selector de posición ajusta el nivel de volumen de sonido de cada altavoz para adecuarse a las posiciones de asiento y el número de personas en el automóvil, y le permite llamar los ajustes al toque de un botón. -
Página 132: Ingreso Al Menú De Audio 2
All manuals and user guides at all-guides.com Ajuste de audio Ingreso al menú de audio 2 En el menú de audio 2, puede operar convenientemente las funciones complejas para cada fuente. Nota: • Luego de ingresar el menú de audio 2, si no realiza una operación dentro de unos 30 segundos, el menú... -
Página 133: Fijación De Los Ajustes De Altavoz De Graves Secundario (Sub W-2)
All manuals and user guides at all-guides.com 1. Seleccione el modo de activación/desactivación del altavoz de graves (Sub W-1) en el menú de audio 2. (Vea la sección previa.) 2. Active o desactive la salida de altavoz de graves secundario con los botones 5/∞. -
Página 134: Salida Sin Extinción (Non Fad E -1)
All manuals and user guides at all-guides.com Ajuste de audio Salida sin extinción (Non Fad Cuando el ajuste de la salida sin extinción está activada, la señal de audio no pasa a través de la unidad de paso bajo de esta unidad (para el altavoz de graves secundario), sino que se genera a través de la salida RCA. -
Página 135: Filtro De Paso Alto (High Pass)
All manuals and user guides at all-guides.com Filtro de paso alto (High Pass) Cuando no desee producir sonidos en la salida de la gama de frecuencias de salida del altavoz de graves secundario en los altavoces delanteros y traseros, active (ON) el filtro de paso alto. -
Página 136: Función De Nivelador De Sonido Automático
All manuals and user guides at all-guides.com Ajuste de audio Función de nivelador de sonido automático (ASL) Durante una conducción, el ruido dentro del automóvil cambia de acuerdo a la velocidad de conducción y condiciones de la ruta. El nivelador de sonido automático (ASL) monitorea tal variación de ruido y aumenta automáticamente el nivel de volumen, si este ruido se convierte mayor. -
Página 137: Función De Ecualización Automática
All manuals and user guides at all-guides.com Función de ecualización automática El ecualizador automático de este producto mide automáticamente las características acús- ticas en el interior del automóvil, y luego crea una curva del ecualizador automático basada en esa información. Antes de operar la ecualización automática 7 ADVERTENCIA: •... -
Página 138: Ecualización Automática
All manuals and user guides at all-guides.com Ajuste de audio • Si lleva a cabo la ecualización automática cuando ya existe la curva del ecualizador automático, la curva previa es borrada. • Si cambia el ajuste de la salida de altavoz trasero o el ajuste de la salida de altavoz de graves secundario después de realizar la ecualización automática, la curva del ecualizador automático se borrará. - Página 139 All manuals and user guides at all-guides.com 4. Lleve el interruptor de encendido a la posición ON o ACC. Si el acondicionador de aire o calefactor del automóvil se encuentran activados, desactívelos. El ruido del ventilador en el acondicionador de aire o calefactor pueden evitar una ecualización automática correcta.
- Página 140 All manuals and user guides at all-guides.com Ajuste de audio 9. Salga del automóvil y cierre la puerta dentro de un intervalo de 10 segundos, si se inicia una cuenta regresiva de 10 segundos. El sonido de medición (ruido) se genera de los altavoces, y se inicia la ecualización automática (medición y compensación de las características acústicas).
-
Página 141: Mensajes De Error En La Función De Ecualización Automática
All manuals and user guides at all-guides.com Mensajes de error en la función de ecualización automática Cuando no es posible una medición correcta de las características acústicas en el interior del automóvil con el ecualizador automático, se visualizan los siguientes mensajes de error. -
Página 142: Extracción Y Colocación Del Panel Delantero
All manuals and user guides at all-guides.com Extracción y colocación del panel delantero Protección contra robo El panel delantero de la unidad principal es extraíble como una medida antirrobo. Precaución: • Nunca fuerce ni tampoco agarre el visualizador con mucha fuerza al extraer o colocar el panel delantero. -
Página 143: Colocación Del Panel Delantero
All manuals and user guides at all-guides.com Colocación del panel delantero 1. Asegúrese de cerrar la cubierta interna. 2. Vuelva a colocar el panel delantero encajándolo en su lugar. Sonido de advertencia Si no se extrae el panel delantero dentro de 5 segundos después de desactivar el encendido, se producirá... -
Página 144: Ajustes Iniciales
All manuals and user guides at all-guides.com Ajustes iniciales Selección del menú de ajustes iniciales Con este menú se pueden realizar los ajustes iniciales para el producto. 1. Desactive las fuentes. 2. Seleccione el menú de ajustes iniciales. Sostenga durante 2 segundos. 3. -
Página 145: Funciones Del Menú De Ajustes Iniciales
All manuals and user guides at all-guides.com Funciones del menú de ajustes iniciales El menú de ajustes iniciales provee las siguientes funciones. Cambio del paso de sintonía de FM (FM tuning step) Normalmente ajustado en 50 kHz durante la sintonización por búsqueda en el modo FM, el intervalo de sintonía cambia a 100 kHz cuando se activa el modo AF o TA. -
Página 146: Cambio De La Búsqueda Pi Automática (Auto Pi Seek)
All manuals and user guides at all-guides.com Ajustes iniciales Cambio de la búsqueda PI automática (Auto PI Seek) Durante la operación de búsqueda PI de emisora preajustada, puede activar o desactivar la función de búsqueda PI automática. (Vea “Función de búsqueda PI” en la página 27.) 1. -
Página 147: Cambio De La Salida Del Altavoz Trasero
All manuals and user guides at all-guides.com Cambio de la salida del altavoz trasero (Rear Speaker Out) Los cables de los altavoces traseros del producto pueden usarse para una conexión de altavoz de gama completa (“Full Range output”) o altavoz secundario (“Sub woofer output”). -
Página 148: Ajuste Del Reductor De Luz (Dimmer)
All manuals and user guides at all-guides.com Ajustes iniciales Ajuste del reductor de luz (Dimmer) Para evitar que el visualizador de este producto quede muy brillante durante la noche, cuando se encienden los faros del vehículo la luz del visualizador se atenúa. Esta función se puede activar o desactivar. -
Página 149: Selección Del Papel De Pared (Wall Paper)
All manuals and user guides at all-guides.com Selección del papel de pared (Wall Paper) Este producto se equipa con tres tipos de papel de pared. 1. Presione el botón FUNCTION y seleccione el modo de papel de pared (Wall Paper) en el menú de ajustes iniciales. 2. -
Página 150: Función De Alerta Rfp
Pioneer, así también como los contenidos del vehículo. Activación de la función de alerta RFP Pioneer ha desarrollado una visualización de menú que le permite ajustar su alerta RFP a sus necesidades personales. Pasando a través de este menú es posible seleccionar su propio “Tiempo de retardo de entrada”, “Volumen de salida de altavoz”... -
Página 151: Activación Y Desactivación Del Altavoz Interno
All manuals and user guides at all-guides.com Activación y desactivación del altavoz interno Esta función le permite seleccionar si la salida del altavoz es generada o no cuando se dis- para “RFP Alert”. Inicialmente desde la fábrica la salida del altavoz se encuentra activada. Cambiando entre los botones 5, ∞... -
Página 152: Selección De Los Sistemas De Puertas
All manuals and user guides at all-guides.com Función de alerta RFP Selección de los sistemas de puertas Es necesario seleccionar el “Tipo de sistema de puertas” (conmutando entre negativo o positivo) para el que tiene su vehículo. Inicialmente, el sistema se ajusta para los vehículos con el tipo de masa eléctrica (conmutación negativa). -
Página 153: Operación De "Alerta Rfp
Al entrar a su vehículo, y dentro del ajuste “Tiempo de retardo de entrada” en el menú de alerta RFP, fije su panel delantero extraíble Pioneer como se describe en la página 62. Si ha olvidado su panel delantero extraíble, inserte la llave de encendido en el encendido,... -
Página 154: Detección De Entrada
All manuals and user guides at all-guides.com Función de alerta RFP Detección de entrada Si la “Alerta RFP” no ha sido desarmada de acuerdo con “Desarme de la alerta”, la “Alerta RFP” será disparada. La “Alerta RFP” sonará durante 60 segundos y se repetirá 5 veces si cualquier puerta queda abierta o es vuelta abrir. -
Página 155: Otras Funciones
All manuals and user guides at all-guides.com Otras funciones Cambio a la visualización de entretenimiento Puede cambiar la visualización a las pantallas de película, etc., mientras escucha cada fuente. (Por ejemplo, Modo de pantalla de película 1) • Seleccione la visualización de entretenimiento deseada. Cada presión cambia la visualización ... -
Página 156: Uso Del Botón Pgm (Program Function)
All manuals and user guides at all-guides.com Otras funciones Uso del botón PGM (Program Function) El botón PGM puede memorizar una de las funciones del menú de funciones. Es posible memorizar una función diferente para cada fuente. La operaciones del botón PGM sólo son posibles con un controlador remoto (en venta por separado) tal como CD-R600. -
Página 157: Uso Del Botón Pgm
All manuals and user guides at all-guides.com Uso del botón PGM El botón PGM funciona de manera diferente dependiendo de la función programada (memorizada). • Utilice el botón PGM en el controlador remoto. (CD-R600, por ejemplo) 7 Sintonizador Nombre de la función (Visualización) Presione Sostenga durante 2 segundos Memoria de las mejores emisoras (BSM) Desactivación... -
Página 158: Uso De La Fuente Aux
All manuals and user guides at all-guides.com Otras funciones Uso de la fuente AUX Es posible usar un equipo auxiliar (AUX) con este producto. Para escuchar al equipo auxiliar, active el modo AUX en el menú de ajustes iniciales, y seguidamente seleccione la fuente deseada. -
Página 159: Reproductor De Md Y Cuidados
All manuals and user guides at all-guides.com Reproductor de MD y cuidados Precaución • No abra la placa de cierre del disco MD con la mano. Forzándolo puede resultar en daños. Placa de cierre • Cerciórese de adherir las etiquetas suministradas con los discos MD en la posición especificada. -
Página 160: Mensajes De Error Del Reproductor De Md Incorporado
Cuando ocurren problemas con la reproducción de MD, aparece un mensaje de error en el visualizador. Vea la tabla siguiente para identificar el problema, y luego tome la acción recomendada. Si el error persistiera, comuníquese con su concesionario o Centro de Servicio PIONEER más cercano. Mensaje Causa posible Acción recomendada... -
Página 161: Especificaciones
All manuals and user guides at all-guides.com A Title (English) Especificaciones General Reproductor de MD Fuente de alimentación ........14,4 V CC Sistema ....Sistema de audio digital de minidisco (10,8 – 15,1 V permisible) Discos utilizables ..........Minidiscos Sistema de conexión a tierra ......Tipo negativo Formato de las señales .. - Página 162 All manuals and user guides at all-guides.com...
- Página 163 All manuals and user guides at all-guides.com...
- Página 164 300 Allstate Parkway, Markham, Ontario L3R 0P2, Canada Published by Pioneer Corporation. TEL: (905) 479-4411 Copyright © 2000 by Pioneer Corporation. PIONEER ELECTRONICS DE MEXICO, S.A. de C.V. All rights reserved. San Lorenzo Num 1009 3er piso Desp. 302 Publication de Pioneer Corporation.