Tabla de contenido
Publicidad
Idiomas disponibles
Idiomas disponibles
Enlaces rápidos
AIRE ACONDICIONADO - MANUAL DE INSTALACIÓN
Sonifer,S.A.
Avenida de Santiago, 86
30007 Murcia
España
E-mail:
sonifer@sonifer.es
MADE IN P.R.C.
Lea atentamente este manual antes de utilizar este aparato y guárdelo para futuras consultas. Sólo
así podrá obtener los mejores resultados y la máxima seguridad de uso.
Read this manual carefully before running this appliance and save it for reference in order to obtain
the best results and ensure safe use.
AIR CONDITIONER – INSTALLATION MANUAL
FDI 94
FDI 124
FDR 184
FDI 244
Publicidad
Tabla de contenido

Manuales relacionados para Orbegozo FDI 94


Resumen de contenidos para Orbegozo FDI 94
- Página 1 AIRE ACONDICIONADO - MANUAL DE INSTALACIÓN AIR CONDITIONER – INSTALLATION MANUAL FDI 94 FDI 124 FDR 184 FDI 244 Sonifer,S.A. Avenida de Santiago, 86 30007 Murcia España E-mail: sonifer@sonifer.es MADE IN P.R.C. Lea atentamente este manual antes de utilizar este aparato y guárdelo para futuras consultas. Sólo así...
- Página 2 FDI 94 FDI 124 FDI 184 FDI 244 MANUAL DE INSTALACIÓN ESPAÑOL Antes de utilizar su aire acondicionado, lea este manual atentamente y guárdelo para futuras consultas. Lea este manual En él encontrará información útil para ayudarle a realizar la instalación del aire acondicionado adecuadamente y las pruebas de funcionamiento.
-
Página 3: Instrucciones De Seguridad
FDI 94 FDI 124 FDI 184 FDI 244 MANUAL DE INSTALACIÓN Cuando se utilice este aire acondicionado en países europeos, se debe tener en cuenta la siguiente información: ELIMINACIÓN: No elimine este producto con el resto de productos domésticos. La eliminación de estos productos se debe hacer por separado ya que es necesario un tratamiento especial de estos residuos. - Página 4 FDI 94 FDI 124 FDI 184 FDI 244 MANUAL DE INSTALACIÓN Utilice sólo accesorios originales. De otro modo puede causar fugas de agua, shocks eléctricos o incendios, o que la unidad no funcione correctamente. Instale la unidad en un lugar resistente y firme que soporte el peso de la misma. Si la ubicación no es suficientemente fuerte o la instalación no se realiza de manera adecuada, la unidad podría caer y provocar...
- Página 5 FDI 94 FDI 124 FDI 184 FDI 244 MANUAL DE INSTALACIÓN ACCESORIOS...
-
Página 6: Resumen De Instalación - Unidad Interior
FDI 94 FDI 124 FDI 184 FDI 244 MANUAL DE INSTALACIÓN RESUMEN DE INSTALACIÓN – UNIDAD INTERIOR... - Página 7 FDI 94 FDI 124 FDI 184 FDI 244 MANUAL DE INSTALACIÓN...
-
Página 8: Partes De La Unidad
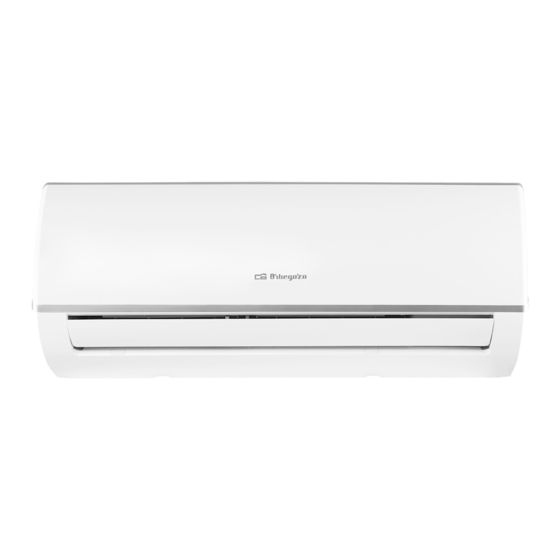
FDI 94 FDI 124 FDI 184 FDI 244 MANUAL DE INSTALACIÓN PARTES DE LA UNIDAD NOTA: Las ilustraciones de este manual tienen un carácter indicativo. La forma real de las unidades interiores o exteriores pueden ser ligeramente diferentes. La forma real siempre prevalece. -
Página 9: Paso 1: Seleccione El Lugar De Instalación
FDI 94 FDI 124 FDI 184 FDI 244 MANUAL DE INSTALACIÓN INSTRUCCIONES DE INSTALACIÓN – UNIDAD INTERIOR Antes de la Instalación: Antes de instalar la unidad interior compruebe en la etiqueta del producto que el modelo de la unidad interior corresponde con la unidad exterior. -
Página 10: Paso 2: Instalando La Placa De Montaje A La Pared
FDI 94 FDI 124 FDI 184 FDI 244 MANUAL DE INSTALACIÓN PASO 2: INSTALANDO LA PLACA DE MONTAJE A LA PARED La placa de montaje es la pieza donde irá acoplada la unidad interior. Quite el tornillo que une la placa de montaje a la unidad interior. - Página 11 FDI 94 FDI 124 FDI 184 FDI 244 MANUAL DE INSTALACIÓN Distancia relativa entre agujeros para los tornillos Posición correcta de la placa de montaje:...
-
Página 12: Paso 4: Preparando El Sistema De Tuberías Del Refrigerante
FDI 94 FDI 124 FDI 184 FDI 244 MANUAL DE INSTALACIÓN PASO 4: PREPARANDO EL SISTEMA DE TUBERÍAS DEL REFRIGERANTE Los tubos de refrigerante están dentro de una capa aislante junto a la parte trasera de la unidad. Usted debe preparar las tuberías antes de pasarlas a través del agujero de la pared. -
Página 13: Paso 5: Conectar La Manguera De Drenaje
FDI 94 FDI 124 FDI 184 FDI 244 MANUAL DE INSTALACIÓN ATENCIÓN: Sea extremadamente cuidadoso para no golpear o dañar la canalización cuando la doble. Podría afectar al desempeño de la unidad. PASO 5: CONECTAR LA MANGUERA DE DRENAJE Por defecto, la manguera de drenaje está en la parte izquierda de la unidad (mirándola por detrás). Sin embargo en ocasiones puede estar en la parte derecha. - Página 14 FDI 94 FDI 124 FDI 184 FDI 244 MANUAL DE INSTALACIÓN ATENCIÓN: Asegúrese de realizar la instalación de acuerdo a la figura: NO DOBLE la manguera de drenaje (a) NO HAGA dobleces que hagan que el agua no termine de drenarse (b) ...
-
Página 15: Paso 6: Conectar El Cable De Señal
FDI 94 FDI 124 FDI 184 FDI 244 MANUAL DE INSTALACIÓN 10. Si la unidad tiene función calefacción, debe ser instalada al menos a un metro (1m) de cualquier material combustible. ANTES DE REALIZAR LA INSTALACIÓN O CUALQUIER TRABAJO ELÉCTRICO, DESCONECTE LA ELECTRICIDAD PRINCIPAL. -
Página 16: Paso 7: Envolver Las Canalizaciones Y Cables
FDI 94 FDI 124 FDI 184 FDI 244 MANUAL DE INSTALACIÓN 2. Abra el panel frontal de la unidad interior 3. Abra la caja del cableado con un destornillador, situada en la parte derecha. Verá el bloque de terminales. ATENCIÓN: TODO EL CABLEADO DEBE SER REALIZADO ESTRICTAMENTE EN CONCORDANCIA CON EL DIAGRAMA ELÉCTRICO LOCALIZADO EN EL INTERIOR DE LA TAPA QUE CUBRE EL BLOQUE DE TERMINALES. -
Página 17: No Entrelace El Cable De Señal Con Otros
FDI 94 FDI 124 FDI 184 FDI 244 MANUAL DE INSTALACIÓN NOTA: la manguera de drenaje debe estar en la parte baja. NO ENTRELACE EL CABLE DE SEÑAL CON OTROS 2. Con cinta adhesiva, una la manguera de drenaje a la parte de debajo de los tubos de refrigerante. -
Página 18: Instalación De La Unidad Exterior
FDI 94 FDI 124 FDI 184 FDI 244 MANUAL DE INSTALACIÓN Si las canalizaciones ya han sido pasadas por el agujero de la pared: 1. Enganche la parte de arriba de la unidad interior en el gancho superior de la placa de montaje. - Página 19 FDI 94 FDI 124 FDI 184 FDI 244 MANUAL DE INSTALACIÓN INSTRUCCIONES DE INSTALACIÓN – UNIDAD EXTERIOR PASO 1: SELECCIONE EL LUGAR DE INSTALACIÓN Antes de la instalación debe seleccionar una localización apropiada, de acuerdo a los siguientes instrucciones: Tiene una buena circulación de aire y ventilación ...
-
Página 20: Paso 2: Instalar La Junta De Drenaje
FDI 94 FDI 124 FDI 184 FDI 244 MANUAL DE INSTALACIÓN NOTAS PARA LUGARES DE CONDICIONES METEOROLÓGICAS EXTREMAS Si el aparato va a ser expuesto a fuertes vientos, instale la unidad de forma que la entrada de aire forme un ángulo de 90º respecto a la dirección del viento. -
Página 21: Paso 3: Anclado De La Unidad Exterior
FDI 94 FDI 124 FDI 184 FDI 244 MANUAL DE INSTALACIÓN PASO 3: ANCLADO DE LA UNIDAD EXTERIOR La unidad puede ser anclada al suelo o a la pared. Dimensiones de la unidad Dependiendo del tamaño de su unidad exterior, prepare la instalación en base a las siguientes dimensiones:... -
Página 22: Reducir Vibraciones
FDI 94 FDI 124 FDI 184 FDI 244 MANUAL DE INSTALACIÓN Si va a instalar la unidad en un soporte anclado en la pared, siga estas instrucciones Marque la posición de los agujeros para el soporte basándose en la tabla de dimensiones de la unidad ... - Página 23 FDI 94 FDI 124 FDI 184 FDI 244 MANUAL DE INSTALACIÓN Si ocurre una incidencia de seguridad grave relacionada con la corriente general, detenga el trabajo de instalación inmediatamente. Explique el razonamiento al cliente y rechace instalar la unidad hasta que la incidencia se resuelva.
-
Página 24: Conexión De Las Canalizaciones De Refrigerante
FDI 94 FDI 124 FDI 184 FDI 244 MANUAL DE INSTALACIÓN 5. Tras comprobar que las conexiones son seguras, envuelva los cables para protegerlos del agua de lluvia. 6. Usando una abrazadera, ajuste el cable a la unidad exterior. 7. Aísle los cables con cinta de PVC apta para electricidad. Póngalos de manera que no toquen ninguna parte eléctrica o metálica. -
Página 25: Instrucciones De Conexión
FDI 94 FDI 124 FDI 184 FDI 244 MANUAL DE INSTALACIÓN INSTRUCCIONES DE CONEXIÓN PASO 1: CORTE DE TUBOS Cuando esté preparando los tubos de refrigeración, tenga especial cuidado al cortar y acampanarlos. Ello asegurará una eficiente operación y minimizará la necesidad de mantenimiento futuro. -
Página 26: Paso 4: Conectar Tubos
FDI 94 FDI 124 FDI 184 FDI 244 MANUAL DE INSTALACIÓN 5. Ponga el abocardado al final de la tubería. El final del tubo debe extenderse más allá del final del abocardado, de acuerdo a las dimensiones de la tabla siguiente: 6. -
Página 27: Instrucciones Para Conectar El Tubo A La Unidad Interior
FDI 94 FDI 124 FDI 184 FDI 244 MANUAL DE INSTALACIÓN INSTRUCCIONES PARA CONECTAR EL TUBO A LA UNIDAD INTERIOR 1. Alinee el centro de los dos tubos que quiere conectar: 2. Ajuste la tuerca de abocardado tanto como sea posible con la mano. -
Página 28: Instrucciones Para Conectar El Tubo A La Unidad Exterior
FDI 94 FDI 124 FDI 184 FDI 244 MANUAL DE INSTALACIÓN INSTRUCCIONES PARA CONECTAR EL TUBO A LA UNIDAD EXTERIOR 1. Desatornille la tapa que cubre las válvulas en el lado de la unidad exterior 2. Quite los tapones que protegen las válvulas. - Página 29 FDI 94 FDI 124 FDI 184 FDI 244 MANUAL DE INSTALACIÓN Antes de proceder a la evaluación: Compruebe que ambas tuberías de presión (alta y baja) entre ambas unidades están conectadas adecuadamente de acuerdo a lo especificado en la sección de conexión de canalizaciones de este manual.
-
Página 30: Abra Las Válvulas Cuidadosamente
FDI 94 FDI 124 FDI 184 FDI 244 MANUAL DE INSTALACIÓN 10. Observe el manómetro durante un minuto para asegurarse de que no hay cambios en la presión. El manómetro debería marcar una presión ligeramente superior a la presión atmosférica. -
Página 31: Comprobaciones E Segudridad Eléctrica
FDI 94 FDI 124 FDI 184 FDI 244 MANUAL DE INSTALACIÓN COMPROBACIONES E SEGUDRIDAD ELÉCTRICA Tras la instalación confirme que todo el cableado eléctrico ha sido instalado de acuerdo a las normativas locales y nacionales, y de acuerdo a este manual de instalación. -
Página 32: Instrucciones Para El Test De Funcionamiento
FDI 94 FDI 124 FDI 184 FDI 244 MANUAL DE INSTALACIÓN Comprobaciones de seguridad eléctrica: confirme que el sistema eléctrico de la unidad es seguro y funciona adecuadamente. Comprobaciones de fugas de gas: compruebe que todas las tuercas abocardadas y conexiones no tienen fugas. - Página 33 FDI 94 FDI 124 FDI 184 FDI 244 MANUAL DE INSTALACIÓN EL control manual está localizado a la derecha de la unidad. Púlselo dos veces para la función frío. Haga el test de funcionamiento normalmente.
-
Página 34: Información De Servicio
FDI 94 FDI 124 FDI 184 FDI 244 MANUAL DE INSTALACIÓN INFORMACIÓN DE SERVICIO (Requerida para las unidades R32/R290 solo Refrigerante) Comprobaciones previas Antes de conectar cualquier sistema que contenga refrigerantes inflamables será preciso realizar determinadas comprobaciones para minimizar el riesgo de ignición. Para reparar el sistema de refrigeración se deberán tomar las precauciones indicadas a continuación. - Página 35 FDI 94 FDI 124 FDI 184 FDI 244 MANUAL DE INSTALACIÓN • el tamaño de la carga es acorde al tamaño de la habitación en la que se instalan los elementos que contengan refrigerante; • los conductos de ventilación y las salidas funcionan adecuadamente y no están obstruidos;...
- Página 36 FDI 94 FDI 124 FDI 184 FDI 244 MANUAL DE INSTALACIÓN Detección de refrigerantes inflamables No podrán usarse bajo ningún concepto las posibles fuentes de ignición para buscar o detectar fugas de refrigerante. No se usarán lámparas de haluros (o cualquier otro detector que haga uso de una llama abierta).
- Página 37 FDI 94 FDI 124 FDI 184 FDI 244 MANUAL DE INSTALACIÓN Baja del servicio Antes de llevar a cabo este procedimiento es esencial que el técnico esté familiarizado completamente con el equipo y sus elementos. Se recomienda que todos los refrigerantes sean recuperados de forma segura. Antes de realizar esta tarea, se tomará...
- Página 38 FDI 94 FDI 124 FDI 184 FDI 244 MANUAL DE INSTALACIÓN con una nota indicando Traslado de Residuos. No mezcle los refrigerantes en las unidades de recuperación y, en especial, tampoco en los cilindros. • Si se eliminaran los compresores o el aceite de estos, asegúrese de que hayan sido evacuados a un nivel aceptable, para así...
- Página 39 FDI 94 FDI 124 FDI 184 FDI 244 MANUAL DE INSTALACIÓN ENGLISH Before using your air conditioning, read carefully this manual and keep it for future doubts. Read this manual You will find here useful information to help you to install the units properly and to make the working tests.
-
Página 40: Safety Instructions
FDI 94 FDI 124 FDI 184 FDI 244 MANUAL DE INSTALACIÓN A) The local government has established collecting systems which let the user to disposal of electronic wastes without costs. B) When buying a new product, the dealer will take care of the old unit at no cost to the user. - Página 41 FDI 94 FDI 124 FDI 184 FDI 244 MANUAL DE INSTALACIÓN 6. For all electrical work, follow all local and national wiring standards, regulations, and the Installation Manual. You must use an independent circuit and single outlet to supply power. Do not connect other appliances to the same outlet.
- Página 42 FDI 94 FDI 124 FDI 184 FDI 244 MANUAL DE INSTALACIÓN ACCESSORIES...
-
Página 43: Installation Summary - Indoor Unit
FDI 94 FDI 124 FDI 184 FDI 244 MANUAL DE INSTALACIÓN INSTALLATION SUMMARY - INDOOR UNIT... - Página 44 FDI 94 FDI 124 FDI 184 FDI 244 MANUAL DE INSTALACIÓN...
- Página 45 FDI 94 FDI 124 FDI 184 FDI 244 MANUAL DE INSTALACIÓN UNITS PARTS NOTE ON ILLUSTRATIONS: Illustrations in this manual are for explanatory purposes. The actual shape of your indoor unit may be slightly different. The actual shape shall prevail.
-
Página 46: Indoor Unit Installation
FDI 94 FDI 124 FDI 184 FDI 244 MANUAL DE INSTALACIÓN INDOOR UNIT INSTALLATION INSTALLATION INSTRUCTIONS – INDOOR UNIT PRIOR TO INSTALLATION - Before installing the indoor unit, refer to the label on the product box to make sure that the model number of the indoor unit matches the model number of the outdoor unit. - Página 47 FDI 94 FDI 124 FDI 184 FDI 244 MANUAL DE INSTALACIÓN Refer to the following diagram to ensure proper distance from walls and ceiling: STEP 2: ATTACH MOUNTING PLATE TO WALL The mounting plate is the device on which you will mount the indoor unit.
- Página 48 FDI 94 FDI 124 FDI 184 FDI 244 MANUAL DE INSTALACIÓN STEP 3: DRILL WALL HOLE FOR CONNECTIVE PIPING You must drill a hole in the wall for refrigerant piping, the drainage pipe, and the signal cable that will connect the indoor and outdoor units.
- Página 49 FDI 94 FDI 124 FDI 184 FDI 244 MANUAL DE INSTALACIÓN Mounting plate dimensions:...
- Página 50 FDI 94 FDI 124 FDI 184 FDI 244 MANUAL DE INSTALACIÓN STEP 4: PREPARE REFRIGERANT PIPING The refrigerant piping is inside an insulating sleeve attached to the back of the unit. You must prepare the piping before passing it through the hole in the wall. Refer to the Refrigerant Piping Connection section of this manual for detailed instructions on pipe flaring and flare torque requirements, technique, etc.
- Página 51 FDI 94 FDI 124 FDI 184 FDI 244 MANUAL DE INSTALACIÓN CAUTION Be extremely careful not to dent or damage the piping while bending them away from the unit. Any dents in the piping will affect the unit’s performance. STEP 5: CONNECT DRAIN HOSE By default, the drain hose is attached to the lefthand side of unit (when you’re facing the back of the unit).
- Página 52 FDI 94 FDI 124 FDI 184 FDI 244 MANUAL DE INSTALACIÓN 1. All wiring must comply with local and national electrical codes, and must be installed by a licensed electrician. 2. All electrical connections must be made according to the Electrical Connection Diagram located on the panels of the indoor and outdoor units.
- Página 53 FDI 94 FDI 124 FDI 184 FDI 244 MANUAL DE INSTALACIÓN TAKE NOTE OF FUSE SPECIFICATIONS The air conditioner’s circuit board (PCB) is designed with a fuse to provide overcurrent protection. The specifications of the fuse are printed on the circuit board, such as: T3.15A/250VAC, T5A/250VAC, etc.
- Página 54 FDI 94 FDI 124 FDI 184 FDI 244 MANUAL DE INSTALACIÓN 8. After checking to make sure every connection is secure, use the cable clamp to fasten the signal cable to the unit. Screw the cable clamp down tightly. 9. Replace the wire cover on the front of the unit, and the plastic panel on the back.
-
Página 55: Outdoor Unit Installation
FDI 94 FDI 124 FDI 184 FDI 244 MANUAL DE INSTALACIÓN 7. Again, check that the unit is firmly mounted by applying slight pressure to the left and the right-hand sides of the unit. If refrigerant piping is already embedded in the wall, do the following: 1. - Página 56 FDI 94 FDI 124 FDI 184 FDI 244 MANUAL DE INSTALACIÓN INSTALLATION INSTRUCTIONS – OUTDOOR UNIT STEP 1: SELECT INSTALLATION LOCATION Before installing the outdoor unit, you must choose an appropriate location. The following are standards that will help you choose an appropriate location for the unit.
- Página 57 FDI 94 FDI 124 FDI 184 FDI 244 MANUAL DE INSTALACIÓN - If the unit is frequently exposed to heavy rain or snow: Build a shelter above the unit it to protect it from the rain or snow. Be careful not to obstruct air flow around the unit.
- Página 58 FDI 94 FDI 124 FDI 184 FDI 244 MANUAL DE INSTALACIÓN The following is a list of different outdoor unit sizes and the distance between their mounting feet. Prepare the installation base of the unit according to the dimensions below.
- Página 59 FDI 94 FDI 124 FDI 184 FDI 244 MANUAL DE INSTALACIÓN STEP 4: CONNECT SIGNAL AND POWER CABLES The outside unit’s terminal block is protected by an electrical wiring cover on the side of the unit. A comprehensive wiring diagram is printed on the inside of the wiring cover.
-
Página 60: Refrigerant Piping Connection
FDI 94 FDI 124 FDI 184 FDI 244 MANUAL DE INSTALACIÓN 11. If the unit has an auxiliary electric heater, it must be installed at least 1 meter (40in) away from any combustible materials. WARNING BEFORE PERFORMING ANY ELECTRICAL OR WIRING WORK, TURN OFF THE MAIN POWER TO THE SYSTEM. -
Página 61: Connection Instructions - Refrigerant Piping
FDI 94 FDI 124 FDI 184 FDI 244 MANUAL DE INSTALACIÓN Note on Pipe Length The length of refrigerant piping will affect the performance and energy efficiency of the unit. Nominal efficiency is tested on units with a pipe length of 5 meters (16.5ft). - Página 62 FDI 94 FDI 124 FDI 184 FDI 244 MANUAL DE INSTALACIÓN 1. Hold the pipe at a downward angle to prevent burrs from falling into the pipe. Using a reamer or deburring tool, remove all burrs from the cut section of the pipe.
- Página 63 FDI 94 FDI 124 FDI 184 FDI 244 MANUAL DE INSTALACIÓN INSTRUCTIONS FOR CONNECTING PIPING TO INDOOR UNIT 1. Align the center of the two pipes that you will connect. 2. Tighten the flare nut as tightly as possible by hand.
-
Página 64: Air Evacuation
FDI 94 FDI 124 FDI 184 FDI 244 MANUAL DE INSTALACIÓN 4. Using a spanner, grip the body of the valve. Do not grip the nut that seals the service valve. 5. While firmly gripping the body of the valve, use a torque wrench to tighten the flare nut according to the correct torque values. - Página 65 FDI 94 FDI 124 FDI 184 FDI 244 MANUAL DE INSTALACIÓN Connect the charge hose of the manifold gauge to service port on the outdoor unit’s low pressure valve. Connect another charge hose from the manifold gauge to the vacuum pump.
-
Página 66: Before Test Run
FDI 94 FDI 124 FDI 184 FDI 244 MANUAL DE INSTALACIÓN ELECTRICAL AND GAS LEAK CHECKS ELECTRICAL SAFETY CHECKS After installation, confirm that all electrical wiring is installed in accordance with local and national regulations, and according to the Installation Manual. - Página 67 FDI 94 FDI 124 FDI 184 FDI 244 MANUAL DE INSTALACIÓN TEST RUN Before Test Run Only perform test run after you have completed the following steps: • Electrical Safety Checks – Confirm that the unit’s electrical system is safe and operating properly •...
- Página 68 FDI 94 FDI 124 FDI 184 FDI 244 MANUAL DE INSTALACIÓN DOUBLE-CHECK PIPE CONNECTIONS During operation, the pressure of the refrigerant circuit will increase. This may reveal leaks that were not present during your initial leak check. Take time during the Test Run to double-check that all refrigerant pipe connection points do not have leaks.
-
Página 69: Information Servicing
FDI 94 FDI 124 FDI 184 FDI 244 MANUAL DE INSTALACIÓN INFORMATION SERVICING (Required for the units adopt R32/R290 refrigerant only) Checks to the area Prior to beginning work on systems containing flammable refrigerants, safety checks are necessary to ensure that the risk of ignition is minimised. - Página 70 FDI 94 FDI 124 FDI 184 FDI 244 MANUAL DE INSTALACIÓN Repair and maintenance to electrical components shall include initial safety checks and component inspection procedures. If a fault exists that could compromise safety, then no electrical supply shall be connected to the circuit until it is satisfactorily dealt with.
- Página 71 FDI 94 FDI 124 FDI 184 FDI 244 MANUAL DE INSTALACIÓN 15. Removal and evacuation When breaking into the refrigerant circuit to make repairs or for any other purpose, conventional procedures shall be used; however, it is important that best practice is followed since flammability is a consideration. The following procedure shall be adhered to: ...
- Página 72 FDI 94 FDI 124 FDI 184 FDI 244 MANUAL DE INSTALACIÓN k) Recovered refrigerant shall not be charged into another refrigeration system unless it has been cleaned and checked. 18. Labelling Equipment shall be labelled stating that it has been de-commissioned and emptied of refrigerant. The label shall be dated and signed.
- Página 73 AIRE ACONDICIONADO - MANUAL DE USUARIO CLIMATISEUR - MANUEL D’UTILISATION AR-CONDICIONADO - MANUAL DO USUARIO AIR CONDITIONER - USER’S MANUAL FDI 94 FDI 124 FDR 184 FDI 244 Sonifer,S.A. Avenida de Santiago, 86 30007 Murcia España E-mail: sonifer@sonifer.es MADE IN P.R.C.
- Página 74 FDI 94 FDI 124 FDI 184 FDI 244 MANUAL DE USUARIO Lea este manual En él encontrará información útil para ayudarle a realizar la instalación del aire acondicionado adecuadamente y las pruebas de funcionamiento. Un breve mantenimiento preventivo por su parte puede ahorrarle gran cantidad de tiempo y dinero durante la vida útil de su aire acondicionado.
- Página 75 FDI 94 FDI 124 FDI 184 FDI 244 MANUAL DE USUARIO D) Puesto que los aparatos viejos contienen recursos útiles, se pueden vender a centros de manipulación de chatarra de metal. La eliminación de residuos en bosques y paisajes pone en peligro su salud puesto que se filtran sustancias peligrosas en las aguas subterráneas y que pueden alcanzar la cadena alimentaria.
- Página 76 FDI 94 FDI 124 FDI 184 FDI 244 MANUAL DE USUARIO No utilice el cable de conexión cerca de aparatos de calefacción. • Puede producir fuego y descargas eléctricas. No utilice el cable de conexión cerca de combustibles o gases inflamables, como por ejemplo, con gasolina, ...
-
Página 77: Partes Del Aparato
FDI 94 FDI 124 FDI 184 FDI 244 MANUAL DE USUARIO DESCRPICIÓN DE LAS PARTES Y FUNCIONES PARTES DEL APARATO... -
Página 78: Conseguir Un Rendimiento Óptimo
FDI 94 FDI 124 FDI 184 FDI 244 MANUAL DE USUARIO Nota: Las figuras de este manual tienen una finalidad únicamente explicativa. Pueden diferir ligeramente del aire acondicionado que usted ha adquirido. La forma real es la que prevalece. NOTA: Este manual no incluye la información relativa al funcionamiento del mando a distancia. Para información sobre éste, consulte el “Manual del mando a distancia”... - Página 79 FDI 94 FDI 124 FDI 184 FDI 244 MANUAL DE USUARIO 2. Si prefiere que la lama se mueva hacía arriba y debajo de manera continua, presione y mantenga pulsado el botón SWING/DIRECT durante tres segundos. Vuelva a presionarlo para parar esta función automática.
-
Página 80: Modo Sleep
FDI 94 FDI 124 FDI 184 FDI 244 MANUAL DE USUARIO MODO SLEEP El modo SLEEP se utiliza para ahorrar energía mientras el usuario duerme, ya que no necesita la misma configuración de temperatura para estar cómodo). Esta función es activada mediante el mando a distancia. -
Página 81: Cuidados Y Mantenimiento
FDI 94 FDI 124 FDI 184 FDI 244 MANUAL DE USUARIO 4. Presione el botón de CONTROL MANUAL una vez más para activar el modo FRÍO FORZADO. 5. Presione el botón de CONTROL MANUAL una tercera vez para apagar la unidad. - Página 82 FDI 94 FDI 124 FDI 184 FDI 244 MANUAL DE USUARIO 4. Si su filtro tiene un pequeño filtro para renovar el aire, desmóntelo del filtro de aire principal. Limpie el filtro de aire con una aspiradora o con agua.
- Página 83 FDI 94 FDI 124 FDI 184 FDI 244 MANUAL DE USUARIO Mantenimiento – Periodos largos sin usar Mantenimiento – Inspección antes de temporada alta...
-
Página 84: Consejos De Funcionamiento
FDI 94 FDI 124 FDI 184 FDI 244 MANUAL DE USUARIO CONSEJOS DE FUNCIONAMIENTO Las circunstancias descritas a continuación pueden presentarse durante el funcionamiento normal. CIRCUNSTANCIA POSIBLE CAUSA El aparato tiene una función de protección durante tres minutos que evita que el La unidad no se enciende al aparato se sobrecargue. - Página 85 FDI 94 FDI 124 FDI 184 FDI 244 MANUAL DE USUARIO PROBLEMA POSIBLE CAUSA SOLUCIÓN La temperatura seleccionada es mayor a la Baje la temperatura seleccionada temperatura de la habitación El intercambiador de la unidad interior o Limpie el intercambiador afectado exterior está...
- Página 86 FDI 94 FDI 124 FDI 184 FDI 244 MANUAL DE USUARIO Eliminación del electrodoméstico viejo. En base a la Norma europea 2002/96/CE de Residuos de aparatos Eléctricos y Electrónicos (RAEE), los electrodomésticos viejos no pueden ser arrojados en los contenedores municipales habituales; tienen que ser recogidos selectivamente para optimizar la recuperación y reciclado de los componentes y...
- Página 87 FDI 94 FDI 124 FDI 184 FDI 244 MANUAL DE USUARIO ENGLISH Before using the air conditioning, read this manual carefully and keep it for checkings. Read this manual On it, you will find useful information in order to help you to install the air conditioning and make the testing proofs.
- Página 88 FDI 94 FDI 124 FDI 184 FDI 244 MANUAL DE USUARIO D) As old products contain valuable resources, they can be sold to scrap metal dealers. Wild disposal of waste in forests and landscapes endangers your health when hazardous substances leak into the ground-water and find their way into the food chain.
- Página 89 FDI 94 FDI 124 FDI 184 FDI 244 MANUAL DE USUARIO...
- Página 90 FDI 94 FDI 124 FDI 184 FDI 244 MANUAL DE USUARIO...
-
Página 91: Parts Names
FDI 94 FDI 124 FDI 184 FDI 244 MANUAL DE USUARIO PARTS NAMES NOTE: All the pictures in this manual are for explanation purpose only. Your air conditioner may be slightly different. The actual shape shall prevail. Note: this manual does not include the information about the using instructions of the remote control. Please... - Página 92 FDI 94 FDI 124 FDI 184 FDI 244 MANUAL DE USUARIO GETTING AN OPTIMAL PERFORMANCE Getting an optimum performance in the cooling, heating or drying modes is possible in the following range of temperatures. Using the device out of this range will activate some safety functions which will cause a less optimal performance.
-
Página 93: Sleep Mode
FDI 94 FDI 124 FDI 184 FDI 244 MANUAL DE USUARIO Be careful to not cause damage to the louvers. Warning Do not operate the air conditioner for long periods with the air flow direction set downward in cooling or dehumidifying mode. -
Página 94: Care And Maintenance
FDI 94 FDI 124 FDI 184 FDI 244 MANUAL DE USUARIO MANUAL OPERATION (WITHOUT REMOTE CONTROL) How to operate your unit without the remote control In the event that your remote control fails to work, your unit can be operated manually with the MANUAL CONTROL button located on the indoor unit. - Página 95 FDI 94 FDI 124 FDI 184 FDI 244 MANUAL DE USUARIO CAUTION If the unit is especially dirty, you can use a cloth soaked in warm water to wipe it clean. Then, dry the unit. • Do not use chemicals or chemically treated cloths to clean the unit.
- Página 96 FDI 94 FDI 124 FDI 184 FDI 244 MANUAL DE USUARIO Maintenance – Long Periods of Non-Use Maintenance – Pre-Season Inspection...
-
Página 97: Common Issues
FDI 94 FDI 124 FDI 184 FDI 244 MANUAL DE USUARIO COMMON ISSUES The following problems are not a malfunction and in most situations will not require repairs. - Página 98 FDI 94 FDI 124 FDI 184 FDI 244 MANUAL DE USUARIO...
- Página 99 FDI 94 FDI 124 FDI 184 FDI 244 MANUAL DE USUARIO...
- Página 100 FDI 94 FDI 124 FDI 184 FDI 244 MANUAL DE USUARIO NOTE: If your problem persists after performing the checks and diagnostics above, turn off your unit immediately and contact an authorized service center. Disposal of old electrical appliances. The European directive 2002/96/EC on Waste Electrical and Electronic Equipment (WEEE), requires that old household electrical appliances must not be disposed of in the normal unsorted municipal waste stream.
-
Página 101: Mando A Distancia
MANUAL DE INSTRUCCIONES MANDO A DISTANCIA FDI 94 124 184 244 Sonifer,S.A. Avenida de Santiago, 86 30007 Murcia España E-mail: sonifer@sonifer.es MADE IN P.R.C. Lea atentamente este manual antes de utilizar este aparato y guárdelo para futuras consultas. Sólo así podrá obtener los mejores resultados y la máxima seguridad de uso. -
Página 102: Consejos Para El Uso Del Mando A Distancia
MANDO A DISTANCIA FDI 94 124 184 244 ESPAÑOL Antes de empezar a utilizar su nuevo acondicionador de aire, asegúrese de familiarizarse con su control remoto. La siguiente es una breve introducción al control remoto en si mismo Para obtener instrucciones sobre cómo operar su acondicionador de aire, consulte la sección Como Usar las Funciones Básicas en este manual. - Página 103 MANDO A DISTANCIA FDI 94 124 184 244...
-
Página 104: Fan Speed
MANDO A DISTANCIA FDI 94 124 184 244 1. ON/OFF: Pulse este botón para poner en marcha la unidad interior. Púlselo de nuevo para detenerla. 2. MODE: Cada vez que se aprieta este botón, se activa la secuencia siguiente: 3. FAN SPEED: se utiliza para seleccionar la velocidad del ventilador en cuatro pasos: 4. -
Página 105: Indicadores De La Pantalla Lcd
MANDO A DISTANCIA FDI 94 124 184 244 INDICADORES DE LA PANTALLA LCD NOTA: Es posible que la unidad que ha comprado no tenga activados todos los indicadores. En ese caso, durante el funcionamiento real, sólo aquellos que estén activados se mostarán en la visualización de la pantalla. - Página 106 MANDO A DISTANCIA FDI 94 124 184 244 CÓMO USAR LAS FUNCIONES DEL MANDO A DISTANCIA AJUSTE DE TEMPERATURA El rango operativo de temperatura de las unidades es 17- 30℃. Puede aumentar o disminuir el temperatura fijada en incrementos de 1ºC.
-
Página 107: Función Fan (Ventilador)
MANDO A DISTANCIA FDI 94 124 184 244 FUNCIÓN FAN (VENTILADOR) 1. Pulse el botón MODO para seleccionar el modo VENTILADOR. 2. Pulse el botón VENTILADOR para seleccionar la velocidad del ventilador: AUTO, BAJO, MEDIO o ALTO. 3. Pulse el botón ON/OFF para encender la unidad. -
Página 108: Función Timer Off
MANDO A DISTANCIA FDI 94 124 184 244 1. Pulse el botón TIMER ON. Por defecto, el último período de tiempo establecido y una "h" (que indica horas) aparecerán en la pantalla. NOTA: Este número indica cuanto tiempo después de la hora actual usted desea que la unidad se encienda. - Página 109 MANDO A DISTANCIA FDI 94 124 184 244 AJUSTANDO TANTO TIMER ON COMO TIMER OFF AL MISMO TIEMPO Tenga en cuenta que el tiempo que usted fije para ambas funciones refiere al tiempo contado a partir a la hora actual. Por ejemplo, digamos que la hora actual es la 1:00 PM, y desea que la unidad se encienda automáticamente a las 7:00 PM.
-
Página 110: Cómo Usar Las Funciones Avanzadas
MANDO A DISTANCIA FDI 94 124 184 244 CÓMO USAR LAS FUNCIONES AVANZADAS... -
Página 111: Inserción Y Remplazo De Las Pilas
MANDO A DISTANCIA FDI 94 124 184 244 INSERCIÓN Y REMPLAZO DE LAS PILAS Su unidad de aire acondicionado viene con dos pilas AAA. Ponga las pilas en el mando a distancia antes de usarlo. 1. Deslice hacia abajo la cubierta posterior del control remoto, dejando al descubierto el compartimiento de las pilas. -
Página 112: Handling The Remote Control
MANDO A DISTANCIA FDI 94 124 184 244 ENGLISH Before you begin using your new air conditioner, make sure to familiarize yourself with its remote control. The following is a brief introduction to the remote control itself. For instructions on how to operate your air conditioner, refer to the How to Use Basic Functions section of this manual. - Página 113 MANDO A DISTANCIA FDI 94 124 184 244...
- Página 114 MANDO A DISTANCIA FDI 94 124 184 244 1. ON/OFF: This button turns the air conditioner ON and OFF. 2. MODE: Press this button to modify the air conditioner mode in a sequence of following: 3. FAN SPEED: Used to select he fan speed in four steps: 4.
-
Página 115: Remote Led Screen Indicators
MANDO A DISTANCIA FDI 94 124 184 244 REMOTE LED SCREEN INDICATORS... - Página 116 MANDO A DISTANCIA FDI 94 124 184 244 HOW TO USE THE FUNCTIONS SETTING TEMPERATURE The operating temperature range for units is 17- 30ºC(62ºF-86ºF). You can increase or decrease the set tEmperature in 1ºC(1ºF)increments. AUTO operation In AUTO mode, the unit will automatically select the COOL, FAN, HEAT or DRY mode based on the set temperature.
- Página 117 MANDO A DISTANCIA FDI 94 124 184 244 FAN operation 1. Press the MODE button to select FAN mode. 2. Press FAN button to select the fan speed: AUTO, LOW, MED or HIGH. 3. Press the ON/OFF button to start the unit.
- Página 118 MANDO A DISTANCIA FDI 94 124 184 244 the current time that you want the unit to turn on. For example, if you set TIMER ON for 2 hours, “2.0h” will appear on the screen, and the unit will turn on after 2 hours.
- Página 119 MANDO A DISTANCIA FDI 94 124 184 244 Setting both TIMER ON and TIMER OFF at the same time Keep in mind that the time periods you set for both functions refer to hours after the current time. For example, say that the current time is 1:00 PM, and you want the unit to turn on automatically at 7:00 PM.
-
Página 120: Inserting And Replacing Batteries
MANDO A DISTANCIA FDI 94 124 184 244 How To Use The Advanced Functions INSERTING AND REPLACING BATTERIES Your air conditioning unit comes with two AAA batteries. Put the batteries in the remote control before use. 1. Slide the back cover from the remote Control downward, exposing the battery compartment. -
Página 121: Declaration Of Conformity
MANDO A DISTANCIA FDI 94 124 184 244 TIPS FOR USING REMOTE CONTROL The remote control must be used within 8 meters of the unit. The unit will beep when remote signal is received. Curtains, other materials and direct sunlight can interfere with the infrared signal receiver. -
Página 122: Utilisation De La Télécommande
MANDO A DISTANCIA FDI 94 124 184 244 FRANÇAIS Familiarisez-vous avec votre télécommande avant d'utiliser votre nouveau climatiseur. Veuillez trouver ci-dessous une brève introduction à propos de la télécommande. Veuillez consulter « Comment Utiliser les Fonctions Basiques » dans ce manuel afin d'obtenir des instructions concernant le fonctionnement de votre climatiseur. - Página 123 MANDO A DISTANCIA FDI 94 124 184 244...
-
Página 124: Vitesse Du Ventilateur
MANDO A DISTANCIA FDI 94 124 184 244 ON/OFF (Allumer/Éteindre) Allume ou éteint l’appareil. MODE (MODE) Modifie les modes de fonctionnement de la manière suivante : Note : Le mode chauffage n’est pas compatible avec les équipements servant uniquement à refroidir. - Página 125 MANDO A DISTANCIA FDI 94 124 184 244 INDICATEUR DE TRANSMISSION Il s’éclaire lorsque la télécommande envoie son signal à l’appareil. MODE Affiche le mode actuel, inclus : AUTO (Automatique) REFROIDISSEMENT DÉSHUMIDIFICATION CHALEUR VENTILATEUR ON/OFF Il s’affiche lorsque l’appareil est allumé et disparaît lorsqu’il s’éteint.
-
Página 126: Indicateurs De L'écran
MANDO A DISTANCIA FDI 94 124 184 244 TIMER OFF Il s’affiche lorsque le temporisateur est éteint. BATTERIE Détecteur de batterie faible. SLEEP Il s’affiche lorsque le mode SLEEP est sélectionné. FOLLOW ME (SUIS-MOI) Indique que la fonction FOLLOW ME (SUIS-MOI) est activée. -
Página 127: Fonction Refroidissement
MANDO A DISTANCIA FDI 94 124 184 244 FONCTION REFROIDISSEMENT 1. Appuyez sur le bouton MODE 2. Fixez la température souhaitée en utilisant les boutons ▲ou▼. 3. Appuyez sur le bouton VENTILATEUR pour choisir la vitesse du ventilateur : AUTOMATIQUE, FAIBLE, MOYENNE ou RAPIDE. - Página 128 MANDO A DISTANCIA FDI 94 124 184 244 FONCTION CHALEUR 1. Appuyez sur le bouton MODE pour sélectionner le mode CHALEUR. 2. Fixez la température souhaitée en utilisant les boutons ▲ou▼. 3. Appuyez sur le bouton VENTILATEUR pour choisir la vitesse du ventilateur : AUTOMATIQUE, FAIBLE, MOYENNE ou RAPIDE.
- Página 129 MANDO A DISTANCIA FDI 94 124 184 244 3. Attendez 2 secondes et la fonction TIMER ON s'activera. L'écran numérique de votre télécommande revient ensuite à l'écran de la température. FONCTION TIMER OFF La fonction TIMER OFF vous permet d'établir le moment où...
- Página 130 MANDO A DISTANCIA FDI 94 124 184 244 Suivez les étapes suivantes : Exemple : Réglez l'appareil pour qu'il s'allume au bout de 6 heures, qu'il fonctionne pendant 2 heures et qu'il s'éteigne ensuite (voir le schéma ci-dessous)
-
Página 131: Insertion Et Remplacement Des Piles
MANDO A DISTANCIA FDI 94 124 184 244 FONCTION REPOS La fonction REPOS est utilisée pour réduire la consommation d’énergie pendant la nuit (lorsque vous n’avez pas besoin des mêmes réglages de température pour votre confort). Cette fonction peut uniquement être activée avec la télécommande. -
Página 132: Déclaration De Conformité
MANDO A DISTANCIA FDI 94 124 184 244 Enlèvement des appareils ménagers usagés. La directive européenne 2002/96/EC sur les Déchets des Equipements Electriques et Electroniques (DEEE), exige que les appareils ménagers usages ne soient pas jetés dans le flux normal des déchets municipaux. Les appareils usagés doivent être collectés séparément afin d’optimiser le taux... -
Página 133: Botões De Função
MANDO A DISTANCIA FDI 94 124 184 244 PORTUGUÊS BOTÕES DE FUNÇÃO Antes de começar a utilizar a sua nova unidade de ar condicionado, certifique-se de que se familiariza com o seu controlo remoto. Abaixo encontra-se uma breve introdução ao controlo remoto propriamente dito. Consulte a secção Como Usar as Funções Básicas deste manual para obter as instruções sobre como operar a unidade... - Página 134 MANDO A DISTANCIA FDI 94 124 184 244...
- Página 135 MANDO A DISTANCIA FDI 94 124 184 244 ON/OFF (Ativação/Desativação) Desativa ou ativa a unidade. MODE (MODO) Percorre em deslocamento os modos operacionais da seguinte maneira: AUTO (Auto) - FRESCO (Refrigeração) - SECO (Desumidificação) - CALOR (Aquecimento) - VENTILADOR (Oscilação).
-
Página 136: Indicadores Do Ecrã
MANDO A DISTANCIA FDI 94 124 184 244 INDICADORES DO ECRÃ INDICADOR TRANSMISIÓN INDICADOR DA TRANSMISSÃO Se ilumina cuando el M/D envía su señal a Acende-se quando o controlo remoto la unidade envia o seu sinal para a unidade. MODO... - Página 137 MANDO A DISTANCIA FDI 94 124 184 244 encendida y desaparece cuando se apaga ativada e desaparece quando a unidade for desativada. TIMER ON TIMER ON Muestra cuando el temporizador está É apresentado quando o temporizador é encendido ativado. TIMER OFF...
-
Página 138: Configuração Da Temperatura
MANDO A DISTANCIA FDI 94 124 184 244 COMO USAR AS FUNÇÕES BÁSICAS CONFIGURAÇÃO DA TEMPERATURA A amplitude operacional da temperatura das unidades é de 17-30 °C. É possível aumentar ou diminuir a temperatura definida em incrementos de 1 °C. - Página 139 MANDO A DISTANCIA FDI 94 124 184 244 FUNÇÃO VENTILADOR 1. Prima o botão MODO para selecionar o modo VENTILADOR. 2. Prima o botão VENTILADOR para selecionar a velocidade do ventilador: AUTO, BAJO, MEDIO ou ALTO. 3. Prima o botão ON/OFF para ativar a unidade.
- Página 140 MANDO A DISTANCIA FDI 94 124 184 244 TIMER ON TIMER ON (Ativação do temporizador) TIMER OFF TIMER (Desativação temporizador) 1 sec 1 seg 2 sec 2 seg Ejemplo de ajuste de la unidad para Exemplo de configuração da unidade para encenderse automáticamente después de...
-
Página 141: Timer Off
MANDO A DISTANCIA FDI 94 124 184 244 Continue a premir o botão TIMER ON ou TIMER até alcançar tempo pretendido. NOTA: Quando as funções TIMER ON ou TIMER OFF forem configuradas até 10 horas, o tempo aumentará em incrementos de 30 minutos com cada pressão. -
Página 142: Função Sleep
MANDO A DISTANCIA FDI 94 124 184 244 FUNÇÃO SLEEP A função SLEEP é utilizada para diminuir o consumo de energia durante a noite (quando não são necessários os mesmos ajustes da temperatura para assegurar o conforto). Só é possível ativar esta função através do controlo remoto. -
Página 143: Conselhos Relativos Ao Uso Do Controlo Remoto
MANDO A DISTANCIA FDI 94 124 184 244 Para obter o melhor rendimento do produto: Não misture pilhas novas e velhas nem de diferentes tipos. Não deixe as pilhas dentro do controlo remoto se não planear usar o dispositivo durante um período superior a 2 meses.