
Manuales relacionados para APRILIA SCARABEO50 I.E.-100 4T


Resumen de contenidos para APRILIA SCARABEO50 I.E.-100 4T
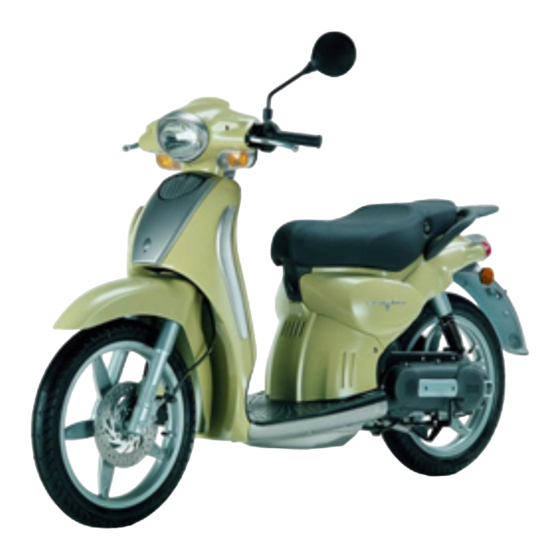
- Página 1 All manuals and user guides at all-guides.com SCARABEO 50 I.E. - 100 4T use+maintenancebook aprilia part# 8202290...
- Página 2 All manuals and user guides at all-guides.com © 2001 aprilia s.p.a. - Noale (VE) MENSAJES DE SEGURIDAD INFORMACION Los mensajes de aviso abajo descritos se Las operaciones precedidas por este utilizan en todo el manual para indicar lo si- símbolo deben ser repetidas también guiente: en el lado opuesto del vehículo.
- Página 3 – dirigirse a un Concesionario Oficial (Automatic Switch-on Device) dad de la información facilitada. Sin embar- aprilia para la sustitución de tales com- opcional go, como los productos aprilia están suje- ponentes con otros homologados para ese versión con freno de tambor...
-
Página 4: Tabla De Contenido
All manuals and user guides at all-guides.com INDICE GENERAL FRENO TRASERO DE TAMBOR ....33 DESMONTAJE SILENCIADOR BATTERY HYDROGEN GAS CONDUCCIÓN SEGURA ........5 NEUMÁTICOS ..........34 DE ESCAPE .......... 66 AND ELECTROLYTE REGLAS FUNDAMENTALES DE VERSIÓN ENCENDIDO AUTOMÁTICO DESMONTAJE SILENCIADOR SEGURIDAD ........... -
Página 5: Conducción Segura
All manuals and user guides at all-guides.com conducción segura... -
Página 6: Reglas Fundamentales De Siguridad
All manuals and user guides at all-guides.com REGLAS FUNDAMENTALES La ingestión de algunas medicinas, alcohol La mayor parte de los accidentes se debe a y sustancias estupefacientes o psicofár- la inexperiencia del piloto. DE SIGURIDAD macos aumenta notablemente el riesgo de NO preste NUNCA el vehículo a principian- Para conducir el vehículo es necesario po- accidentes. - Página 7 All manuals and user guides at all-guides.com Respete rigurosamente las señales y las No choque contra obstáculos que puedan Conduzca siempre con ambas manos sobre normas del tráfico rodado nacional y local. dañar el vehículo o llevar a la pérdida del el manillar y con los pies sobre el estribo (o control del mismo.
-
Página 8: Seguridad
Sólo para los vehículos hasta 50 cm Eventualmente, dé el vehículo a un Conce- cluidos sionario Oficial aprilia para que controle, Se advierte que cualquier modificación del sobre todo, el bastidor, el manillar, las sus- aparato motor o de otros órganos para au- pensiones, los órganos de seguridad y los... -
Página 9: Ropa
All manuals and user guides at all-guides.com ONLY ORIGINALS el ciclomotor pase a ser a todos los efectos ROPA una motocicleta, con la consiguiente obliga- Sólo para los vehículos de más de 50 cm Antes de empezar a conducir, acuérdese de ción para el propietario: Cualquier modificación que se aporte al ve- ponerse y de abrocharse siempre y co-... -
Página 10: Accesorios
ángulo de namiento de los dispositivos de señalización viraje, que no obstaculice la puesta en fun- acústica y visual. aprilia aconseja el uso ción de los mandos y que no reduzca la al- de accesorios originales (aprilia genuine tura del suelo y el ángulo de inclinación en... - Página 11 All manuals and user guides at all-guides.com No sujete jamás objetos voluminosos, pe- No transporte ningún tipo de equipaje que No supere el límite máximo de peso trans- sados y/o peligrosos en el manillar, en los no esté fijado firmemente al vehículo. portable por cada maletero.
-
Página 12: Ubicación Elementos Principales
All manuals and user guides at all-guides.com UBICACION ELEMENTOS PRINCIPALES 10 11 PIE DE LA ILUSTRACION 1) Claxon 7) Cerradura sillín 2) Depósito líquido freno trasero 8) Portaequipajes 3) Guantera portadocumentos 9) Caballete central 4) Portafusibles 10) Filtro aire 5) Batería 11) Tapa de inspección 6) Estribo izquierdo pasajero (países donde previsto) - Página 13 9) Depósito combustible 4) Interruptor de encendido / seguro de dirección 10) Estribo derecho pasajero 5) Gancho portabolsos (países donde previsto) 6) Tapa número chasis 11) Gancho antirrobo (para cable acorazado “Body-Guard” aprilia uso y mantenimiento Scarabeo 50 - Scarabeo 100 4T...
-
Página 14: Ubicación Elementos Principales
All manuals and user guides at all-guides.com UBICACION ELEMENTOS PRINCIPALES apri PIE DE LA ILUSTRACION 1) Claxon 8) Caballete central 2) Guantera portadocumentos 9) Pedal de arranque 3) Portafusibles 10) Filtro aire 4) Batería 11) Tapa de inspección 5) Estribo izquierdo pasajero 6) Cerradura sillín 7) Portaequipajes uso y mantenimiento Scarabeo 50... - Página 15 1) Tapón depósito combustible 8) Estribo derecho pasajero 2) Interruptor de encendido / seguro de dirección 9) Gancho antirrobo (para cable acorazado 3) Gancho portabolsos “Body-Guard” aprilia 4) Tapa número chasis 5) Depósito líquido freno delantero 6) Bujía uso y mantenimiento Scarabeo 50...
-
Página 16: Ubicación Mandos / Instrumentose Indicadores
All manuals and user guides at all-guides.com UBICACION MANDOS / INSTRUMENTOS E INDICADORES mph km/h aprilia mph km/h aprilia mph km/h aprilia mph km/h aprilia PIE DE LA ILUSTRACION 10) Velocímetro 1) Mandos eléctricos en el lado izquierdo del manillar... -
Página 17: Tablas Instrumentos E Indicadores17
” y se apaga una vez puesto en funcionamiento Luz testigo diagnóstico el vehículo. (Injection Check) Si la luz testigo se enciende durante el funcionamiento de la ATENCION moto, el vehículo está averiado; diríjase a un concesionario aprilia. uso y mantenimiento Scarabeo 50 - Scarabeo 100 4T... -
Página 18: Luz Testigo Injection Check
Concesionario Oficial aprilia. Si en este caso se arranca el vehículo, las funciones del mismo pueden ser limitadas. Detenga el vehículo y llévelo a un Concesionario Oficial aprilia. PRIORIDAD 2 La luz testigo se enciende y permanece encendida un mínimo de 10 segundos. -
Página 19: Mandos Principales Individuales
All manuals and user guides at all-guides.com MANDOS PRINCIPALES INDIVIDUALES MANDOS EN EL LADO IZQUIERDO DEL MANILLAR IMPORTANTE Los componentes eléctricos funcionan sólo si el interruptor de encendido está en posición “ ”. IMPORTANTE La instalación de iluminación funciona solo con el motor encendido. -
Página 20: Mandos En El Lado Derecho Del Manillar
All manuals and user guides at all-guides.com MANDOS EN EL LADO DERECHO DEL MANILLAR IMPORTANTE Los componentes eléctricos funcionan sólo si el interruptor de encendido está en posición “ ”. IMPORTANTE La instalación de iluminación funciona solo con el motor encendido. •... -
Página 21: Mandos Principales Individuales
All manuals and user guides at all-guides.com MANDOS PRINCIPALES INDIVIDUALES MANDOS EN EL LADO IZQUIERDO DEL MANILLAR IMPORTANTE Los componentes eléctricos funcionan sólo si el interruptor de encendido está en posición “ ”. IMPORTANTE La instalación de iluminación funciona solo con el motor encendido. -
Página 22: Mandos En El Lado Derecho Del Manillar
All manuals and user guides at all-guides.com MANDOS EN EL LADO DERECHO DEL MANILLAR IMPORTANTE Los componentes eléctricos funcionan sólo si el interruptor de encendido está en posición “ ”. IMPORTANTE La instalación de iluminación funciona solo con el motor encendido. •... -
Página 23: Interruptor De Encendido
All manuals and user guides at all-guides.com Extracción Función Posición Llave La dirección Es posible está quitar la bloqueada. llave. INTERRUPTOR DE ENCENDIDO SEGURO DE DIRECCION No es posible Seguro de arrancar PELIGRO El interruptor de encendido se encuentra en dirección el motor ni el lado derecho, cerca del manguito de la... -
Página 24: Equipo Auxiliar
♦ ♦ Introduzca la llave en la cerradura sillín (1). Introduzca la llave de encendido en la ce- razado “Body-Guard” aprilia (5) que ♦ Gire la llave en sentido horario y levante rradura (3) y gírela en sentido horario. -
Página 25: Kit Herramientas
All manuals and user guides at all-guides.com Las llaves están ubicadas en el alojamiento situado en el plástico debajo del sillín. El kit herramientas está compuesto por: – n° 1 llave de tubo de 16 mm (1); – n° 1 destornillador (2) con un extremo cru- ciforme tipo PH tamaño 2 y con el otro extremo con llave macho hexagonal de 4 –... -
Página 26: Trasero
All manuals and user guides at all-guides.com UBICACIÓN DEL CASCO EN EL dido e introdúzcala en la cerradura (1) del maletero trasero. MALETERO TRASERO ♦ Gire la llave en sentido contrario a las agu- jas del reloj y abra el maletero trasero (2). Gracias al maletero trasero no es necesario ♦... -
Página 27: Componentes Principales
All manuals and user guides at all-guides.com COMPONENTES PRINCIPALES COMBUSTIBLE Evite el contacto del combustible con la piel, la inhalación de vapores, la inges- PELIGRO tión y el trasiego de un recipiente a otro por medio de un tubo. El combustible utilizado para la propul- sión de los motores de explosión es muy NO ESPARZA EL COMBUSTIBLE EN EL inflamable y puede volverse explosivo en... -
Página 28: Lubricantes
Concesiona- se que esté perfectamente limpio. ♦ En caso de pérdidas o malfunciona- rio Oficial aprilia para la realización de Efectúe el relleno del aceite. mientos, diríjase a un Concesionario Ofi- la purga. ATENCION cial aprilia. -
Página 29: Relleno Aceite Motor
Cada 2000 km (1250 mi) está previsto efec- CENTRAL). estándar, se definen las frecuencias de sus- tuar, en un Concesionario Oficial aprilia, titución previstas en el programa de mante- un control y eventual relleno de aceite mo- ATENCION nimiento. -
Página 30: Control Nivel Aceite Transmision
BIENTE. un Concesionario Oficial aprilia. filtro se deben efectuar cada 4000 km (2500 Lea con cuidado pág. 47 (MANTENI- mi) en un Concesionario Oficial aprilia. MIENTO). ACEITE TRANSMISION Para el control del nivel del aceite transmi- Vacíe el motor haciendo salir todo el aceite sión, hay que efectuar las siguientes ope-... -
Página 31: Líquido Frenos - Recomendaciones
MANTENGASE LEJOS DEL ALCANCE Diríjase a un Concesionario Oficial PELIGRO DE LOS NIÑOS. aprilia si tiene dudas sobre el funciona- miento perfecto del sistema de frenado, NO ESPARZA EL LÍQUIDO EN EL AM- Hacer funcionar el motor con aceite in- y si no se encuentra en la posibilidad de BIENTE. -
Página 32: Frenos De Disco
No dude en dirigirse a un Concesionario El depósito líquido frenos (1) está situado disco. Oficial aprilia en caso de dudas sobre cerca de la fijación palanca freno delante- el perfecto funcionamiento de la instala- Si las pastillas y/o el disco no deben ser sus- ro. -
Página 33: Freno Trasero De Tambor
No dude en dirigirse a un Concesionario material de roce y tambor. Por este motivo PELIGRO Oficial aprilia en caso de dudas sobre compruebe el juego incluso con zapatas a Con el motor caliente, preste atención el perfecto funcionamiento de la instala- temperatura de ejercicio. -
Página 34: Neumáticos
All manuals and user guides at all-guides.com NEUMATICOS PELIGRO PELIGRO Controle las condiciones de las superfi- Este vehículo está equipado con neumáti- Si la presión del hinchado es demasiado cies y del desgaste, porque una mala con- cos sin cámara. alta, las irregularidades del terreno no lle- dición de los neumáticos puede compro- gan a amortiguarse y se transmiten al... - Página 35 Los neumáticos se deben sustituir con Por esta razón le aconsejamos diríjase delantero y trasero ......1,5 mm otros de tipo y modelo indicados por la a un Concesionario Oficial aprilia o a 3 mm) casa fabricante, véase pág. 86 (DATOS un servicio especializado para ejecutar y en todo caso no inferior a lo prescrito por TÉCNICOS);...
-
Página 36: Versión Encendido Automático Luces Escape / Silenciador De Escape
“ ” (luz de En caso de que el ruido producido por el cruce delantera). sistema de escape aumente, diríjase de in- mediato a un Concesionario Oficial aprilia. uso y mantenimiento Scarabeo 50 - Scarabeo 100 4T... -
Página 37: Normas Para El Uso
No dude en dirigirse a un Concesionario – fijación jos. Si acaso, ajústelos o apriételos. Oficial aprilia si no comprende el fun- Controle el nivel y reponga gasolina si es necesario. Depósito gasolina cionamiento de unos mandos o si nota o 27, 83 Controle pérdidas eventuales u oclusiones del circuito. -
Página 38: Arranque
All manuals and user guides at all-guides.com ARRANQUE IMPORTANTE ARRANQUE ELÉCTRICO Si el vehículo ha queda- do inactivo durante mucho tiempo, realice ♦ Coloque el vehículo sobre el caballete cen- PELIGRO las operaciones de pág. 40 (ARRANQUE tral en un terreno firme y llano. Los gases de escape contienen mo- TRAS LARGA INACTIVIDAD). - Página 39 Haga regresar a su sitio el pedal de arran- el vehículo y diríjase a un Concesionario abra ligeramente el puño del gas aproxima- que (6). Oficial aprilia. damente 1/8 (véase figura), luego suéltelo al ponerse en marcha el motor. Evite presionar el pulsador de arranque “...
- Página 40 All manuals and user guides at all-guides.com ARRANQUE CON EL MOTOR INUNDADO Si el motor se pone en marcha. Antes de volver a instalarla: ♦ Suelte el puño de gas (7). IMPORTANTE Coloque un paño limpio ♦ En caso de que no se realice correctamen- En caso de que el ralentí...
-
Página 41: Salida Y Conducción
All manuals and user guides at all-guides.com ♦ SALIDA Y CONDUCCION Para ponerse en marcha, suelte la palan- PELIGRO ca del freno y el vehículo empezará a IMPORTANTE Antes de salir, lea con En caso de conducción con pasajero, ins- moverse. - Página 42 All manuals and user guides at all-guides.com PELIGRO PELIGRO PELIGRO Antes de iniciar una curva, reduzca la Durante la conducción con escasa visi- En caso de frenada, accione ambos fre- velocidad o frene recorriendo la misma bilidad, para aumentar la visibilidad de su nos para obtener una deceleración uni- con velocidad moderada y constante o vehículo, encienda las luces de cruce...
- Página 43 All manuals and user guides at all-guides.com PELIGRO PELIGRO PELIGRO Señale siempre los cambios de vías o de Si la luz testigo de reserva del aceite mez- Ponga cuidado en todo tipo de obstácu- dirección por medio de los dispositivos clador “...
-
Página 44: Rodaje
All manuals and user guides at all-guides.com RODAJE Para los primeros 500 km de recorrido (312 mi), aténgase a las siguientes normas: PELIGRO ♦ 0-100 km (0-62 mi) Durante los primeros 100 km (62 mi), ac- Durante los primeros 500 km (312 mi) de túe con cuidado sobre los frenos y evite funcionamiento, realice los controles se- frenazos repentinos y prolongados. -
Página 45: Parada
All manuals and user guides at all-guides.com PARADA APARCAMIENTO ♦ Gire la llave (1) y ponga en “ ” el inte- rruptor de encendido (2). PELIGRO PELIGRO ♦ Coloque el vehículo sobre el caballete, Aparque el vehículo sobre suelo sólido y Evite, si es posible, parar bruscamente véase pág. -
Página 46: Colocación Del Vehículo Sobre El Caballete Central
♦ Empuje sobre la palanca del caballete (2). Utilice, si es posible, un cable acorazado ..............ATENCION “Body-Guard” aprilia adecuado o un N. TELEFONO: ........... dispositivo antirrobo adicional. Asegúrese de la estabilidad del vehícu- Compruebe que los documentos y la tasa de circulación estén en orden. -
Página 47: Mantenimiento
Se aconseja que pida al Concesionario tema de escape se hayan enfriado, levan- ATENCION Oficial aprilia que le haga probar el vehí- te el vehículo posiblemente por medio del culo en la carretera tras una intervención de De no resultar expresamente descrito, equipo adecuado, sobre una superficie reparación o de mantenimiento periódico. -
Página 48: Ficha De Mantenimiento Periódico
Cada 4000 km Cada 8000 km INTERVENCIONES A REALIZAR POR EL Componentes [500 km (2500 mi) (5000 mi) Concesionario Oficial aprilia (QUE PUE- DEN EFECTUARSE POR EL USUARIO) o 12 meses o 24 meses (312 mi)] Batería - nivel electrólito LEYENDA Bujía... - Página 49 All manuals and user guides at all-guides.com INTERVENCIONES A REALIZAR POR EL Concesionario Oficial aprilia Fin rodaje Cada 4000 km Cada 8000 km LEYENDA Componentes [500 km (2500 mi) (5000 mi) 1 = controle, limpie, ajuste, lubrique o sus- o 12 meses...
- Página 50 All manuals and user guides at all-guides.com INTERVENCIONES A REALIZAR POR EL Concesionario Oficial aprilia Fin rodaje Cada 4000 km Cada 8000 km LEYENDA Componentes [500 km (2500 mi) (5000 mi) 1 = controle, limpie, ajuste, lubrique o sus- o 12 meses...
-
Página 51: Ficha De Mantenimiento Periódico
FICHA DE MANTENIMIENTO PERIODICO Fin rodaje Cada 4000 km Cada 8000 km INTERVENCIONES A REALIZAR POR EL Componentes Concesionario Oficial aprilia (QUE PUE- [1000 km (2500 mi) (5000 mi) DEN EFECTUARSE POR EL USUARIO) o 12 meses o 24 meses (625 mi)] Bujía - Distancia electrodos... - Página 52 All manuals and user guides at all-guides.com INTERVENCIONES A REALIZAR POR EL Concesionario Oficial aprilia Fin rodaje Cada 4000 km Cada 8000 km LEYENDA Componentes [1000 km (2500 mi) (5000 mi) 1 = controle, limpie, ajuste, lubrique o sus- o 12 meses...
- Página 53 All manuals and user guides at all-guides.com Fin rodaje Cada 4000 km Cada 8000 km LEYENDA Componentes [1000 km (2500 mi) (5000 mi) 1 = controle, limpie, ajuste, lubrique o sus- o 12 meses o 24 meses (625 mi)] tituya si es necesario; 2 = limpie;...
-
Página 54: Ficha De Reconocimiento
All manuals and user guides at all-guides.com FICHA DE RECONOCIMIENTO NUMERO BASTIDOR El número del bastidor está troquelado en Resulta recomendable escribir los números el tubo central del bastidor. del bastidor y del motor en el espacio reser- Para leerlo es preciso desmontar la tapa (1). vado expresamente en este manual. -
Página 55: Filtro Aire
All manuals and user guides at all-guides.com FILTRO AIRE DESMONTAJE IMPORTANTE Cuando el filtro resulta obstruido saque el elemento filtrante (4) y ♦ Lea con cuidado pág. 47 (MANTENIMIEN- Coloque el vehículo sobre el caballete sustitúyalo. central en un terreno firme y llano, véase TO). -
Página 56: Filtro Aire 100
All manuals and user guides at all-guides.com FILTRO AIRE LIMPIEZA DESMONTAJE Lea con cuidado pág. 47 (MANTENIMIEN- ♦ Coloque el vehículo sobre el caballete PERICOLO TO). central en un terreno firme y llano, véase No use gasolina o disolventes inflama- pág. -
Página 57: Desmontaje Caja Filtro Aire Completa
Concesionario Oficial aprilia. ♦ Desenrosque el tornillo de fijación salpi- cadero con caja filtro (6). -
Página 58: Rueda Delantera
En caso de necesidad, diríjase a un Con- En este caso diríjase a un Concesionario cesionario Oficial aprilia. ATENCION Oficial aprilia que efectuará la interven- En todo caso, si quiere efectuar tales Asegúrese de la estabilidad del vehículo. ción de mantenimiento. - Página 59 ♦ Coloque la rueda entre las varillas de la tando con cuidado el disco en la pinza freno. Concesionario Oficial aprilia, para evi- horquilla sobre el sujetador (1). ♦ Introduzca la arandela (4) entre el reenvío tar inconvenientes que podrían causar se-...
-
Página 60: Rueda Trasera
Las operaciones para el desmontaje y el montaje de la rueda trasera pueden ser difíciles y complejas para un operador inexperto. En caso de necesidad, diríja- se a un Concesionario Oficial aprilia. En todo caso, si quiere efectuar tales operaciones personalmente, aténgase a las siguientes instrucciones. -
Página 61: Comprobación Desgaste Pastillas
MIENTO). freno y las pastillas. Para la sustitución, diríjase a un Conce- Controle el desgaste de las pastillas del fre- sionario Oficial aprilia. no después de los primerosi 500 km (312 PELIGRO mi), luego cada 2000 km (1250 mi). El consumo más allá del límite del mate- El desgaste de las pastillas del freno de dis- rial de fricción pondría el soporte metá-... -
Página 62: Comprobación Desgaste Zapatas
4000 km (2500 mi). malías de funcionamiento o las piezas re- sultan dañadas, diríjase a un Concesio- ATENCION nario Oficial aprilia, que efectuará la sus- En caso de que se notaran anomalías en titución. el funcionamiento o se necesitara la in- tervención de personal especializado,... -
Página 63: Control De La Dirección
ATENCION dente, diríjase a un Concesionario Ofi- a restablecer las condiciones óptimas de Asegúrese de la estabilidad del vehícu- cial aprilia que proveerá a restablecer las empleo. condiciones óptimas de la dirección. uso y mantenimiento Scarabeo 50 - Scarabeo 100 4T... -
Página 64: Desmontaje Pinza Freno Trasero
♦ Levante la funda de protección (3). En este caso diríjase a un Concesionario Durante el desmontaje preste atención Oficial aprilia, que efectuará una inter- para no dañar la tubería, el disco y las vención de mantenimiento. ATENCION pastillas del freno. -
Página 65: Desmontaje Cubremanillar Delantero
All manuals and user guides at all-guides.com DESMONTAJE DESMONTAJE ATENCION CUBREMANILLAR DELANTERO TAPA DE INSPECCION Maneje con cuidado los componentes de Lea con cuidado pág. 47 (MANTENIMIEN- plástico y los pintados; no los raye ni Lea con cuidado pág. 47 (MANTENIMIEN- TO). -
Página 66: Desmontaje Silenciador De Escape
All manuals and user guides at all-guides.com ♦ DESMONTAJE Desenrosque y quite los dos tornillos (1) IMPORTANTE Durante el montaje sus- de fijación del silenciador al motor. SILENCIADOR DE ESCAPE tituya la junta entre colector de escape y si- lenciador con otra nueva. Par de apriete tornillos (1): Lea con cuidado pág. - Página 67 All manuals and user guides at all-guides.com ♦ DESMONTAJE Saque la tapa de inspección, véase pág. IMPORTANTE Durante el montaje sus- 65 (DESMONTAJE TAPA DE INSPEC- SILENCIADOR DE ESCAPE tituya la junta entre colector de escape y si- CIÓN). lenciador con otra nueva. Lea con cuidado pág.
-
Página 68: Desmontaje Plataforma Reposapiés
All manuals and user guides at all-guides.com DESMONTAJE CONTROL CABALLETE ATENCION PLATAFORMA REPOSAPIÉS No fuerce el escudo inferior porque está Lea con cuidado pág. 47 (MANTENIMIEN- fijado al chasis mediante dos tornillos TO). Lea con cuidado pág. 47 (MANTENIMIEN- TO). delanteros. -
Página 69: Control Interruptores
All manuals and user guides at all-guides.com CONTROL INTERRUPTORES AJUSTE DEL RALENTI PELIGRO Lea con cuidado pág. 47 (MANTENIMIEN- Lea con cuidado pág. 47 (MANTENIMIEN- Asegúrese, antes de efectuar la opera- TO). TO). ción, que el local en el que se trabaja ten- En el vehículo se encuentran dos interrup- ga un adecuado recambio de aire. -
Página 70: Ajuste Mando Acelerador
Tras el ajuste: ♦ Apriete la tuerca (3), bloqueando el regis- ATENCION tro (4) y coloque la funda de protección (2). En caso de necesidad, diríjase a un Con- cesionario Oficial aprilia. uso y mantenimiento Scarabeo 50 - Scarabeo 100 4T... -
Página 71: Bujía
All manuals and user guides at all-guides.com parte del equipamiento base del kit herra- da, atornille a mano la bujía para no dañar BUJIA mientas, y extráigala de su sede, teniendo la rosca. ♦ Lea con cuidado pág. 47 (MANTENIMIEN- cuidado que polvo u otras sustancias no Apriete con la llave del kit herramientas del entren en el interior del cilindro. -
Página 72: Batería
Si algo del líquido electrolítico viniera a una consulta técnica, diríjase a un Conce- mables no deben ser acercados a los contacto con la piel, lávese con abun- sionario Oficial aprilia, que garantizará un componentes eléctricos. dante agua fría. servicio esmerado y rápido. -
Página 73: Larga Inactividad De La Batería
All manuals and user guides at all-guides.com LARGA INACTIVIDÀD CONTROL Y LIMPIEZA Si fuera necesario: ♦ Asegúrese que el interruptor de encendi- TERMINALES Y BORNES DE LA BATERIA do esté en posición “ ”. En caso de que el vehículo quede inactivo Lea con cuidado pág. -
Página 74: Desmontaje Batería
All manuals and user guides at all-guides.com DESMONTAJE BATERIA DESMONTAJE COMPLETO ♦ Controle que el nivel del líquido esté com- ♦ Desconecte antes el cable negativo (-) y prendido entre las dos muescas “MIN” y Lea con cuidado pág. 72 (BATERIA). luego el positivo (rojo) (+). -
Página 75: Recarga Batería
All manuals and user guides at all-guides.com RECARGA BATERIA ATENCION Lea con cuidado pág. 72 (BATERIA). Vuelva a instalar la batería sólo 5-10 mi- nutos después de haberla desconectada ♦ Desmonte la batería, véase pág. 74 (DE- del cargador, ya que, durante un breve SMONTAJE BATERIA). -
Página 76: Sustitución Fusible
Antes de sustituir el fusible, busque, si es caso consulte un Concesionario Oficial todas las cargas eléctricas, excepto el cir- posible, la causa que ha ocasionado la aprilia. cuito luces que está alimentado con corrien- avería. te alterna. uso y mantenimiento Scarabeo 50... -
Página 77: Regulación Vertical Haz Luminoso
All manuals and user guides at all-guides.com BOMBILLAS Lea con cuidado pág. 48-53 (FICHA DE MANTENIMIENTO PERIÓDICO). PELIGRO Peligro de incendio. El combustible y otras sustancias infla- mables no deben ser acercados a los componentes eléctricos. ATENCION REGULACION VERTICAL Para regular el haz luminoso: Antes de sustituir una bombilla, ponga el ♦... -
Página 78: Sustitución Bombillas Faro Delantero
All manuals and user guides at all-guides.com SUSTITUCION BOMBILLAS BOMBILLA BOMBILLAS DE POSICION LUZ DE CRUCE / LUZ LARGA FARO DELANTERO ATENCION ♦ Gire en sentido antihorario el casquillo Para extraer el casquillo portalámparas, Lea con cuidado pág. 77 (BOMBILLAS). portalámparas (3) y extráigalo de la sede. -
Página 79: Sustitución Bombillas Indicadores De Dirección Delanteros
All manuals and user guides at all-guides.com SUSTITUCION BOMBILLAS FARO TRASERO Lea con cuidado pág. 77 (BOMBILLAS). ♦ Coloque el vehículo sobre el caballete. ♦ Destornille y quite el tornillo (6). IMPORTANTE Durante el desmontaje de la pantalla de protección, trabaje con cui- dado, para no romper el diente de acopla- miento. -
Página 80: Sustitución Bombillas Indicadores De Dirección Traseros
All manuals and user guides at all-guides.com ♦ SUSTITUCION BOMBILLAS Presione moderadamente el transparente IMPORTANTE Si el casquillo portalám- de color amarillo ámbar (4), gírelo en sen- INDICADORES DE DIRECCION paras (6) sale de su alojamiento, vuelva a tido antihorario y extráigalo. TRASEROS introducirlo correctamente, haciendo coinci- dir la abertura de radios del casquillo porta-... -
Página 81: Sustitución Bombillas Salpicadero
All manuals and user guides at all-guides.com aprilia mph km/h aprilia mph km/h SUSTITUCIÓN SUSTITUCION BOMBILLAS ATENCION LUZ MATRÍCULA (en los países BOMBILLAS SALPICADERO Para extraer el casquillo portalámparas, donde está previsto) Lea con cuidado pág. 77 (BOMBILLAS). no fuerce los cables eléctricos. -
Página 82: Transporte
All manuals and user guides at all-guides.com TRANSPORTE BOMBILLAS LUCES TESTIGOS LUCES DE ILUMINACIÓN SALPICADERO PELIGRO ATENCION IMPORTANTE Antes de transportar el vehículo es ne- Extraiga un portalámpa- cesario vaciar con cuidado el depósito ras a la vez para evitar colocarlo incorrecta- Extraiga un portalámpara a la vez para combustible y el carburador, véase pág. -
Página 83: Evacuacion Del Combustible Del Deposito
Durante el montaje sus- semejante. En caso de necesidad, diríjase a un Con- tituya la abrazadera con otra nueva. PELIGRO cesionario Oficial aprilia. Una vez finalizado el vaciado coloque correctamente el tapón del depósito. ♦ Coloque el tapón depósito combustible. -
Página 84: Limpieza
All manuals and user guides at all-guides.com LIMPIEZA Limpie frecuentemente el vehículo si lo uti- Para quitar la parte sucia y el barro de las liza en zonas o en condiciones de: superficies pintadas, es necesario utilizar un ♦ Contaminación atmosférica (ciudad y zo- chorro de agua de presión baja, mojar las nas industriales). -
Página 85: Periodos De Larga Inactividad
All manuals and user guides at all-guides.com PERIODOS DE LARGA INACTIVIDÀD Hay que adoptar algunas precauciones para evitar las consecuencias por no haber utili- zado el vehículo. Además es necesario realizar las repara- ciones y un control general antes del perío- do de inactividad, para no olvidarse de rea- lizarlas posteriormente. -
Página 86: Datos Técnicos
All manuals and user guides at all-guides.com DATOS TECNICOS MEDIDAS Longitud máx............. 1905 mm - 1905 mm Anchura máx. (en las palancas frenos) ..... 705 mm - 705 mm Altura máxima (en los espejos retrovisores) ..1270 mm - 1270 mm Altura hasta el sillín .......... - Página 87 All manuals and user guides at all-guides.com CARBURADOR Modelo: – standard ............KEIHIN CVK 20 - DELLORTO PHVD 22 Difusor ............... cuerpo de mariposa BING Ø 18 mm - Ø 20 mm / Ø 22 mm ALIMENTACION Combustible ........gasolina super DIN 51 600 (4 Stars), mínimo octano 98 (N.O.R.M.) y 88 (N.O.M.M.) BASTIDOR Tipo ..............
- Página 88 All manuals and user guides at all-guides.com ENCENDIDO Tipo ..............T.C.I. - C.D.I. Avance de encendido ......... variable con 20° a 4000 rpm Avance de encendido ......... 17° a 7500 rpm Bujia estándar ............ NGK CPR 8E - NGK BR8 HS Distancia electrodos bujía ........
- Página 89 All manuals and user guides at all-guides.com uso y mantenimiento Scarabeo 50 - Scarabeo 100 4T...
-
Página 90: Tabla Lubricantes
All manuals and user guides at all-guides.com TABLA LUBRICANTES Aceite motor (aconsejado): SUPERBIKE 4, SAE 5W - 40. En sustitución al aceite aconsejado pueden utilizarse aceites de marca con prestaciones conformes o superiores a las especificaciones CCMC G-4, A.P.I. SG. PELIGRO Para empleos particularmente gravosos o en climas calientes, se aconseja el aceite 5W50/10W50 sintético. -
Página 91: Pida Solo Repuestos Originales
All manuals and user guides at all-guides.com NOTAS PIDA SOLO REPUESTOS ORIGINALES uso y mantenimiento Scarabeo 50 - Scarabeo 100 4T... - Página 92 Importadores via G. Galilei, 1 - 30033 Noale (VE) Italy - Tel. +39(0)41 5829111 - Fax +39(0)41 441054 Servizio Clienti aprilia +39(0)41 5786269 - E-mail: aprilia@aprilia.it Z.A. Central Parc - 255 BLV Robert Ballanger B.P. 77 93421 Villepinte (F) - Tel. 0033-1-49634747 - Fax 0033-1-49638750 Am Seestern 3 D-40547 Düsseldorf (D)
- Página 93 Tel. 00353-1-4566222 - Fax 00353-1-4756461 - E-mail: sales@bikeworld.ie Kjørbekkdalen 6, 3735 Skien (N) HARO SKANDINAVIA A.S. Tel. 0047-35506780 - Fax 0047-35506781 - E-mail: tore@aprilia.no APRILIA DE MEXICO, SA. de CV. San Jeromino, 64640, 552 Monterrey N.L. (MX) Tel. 0052-8333-4493 - Fax 0052-8348-9398 - E-mail: javier@aprilia.com.mx Str.
-
Página 94: Esquema Eléctrico - Scarabeo
All manuals and user guides at all-guides.com ESQUEMA ELECTRICO - Scarabeo LOCK Bi/Vi Bi/Vi Bi/R Bi/G Ar/N ARANCIO BIANCO ARANCIO VERDE VISTO DAL LATO CHE SI CONNETTE AL REGOLATORE uso y mantenimiento Scarabeo 50 - Scarabeo 100 4T... - Página 95 All manuals and user guides at all-guides.com LEYENDA ESQUEMA ELECTRICO - Scarabeo 1) Conectores múltiples 30) Intermitencia 2) Centralita E.C.U. 31) Desviador luces izquierdo 3) Conexión serial 32) Claxon 4) Sensor acelerador 33) Sonda nivel gasolina 5) Pick-up 34) Luz testigo check inyección 6) Sensor temperatura 35) Instrumento nivel gasolina 7) Bomba aceite...
-
Página 96: Esquema Eléctrico - Scarabeo
All manuals and user guides at all-guides.com ESQUEMA ELECTRICO - Scarabeo 30 27 LOCK Bi/R Gr/V G/Bi uso y mantenimiento Scarabeo 50 - Scarabeo 100 4T... - Página 97 All manuals and user guides at all-guides.com LEYENDA ESQUEMA ELECTRICO - Scarabeo 35) Claxon 1) Generador 2) Transductor 36) Pick up 3) Bujia 37) Fusible 5) Regulador de tensión 38) Conectores múltiples 6) Batería 40) Starter automático 7) Motor de arranque 8) Relé...
- Página 98 All manuals and user guides at all-guides.com NOTAS PIDA SOLO REPUESTOS ORIGINALES uso y mantenimiento Scarabeo 50 - Scarabeo 100 4T...
- Página 99 All manuals and user guides at all-guides.com NOTAS PIDA SOLO REPUESTOS ORIGINALES uso y mantenimiento Scarabeo 50 - Scarabeo 100 4T...
- Página 100 All manuals and user guides at all-guides.com NOTAS PIDA SOLO REPUESTOS ORIGINALES uso y mantenimiento Scarabeo 50 - Scarabeo 100 4T...
- Página 101 All manuals and user guides at all-guides.com NOTAS PIDA SOLO REPUESTOS ORIGINALES uso y mantenimiento Scarabeo 50 - Scarabeo 100 4T...
- Página 102 All manuals and user guides at all-guides.com NOTAS PIDA SOLO REPUESTOS ORIGINALES uso y mantenimiento Scarabeo 50 - Scarabeo 100 4T...
- Página 103 All manuals and user guides at all-guides.com NOTAS PIDA SOLO REPUESTOS ORIGINALES uso y mantenimiento Scarabeo 50 - Scarabeo 100 4T...
- Página 104 All manuals and user guides at all-guides.com La Sociedad aprilia s.p.a. queda agradecida a sus Clientes por haber elegido el vehículo y les recomienda: – No esparzan aceite, combustible, sustancias y componentes contaminan- tes en el ambiente. – No mantengan el motor encendido si no es necesario.
- Página 105 All manuals and user guides at all-guides.com SCARABEO 50 I.E. - 100 4T use+maintenancebook aprilia part# 8202290...
- Página 106 All manuals and user guides at all-guides.com © 2001 aprilia s.p.a. - Noale (VE) SAFETY WARNINGS TECHNICAL The following precautionary warnings are The operations preceded by this sym- used throughout this manual in order to con- bol must be repeated also on the op- vey the following messages: posite side of the vehicle.
- Página 107 Electronic injection version countries, according to the laws in force. The aprilia has carried out this manual with the 100 cm model user of the vehicle in these countries must:...
- Página 108 All manuals and user guides at all-guides.com TABLE OF CONTENTS DISC BRAKES ..........32 BATTERY HYDROGEN GAS REMOVING THE INSPECTION COVER ..65 SAFE DRIVE ............5 REAR DRUM BRAKE ........33 REMOVING THE EXHAUST AND ELECTROLYTE BASIC SAFETY RULES ........6 TYRES ............
-
Página 109: Safe Drive
All manuals and user guides at all-guides.com safe drive... -
Página 110: Basic Safety Rules
All manuals and user guides at all-guides.com The use of medicins, alcohol and drugs or BASIC SAFETY RULES Most road accidents are caused by the driv- psychotropic substances notably increases er’s lack of experience. To drive the vehicle it is necessary to be in the risk of accidents. - Página 111 All manuals and user guides at all-guides.com Avoid obstacles that could damage the ve- Always keep both hands on the handlebars Rigorously observe all road signs and na- hicle or make you lose control. and both feet on the footboard (or on the foot- tional and local road regulations.
- Página 112 Any modification of the vehicle will result in If necessary, have the vehicle inspected by the invalidity of the guarantee. an aprilia Official Dealer, who should care- fully check the frame, handlebars, suspen- Only for vehicles up to 50 cm...
-
Página 113: Clothing
All manuals and user guides at all-guides.com ONLY ORIGINALS the following obligations for the owner: CLOTHING – new homologation; Only for vehicles over 50 cm Before starting, always wear a correctly fas- – new registration; tened crash helmet. Make sure that it is ho- Any change made to the vehicle and removal –... -
Página 114: Accessories
(aprilia and reduce the distance from the ground and genuine accessories). the angle of inclination in turns. - Página 115 All manuals and user guides at all-guides.com Avoid hanging bulky, heavy and/or danger- Do not carry any bag if it is not tightly se- Do not exceed the maximum load allowed ous objects on the handlebars, mudguards cured to the vehicle. for each side-bag.
-
Página 116: Arrangement Of The Main Elements
All manuals and user guides at all-guides.com ARRANGEMENT OF THE MAIN ELEMENTS 10 11 1) Horn 7) Saddle lock 2) Rear brake reservoir 8) Luggage carrier 3) Document holder 9) Centre stand 4) Fuse carrier 10) Air cleaner 5) Battery 11) Inspection cover 6) Passenger left footrest (in the countries where required) - Página 117 4) Ignition switch / steering lock 10) Passenger right footrest 5) Bag hook (in the countries where required) 6) Frame number cover 11) Anti-theft hook (for the aprilia “Body-Guard” armored cable use and maintenance Scarabeo 50 - Scarabeo 100 4T...
-
Página 118: Arrangement Of The Main Elements
All manuals and user guides at all-guides.com ARRANGEMENT OF THE MAIN ELEMENTS apri 1) Horn 8) Centre stand 2) Document holder 9) Kick starter 3) Fuse carrier 10) Air cleaner 4) Battery 11) Inspection cover 5) Passenger left footrest 6) Saddle lock 7) Luggage carrier use and maintenance Scarabeo 50 - Scarabeo 100 4T... - Página 119 All manuals and user guides at all-guides.com 7) Fuel tank 1) Filler cap 8) Passenger right footrest 2) Ignition switch / steering lock 9) Anti-theft hook (for the aprilia 3) Bag hook “Body-Guard” armored cable 4) Frame number cover 5) Front brake reservoir...
-
Página 120: Arrangement Of The Controls / Instruments And Indicators
All manuals and user guides at all-guides.com ARRANGEMENT OF THE CONTROLS / INSTRUMENTS AND INDICATORS aprilia aprilia mph km/h mph km/h mph km/h aprilia mph km/h aprilia 10) Speedometer 1) Electrical controls on the left side of the handlebar 11) Fuel level indicator ( ) -
Página 121: Instruments And Indicators Table
“ position and goes off after starting the vehicle. Diagnostic system warning light (injection check) If the warning light comes on while running the vehicle, this CAUTION denotes a malfunction. Contact your aprilia Dealer. use and maintenance Scarabeo 50 - Scarabeo 100 4T... -
Página 122: Injection Check Warning Light
It is strongly recommended that you contact an aprilia Offi- cial Dealer. If the vehicle is started, its functionality may be limited. Stop the vehicle and take it to an aprilia Official Dealer. PRIORITY NO. 2 The warning light comes on and stays lit for at least 10 seconds. -
Página 123: Main Indipendent Controls
All manuals and user guides at all-guides.com MAIN INDIPENDENT CONTROLS CONTROLS ON THE LEFT SIDE OF THE HANDLEBAR NOTE The electrical parts work only when the ignition switch is in position “ ”. NOTE The lighting system works only when the engine is run- ning. -
Página 124: Controls On The Right Side Of The Handlebar
All manuals and user guides at all-guides.com CONTROLS ON THE RIGHT SIDE OF THE HANDLEBAR NOTE The electrical parts work only when the ignition switch is in position “ ”. NOTE The lighting system works only when the engine is run- ning. -
Página 125: Main Indipendent Controls
All manuals and user guides at all-guides.com MAIN INDIPENDENT CONTROLS CONTROLS ON THE LEFT SIDE OF THE HANDLEBAR NOTE The electrical parts work only when the ignition switch is in position “ ”. NOTE The lighting system works only when the engine is running. 1) DIMMER SWITCH ( •... -
Página 126: Controls On The Right Side Of The Handlebar
All manuals and user guides at all-guides.com CONTROLS ON THE RIGHT SIDE OF THE HANDLEBAR NOTE The electrical parts work only when the ignition switch is in position “ ”. NOTE The lighting system works only when the engine is running. •... -
Página 127: Ignition Switch
All manuals and user guides at all-guides.com Function Position removal The steering It is possible is locked. It is to remove neither pos- the key. IGNITION SWITCH STEERING LOCK sible to start Steering the engine, WARNING lock The ignition switch is positioned on the right nor to switch Never turn the key to position “... -
Página 128: Auxiliary Equipment
To prevent the vehicle from being stolen, it ♦ Position the vehicle on the centre stand, a solid and level surface. is advisable to secure it with the aprilia on a solid and level surface. ♦ Insert the ignition key in the lock (3) and “Body-Guard”... -
Página 129: Tool Kit
All manuals and user guides at all-guides.com The wrenches are located in the comparment found in the undersaddle plastic part. The tool kit is formed by: – No.1 16 mm socket wrench (1); – No. 1 screwdriver (2) with one cross end of the PH type, size 2, and opposite end with hexagonal male wrench of 4 mm. -
Página 130: Positioning The Helmet In The Rear Top Case
All manuals and user guides at all-guides.com POSITIONING THE HELMET IN rear top case. ♦ Turn the key anticlockwise and open the THE REAR TOP CASE rear top case (2). ♦ Put the helment (3) into the rear top case, Thanks to the rear top case, it is not neces- positioning it as shown in the figure and sary to take away the helmet with you eve-... -
Página 131: Main Components
All manuals and user guides at all-guides.com MAIN COMPONENTS Avoid any contact of the fuel with the skin FUEL and the inhalation of vapours; do not WARNING swallow fuel or pour it from a receptacle into another by means of a tube. The fuel used for internal combustion engines is extremely inflammable and in DO NOT DISPOSE OF FUEL IN THE EN-... -
Página 132: Lubricants
Carefully remove any trace of oil. into the oil. it is necessary to contact an aprilia Offi- In case of leakages or malfunctions, con- If you use a funnel or other similar items, cial Dealer, who will provide for bleeding tact an aprilia Official Dealer. -
Página 133: Topping Up The Engine Oil
Have the oil checked and topped up at your oil capacity and on an oil consumption av- described on page 46 (POSITIONING THE aprilia Official Dealer every 2000 km erage calculated according to standard VEHICLE ON THE CENTRE STAND). (1250 mi). -
Página 134: Checking Transmission Oil Level
DO NOT DISPOSE OF THE USED OIL IN Change the oil and clean the filter every 4000 aprilia Official Dealer. THE ENVIRONMENT. km (2500 mi) at an aprilia Official Dealer. TRANSMISSION OIL Carefully read the instructions on page Allow the oil to completely flow out of the 47 (MAINTENANCE). -
Página 135: Brake Fluid - Recommendations
ENVIRONMENT. checking operations, contact your parts and cause serious damages. aprilia Official Dealer. KEEP AWAY FROM CHILDREN. use and maintenance Scarabeo 50 - Scarabeo 100 4T... -
Página 136: Disc Brakes
The brake fluid must be changed every When the disc pads wear out, the level of When the friction pads wear out, the fluid two years by an aprilia Official Dealer. the fluid decreases progressively to com- level decreases automatically in order to pensate for their wear. -
Página 137: Rear Drum Brake
Official Dealer. ♦ Perform a test drive by actuating the rear ♦ Unloose register (1), check that the wheel brake two or three times. -
Página 138: Tyres
All manuals and user guides at all-guides.com TYRES WARNING WARNING Check the surface and the wear of the This vehicle is equipped with tyres with air If the inflation pressure is too high, the tyres, since tyres in bad conditions can tube. - Página 139 However, the minimum tread depth must not by the manufacturer, see page 86 (TECH- out by an aprilia Official Dealer or by a be less than the valuse prescribed by the NICAL DATA); the use of tyres different qualified tyre repairer.
-
Página 140: Automatic Light Switching Version
If the noise produced by the exhaust sys- tem increases, immediately contact your ♦ Before starting the vehicle, make sure that aprilia Official Dealer. the dimmer switch is in position “ ” (front low beam). use and maintenance Scarabeo 50... -
Página 141: Instructions For Use
If necessary, lubricate joints and hinges. injuries or damages to the vehicle. Do not hesitate to consult your aprilia Make sure that the fastening elements are not loose. Fastening elements –... -
Página 142: Starting
All manuals and user guides at all-guides.com NOTE After a long period of inactivity, carry STARTING ELECTRIC STARTING out the operations described at page 40 ♦ Position the vehicle on the centre stand, WARNING (STARTING AFTER A LONG PERIOD OF on a solid and level surface. - Página 143 Press the start push button “ ” (5), rotate ♦ Let the kick starter go back to home posi- stop the vehicle and contact an aprilia the throttle twistgrip by 1/8 of its turn (see tion (6). Official Dealer. figure), and then release it as soon as the engine starts.
- Página 144 All manuals and user guides at all-guides.com STARTING WITH FLOODED ENGINE If the engine starts. Before reinstalling it: ♦ Release the throttle grip (7). NOTE Put a clean cloth on the cylinder, ♦ If the starting is not carried out properly or if If the idling is unstable, twist the throttle near the spark plug seat, in order to protect there is too much fuel in the intake ducts and...
-
Página 145: Departure And Drive
All manuals and user guides at all-guides.com ♦ DEPARTURE AND DRIVE To leave, release the brake lever and the WARNING vehicle will start moving. NOTE Before departure, carefully read the If you drive with a passenger, instruct “safe drive” chapter, see page 5 (SAFE him/her so that he / she does not create DRIVE). - Página 146 All manuals and user guides at all-guides.com WARNING WARNING WARNING Before beginning to turn, slow down or When riding in conditions of poor visibil- If you have to brake, close the throttle and brake driving at moderate and constant ity, switch on the high beam lights to im- put on both brakes in order to obtain uni- speed or accelerating slightly;...
- Página 147 All manuals and user guides at all-guides.com WARNING WARNING WARNING Always use the direction indicators in If the mixer oil reserve warning light “ ” Pay the utmost attention to any obstacle time when you intend to change lane or comes on during the normal functioning or variation of the road surface.
-
Página 148: Running-In
All manuals and user guides at all-guides.com RUNNING-IN For the first 500 km (312 mi), keep to the following indications: WARNING ♦ 0-100 km (0-62 mi) During the first 100 km (62 mi) put on the After the first 500 km (312 mi), carry out brakes with caution, avoiding sharp and the checking operations indicated in the prolonged brakings. -
Página 149: Stopping
All manuals and user guides at all-guides.com ♦ STOPPING PARKING Rotate the key (1) and move the ignition switch (2) to position “ ”. WARNING WARNING ♦ Position the vehicle on the stand, see page If possible, avoid stopping abruptly, slow- Park the vehicle on firm and flat ground, 46 (POSITIONING THE VEHICLE ON THE ing down suddenly and braking at the last... -
Página 150: Positioning The Vehicle On The Centre Stand
Grasp the left handgrip and the rear han- garage or a protected place. NAME: ............dle (1). ♦ Push down the stand lever (2). If possible, use the appropriate aprilia ADDRESS: ..........“Body-Guard” armored cable , or an ad- ditional anti-theft device. CAUTION .............. -
Página 151: Maintenance
Ask your aprilia Official Dealer to test the tion block, wait until the engine and the vehicle on the road after a repair or periodic... -
Página 152: Regular Service Intervals Chart
Every 8000 km OPERATIONS TO BE CARRIED OUT BY Components [500 km (2500 mi) (5000 mi) THE aprilia Official Dealer (WHICH CAN (312 mi)] or 12 months or 24 months BE CARRIED OUT EVEN BY THE USER) Battery / electrolyte level... - Página 153 All manuals and user guides at all-guides.com OPERATIONS TO BE CARRIED OUT BY THE aprilia Official Dealer After running-in Every 4000 km Every 8000 km Components [500 km (2500 mi) (5000 mi) 1 = check and clean, adjust, lubricate or...
- Página 154 All manuals and user guides at all-guides.com OPERATIONS TO BE CARRIED OUT BY THE aprilia Official Dealer After running-in Every 4000 km Every 8000 km Components [500 km (2500 mi) (5000 mi) 1 = check and clean, adjust, lubricate or...
-
Página 155: Regular Service Intervals Chart
REGULAR SERVICE INTERVALS CHART OPERATIONS TO BE CARRIED OUT BY After running-in Every 4000 km Every 8000 km THE aprilia Official Dealer (WHICH CAN Components [1000 km (2500 mi) (5000 mi) BE CARRIED OUT EVEN BY THE USER) (625 mi)]... - Página 156 All manuals and user guides at all-guides.com OPERATIONS TO BE CARRIED OUT BY THE aprilia Official Dealer After running-in Every 4000 km Every 8000 km Components [1000 km (2500 mi) (5000 mi) 1 = check and clean, adjust, lubricate or...
- Página 157 All manuals and user guides at all-guides.com After running-in Every 4000 km Every 8000 km Components [1000 km (2500 mi) (5000 mi) 1 = check and clean, adjust, lubricate or (625 mi)] or 12 months or 24 months change, if necessary; 2 = clean;...
-
Página 158: Identification Data
All manuals and user guides at all-guides.com IDENTIFICATION DATA FRAME NUMBER The frame number is stamped on the cen- It is a good rule to write down the frame and tral tube of the frame. To be able to read it, engine numbers in the space provided in this remove the cover (1). -
Página 159: Air Cleaner
All manuals and user guides at all-guides.com AIR CLEANER REMOVAL NOTE If the cleaner is clogged, remove ♦ Carefully read page 47 (MAINTENANCE). Position the vehicle on the centre stand, the filtering element (4) and replace it. on a solid and level surface see page 46 (POSITIONING THE VEHICLE ON THE Check the conditions of the air cleaner CENTRE STAND). -
Página 160: Air Cleaner 100
All manuals and user guides at all-guides.com AIR CLEANER REMOVAL CLEANING ♦ Carefully read page 47 (MAINTENANCE). Position the vehicle on the centre stand, WARNING on a solid and level surface, see page 46 Do not use petrol or inflammable solvents Check the conditions of the air cleaner and (POSITIONING THE VEHICLE ON THE to wash the filtering element, in order to... -
Página 161: Removing Air Cleaner Box Assembly
Contact an ♦ Unloose the splash guard fixing screw with aprilia Official Dealer. filter box (6). ♦ Withdraw clamp (2) from the air tube (3) using a suitable tool (3). -
Página 162: Front Wheel
In this case, contact an aprilia Official Contact an aprilia Official Dealer if nec- CAUTION Dealer that will carry out the required essary. - Página 163 Position the wheel between the fork rods, ♦ Insert the wheel between the rods. Insert aprilia Official Dealer, in order to avoid onto the support (1). with care the disc in the brake caliper. accidents that may be harmful for you ♦...
-
Página 164: Rear Wheel
Withdraw the wheel. balancing of the wheel checked by your ♦ Remove the rear brake caliper, see aprilia Official Dealer, in order to avoid page 64 (REMOVING THE REAR BRAKE accidents that may be harmful for you and/ CALIPERS or other people. -
Página 165: Checking The Brake Pad Wear
♦ Carry out a visual check between brake Check the brake pad wear after the first 500 disc and pads. Have the pads changed by your aprilia km (312 mi) and successively every 2000 Official Dealer. WARNING km (1250 mi). -
Página 166: Checking The Brake Shoes Wear
Dealer that will see to their replacement. If you notice irregularities in the opera- tion or if the help of a qualified techni- cian is necessary, contact your aprilia Official Dealer. use and maintenance Scarabeo 50 - Scarabeo 100 4T... -
Página 167: Checking The Steering
Make sure that the vehicle is stable. ♦ If you find that there is a considerable slack, contact your aprilia Official Dealer, to re- contact your aprilia Official Dealer to re- store the optimal operating conditions. store the optimal steering conditions. -
Página 168: Removing The Rear-View Mirrors
Position the vehicle on the centre stand, CAUTION causing the brake fluid to leak out. on a solid and level surface. In this case, contact an aprilia Official ♦ When disassembling the brake caliper, be Lift the protective case (3). -
Página 169: Removing The Inspection Cover
All manuals and user guides at all-guides.com REMOVING THE LOWER REMOVING CAUTION HANDLEBAR COVER THE INSPECTION COVER Handle the plastic or painted components with care and avoid scraping or damag- Carefully read page 47 (MAINTENANCE). Carefully read page 47 (MAINTENANCE). ing them. -
Página 170: Removing The Exhaust Silencer
All manuals and user guides at all-guides.com ♦ REMOVING Unloose and remove the two fixing screws NOTE On reassembly, replace the seal (1) from the engine silencer. THE EXHAUST SILENCER between the exhaust manifold and the si- lencer with a new one. Screws (1) driving torque: Carefully read page 47 (MAINTENANCE). -
Página 171: Removing The Exhaust Silencer
All manuals and user guides at all-guides.com ♦ REMOVING Remove the inspection cover, see page 65 NOTE On reassembly, replace the seal (REMOVING THE INSPECTION COVER). THE EXHAUST SILENCER between the exhaust manifold and the si- lencer with a new one. ♦... -
Página 172: Removing The Footboard
All manuals and user guides at all-guides.com REMOVING THE FOOTBOARD CHECKING THE STAND CAUTION Carefully read page 47 (MAINTENANCE). Do not force the lower shield as it is fixed Carefully read page 47 (MAINTENANCE). to the frame with only two front screws. Make sure the stand (1) rotates freely. -
Página 173: Checking The Switches
All manuals and user guides at all-guides.com CHECKING THE SWITCHES IDLING ADJUSTMENT WARNING Carefully read page 47 (MAINTENANCE). Carefully read page 47 (MAINTENANCE). Before proceeding, make sure that the room in which you are working is prop- The vehicle is provided with two switches: Adjust the idling after the first 500 km (312 erly ventilated. -
Página 174: Adjusting The Accelerator Control
After the adjustment: CAUTION ♦ Tighten the nut (3), thus locking the adjuster (4) and put back the protection element (2). If necessary, contact your aprilia Official Dealer. use and maintenance Scarabeo 50 - Scarabeo 100 4T... -
Página 175: Spark Plug
All manuals and user guides at all-guides.com from its seat, taking care that neither dust ♦ SPARK PLUG Tighten the spark plug by means of the nor other substances enter the cylinder. spanner you will find in the tool kit, giving it Carefully read page 47 (MAINTENANCE). -
Página 176: Battery
NOTE If servicing or technical advice is a face mask and/or goggles during main- WARNING required, contact an aprilia Official Dealer tenance operations. Risk of fire. that will certainly give you accurate and fast In case of contact with the skin, rinse with Keep fuel and other flammable sub- assistance. -
Página 177: Long Inactivity Of The Battery
All manuals and user guides at all-guides.com LONG INACTIVITY CHECKING AND CLEANING If necessary: ♦ Make sure that the ignition switch is in po- OF THE BATTERY THE TERMINALS sition “ ”. If the vehicle remains unused for more than Carefully read page 72 (BATTERY). -
Página 178: Removing The Battery
All manuals and user guides at all-guides.com REMOVING THE BATTERY COMPLETE REMOVAL ♦ Make sure that the fluid level is included ♦ Disconnect first the negative (-) and then between the two “MIN” and “MAX” notches Carefully read page 72 (BATTERY). the positive cable (red) (+). -
Página 179: Recharging The Battery
All manuals and user guides at all-guides.com RECHARGING THE BATTERY CAUTION Carefully read page 72 (BATTERY). Reassemble the battery only 5-10 minutes after disconnecting the recharger, since ♦ Remove the battery, see page 74 (REMOV- the battery continues to produce gas for ING THE BATTERY). -
Página 180: Changing The Fuses
In this case it is advisable to consult an aprilia Official Dealer. use and maintenance Scarabeo 50 - Scarabeo 100 4T... -
Página 181: Adjusting The Vertical Headlight Beam
All manuals and user guides at all-guides.com BULBS Carefully read pages 48-53 (REGULAR SERVICE INTERVALS CHART). WARNING Risk of fire. Keep fuel and other flammable sub- stances away from the electrical compo- nents. CAUTION Before changing a bulb, position the ve- hicle on the centre stand, move the igni- ADJUSTING THE VERTICAL To adjust the headlight beam:... -
Página 182: Changing The Headlight Bulbs
All manuals and user guides at all-guides.com CHANGING LOW / HIGH BEAM BULB PARKING LIGHT BULB THE HEADLIGHT BULBS CAUTION ♦ Turn the bulb socket anticlockwise (3) and remove it from its seat. Do not pull the electrical wires when re- Carefully read page 77 (BULBS). -
Página 183: Changing The Front Direction Indicator Bulbs
All manuals and user guides at all-guides.com CHANGING THE REAR LIGHT BULB Carefully read page 77 (BULBS). ♦ Position the vehicle on the stand. ♦ Unscrew and remove the two screws (6). NOTE While removing the protection screen, proceed carefully in order not to break the cog. -
Página 184: Changing The Rear Direction Indicator Bulbs
All manuals and user guides at all-guides.com ♦ CHANGING THE REAR Gently press on the amber yellow glass (4), NOTE If the bulb socket (6) goes out of its turn it anticlockwise and remove it. DIRECTION INDICATOR seat, insert it correctly, making the bulb BULBS socket opening coincide with the screw seat. -
Página 185: Changing The Number Plate Bulb (In The Countries Where Required)
All manuals and user guides at all-guides.com aprilia mph km/h aprilia mph km/h CHANGING THE NUMBER CHANGING CAUTION PLATE BULB (in the countries THE DASHBOARD BULBS To extract the bulb socket, do not pull the where required) Carefully read page 77 (BULBS). -
Página 186: Transport
All manuals and user guides at all-guides.com TRANSPORT WARNING LIGHT BULBS DASHBOARD LIGHTING BULBS WARNING NOTE CAUTION Before transporting the vehicle, it is nec- Extract the bulb sockets one by one, essary to empty the fuel tank and the car- in such a way as to avoid positioning them Extract the bulb sockets one by one, in burettor completely, see page 83 (DRAIN-... -
Página 187: Draining The Fuel Tank
♦ Remove the fillercap. If necessary, contact an aprilia Official ♦ Empty the fuel tank by means of a manual Dealer. pump or a similar system. NOTE On reassembly, always replace the clamp with a new one. -
Página 188: Cleaning
All manuals and user guides at all-guides.com CLEANING Clean the vehicle frequently if it used in par- To remove dirt and mud from the painted ticular areas or conditions, such as: surfaces use a low- pressure water jet, care- ♦ Polluted areas (cities and industrial areas). -
Página 189: Long Periods Of Inactivity
All manuals and user guides at all-guides.com LONG PERIODS OF INACTIVITY Precautions are needed to avoid the adverse effects of prolonged inactivity. Further, it is important to carry out the nec- essary repairs and a general check up be- fore the period of inactivity, since you could forget to carry them out later. -
Página 190: Technical Data
All manuals and user guides at all-guides.com TECHNICAL DATA DIMENSIONS Max. length ............1905 mm - 1905 mm Max. width (brake levers) ........705 mm - 705 mm Max. height (rearview mirrors) ......1270 mm - 1270 mm Seat height ............780 mm - 780 mm Wheel base ............ - Página 191 All manuals and user guides at all-guides.com CARBURETTOR Model: – standard ............KEIHIN CVK 20 - DELLORTO PHVD 22 Choke tube ............throttle body BING Ø 18 mm - Ø 20 mm / Ø 22 mm FUEL SUPPLY Fuel ............. premium petrol DIN 51 600 (4 Stars), minimum octane number 98 (N.O.R.M.) and 88 (N.O.M.M.) FRAME Type ..............
- Página 192 All manuals and user guides at all-guides.com IGNITION Type ..............T.C.I. - C.D.I. Spark advance ..........variable with 20° at 4000 rpm Spark advance ..........17° at 7500 rpm Standard spark plug ........... NGK CPR 8E - NGK BR8 HS Spark plug gap ...........
- Página 193 All manuals and user guides at all-guides.com use and maintenance Scarabeo 50 - Scarabeo 100 4T...
-
Página 194: Lubricant Chart
All manuals and user guides at all-guides.com LUBRICANT CHART Engine oil (recommended): SUPERBIKE 4, SAE 5W - 40. As an alternative to the recommended oil, it is possible to use high-quality oils with characteristics in compliance with or superior to CCMC G- 4, A.P.I. - Página 195 All manuals and user guides at all-guides.com NOTE ASK FOR GENUINE SPARE PARTS ONLY use and maintenance Scarabeo 50 - Scarabeo 100 4T...
- Página 196 Importers via G. Galilei, 1 - 30033 Noale (VE) Italy - Tel. +39(0)41 5829111 - Fax +39(0)41 441054 Servizio Clienti aprilia +39(0)41 5786269 - E-mail: aprilia@aprilia.it Z.A. Central Parc - 255 BLV Robert Ballanger B.P. 77 93421 Villepinte (F) - Tel. 0033-1-49634747 - Fax 0033-1-49638750 Am Seestern 3 D-40547 Düsseldorf (D)
- Página 197 Tel. 00353-1-4566222 - Fax 00353-1-4756461 - E-mail: sales@bikeworld.ie HARO SKANDINAVIA A.S. Kjørbekkdalen 6, 3735 Skien (N) Tel. 0047-35506780 - Fax 0047-35506781 - E-mail: tore@aprilia.no APRILIA DE MEXICO, SA. de CV. San Jeromino, 64640, 552 Monterrey N.L. (MX) Tel. 0052-8333-4493 - Fax 0052-8348-9398 - E-mail: javier@aprilia.com.mx Str.
-
Página 198: Wiring Diagram - Scarabeo
All manuals and user guides at all-guides.com WIRING DIAGRAM - Scarabeo LOCK Bi/Vi Bi/Vi Bi/R Bi/G Ar/N ARANCIO BIANCO ARANCIO VERDE VISTO DAL LATO CHE SI CONNETTE AL REGOLATORE use and maintenance Scarabeo 50 - Scarabeo 100 4T... - Página 199 All manuals and user guides at all-guides.com WIRING DIAGRAM KEY - Scarabeo 1) Multiple connectors 30) Flashers 2) Electronic control unit (ECU) 31) LH switch 3) Serial connection 32) Horn 4) Throttle sensor 33) Fuel level sensor 5) Pick-up 34) Injection check warning light 6) Temperature sensor 35) Fuel level instrument 7) Oil pump...
-
Página 200: Wiring Diagram - Scarabeo
All manuals and user guides at all-guides.com WIRING DIAGRAM - Scarabeo 30 27 LOCK Bi/R Gr/V G/Bi use and maintenance Scarabeo 50 - Scarabeo 100 4T... - Página 201 All manuals and user guides at all-guides.com WIRING DIAGRAM KEY - Scarabeo 1) Generator 35) Horn 2) Transducer 36) Pick up 3) Spark plug 37) Fuse 5) Voltage regulator 38) Multiple connectors 6) Battery 40) Automatic starter 7) Starter 8) Start relay 9) Front stoplight switch 10) Rear stoplight switch 12) Number plate bulb...
- Página 202 All manuals and user guides at all-guides.com NOTE ASK FOR GENUINE SPARE PARTS ONLY use and maintenance Scarabeo 50 - Scarabeo 100 4T...
- Página 203 All manuals and user guides at all-guides.com NOTE ASK FOR GENUINE SPARE PARTS ONLY use and maintenance Scarabeo 50 - Scarabeo 100 4T...
- Página 204 All manuals and user guides at all-guides.com NOTE ASK FOR GENUINE SPARE PARTS ONLY use and maintenance Scarabeo 50 - Scarabeo 100 4T...
- Página 205 All manuals and user guides at all-guides.com NOTE ASK FOR GENUINE SPARE PARTS ONLY use and maintenance Scarabeo 50 - Scarabeo 100 4T...
- Página 206 All manuals and user guides at all-guides.com NOTE ASK FOR GENUINE SPARE PARTS ONLY use and maintenance Scarabeo 50 - Scarabeo 100 4T...
- Página 207 All manuals and user guides at all-guides.com NOTE ASK FOR GENUINE SPARE PARTS ONLY use and maintenance Scarabeo 50 - Scarabeo 100 4T...
- Página 208 All manuals and user guides at all-guides.com aprilia s.p.a. wishes to thank its customers for the purchase of this vehicle. - Do not dispose of oil, fuel, polluting substances and components in the environment. - Do not keep the engine running if it isn’t necessary.