Tabla de contenido

Manuales relacionados para aldes T.Flow Hygro+


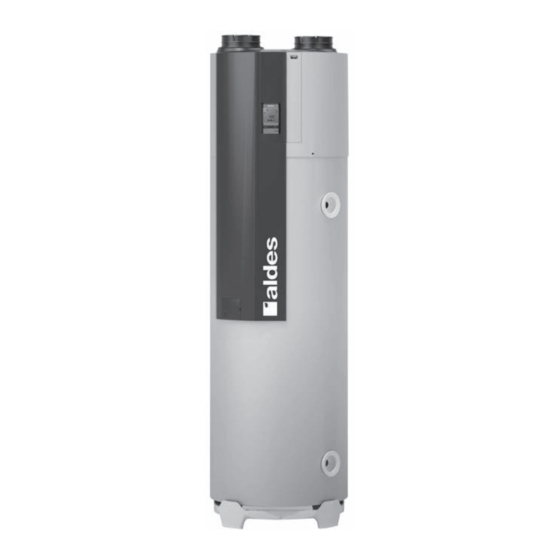
Resumen de contenidos para aldes T.Flow Hygro+
- Página 1 Download the installation instructions in all languages here Notice d’installation Installation instructions T.Flow Hygro+ ® Installationsanweisungen T.Flow Nano ® Instrucción de instalación...
-
Página 2: Tabla De Contenido
TABLE DES MATIÈRES 1. INTRODUCTION ............4 1.1. - Página 3 6. UTILISATION ............21 6.1.
-
Página 4: Introduction
Lisez la notice attentivement avant de commencer l’installation de l’appareil et conservez cette notice en bon état à proximité de l’appareil pendant toute la durée de vie de l’appareil. La présente notice est également disponible sur le site aldes.fr. 1.1.1. Précautions et restrictions d’emploi •... -
Página 5: Symboles
Dans un souci d’amélioration constante de la qualité de ses produits, la société ALDES se réserve le droit de modifier à tout moment les caractéristiques indiquées dans ce document. -
Página 6: Encombrement
1.5. Encombrement T.Flow Hygro+ T.Flow Nano ® ® Vue de face Vue de face Ø 566 Ø 566 Ø 160 Ø 160 Ø 160 Ø 160 Ø 557 Ø 557 Ø 566 Vue de dessus Vue de dessus Ø 566... -
Página 7: Description
® * Gaz à effet de serre fluoré contenu dans un équipement hermétiquement scellé. ** Filtre classe G4 selon EN 779 et ISO Grossier 65% selon ISO 16890. Pour en savoir plus sur la norme ISO 16890, rendez-vous sur https://pro.aldes.fr/qualité-de-lair-intérieur/la-filtration. -
Página 8: Stockage Et Transport
2.4. Stockage et transport Il est formellement interdit de gerber ce produit.Le produit peut être incliné sur une face à 90°. Cette face est clairement indiquée sur l’emballage du produit par une signalétique. L’emballage est renforcé sur cette face pour permettre un transport du produit à... -
Página 9: Installation
3. INSTALLATION 3.1. Lieu d’installation Volume 3 Le lieu d’installation doit répondre aux conditions suivantes : Volume 2 • Respect de la norme NF C 15-100 : Volume 1 60 cm Le chauffe-eau doit être installé dans le volume 3 ou hors volume •... -
Página 10: Préparation De L'installation
3.3. Pose du chauffe-eau L’accès à la pompe à chaleur, située sur la partie supérieure, n’est pas nécessaire. Il est donc inutile et fortement déconseillé de démonter le capot supérieur. L’ensemble des raccordements hydrauliques et électriques est accessible par la face avant (et ne nécessite pas le démontage du capot avant). - Página 11 MINI Nano Montage mural (cf. Gabarit d’Installation 35033150) T.Flow ® L’installation murale du chauffe-eau doit respecter les exigences de la NF DTU 60.1. Selon le type de mur, l’installation sur trépied peut-être obligatoire. Le chauffe eau doit être fixé au mur avec des chevilles et des vis adaptés au mur et au poids de l’appareil (conformément à...
- Página 12 T.Flow Nano Installation sur trépied ® En cas d’installation du T.Flow Nano sur trépied, le produit doit obligatoirement être fixé au mur (au moins sur ® MINI support de fixation supérieur). MINI 1- Percer les trous 2- Placer les chevilles et les vis ou tiges filetées adaptées 3- Placer le produit sur son trépied.
-
Página 13: Raccordement Aéraulique
3.4. Raccordement aéraulique La performance du chauffe-eau est directement liée à la qualité du réseau aéraulique. Il convient donc de prêter la plus grande attention à l’ensemble du système. Réseau d’extraction : Il doit de préférence être installé dans le volume chauffé (faux plafond, combles isolés) afin de limiter la perte d’énergie. La performance du chauffe-eau thermodynamique est liée à... -
Página 14: Piquages D'entrée Et De Rejet De L'air
Dans tous les cas, la sortie d’air sera suffisamment dimensionnée pour ne pas générer d’importantes pertes de charge. Une sortie d’air générant trop de pertes de charge aérauliques peut engendrer un mauvais fonctionnement du système. Utiliser de préférence les sorties toiture/murales aérauliques ALDES. Précautions d’installation des conduits souples : •... -
Página 15: Raccordement Au Réseau Eau Froide Et Au Réseau Eau Chaude
Montage des raccords diélectriques avec joint ou avec pâte d’étanchéité ; et faire attention au couple exercé lors du serrage (ne pas exercer un couple supérieur à 25 N.m). Afin de faciliter d’éventuelles opérations de maintenance, prévoir des vannes d’isolement (non fournies) sur l’arrivée d’eau froide (avant le groupe de sécurité) et le départ d’eau chaude. -
Página 16: Évacuation Des Condensats
3.5.4. Évacuation des condensats L’évaporateur récupérant la chaleur de l’air extrait humide, provoque la condensation de la vapeur d’eau contenue dans l’air. Cette eau, recueillie dans un bac, est évacuée à l’aide d’un tube clair de diamètre 12 mm, fourni et monté sur le produit. Raccordez le tuyau d’évacuation au réseau des eaux usées avec l’accessoire fourni (adaptateur à... - Página 17 *Câblage en double tarif : Dans ce cas, il faut réaliser une seconde alimentation 230V sur le chauffe-eau pour amener le signal heures creuses (si cela est difficile, il est possible de remplacer le signal EDF par une horloge programmée suivant la tarification en vigueur du site concerné).
-
Página 18: Vérifications Importantes Avant Mise En Service
4. VÉRIFICATIONS IMPORTANTES AVANT MISE EN SERVICE 4.1. Réseau aéraulique Contrôlez que l’ensemble des gaines et bouches d’extraction est bien raccordé. Les gaines souples doivent être tendues et ne doivent pas avoir été écrasées. 4.2. Circuit hydraulique Aucune mise en service ne sera effectuée tant que l’installation n’est pas remplie. 4.3. -
Página 19: Réglages
5.3. Réglages 5.3.1. Paramètres à régler suivant la configuration du logement Les paramètres à régler sont les suivants : Réglages Paramètre Désignation Valeurs possibles d’usine BAIN* Nombre de bouches d’extraction type BAIN Nombre de bouches d’extraction sanitaires type WC Valeurs possibles de 0 à... - Página 20 La valeur actuelle du paramètre clignote Filter Modifier la valeur du paramètre avec les touches « + » ou « - » Appuyer sur « OK » pour valider la valeur du paramètre Le paramètre réglé clignote de nouveau Filter Choisir un autre paramètre à...
-
Página 21: Utilisation
Le port USB situé en bas de l’écran de commande est exclusivement réservé à un usage spécifique sous le contrôle du SAV d’ALDES. En cas de défaillance liée à une manipulation non autorisée sur ce port USB, notre garantie ne pourrait être... -
Página 22: Interface D'utilisation
6.1. Interface d’utilisation Symbole Signification Fonction anti-légionellose activée Résistance électrique en fonctionnement Compresseur en fonctionnement Clignote lors d’un anti court cycle (attente démarrage compresseur) S’affiche dans le menu avancé “ MODE+OK ” (dont Réglage Config.). Clignote si une erreur est détectée Indique le niveau d’encrassement du filtre - S’affiche dans le menu info - S’affiche automatiquement sur l’écran quand le filtre est plein :... -
Página 23: Menu Info
6.3. Menu Info Il s’agit d’un menu informatif qui n’interfère pas dans le fonctionnement du chauffe-eau thermodynamique. Il permet à l’utilisateur de connaître les consommations électriques estimées (totale, ventilateur seul et chauffage ECS seul) et l’état du filtre. Il permet aussi de réinitialiser ces données (notamment en cas de remplacement du filtre, voir paragraphe 7.2). Le chauffe-eau thermodynamique continue de fonctionner selon le mode de fonctionnement choisi durant la consultation du menu info. -
Página 24: Mode Vacances
6.4. Mode Vacances En cas d’absence prolongée, ce mode permet de désactiver la production de l’ECS. La protection hors gel et la ventilation du logement restent assurées dans ce mode. La période d’absence est renseignée en indiquant le nombre « n » de jours d’absence. La production d’ECS sera stoppée pendant n-1 jours. -
Página 25: Mode Confort
6.6. Mode Confort/Invités En cas de besoin en eau chaude plus important pour une période donnée, il est possible d’accélérer le renouvellement de l’eau chaude dans le ballon pendant une durée programmée. La période de demande de confort supplémentaire est renseignée en indiquant le nombre « n » de jours durant lesquels le besoin en eau chaude augmente. -
Página 26: Remplacement Du Filtre
7.2. Remplacement du filtre Trappe d’accès Il est recommandé de remplacer le filtre une fois par an afin de garantir un fonctionnement optimum de votre chauffe-eau. Une alerte pour vérification de l’état du filtre s’affiche automatiquement sur l’écran au bout d’un an (indicateur filtre rempli, voir chapitre utilisation). -
Página 27: Défauts
9. DÉFAUTS 9.1. Avec code erreur En cas d’apparition d’un code erreur sur l’écran, veuillez contacter votre installateur ou votre société de maintenance. Lorsque qu’une erreur est présente, le changement de mode ou le réglage de la température de consigne est possible. Cependant l’affichage de l’erreur est prioritaire sur les autres affichages. -
Página 28: Sans Code Erreur
Code Message Conséquences sur le fonctionnement Causes affiché affiché du chauffe-eau Pas de chauffe de l’eau : arrêt de la PAC et de l’appoint Montée en T° anormalement électrique. BALLON <> rapide sur la sonde d'eau bas Er12 Ventilateur en fonctionnement (VMC) pour version ballon ou haut ballon = ballon VIDE FAN_T.FLOW HYGRO+ / B100-FAN_T.FLOW NANO... -
Página 29: Recyclages Et Conformités
être remis à une déchetterie, auprès d’un revendeur ou d’un centre de collecte. ALDES adhère à l’éco-organisme Eco Systèmes www.ecosystem.eco ALDES a conçu ce produit pour être facilement recyclé. En participant au tri sélectif des déchets, vous contribuez au recyclage de ce produit et à la protection de l’environnement. -
Página 30: Bouches D'extraction Valides Selon At En Cours
10.4. Bouches d’extraction valides selon AT en cours Bahia Curve dans la maison individuelle AT 14.5 /17-2266 Hygro B Bouches d’extraction Bahia Curve SdB avec Autre SdB Salle Type de logement Cuisine SdB1 SdB2 Autre SdB 1 WC 1 avec WC d'eau* BW21 BW21... -
Página 31: Entrées D'air Valides Selon At En Cours
Autre SdB avec Autre SdB Salle Hygro A Cuisine SdB 1 SdB 2 SdB 1 WC 1 avec WC d’eau* BW21 F3 (1BWC) F4 (1BWC) BW22 F5 (1BWC) F3 (1B 1WC) F4 (1B 1WC) BW21 F5 (1B 1WC) F6 (2BWC) ou (1B 1WC 1BWC) BW22 F7 et + (2BWC) ou... -
Página 32: Garantie
11. GARANTIE 11.1. Conditions générales de garantie Se reporter aux conditions générales de vente sur le site www.aldes.fr. Le système doit être installé par un professionnel qualifié suivant les règles de l’art, les normes en vigueur et les prescriptions de nos notices. Le système doit être utilisé normalement et régulièrement entretenu par un spécialiste. -
Página 33: Service Après Vente
11.4. Service après vente En cas de problème, merci de vous adresser à votre installateur ou à votre revendeur. Consignes générales chauffe-eau : Toute manutention du produit doit se faire de manière adaptée à son poids et son encombrement.Il convient de respecter les prescriptions du fabricant quant à... -
Página 34: Données Techniques
12. DONNÉES TECHNIQUES Chauffe-eau thermodynamique air extrait T.Flow Hygro+ /T.Flow Nano (Chauffe-eau) ® ® Marque commerciale fournisseur Aldes Aldes Aldes Aldes B200 T.Flow ® B200-FAN T.Flow ® B100-FAN T.Flow ® B100 T.Flow ® Nano / Hygro+ / B200 Hygro+ / B200-FAN Nano / B100-FAN Désignation... - Página 35 Chauffe-eau thermodynamique air extrait T.Flow Hygro+ /T.Flow Nano (Ventilation) ® ® Marque commerciale fournisseur Aldes Aldes B200-FAN T.Flow Hygro+ / B100-FAN T.Flow Nano / ® ® Désignation B200-FAN T.Flow Hygro+ B100-FAN T.Flow Nano ® ® connecté connecté Références 11023198 / 11023384 11023394 / 11023396 Classe énergétique** - Climat moyen...
- Página 36 CONTENTS 1. INTRODUCTION ............38 1.1.
- Página 37 6. USE ..............55 6.1.
-
Página 38: Introduction
Read the manual carefully before starting to install the equipment and keep it in good condition near the equipment throughout its lifetime. These instructions are also available on the aldes website. 1.1.1. Precautions and restrictions on use • This device is intended exclusively for domestic use. -
Página 39: Symbols
• T°C: temperature 1.4. General information Thank you for choosing an ALDES product. We recommend that you read this document carefully and follow the instructions provided to ensure optimal operation of your equipment. Our liability as a manufacturer shall not be affected due to incorrect use of the equipment, lack of or unsuitable servicing or incorrect installation. -
Página 40: Dimensions
1.5. Dimensions T.Flow Hygro+ T.Flow Nano ® ® Front view Front view Ø 566 Ø 566 Ø 160 Ø 160 Ø 160 Ø 160 Ø 557 Ø 557 Ø 566 Top view Top view Ø 566... -
Página 41: Description
2. DESCRIPTION 2.1. Principle of operation ® ® The T.Flow Hygro+/T.Flow Nano solutions renew the air in new or existing dwellings, to improve air quality and protect the construction (SELF-BALANCING or HUMIDITY-CONTROLLED unidirectional CMEV). The heat pump built into the system uses the energy contained in the extract air to produce domestic hot water up to a temperature of 55°C (65°C with electrical boost). -
Página 42: Storage And Transport
2.4. Storage and transport This product must not be stacked under any circumstances, but can be tilted at 90° on one side. This side is indicated clearly by a panel on the product packaging. The packaging is reinforced on this side so that the product can be transported horizontally. -
Página 43: Installation
3. INSTALLATION 3.1. Installation location Space 3 The installation site must meet the following conditions: Space 2 • Compliance with standard NF C 15-100: Space 1 60 cm The water heater must be installed in space 3 or outside heated area •... -
Página 44: Installing The Water Heater
3.3. Installing the water heater There is no need for access to the heat pump in the upper part. It is therefore pointless and strongly advised not to remove the top cover. All the hydraulic and electrical connections can be accessed vis the front side (with no need to remove the front cover). T.Flow Hygro+ ®... - Página 45 MIN. T.Flow Nano Wall mounted (see Installation template 35033150) ® The wall-mounted water heater must comply with the requirements of NF DTU 60.1. It can be mandatory to use a tripod for the installation depending on the type of wall. The water heater must be fixed to the wall with the appropriate anchors and screws for the wall and the weight of the equipment (in accordance with standard EN 60-335-1).
- Página 46 T.Flow Nano Tripod installation ® MIN. When installing the T.Flow Nano on a tripod, it is mandatory to fasten the product to the wall (at least on top ® fastening support). MIN. 1- Drill the holes 2- Insert the anchors and the appropriate screws or threaded rods 3- Position the product on its tripod.
-
Página 47: Aeraulic Connection
3.4. Aeraulic connection The performance attained by the water heater is directly linked to the quality of the aeraulic network. It is thus of the utmost importance to pay careful attention to the whole system. Exhaust ductwork: It must ideally be fitted in the heated space (suspended ceiling, insulated attic) in order to limit energy losses. The thermodynamic water heater performance is linked to the temperature of the incoming air: the COP (Performance coefficient) is in fact higher the hotter the incoming air. -
Página 48: Air Intake And Discharge Connectors
The stale air can be discharged through the wall or the roof. In all cases, the air outlet will be designed suitable to avoid generating major pressure drops. An air outlet that generates too many aeraulic pressure drops can cause the system to malfunction. Ideally use ALDES aeraulic roof/wall outlets. -
Página 49: Hydraulic Connection
3.5. Hydraulic connection 3.5.1. Connection to cold water and hot water ductwork The “cold water inlet” and “hot water outlet” connections must be fitted with dielectric connectors (supplied with the equipment). They are intended to prevent galvanic couples and limit the risks of corrosion. Our warranty may not be valid if these connectors are missing. -
Página 50: Condensate Discharge
3.5.4. Condensate discharge As the evaporator recovers the heat from the moist extract air, it causes condensation of the water vapour contained in the air. This water, collected in a tray, is discharged using a 12 mm diameter clear pipe, supplied and fitted to the product. Connect the discharge pipe to the wastewater ductwork with the accessory supplied (diaphragm adapter to connect the condensate tube to a 32 mm diameter PVC pipe), taking care to provide for a flow water trap and fill in with water (a diaphragm water trap can also be used that does not have to be filled with water). - Página 51 *Dual tariff cabling: In this case, a second 230 V supply must be created to the water heater to bring in the off-peak signal (if this is tricky, the EDF signal can be replaced by a timer programmed for the pricing structure in force on the site in question). The dry peak/off-peak contact should be connected to terminals 4 and 5 on the terminal block solely for a dual tariff pricing structure.
-
Página 52: Important Verifications Prior To Commissioning
4. IMPORTANT VERIFICATIONS PRIOR TO COMMISSIONING 4.1. Aeraulic network Check that all exhaust ducts and grilles are correctly connected. Flexible ducts must be taut and not crushed. 4.2. Hydraulic circuit The installation cannot be commissioned until it is filled. 4.3. Electrical circuit The equipment must be connected by a professional electrician as per standard NF C 15-100. -
Página 53: Settings
5.3. Settings 5.3.1. Setting the language By default, the interface’s language is the French. To change to English, please, follow the instructions below. LANGUAGE Menu Press and hold the "MODE" and "OK" buttons simultaneously very short time to enter the advanced menu." A key (symbol of the "setting"... -
Página 54: Setting Configuration Parameters
5.3.3. Setting configuration parameters Altering certain parameters can diminish the overall energy performance of your system. CONFIG. Setting menu Hold the “MODE” and “OK” buttons down simultaneously for a very short instant to enter the advanced menu A key (“configuration” menu symbol) appears in the top right of the LCD screen. -
Página 55: Use
(pressed simultaneously): access to the advanced menu (including config. setting). The USB port at the bottom of the control screen is reserved exclusively for a specific use controlled by the ALDES after-sales service. Our warranty may be invalidated should a failure be caused by unauthorised use of this USB port. -
Página 56: User Keypad
6.1. User keypad Symbol Meaning Anti-Legionella function active Electric heating element running Compressor running Flashes during anti-short cycle (awaiting compressor start-up) Displays in the advanced menu “ MODE+OK ” (including Config. Setting). Flashes if an error is detected Indicates the filter clogging level - Displays in the info. -
Página 57: Info Menu
6.3. Info menu This involves an information menu, which has no impact on the operation of the thermodynamic water heater. It is used to understand the estimated electricity consumption levels (total, fan only and DHW heating only) and the condition of the filter. It can also be used to reset these data (especially when the filter is replaced, see paragraph 7.2). -
Página 58: Holiday Mode
6.4. Holiday Mode This mode disables DHW production during an extended absence. The frost protection and ventilation in the dwelling continue to run in this mode. The period of absence is filled in by indicating the number “n” of days absent. DHW production will be stopped for n-1 days. -
Página 59: Comfort Mode
6.6. Comfort/Guests Mode Where more hot water is necessary for a given period, the hot water renewal in the tank can be speeded up for a programmed duration. The period for the additional comfort level demand is filled in by indicating the number “n” of days during which the hot water requirements are increased. -
Página 60: Replacing The Filter
7.2. Replacing the filter Access hatch It is recommended that the filter is changed every year to guarantee optimum operation of your water heater. A filter state verification alert displays automatically on the screen after a year (filled filter indicator, see Use chapter). When replacing the filter, make sure you position it in the correct direction: a tab on one side of the filter allows easy removal. -
Página 61: Faults
9. FAULTS 9.1. With error code If an error code appears on the screen, please contact your installer or maintenance company. When an error occurs, it is possible to change mode or adjust the temperature setpoint. However, displaying the error takes priority over the other displays. -
Página 62: Without Error Code
Code Message Consequences on the water heater Causes displayed displayed operation Water not heating: stop heat pump and electrical boost. Abnormally rapid rise in T° on the TANK <> Fan in operation (CMEV) for version Er12 tank bottom water sensor or tank FAN_T.FLOW HYGRO+ / B100-FAN_T.FLOW NANO EMPTY top = empty tank. -
Página 63: Recycling And Compliance
ALDES belongs to the Eco Systèmes eco-body www.ecosystem.eco ALDES has designed this product to be easily recycled. By sorting your waste selectively, you are helping to recycle this product and protect the environment. 10.2. REACH Regulation To the best of our knowledge on the date of writing this document, this item does not contain more than 0.1% of its weight of... -
Página 64: Exhaust Grilles Valid As Per Current Technical Report (France)
10.4. Exhaust grilles valid as per current technical report (France) Bahia Curve in individual housing Technical Report #14.5 /17-2266 Hygro B Bahia Curve exhaust grilles Other Wash- Other Bathroom Type of dwelling Kitchen Bathroom1 Bathroom2 bathroom bathroom 1 with WC 1 with WC room* BW21... -
Página 65: Air Inlets Valid As Per Current Technical Report (France)
Wash-up Other Bathroom Other bathroom Bathroom Bathroom Hygro A Kitchen bathroom 1 with WC 1 with WC room* BW21 F3 (1BWC) F4 (1BWC) BW22 F5 (1BWC) F3 (1B 1WC) F4 (1B 1WC) BW21 F5 (1B 1WC) F6 (2BWC) or (1B 1WC 1BWC) BW22 F7 and + (2BWC) or (1B 1WC 1BWC) -
Página 66: Warranty
11. WARRANTY 11.1. General terms and conditions Refer to the general terms and conditions of sale on www.aldes.fr. The system must be installed by a qualified professional in compliance with best practices, the standards in force and the recommendations in our instructions. The system must be used normally and regularly serviced by a specialist. -
Página 67: After-Sales Service
11.4. After-sales service: In the event of a problem, please contact your installer or vendor. General water heater instructions: The product must be handled in a way appropriate to its weight and size. It is important to comply with the manufacturer’s stipulations for its positioning, fastening and location of its installation. -
Página 68: Technical Data
12. TECHNICAL DATA Thermodynamic water heater using exhaust air T.Flow Hygro+ /T.Flow Nano (Water heater) ® ® Supplier brand Aldes Aldes Aldes Aldes B200-FAN T.Flow ® B100-FAN T.Flow ® B200 T.Flow ® Hygro+ / B100 T.Flow ® Nano / Hygro+ /... - Página 69 Thermodynamic water heater using exhaust air T.Flow Hygro+ /T.Flow Nano (Ventilation) ® ® Supplier brand Aldes Aldes B200-FAN T.Flow Hygro+ / B100-FAN T.Flow Nano / ® ® Description B200-FAN T.Flow ® Hygro+ B100-FAN T.Flow ® Nano connected connected References 11023198 / 11023384...
- Página 70 INHALT 1. EINLEITUNG ............72 1.1.
- Página 71 6. BETRIEB ............. . . 89 6.1.
-
Página 72: Einleitung
1.1. Empfehlungen und Sicherheitshinweise Bitte lesen Sie sich dieses Handbuch aufmerksam durch und verwahren Sie es stets in der Nähe des Gerätes. Diese Anleitung ist auch auf der Website von Aldes verfügbar. 1.1.1. Vorsichtsmaßnahmen und Verwendungsbeschränkungen • Dieses Gerät ist ausschließlich für den Hausgebrauch bestimmt. -
Página 73: Symbole
• T°C: Temperatur 1.4. Allgemeine Informationen Danke, dass Sie sich für ein Produkt von ALDES entschieden haben. Wir empfehlen Ihnen, dieses Dokument sorgfältig zu lesen und die Anweisungen zu befolgen, um den optimalen Betrieb Ihres Geräts zu gewährleisten. Als Hersteller haften wir nicht bei falscher Verwendung des Geräts, fehlender bzw. mangelhafter Wartung oder falscher Installation. -
Página 74: Abmessungen
1.5. Abmessungen T.Flow Hygro+ T.Flow Nano ® ® Vorderansicht Vorderansicht Ø 566 Ø 566 Ø 160 Ø 160 Ø 160 Ø 160 Ø 557 Ø 557 Ø 566 Draufsicht Draufsicht Ø 566... -
Página 75: Beschreibung
2. BESCHREIBUNG 2.1. Funktionsprinzip ® ® T.Flow Hygro+/T.Flow Nano Lösungen für die Lüftung von neuen oder bestehenden Wohnhäusern zur Verbesserung der Luftqualität und zum Schutz des Bauwerks (SELBSTABGLEICHENDES oder FEUCHTEGEREGELTES unidirektionales ZMLS). Die im System eingebaute Wärmepumpe nutzt die in der Abluft enthaltene Energie zur Erzeugung von Brauchwarmwasser bis zu einer Temperatur von 55 °C (65 °C mit elektrischem Boost). -
Página 76: Lagerung Und Transport
2.4. Lagerung und Transport Dieses Produkt darf unter keinen Umständen gestapelt werden, kann aber auf einer Seite um 90° gekippt werden. Diese Seite ist durch einen Hinweis auf der Produktverpackung deutlich gekennzeichnet. Die Verpackung ist an dieser Seite verstärkt, damit das Produkt horizontal transportiert werden kann. Es ist verboten, das Produkt auf die anderen Seiten zu kippen. Wir empfehlen Ihnen, diese Anweisungen sorgfältig zu befolgen. -
Página 77: Installation
3. INSTALLATION 3.1. Aufstellungsort Bereich 3 Der Aufstellungsort muss die folgenden Bedingungen erfüllen: Bereich 2 • Einhaltung der Norm DIN VDE 0100: Bereich 1 60 cm Der Warmwasserbereiter muss im Bereich 3 oder im beheizten Außenbereich installiert werden. • Es wird empfohlen, das Gerät in einem beheizten Raum zu installieren, um die optimale thermische Leistung des Systems zu gewährleisten (ist dies nicht möglich, muss das Produkt in einem frostfreien Raum installiert werden, in dem die Raumtemperatur höchstens 40 °C beträgt). -
Página 78: Installation Des Warmwasserbereiters
3.3. Installation des Warmwasserbereiters Der Zugang zum oberen Teil der Wärmepumpe ist nicht erforderlich. Es wird daher dringend davon abgeraten, die obere Abdeckung zu entfernen. Alle hydraulischen und elektrischen Anschlüsse sind von der Vorderseite aus zugänglich (ohne dass die Frontabdeckung entfernt werden muss). - Página 79 MIN. T.Flow Nano mit Wandbefestigung (siehe Installationsschablone 35033150) ® Der an der Wand montierte Warmwasserbereiter muss den Anforderungen von DIN EN 806 entsprechen. Je nach Art der Wand ist eventuell die Verwendung eines Fußgestells für die Installation erforderlich. Der Warmwasserbereiter muss mit den für die Wand und das Gewicht des Geräts geeigneten Dübeln und Schrauben an der Wand befestigt werden (gemäß...
- Página 80 T.Flow Nano Fußgestell-Installation ® MIN. Bei der Installation des T.Flow Nano auf einem Fußgestell muss das Produkt an der Wand befestigt werden ® (zumindest an der oberen Befestigungsstütze). MIN. 1- Die Löcher bohren 2- Setzen Sie die Dübel und die entsprechenden Schrauben oder Gewindestangen ein 3- Das Produkt auf dem Fußgestell...
-
Página 81: Luftanschluss
3.4. Luftanschluss Die Leistung des Warmwasserbereiters hängt von der Qualität des Luftleitungsnetzes ab. Es ist daher äußerst wichtig, das gesamte System sorgfältig zu behandeln. Abluftkanäle: Sie müssen vorzugsweise in einem beheizten Raum (Zwischendecke, isolierter Dachboden) verlegt werden, um Energieverluste zu begrenzen. Die thermodynamische Leistung des Warmwasserbereiters hängt von der Temperatur der einströmenden Luft ab: Je wärmer die einströmende Luft, desto höher ist der COP (Leistungskoeffizient). -
Página 82: Lufteinlass- Und Luftauslassanschlüsse
In jedem Fall muss der Fortluftauslass so ausgelegt werden, dass er keine größeren Druckverluste erzeugt. Ein Luftauslass, der einen zu hohen Luftdruckverlust erzeugt, kann zu Systemstörungen führen. Verwenden Sie vorzugsweise ALDES-Luftauslässe für Dach und Wand. Vorsichtsmaßnahmen bei der Verwendung von flexiblen Leitungen: •... -
Página 83: Wasseranschluss
3.5. Wasseranschluss 3.5.1. Anschluss an Kalt- und Warmwasserleitungen Die „Kaltwasserzulauf-“ und „Warmwasserablauf-“Anschlüsse müssen mit Isolierverschraubungen versehen werden (im Lieferumfang des Geräts enthalten). Sie verhindern galvanische Verbindungen und begrenzen das Korrosionsrisiko. Das Fehlen dieser Verbindungsstücke kann zum Verlust der Garantie führen. Montage von Isolierverschraubungen mit Dichtung oder Dichtungspaste;... -
Página 84: Kondensatableitung
3.5.4. Kondensatableitung Da der Verdampfer die Wärme aus der feuchten Abluft zurückgewinnt, wird der Wasserdampf in der Luft kondensiert. Dieses in einer Schale aufgefangene Wasser wird über ein mitgeliefertes und am Gerät angebrachtes durchsichtiges Rohr mit 12 mm Durchmesser abgeleitet. Das Abflussrohr wird mit dem mitgelieferten Zubehör (Membranadapter zum Anschluss des Kondensatrohrs an ein PVC- Rohr mit 32 mm Durchmesser) an die Abwasserleitung angeschlossen, wobei darauf zu achten ist, dass ein Siphon vorhanden ist und mit Wasser gefüllt wird (es kann auch ein Membran Geruchssperre verwendet werden, der nicht mit Wasser gefüllt werden muss). - Página 85 *Doppeltarif Verkabelung: In diesem Fall muss eine zweite 230V-Versorgung für den Warmwasserbereiter geschaffen werden, um das Schwachlast-Signal zu erhalten (wenn dies schwierig ist, kann das EDF-Signal durch eine Zeitschaltuhr ersetzt werden, die für die am betreffenden Standort geltende Preisstruktur programmiert ist). Der potentialfreie Kontakt für Spitzen- und Schwachlastzeiten wird an die Klemmen 4 und 5 der Klemmenleiste angeschlossen, die ausschließlich für eine Doppeltarif- Preisstruktur vorgesehen sind.
-
Página 86: Wichtige Prüfungen Vor Der Inbetriebnahme
4. WICHTIGE PRÜFUNGEN VOR DER INBETRIEBNAHME 4.1. Luftleitungsnetz Prüfen, ob alle Abluftleitungen und -gitter korrekt angeschlossen sind. Flexible Kanäle müssen straff sein und dürfen nicht gequetscht werden. 4.2. Hydraulikkreis Die Anlage kann erst in Betrieb genommen werden, wenn sie gefüllt ist. 4.3. -
Página 87: Einstellungen
5.3. Einstellungen 5.3.1. Spracheneinstellung Die voreingestellte Sprache der Schnittstelle ist Französisch. Um die Sprache auf Englisch umzustellen, bitte den nachstehenden Anweisungen folgen. SPRACHE Menü Die Tasten „MODE“ und „OK“ gleichzeitig sehr kurz gedrückt halten, um das erweiterte Menü aufzurufen. Oben rechts auf dem LCD-Bildschirm wird ein Schraubenschlüssel angezeigt (Symbol für das Menü... -
Página 88: Einstellung Von Konfigurationsparametern
5.3.3. Einstellung von Konfigurationsparametern Die Änderung bestimmter Parameter kann die Gesamtenergieeffizienz Ihres Systems beeinträchtigen. KONFIG. Einstellungsmenü Die Tasten „MODE“ und „OK“ gleichzeitig sehr kurz gedrückt halten, um das erweiterte Menü aufzurufen Oben rechts auf dem LCD-Bildschirm wird ein Schraubenschlüssel angezeigt (das Symbol für das Menü... -
Página 89: Betrieb
• (gleichzeitig gedrückt): Zugriff auf das erweiterte Menü (einschließlich der Konfigurationseinstellungen). Der USB-Anschluss am unteren Rand des Kontrollbildschirms ist ausschließlich einer bestimmten Verwendung des ALDES- Kundendienstes vorbehalten. Unsere Garantie kann erlöschen, wenn ein Fehler durch die unbefugte Verwendung dieses USB-Anschlusses verursacht wird. -
Página 90: Benutzertastatur
6.1. Benutzertastatur Symbol Bedeutung Anti-Legionellen-Funktion aktiv Elektrisches Heizelement in Betrieb Kompressor-Betrieb Blinkt während des Anti-Kurzschluss-Zyklus (in Erwartung des Kompressorstarts) Anzeige im erweiterten Menü „ MODE+OK „ (einschließlich Config. Setting). Blinkt, wenn ein Fehler erkannt wird Zeigt den Verschmutzungsgrad des Filters an - Anzeige im Info. -
Página 91: Info-Menü
6.3. Info-Menü Dieses Informationsmenü hat keinen Einfluss auf den Betrieb des thermodynamischen Warmwasserbereiters. Es dient dazu, die geschätzten Stromverbrauchswerte (insgesamt, nur Ventilator und nur Brauchwarmwasserbereitung) und den Zustand des Filters zu erfahren. Ferner können mit ihm diese Daten zurückgesetzt werden (insbesondere beim Austausch des Filters, siehe Abschnitt 7.2). -
Página 92: Urlaubsmodus
6.4. Urlaubsmodus In diesem Modus wird die BWW-Produktion bei längerer Abwesenheit deaktiviert. Der Frostschutz und die Lüftung in der Wohnung laufen in diesem Modus weiter. Der Zeitraum der Abwesenheit wird durch Angabe der Anzahl „n“ von Abwesenheitstagen eingegeben. Die BWW-Produktion wird für n-1 Tage unterbrochen. Nach n-1 Tagen wird der Behälter wieder aufgefüllt, so dass bei der Rückkehr der Bewohner wieder Warmwasser zur Verfügung steht. -
Página 93: Komfort-/Gäste-Modus
6.6. Komfort-/Gäste-Modus Wird eine Zeit lang mehr Warmwasser benötigt, kann die Warmwasserbereitung im Behälter für eine programmierte Dauer beschleunigt werden. Der Zeitraum für den zusätzlichen Komfortbedarf wird durch die Anzahl „n“ der Tage, an denen der Warmwasserbedarf erhöht wird, eingegeben. Die Taste „MODE“... -
Página 94: Auswechseln Des Filters
7.2. Auswechseln des Filters Zugangsklappe Es wird empfohlen, den Filter jedes Jahr zu wechseln, um den optimalen Betrieb Ihres Warmwasserbereiters zu gewährleisten. Nach einem Jahr wird auf dem Bildschirm automatisch eine Meldung über den Filterzustand angezeigt (Anzeige des gefüllten Filters, siehe Kapitel Verwendung). -
Página 95: Störungen
9. STÖRUNGEN 9.1. Mit Fehlercode Bei Anzeige eines Fehlercodes auf dem Bildschirm wenden Sie sich bitte an Ihren Installateur oder Ihren Instandhaltungsbetrieb. Tritt ein Fehler auf, kann der Modus geändert oder der Temperatursollwert angepasst werden. Die Fehleranzeige hat jedoch Vorrang vor anderen Anzeigen. Betrifft die Störung die Wärmepumpe, wird automatisch der „SAFE“-Modus (Backup) ausgelöst: das Wasser wird nur mit elektrischem Boost erwärmt. -
Página 96: Ohne Fehlercode
Angezeigter Angezeigte Auswirkungen auf den Betrieb des Ursachen Code Meldung Warmwasserbereiters Wasser wird nicht erwärmt: Wärmepumpe und Ungewöhnlich schneller Anstieg der T° am elektrischen Boost abschalten. TANK <> unteren Wassersensor des Behälters oder Er12 Ventilator in Betrieb (ZMLS) für Version am oberen Wassersensor des Behälters = EMPTY FAN_T.FLOW HYGRO+ / B100-FAN_T.FLOW... -
Página 97: Recycling Und Konformität
Recyclingzentrum, einem Händler oder einer Sammelstelle gebracht werden. ALDES ist Mitglied der Öko-Organisation Eco Systèmes www.ecosystem.eco ALDES hat dieses Produkt so konzipiert, dass es leicht recycelt werden kann. Durch Abfalltrennung helfen Sie, dieses Produkt zu recyceln und die Umwelt zu schützen. -
Página 98: Abluftelemente Gültig Gemäß Aktuellem Technischen Bericht (Frankreich)
10.4. Abluftelemente gültig gemäß aktuellem technischen Bericht (Frankreich) Bahia Curve in Einfamilienhäusern Technischer Bericht #14.5 /17-2266 Hygro B Bahia Curve Abluftelement Anderes Bade- Bade- Anderes Badezimmer Wohnungstyp Küche Badezimmer Waschraum* zimmer 1 zimmer 2 Bade zimmer mit WC 1 mit WC 1-Zimmer-Wohnung 2-Zimmer-Wohnung 3-Zimmer-Wohnung... -
Página 99: Zuluftelemente Gültig Gemäß Aktuellem Technischen Bericht (Frankreich)
Anderes Bade- Bade- Anderes Badezimmer Hygro A Küche Badezimmer Waschraum* zimmer 1 zimmer 2 Badezimmer 1 mit WC 1 mit WC 1-Zimmer-Wohnung BW21 2-Zimmer-Wohnung 3-Zimmer-Wohnung (1BWC) 4-Zimmer-Wohnung (1BWC) BW22 5-Zimmer-Wohnung (1BWC) 3-Zimmer-Wohnung (1B 1WC) 4-Zimmer-Wohnung (1B 1WC) B22** BW21 5-Zimmer-Wohnung (1B 1WC) 6-Zimmer-Wohnung (2BWC) oder (1B 1WC 1BWC) B22**... -
Página 100: Garantie
11. GARANTIE 11.1. Allgemeine Geschäftsbedingungen Siehe die allgemeinen Geschäftsbedingungen auf der Website www.exhausto.de. Die Anlage muss von einem qualifizierten Fachmann unter Einhaltung der bewährten Verfahren, der geltenden Normen und Empfehlungen in unserer Anleitung installiert werden. Die Anlage ist normal und regelkonform zu verwenden und von einer Fachkraft zu warten. -
Página 101: Kundendienst
11.4. Kundendienst: Bei Problemen wenden Sie sich bitte an Ihren Installateur oder Händler. Allgemeine Hinweise zum Warmwasserbereiter: Das Produkt muss seinem Gewicht und seiner Größe entsprechend gehandhabt werden. Für die Positionierung, Befestigung und den Aufstellungsort müssen die Herstellervorschriften beachtet werden. Die elektrischen Anschlüsse müssen unter strikter Beachtung der Herstellervorgaben und der vor Ort geltenden Vorschriften ausgeführt werden, insbesondere im Hinblick auf das Vorhandensein von elektrischen Schutzvorrichtungen (Schutzschalter usw.). -
Página 102: Technische Daten
12. TECHNISCHE DATEN Thermodynamischer Warmwasserbereiter mit Abluft-Verwendung T.Flow Hygro+ /T.Flow Nano (Warmwasserbereiter) ® ® Handelsmarke des Lieferanten Aldes Aldes Aldes Aldes B200-FAN T.Flow ® B100-FAN T.Flow ® B200 T.Flow ® Hygro+ / B100 T.Flow ® Nano / Hygro+ / Nano / B100-FAN Beschreibung B200 T.Flow... - Página 103 Thermodynamischer Warmwasserbereiter mit Abluft-Verwendung T.Flow Hygro+ /T.Flow Nano (Lüftung) ® ® Handelsmarke des Lieferanten Aldes Aldes B200-FAN T.Flow Hygro+ / B100-FAN T.Flow Nano / ® ® Beschreibung B200-FAN T.Flow ® Hygro+ B100-FAN T.Flow ® Nano vernetzt vernetzt Artikelnummern 11023198 / 11023384 11023394 / 11023396 Energieklasse** - Gemäßigtes Klima...
- Página 104 ÍNDICE 1. INTRODUCCIÓN ............106 1.1.
- Página 105 6. UTILIZACIÓN ............123 6.1.
-
Página 106: Introducción
Lea atentamente el manual antes de comenzar la instalación del equipo y conserve este manual en buen estado a proximidad del aparato durante toda su vida útil. El presente manual también está disponible en el sitio aldes.es. 1.1.1. Precauciones y restricciones de empleo •... -
Página 107: Símbolos
Por su preocupación de mejora constante de la calidad de sus productos, la empresa ALDES se reserva el derecho de modificar en cualquier momento las características indicadas en este documento. El buen funcionamiento del equipo está condicionado por el estricto respeto del presente manual. -
Página 108: Dimensiones
1.5. Dimensiones T.Flow Hygro+ T.Flow Nano ® ® Vista frontal Vista frontal Ø 566 Ø 566 Ø 160 Ø 160 Ø 160 Ø 160 Ø 557 Ø 557 Vista superior Ø 566 Vista superior Ø 566... -
Página 109: Descripción
2. DESCRIPCIÓN 2.1. Principio de funcionamiento Las soluciones T.Flow Hygro+ / T.Flow Nano aseguran la renovación de aire en las viviendas, nuevas o existentes, para ® ® garantizar una mejor calidad de aire y una preservación del edificio (VMC simple flujo AUTO o HIGRO). La bomba de calor, integrada en el sistema, utiliza la energía contenida en el aire extraído para producir agua caliente sanitaria hasta una temperatura de 55 °C (65 °C con apoyo eléctrico). -
Página 110: Almacenamiento Y Transporte
2.4. Almacenamiento y transporte Está formalmente prohibido apilar este producto. El producto se puede inclinar sobre una superficie a 90°. Esta cara está claramente indicada en el embalaje del producto por una señalización. El embalaje está reforzado en esta cara para permitir transportar el producto en horizontal. -
Página 111: Instalación
3. INSTALACIÓN 3.1. Lugar de instalación Volumen 3 Volumen 2 El lugar de instalación debe responder a las siguientes condiciones: • Respeto de la norma REBT: Volumen 1 60 cm El calentador de agua se debe instalar en el espacio 3 o fuera de espacio •... -
Página 112: Montaje Del Calentador De Agua
3.3. Montaje del calentador de agua No es necesario el acceso a la bomba de calor situada en la parte superior. Por lo tanto, es inútil y fuertemente desaconsejado desmontar el capó superior. El conjunto de conexiones hidráulicas y eléctricas es accesible por la cara delantera (y no requiere el desmontaje del capó delantero). - Página 113 T.Flow Nano Montaje mural (ver Plantilla de instalación 35033150) ® MINI La instalación del calentador de agua en una pared debe respetar las exigencias de las normas en vigor o reglas del oficio. Según el tipo de pared, la instalación sobre trípode puede ser obligatoria. El calentador de agua se debe fijar a la pared con tacos y tornillos adaptados a la pared y al peso del equipo (conforme a la Norma UNE EN 60-335-1).
- Página 114 MINI T.Flow Nano Instalación sobre trípode ® En caso de instalación del T.Flow Nano sobre trípode, el producto, se debe fijar obligatoriamente a la pared (al ® menos, sobre soporte de fijación superior). MINI MINI 1- Taladrar los agujeros 2- Colocar los tacos y los tornillos o varillas roscadas adaptados 3- Colocar el producto sobre su trípode...
-
Página 115: Conexión Aeráulica
3.4. Conexión aeráulica La prestación del calentador de agua está directamente relacionada con la calidad de la red aeráulica. Por lo tanto, es necesario prestar la mayor atención al conjunto del sistema. Red de extracción: Preferiblemente, se debe instalar en el espacio con calefacción (falso techo, desvanes aislados) para limitar la pérdida de energía. -
Página 116: Embocaduras De Entrada Y Descarga De Aire
Una salida de aire que genera demasiadas pérdidas de carga aeráulicas puede ocasionar un mal funcionamiento del sistema. Utilizar preferentemente las salidas de tejado/pared aeráulicas ALDES. Precauciones de instalación de los conductos flexibles: • Asegúrese de la estanqueidad de la red a nivel de los manguitos y de las embocaduras utilizando las abrazaderas de fijación. -
Página 117: Conexión Hidráulica
3.5. Conexión hidráulica 3.5.1. Conexión a la red de agua fría y a la red de agua caliente Es obligatorio equipar las embocaduras de “entrada de agua fría” y “salida de agua caliente” con racores dieléctricos (suministrados con el equipo). Están destinadas a evitar los pares galvánicos y limitar los riesgos de corrosión. En caso de ausencia de estas conexiones, no se podrá... -
Página 118: Evacuación De Los Condensados
3.5.4. Evacuación de los condensados Al recuperar el calor del aire extraído húmedo, el evaporador provoca la condensación del vapor de agua contenido en el aire. Esta agua, recogida en una bandeja, se evacúa por un tubo claro de 12 mm de diámetro, suministrado y montado en el producto. Conecte el tubo de evacuación a la red de aguas residuales con el accesorio suministrado (adaptador de membrana para la conexión del tubo de condensados de PVC diámetro 32 mm), teniendo cuidado de prever un sifón de desagüe y cargarlo con agua (también es posible utilizar un sifón... - Página 119 *Cableado en tarifa con discriminación horaria: En este caso, hay que realizar una segunda alimentación de 230 V en el calentador de agua para llevar la señal de horas valle (si esto es difícil, es posible reemplazar la señal de la compañía eléctrica por un reloj programado según la tarificación en vigor del sitio en cuestión).
-
Página 120: Verificaciones Importantes Antes De La Puesta En Marcha
4. VERIFICACIONES IMPORTANTES ANTES DE LA PUESTA EN MARCHA 4.1. Red aeráulica Controle que el conjunto de conductos y bocas de extracción está bien conectado. Los conductos flexibles deben estar tendidos y no haber sido aplastados. 4.2. Circuito hidráulico No se efectuará ninguna puesta en marcha hasta que la instalación no esté llena. 4.3. -
Página 121: Ajustes
5.3. Ajustes 5.3.1. Ajuste del idioma Por defecto, el idioma de la interfaz es el francés. Para cambiar la interfaz al español, sigua las instrucciones a continuación. Menú IDIOMA Mantener pulsadas simultáneamente las teclas “MODE” y “OK» un muy breve instante para entrar en el menú... -
Página 122: Ajuste De Los Parámetros De Configuración
5.3.3. Ajuste de los parámetros de configuración La modificación de algunos parámetros puede degradar la prestación energética global de su sistema. Menú Ajuste CONFIG. Mantener pulsados simultáneamente los botones "MODE" y "OK" un muy breve instante para entrar en el menú avanzado Una llave (símbolo del menú... -
Página 123: Utilización
El puerto USB situado en la parte inferior de la pantalla de mando está exclusivamente reservado a un uso específico bajo el control del SPV de ALDES. En caso de fallo relacionado con una manipulación no autorizada en este puerto USB, nuestra... -
Página 124: Interfaz De Utilización
6.1. Interfaz de utilización Símbolo Significado Función antilegionela activada Resistencia eléctrica en funcionamiento Compresor en funcionamiento Parpadea durante un anti corto ciclo (espera de arranque compresor) Se muestra en el menú avanzado “ MODE+OK ” (incluido Ajuste Config.). Parpadea si se detecta un error Indica el nivel de ensuciamiento del filtro - Se muestra en el menú... -
Página 125: Menú Info
6.3. Menú Info Se trata de un menú informativo que no interfiere sobre el funcionamiento del calentador de agua termodinámico. Permite al usuario conocer los consumos eléctricos estimados (total, ventilador solo y calentamiento ACS solo) y el estado del filtro. También permite reiniciar estos datos (en particular, en caso de sustitución del filtro, ver párrafo 7.2). -
Página 126: Modo Vacaciones
6.4. Modo Vacaciones En caso de ausencia prolongada, este modo permite desactivar la producción de ACS. En este modo, se sigue garantizando la protección contra heladas y la ventilación de la vivienda. El periodo de ausencia se rellena indicando el número "n" de días de ausencia. La producción de ACS se detendrá... -
Página 127: Modo Confort
6.6. Modo Confort/Invitados En caso de necesidad de mayor cantidad de agua caliente por un periodo dado, es posible acelerar la renovación del agua caliente en el acumulador durante una duración programada. El periodo de solicitud de confort suplementario se rellena indicando el número "n" de días durante los cuales la necesidad de agua caliente aumenta. -
Página 128: Sustitución Del Filtro
7.2. Sustitución del filtro Trampilla de Se recomienda sustituir el filtro un vez al año para garantizar un acceso funcionamiento óptimo de su calentador de agua. Al cabo de un año se muestra automáticamente una alerta en la pantalla para verificar el estado del filtro (indicador filtro lleno, ver capítulo utilización). -
Página 129: Fallos
9. FALLOS 9.1. Con código de error En caso de aparición de un código de error en la pantalla, contacte con su instalador o con su empresa de mantenimiento. Cuando hay un error, es posible cambiar de modo o el ajuste de la temperatura de consigna. Sin embargo, la visualización del error es prioritaria sobre las otras visualizaciones. -
Página 130: Sin Código De Error
Código Mensaje Consecuencias sobre el funcionamiento Causas mostrado mostrado del calentador de agua No hay calentamiento del agua: parada de la BDC y del Subida de T° anormalmente rápida apoyo eléctrico. ACUMUL <> en la sonda de agua abajo o Er12 Ventilador en funcionamiento (VMC) para versión arriba del acumulador =... -
Página 131: Reciclajes Y Conformidades
ALDES está inscrito en el ecoorganismo Eco Systèmes www.ecosystem.eco ALDES ha diseñado este producto para poderse reciclar fácilmente. Al participar a la recogida selectiva de residuos, contribuye al reciclaje de este producto y a la protección del medio ambiente. -
Página 132: Bocas De Extracción Válidas Según Dit En Curso
10.4. Bocas de extracción válidas según DIT en curso Bahia Curve en la vivienda individual DIT 556R/18 y en la vivienda colectiva DIT 14.5 /17-2267 Higro B Cuarto Cantidad de habitaciones Baño con Otro baño Cocina Baño 1 Baño 2 Otro baño 1 principales WC 1... -
Página 133: Entradas De Aire Válidas Según Dit En Curso
10.5. Entradas de aire válidas según DIT en curso Entradas de aire en la vivienda individual DIT 556R/18 Higro B Higro A Cantidad de entradas de aire Tipo de vivienda Salón Por dormitorio hidrorregulable (EH) Tipo de vivienda Estudio 2 x 45 Salón Por dormitorio Vivienda con 1 dormitorio... -
Página 134: Garantía
11. GARANTÍA 11.1. Condiciones generales de garantía Remitirse a las condiciones generales de venta en el sitio www.aldes.es. El sistema debe ser instalado por un profesional cualificado según las reglas del oficio, las normas en vigor y las prescripciones de nuestros manuales. El sistema debe ser utilizado normalmente y mantenido regularmente por un especialista. -
Página 135: Servicio Posventa
11.4. Servicio posventa En caso de problema, póngase en contacto con su instalador o su revendedor. Consignas generales calentador de agua: Toda manipulación del producto se debe realizar de forma adaptada a su peso y a sus dimensiones. Conviene respetar las prescripciones del fabricante en cuanto a su posicionamiento, su fijación y el emplazamiento de su instalaciones. -
Página 136: Datos Técnicos
12. DATOS TÉCNICOS Calentador de agua termodinámico sobre aire extraído T.Flow Hygro+ /T.Flow Nano (Calentador de agua) ® ® Marca comercial proveedor Aldes Aldes Aldes Aldes B200 T.Flow ® B200-FAN T.Flow B100-FAN T.Flow ® ® B100 T.Flow Nano / ®... - Página 137 Calentador de agua termodinámico sobre aire extraído T.Flow Hygro+ /T.Flow Nano (Ventilación) ® ® Marca comercial proveedor Aldes Aldes B200-FAN T.Flow Hygro+ / B100-FAN T.Flow Nano / ® ® Denominación B200-FAN T.Flow ® Hygro+ B100-FAN T.Flow ® Nano conectado conectado Códigos...
- Página 138 NOTES l NOTES l NOTEN l NOTAS...
- Página 140 FRANCE - Vous êtes un client professionnel : 09 69 32 39 98 (n° Cristal, prix d’un appel local) • ata.stve@aldes.com - Vous êtes un client particulier : 0 810 20 22 24 (n° Azur, 0,06€ la minute) • service-conso@aldes.com Besoin d’une assistance technique après-vente ?