Tabla de contenido
Publicidad
Idiomas disponibles
Idiomas disponibles
Enlaces rápidos
MODELO
MODEL
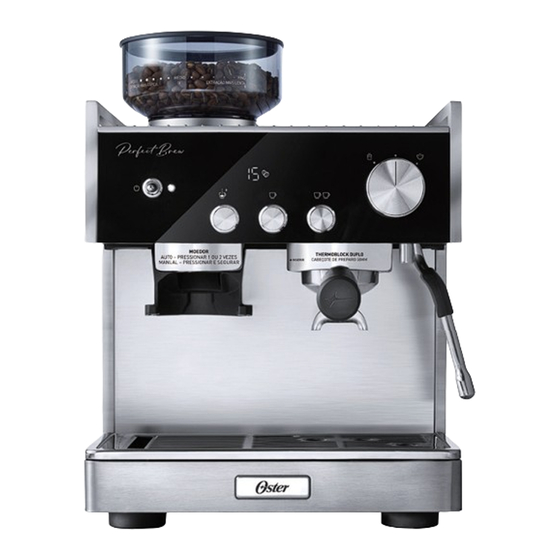
CAFETERA PARA ESPRESSO PERFECT BREW MÁXIMA
LEA TODAS LAS INSTRUCCIONES ANTES DE USAR ESTE APARATO
BVSTEM7400_23SEM1 (LA)_SPA/ENG.indd 1
BVSTEM7400_23SEM1 (LA)_SPA/ENG.indd 1
BVSTEM7400
Manual de Instrucciones
Instruction Manual
PERFECT BREW MÁXIMA ESPRESSO MAKER
READ ALL INSTRUCTIONS BEFORE USING THIS APPLIANCE
2023/11/7 10:38
2023/11/7 10:38
Publicidad
Tabla de contenido
Solución de problemas

Manuales relacionados para Oster BVSTEM7400


Resumen de contenidos para Oster BVSTEM7400
- Página 1 MODELO BVSTEM7400 MODEL Manual de Instrucciones CAFETERA PARA ESPRESSO PERFECT BREW MÁXIMA LEA TODAS LAS INSTRUCCIONES ANTES DE USAR ESTE APARATO Instruction Manual PERFECT BREW MÁXIMA ESPRESSO MAKER READ ALL INSTRUCTIONS BEFORE USING THIS APPLIANCE BVSTEM7400_23SEM1 (LA)_SPA/ENG.indd 1 BVSTEM7400_23SEM1 (LA)_SPA/ENG.indd 1...
-
Página 2: Precauciones Importantes
PR E C A UC I ON E S I MPO R TAN TE S Cuando se utiliza aparatos eléctricos, siempre se debe seguir medidas básicas de seguridad para reducir el riesgo de incendio, descarga eléctrica o lesiones personales, incluidas las siguientes: 1. -
Página 3: Para Modelos Capaces De Utilizar Cápsulas Selladas
16. La base calefactora y la resistencia pueden permanecer calientes después del ciclo de preparación. No toque la base calefactora, ni la resistencia inmediatamente después de que el aparato haya terminado el ciclo de preparación. Espere a que el aparato se enfríe. 17. - Página 4 FUNCIONES DE TU CAFETERA ESPRESSO PERFECT BREW MÁXIMA Español - 3 BVSTEM7400_23SEM1 (LA)_SPA/ENG.indd 3 BVSTEM7400_23SEM1 (LA)_SPA/ENG.indd 3 2023/11/7 10:38 2023/11/7 10:38...
- Página 5 FUNCIONES DE TU CAFETERA ESPRESSO PERFECT BREW MÁXIMA Español - 4 BVSTEM7400_23SEM1 (LA)_SPA/ENG.indd 4 BVSTEM7400_23SEM1 (LA)_SPA/ENG.indd 4 2023/11/7 10:38 2023/11/7 10:38...
- Página 6 FUNCIONES DE TU CAFETERA ESPRESSO PERFECT BREW MÁXIMA A. Tolva para café en grano extraíble Q. Cartucho de filtro de agua B. Área de molienda iluminada R. Soporte de filtro de agua C. Molinillo cónico de muelas con S. Jarra de leche con capacidad de dosificación automática y 30 460 mL (15 oz) configuraciones de molienda...
- Página 7 FUNCIONES DE TU CAFETERA ESPRESSO PERFECT BREW MÁXIMA Español - 6 BVSTEM7400_23SEM1 (LA)_SPA/ENG.indd 6 BVSTEM7400_23SEM1 (LA)_SPA/ENG.indd 6 2023/11/7 10:38 2023/11/7 10:38...
- Página 8 FUNCIONES DE TU CAFETERA ESPRESSO PERFECT BREW MÁXIMA Pantalla LED Interruptor de encendido (iconos mostrados de izquierda a derecha). Presiona hacia abajo para encender y apagar la cafetera espresso. 1A. Alerta de bajo nivel de agua Indicador de encendido Se ilumina cuando hay que rellenar el Se ilumina cuando se enciende la unidad, depósito de agua y parpadea cuando la máquina se ha quedado sin agua.
-
Página 9: Antes Del Primer Uso
Antes del primer uso Utiliza la siguiente información como ayuda para el primer uso. Nota: Retira el tapón rojo del depósito de agua antes de usar. 2. Inserta la muela 3. Bandeja de goteo y bandeja 4. Enciende la 1. Lava y seca las piezas superior de almacenamiento de accesorios máquina... - Página 10 Guía rápida para hacer café Utiliza la siguiente guía para preparar tu primera taza de café. 1. Selecciona el filtro 2. Inserta el portafiltro DOS TAZAS UNA TAZA Selecciona: Inserta el portafi ltro El portafi ltro se colocará plano, sin soporte, en el - Filtro de una taza en el soporte de soporte de molienda.
- Página 11 Guía rápida para hacer café Nota: El sistema de calentamiento con tecnología Thermoblock doble y dos bombas de presión te permite preparar espresso y espumar leche al mismo tiempo. 8. Retira el disco de café 9. Prepara la jarra 10. Antes de texturizar usado compactado de leche la leche...
-
Página 12: Guía De Extracción Del Espresso
Guía de extracción del espresso Esta guía te ayudará a mejorar la extracción del café espresso, para conseguir siempre un café de excelente sabor. Subextraído Extracción óptima Sobreextraído Extracción demasiado rápida Extracción demasiado lenta Extracción en fl ujo continuo Extracción^ Se extrae en menos de 15 Se extrae en más de 35 Se extrae en 20-30 segundos... -
Página 13: Guía De Resolución De Problemas
La junta de silicona del cabezal de colado Contacta con el servicio de atención al cliente está dañada o desgastada. de Oster. El espresso sale Café en grano guardado en frigorífico o en Guarda el café en grano en un recipiente seco demasiado frío... - Página 14 GUÍA DE RESOLUCIÓN DE PROBLEMAS PROBLEMA Posible causa Qué hacer El espresso No hay agua en el depósito de agua. Llena el depósito con agua. no sale o sale Llena de agua por el cabezal de colado, en gotas presiona el BOTÓN DE UNA TAZA. (sobreextraído) Deja correr el agua.
- Página 15 GUÍA DE RESOLUCIÓN DE PROBLEMAS PROBLEMA Posible causa Qué hacer El espresso se Prensado desigual. Asegúrate de prensar uniformemente el café vierte en la taza de molido. forma irregular Obstrucción en el cabezal de colado o en Comprueba que no haya nada que obstruya el el portafiltro.
- Página 16 GUÍA DE RESOLUCIÓN DE PROBLEMAS PROBLEMA Posible causa Qué hacer Poca espuma La punta del tubo de vapor está mal Asegúrate de que la punta del tubo de vapor al texturizar colocada en la jarra de leche. está colocado correctamente (justo por debajo de la superficie de la leche) al texturizar.
- Página 17 GUÍA DE RESOLUCIÓN DE PROBLEMAS PROBLEMA Posible causa Qué hacer El café molido es Ajuste de molienda incorrecto. Ajusta la configuración de molido girando la grueso cuando tolva para café en grano. Consulta Consejos está en el ajuste para la molienda y la extracción. de molido fino Muela superior mal asentada.
- Página 18 GUÍA DE RESOLUCIÓN DE PROBLEMAS PROBLEMA Posible causa Qué hacer La cafetera La cafetera espresso pasará al modo de Pulsa el interruptor de encendido/apagado espresso se apaga espera después hacia abajo para reactivar la máquina. sola de 20 minutos para ahorrar energía. El molinillo no El molinillo se ha sobrecalentado.
-
Página 19: Calibrado
SUGERENCIAS PARA LA MOLIENDA, EL PRENSADO Y LA PREPARACIÓN DEL CAFÉ Calibrado Cuando prepares un espresso en 25-30 segundos, habrás identificado el ajuste correcto de molido Configurar la Cafetera Espresso Perfect Brew para la máquina y los granos específicos. Máxima para preparar un espresso perfecto es GIRAR EN EL GIRAR EN algo que difícilmente conseguirás a la primera vez. -
Página 20: Sugerencias Para La Preparación Del Café
SUGERENCIAS PARA LA PREPARACIÓN DEL CAFÉ Agua caliente Alerta de depósito vacío: cuando se quede sin agua, tu Cafetera Espresso Perfect Brew Máxima Si deseas preparar una bebida larga a base de emitirá tres pitidos y mostrará "- -". Dependiendo de espresso, puedes añadir agua caliente adicional la operación que se esté... -
Página 21: Sugerencias Para Texturizar La Leche
SUGERENCIAS PARA TEXTURIZAR LA LECHE ANCHO DEL Nota: Al integrar dos calentadores y dos DEDO bombas la Cafetera Espresso Perfect Brew Máxima, puede espumar leche al mismo tiempo que el espresso, o dispensar a la vez agua caliente. Texturizar la leche es vaporizarla. 3. - Página 22 SUGERENCIAS PARA TEXTURIZAR LA LECHE Nota: Las recomendaciones anteriores pueden Nota: Si se utiliza una bebida no láctea, será variar de una marca de leche a otra y en función necesario realizar algunos ajustes en la técnica. de tus preferencias gustativas. 5.
-
Página 23: Cómo Optimizar Tu Espresso
CÓMO OPTIMIZAR TU ESPRESSO Personalizable - Volúmenes de disparo - Inserta el portafiltro en el cabezal de colado. La Cafetera Espresso Perfect Brew Máxima cuenta - Mantén pulsado el BOTÓN de con Control Volumétrico de Disparo Automático. doble disparo durante 3 segundos. Extrae la cantidad justa de espresso y se detiene automáticamente. - Página 24 CÓMO OPTIMIZAR TU ESPRESSO Personalizable - Personalizable - Temperatura de la extracción Perfil de preinfusión de la extracción Puedes ajustar la temperatura del agua utilizada Puedes elegir entre tres perfiles de preinfusión para para la extracción del espresso, en incrementos adaptarlo a tus preferencias personales.
- Página 25 CÓMO OPTIMIZAR TU ESPRESSO - Se mostrará el perfil de pre-infusión actual. Personalizable - Ajustes del tiempo de molienda - Puedes recorrer los ajustes preprogramados Debido a una serie de razones, como un cambio de pulsando el botón de un disparo. tipo de grano de café, puede ser que desees ajustar la configuración de fábrica para la cantidad de café...
- Página 26 CÓMO OPTIMIZAR TU ESPRESSO - La máquina emitirá un pitido, el icono de molido Personalizable - Recalibrado del molinillo parpadeará y se mostrará una de las siguientes A medida que las muelas del molinillo se desgastan, opciones: el espacio entre ellas aumenta ligeramente, lo a.
- Página 27 CÓMO OPTIMIZAR TU ESPRESSO - Ahora puedes ajustar la molienda. Utiliza el botón Restaurar - ajustes de molido de fábrica de doble tiro para aumentar la molienda, o el - Mantén pulsados los 3 BOTONES DE botón EXTRACCIÓN, empujando simultáneamente hacia de un tiro para disminuirla.
-
Página 28: Cuidado Y Limpieza - Cafetera Espresso
CUIDADO Y LIMPIEZA - CAFETERA ESPRESSO El proceso de elaboración del espresso consiste Limpieza de la placa calefactora y el exterior en extraer los aceites de los granos de café. Con • En caso necesario el tiempo se acumulan depósitos de café y aceites que afectan al sabor del café... - Página 29 CUIDADO Y LIMPIEZA - CAFETERA ESPRESSO • Cada vez - Deja pasar agua antes de preparar un espresso. • Semanal - Purga el agua por el cabezal de colado pulsando el BOTÓN DE UNA DOSIS. - Deja correr el agua hasta que se detenga. - La máquina está...
- Página 30 CUIDADO Y LIMPIEZA - CAFETERA ESPRESSO - El agua se purgará en la bandeja de goteo y saldrán pequeñas cantidades de agua por las boquillas del portafiltro. • Ciclo de limpieza completado - La Cafetera Espresso Perfect Brew Máxima emitirá un pitido y la LUZ DE - Por la mañana, retira la jarra y enjuágala LIMPIEZA dejará...
- Página 31 CUIDADO Y LIMPIEZA - CAFETERA ESPRESSO - Por la mañana, enjuaga la jarra y los filtros con agua corriente, asegurándote de que se hayan eliminado todos los restos de la pastilla AFLOJAR limpiadora. - Coloca un filtro en el portafiltro (sin café) e insértalo en el cabezal de colado.
-
Página 32: Cuidado Y Limpieza - Molinillo
CUIDADO Y LIMPIEZA - MOLINILLO Las muelas cónicas se utilizan para moler los granos de café a un tamaño adecuado para la extracción del espresso. Con el tiempo se acumulan 2. RETIRAR depósitos de molido y aceite que afectan al sabor del espresso y al funcionamiento del molinillo 1. - Página 33 CUIDADO Y LIMPIEZA - MOLINILLO molinillo y guarda los granos de café restantes 1. ALINEAR GUÍA DE TOLVA 2. INSERTAR en un recipiente hermético para conservar su frescura. 3. GIRA - Vuelve a colocar la tolva para café en grano y gírela hasta la posición 30.
- Página 34 CUIDADO Y LIMPIEZA - MOLINILLO • Limpieza y desatasco de la muela inferior y la - Cuando esté correctamente asentada, la muela cámara de molienda superior quedará a ras de la superficie de la boca del molinillo. - Utiliza el cepillo de limpieza o un aspirador para limpiar a fondo las piezas y superficies de la cámara de molienda y eliminar los restos de café.
-
Página 35: Ciclo De Descalcificación - Cafetera Espresso
CICLO DE DESCALCIFICACIÓN – CAFETERA ESPRESSO Tras un uso continuado, la Cafetera Espresso Perfect Brew Máxima puede desarrollar una acumulación de depósitos minerales y, por lo tanto, requerir una descalcificación ocasional. Recomendamos descalcificar la Cafetera Espresso Perfect Brew Máxima cada 4-6 meses, aunque este periodo dependerá... - Página 36 SHOWER HEAD SILICONE SEAL CICLO DE DESCALCIFICACIÓN – CAFETERA ESPRESSO GROUP HEAD INSIDE RIM - Cuando deje de salir agua caliente por la salida de Importante: Se puede salir del ciclo agua caliente, este paso habrá finalizado. de descalcificación en cualquier momento pulsando el BOTÓN DE - Para indicar que la máquina ha finalizado este PREPARACIÓN MANUAL.
- Página 37 CICLO DE DESCALCIFICACIÓN – CAFETERA ESPRESSO - Después de 2 minutos el agua deja de bombear y - La LUZ DE VAPOR estará ahora el Salida de AGUA CALIENTE parpadeará. completamente iluminada. - Coloca la perilla en posición vertical. - La bomba se pondrá en marcha y saldrá agua - El ciclo de descalcificación ha finalizado.
-
Página 38: Important Safeguards
IMPORTANT SAFEGUARDS When using electrical appliances, basic safety precautions should always be followed to reduce the risk of fire, electric shock, and/or injury to persons including the following: 1. Read all instructions. 2. Do not touch hot surfaces. Use handles or knobs. 3. - Página 39 For models capable of using sealed capsules: 18. The sharp needles on the top lid and bottom of capsule holder used to puncture the capsules may cause injury. Keep hands away from the sharp needles and use caution while using, cleaning, or handling the capsule holder. 19.
- Página 40 FEATURES OF YOUR PERFECT BREW MÁXIMA ESPRESSO MAKER English - 3 BVSTEM7400_23SEM1 (LA)_SPA/ENG.indd 3 BVSTEM7400_23SEM1 (LA)_SPA/ENG.indd 3 2023/11/7 10:38 2023/11/7 10:38...
- Página 41 FEATURES OF YOUR PERFECT BREW MÁXIMA ESPRESSO MAKER English - 4 BVSTEM7400_23SEM1 (LA)_SPA/ENG.indd 4 BVSTEM7400_23SEM1 (LA)_SPA/ENG.indd 4 2023/11/7 10:38 2023/11/7 10:38...
- Página 42 FEATURES OF YOUR PERFECT BREW MÁXIMA ESPRESSO MAKER A. Removable Bean Hopper R. Water Filter Holder B. Illuminated Grind Area S. 460 mL (15 oz) Milk jug C. Conical burr grinder with automatic dosing T. - 1 and 2 single wall filters: For freshly and 30 grind settings ground coffee grinds - 1 and 2 pressurized (double wall) filters:...
- Página 43 FEATURES OF YOUR PERFECT BREW MÁXIMA ESPRESSO MAKER English - 6 BVSTEM7400_23SEM1 (LA)_SPA/ENG.indd 6 BVSTEM7400_23SEM1 (LA)_SPA/ENG.indd 6 2023/11/7 10:38 2023/11/7 10:38...
- Página 44 FEATURES OF YOUR PERFECT BREW MÁXIMA ESPRESSO MAKER Power on Toggle Switch LED Display (Icons displayed left to right). Push down to turn espresso machine on and off. 1A. Low Water Alert Illuminates when the water in Power on Indicator the reservoir needs topping up and Illuminates whenever the unit flashes when the unit has run out of...
-
Página 45: Before First Use
Before First Use Use below information to help with the fi rst time set up. Note: Please remove red plug from water reservoir before fi rst use. 1. Wash & Dry Parts 2. Insert Top Burr 3. Drip Tray & Accessories Storage Tray 4. - Página 46 Quick Coffee Making Guide Use below guide to help you make your fi rst cup of coffee. 1. Select Filter Basket 2. Insert Portafilter TWO CUP ONE CUP Select either: Insert Portafi lter into Portafi lter will sit fl at, unsupported, in the - 1 Cup (Single Shot) Filter Basket Grinding Cradle.
- Página 47 Quick Coffee Making Guide Note: The heating system with dual Thermoblock technology and two pumps allows you to prepare espresso and froth milk at the same time. 8. Remove Coffee Cake 9. Prep Milk Jug 10. Before Texturing Milk 4°C FILL BANG Return DIAL to vertical...
- Página 48 Espresso Extraction Guide This guide will help to improve espresso extraction, to achieve grat tasting coffee, every time. Under Extraction Optimum Extraction Over Extraction Extraction too fast Steady-fl ow extraction Extraction too slow Pour^ Pours for under 15 sec Pours for 20-30 sec Pours for over 35 sec Pale brown Rich caramel...
-
Página 49: Troubleshooting Guide
Clean the parts with the Cleaning Brush and Shower Head is dirty. damp cloth. Group Head Silicone Seal is damaged or Contact Oster Customer Care. worn. Espresso Coffee beans being stored in the fridge or Store coffee beans in a dry, airtight container. - Página 50 TROUBLESHOOTING GUIDE PROBLEM Possible cause What to do No espresso No water in the Water Reservoir. Fill reservoir with water. Prime water through the Group Head, press the ONE CUP BUTTON. pours or pours Allow water to run through. out in drips (over extracted) Coffee grind is too fine.
- Página 51 TROUBLESHOOTING GUIDE PROBLEM Possible cause What to do Espresso pours Uneven tamping. Ensure coffee grinds are tamped evenly. into cup unevenly Obstruction in the Group Head Check there is nothing obstructing the Group or Portafilter. Head or Portafilter & clean. Pump makes an No water in the reservoir, and the pump Fill reservoir with water, then press the one cup...
- Página 52 TROUBLESHOOTING GUIDE PROBLEM Possible cause What to do Not enough foam Steam wand tip is wrongly positioned in Ensure the Steam Wand Tip is positioned milk jug. correctly (just below milk surface) when when texturing texturing. See Tip for Milk Texturing. Milk is not fresh.
- Página 53 TROUBLESHOOTING GUIDE PROBLEM Possible cause What to do Coffee grinds Grind Setting not correct. Adjust the Grind Settings by turning the Bean are coarse when Hopper. See Tips for Grinding, & Extraction. on a fine Grind Top Burr not seated correctly. Coffee beans Top burr needs removing and the areas cleaning, Setting or grinds are caught around &...
- Página 54 TROUBLESHOOTING GUIDE PROBLEM Possible cause What to do Espresso Your Espresso machine will go into Standby Flick on/off power switch downwards to reactivate Machine turns mode after 20 minutes to conserve power. your machine. itself off Grinder will not Your grinder has overheated. Wait for 6 minutes, once the auto-cool down cycle has finished your machine will be ready operate after a...
- Página 55 TIPS FOR GRINDING, TAMPING & BREWING Dialing In When you brew an espresso in 25-30s, then you have identified the correct grinder setting for specific Setting up your Perfect Brew Máxima Espresso machine and beans. Maker to make perfect Espresso is something that you are unlikely to get right first time.
- Página 56 TIPS FOR BREWING Hot Water Empty Tank Alert – when it runs out of water your PERFECT BREW MÁXIMA Espresso Maker will If wanting to make a long espresso based drink, you beep three times and will display ‘- -’. Depending on can add extra hot water using the Hot Water Tap the operation being performed either the;...
- Página 57 Jug to rise. As this happens follow the level of Thermoblock technology and two pumps on your the milk by lowering the Jug, keeping the Steam Oster unit there is no steam warm-up period, Wand Tip just below the surface. steam is available on demand.
- Página 58 TIPS FOR MILK TEXTURING Note: Above recommendations might vary from Note: Some adjustments to technique will be one milk brand to another and depending on required when using non-dairy milk. your taste preference. 5. Amount of Foam 8. Wipe Steam Wand Create the amount of microfoam you want.
- Página 59 FINE TUNING YOUR ESPRESSO Customisable - Shot Volumes - Insert Portafilter into the Group Head. The Perfect Brew Máxima Espresso Maker features - Press & hold the Double Auto Shot Volumetric Control. shot BUTTON for 3 seconds. It extracts just the right amount of espresso then automatically stops.
- Página 60 FINE TUNING YOUR ESPRESSO Customisable - Extraction Temperature Customisable - Extraction Pre-Infusion Profile You can adjust the water temperature used for You can select from three Pre-infusion Profiles to espresso extraction, in 2°C increments, to cater cater for personal preferences. for different types of roasted coffee beans and for personal preference.
- Página 61 FINE TUNING YOUR ESPRESSO - The current pre-infusion profile will displayed. Customisable – Grinder Time Adjustments - The preprogrammed settings can be scrolled Due to a number of reasons, such as a changing through by pressing the single shot button. your type of coffee bean, it may be that you want to adjust the factory settings for the amount of coffee dispensed for each dose.
- Página 62 FINE TUNING YOUR ESPRESSO - The machine will beep and the grind icon will Customisable – Grinder Recalibration pulse, and one of the following options will be As the burrs on your grinder wear, the gap between displayed: the burrs will increase slightly, this will cause the a.
- Página 63 FINE TUNING YOUR ESPRESSO - The grind setting can then be adjusted. Use the Restore – factory grind settings double shot button to increase the Grind setting, or - Press and hold all 3 EXTRACTION BUTTONS, the single shot button to decrease. simultaneously pushing downwards on the portafilter handle at the same time for 3 seconds.
- Página 64 CARE AND CLEANING – ESPRESSO MACHINE The espresso making process involves extracting Cleaning Warming Plate & Exterior oils out of coffee grinds. Deposits of grinds & oils • When Required build up over time, affecting the taste of the coffee & operation of the Espresso Machine.
- Página 65 CARE AND CLEANING – ESPRESSO MACHINE - With the Cleaning Brush remove any coffee grinds - Place one Cleaning Tablet in the middle of the from around the Group Head inside rim and Silicone Cleaning Disc in the space provided. SHOWER HEAD Seal.
- Página 66 - Wipe the Steam Wand with a damp cloth. (See Unscrew the Steam Wand Tip and soak overnight in Coffee Making Guide page 13). the Milk Jug with warm water & one Oster Cleaning - After texturing milk purge the Steam Wand by Tablet.
- Página 67 CARE AND CLEANING – ESPRESSO MACHINE Cleaning Filter Baskets • Unblocking Dual Wall Filter Baskets • 2-3 Months If the Dual Wall Filter Basket (if supplied) becomes clogged with coffee grinds: Soak the Filter Basket(s) overnight in the Milk Jug with warm water &...
-
Página 68: Important
CARE AND CLEANING – GRINDER Conical Burrs are used to grind coffee beans to a Remove the Bean Hopper from the Grinder Collar suitable size for espresso extraction. Deposits of and store any remaining beans in an airtight grinds & oils build up over time, affecting the taste of container to preserve their freshness. - Página 69 CARE AND CLEANING – GRINDER - Reset to the Grind Setting noted prior to cleaning. - Reinstall the bean hopper and rotate to setting 30. Push down on the portafilter to activate the Cleaning & Unblocking Grinder Burrs, Collar, grinder, and hold the remain beans are ground Grind Chamber and Outlet and dispensed (you will hear the sound of the motor change).
- Página 70 CARE AND CLEANING – GRINDER • Cleaning & Unblocking Bottom Burr and Grind - Rotate the Top Bur approximately 30 degrees Chamber clockwise to lock, the burr should click into position. - Use the Cleaning Brush or a Vacuum Cleaner to thoroughly clear the parts and surfaces in the - When correctly seated, the Top Burr will be flush Grind Chamber of fine coffee grinds.
- Página 71 DESCALING CYCLE – ESPRESSO MACHINE After continued use, your Perfect Brew Máxima Espresso Maker Machine may develop a build-up of mineral deposits and therefore require occasional descaling. We recommend descaling your Perfect Brew Máxima Espresso Maker Machine every 4-6 months, although this period will depend on the - Place a 1 Litre container under the group head hardness of water and frequency of use.
- Página 72 DESCALING CYCLE – ESPRESSO MACHINE - When hot water has stopped being released from Important: The Descaling Cycle can the Hot water tap, this step is finished. be exited at any point by pressing the - To indicate the machine has finished this step the MANUAL BREW BUTTON.
- Página 73 DESCALING CYCLE – ESPRESSO MACHINE - After 2 minutes water will stop pumping and the - The STEAM LIGHT will HOT WATER TAP will flash. now be fully illuminated. - Return the dial to the vertical position. - The Pump will start and hot water will run from the - The Descaling Cycle is complete.
- Página 74 BVSTEM7400_23SEM1 (LA)_SPA/ENG.indd 37 BVSTEM7400_23SEM1 (LA)_SPA/ENG.indd 37 2023/11/7 10:38 2023/11/7 10:38...
- Página 75 BVSTEM7400_23SEM1 (LA)_SPA/ENG.indd 38 BVSTEM7400_23SEM1 (LA)_SPA/ENG.indd 38 2023/11/7 10:38 2023/11/7 10:38...
- Página 76 220 V 2 000 W La siguiente información es para México solamente. The following information is intended for Mexico only. CAFETERA PARA ESPRESSO OSTER ® MODELOS: BVSTEM7400, BVSTEM7400-013 IMPORTADOR: NEWELL BRANDS DE MÉXICO S.A. DE C.V. BLVD. MANUEL ÁVILA CAMACHO NO. 32 PISO 14, COL. LOMAS DE CHAPULTEPEC III SECCIÓN, ALC.